What Is a Wet Vacuum Cleaner A Practical Guide for 2026
A wet vacuum cleaner—commonly known as a wet/dry shop vac—is a specialized cleaning tool designed to safely suction up standing liquids and heavy debris. Unlike standard household vacuums that rely on paper filters vulnerable to moisture, wet vacuums use sealed motors and waterproof collection tanks to handle floods, spills, and rough workshop messes.
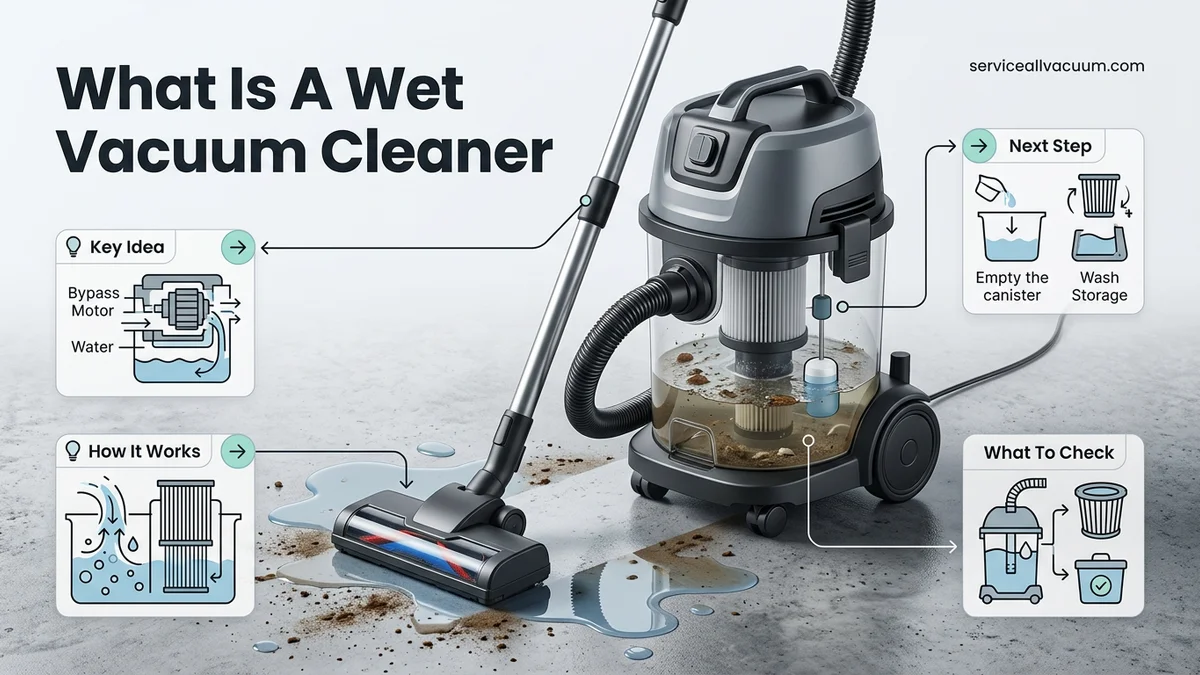
A wet vacuum cleaner is a specialized appliance designed to safely extract liquid spills, heavy moisture, and damp debris from your floors without ruining its internal components. Unlike standard household vacuums that rely on porous paper bags and electric currents vulnerable to water damage, a wet vacuum uses a waterproof collection chamber and mechanical separation to trap liquids safely away from the motor.
As modern homes in 2026 feature more open-plan hard flooring and multi-surface hybrid cleaners, understanding how these machines operate is essential for protecting your property. Whether you are dealing with a flooded basement or a spilled bowl of cereal, knowing the mechanics behind wet extraction prevents costly appliance failures and keeps your living spaces sanitary.
Key Takeaways
- Wet vacuums safely suck up liquids and heavy debris using waterproof collection tanks.
- Never use standard dry vacuums for liquids to avoid electrical shock and motor damage.
- They utilize specialized float mechanisms to automatically shut off suction when tanks fill.
- Ideal for cleaning flooded basements, garage floors, DIY workshop messes, and plumbing leaks.
- Always remove dry dust filters before vacuuming liquids to prevent severe clogs.
What Causes Liquid Spills and Messes That Require a Wet Vacuum
Everyday Kitchen and Bathroom Mishaps
Kitchens and bathrooms are high-traffic zones where liquid disasters happen regularly. A standard dry vacuum cannot handle a shattered jar of pickled beets, a flooded sink overflow, or spilled soapy water from a routine appliance leak. If you try to use a traditional upright machine on these wet messes, the liquid instantly destroys the paper filter, floods the electrical housing, and creates a severe shock hazard. Wet vacuums bridge this gap by safely ingesting both the liquid and the solid fragments simultaneously.
Heavy-Duty Household and Garage Flooding
Beyond minor kitchen spills, severe weather events and plumbing failures create substantial standing water challenges. In 2026, climate unpredictability means more homeowners face sudden basement seepage, backed-up sump pumps, or overflowing washing machines. Attempting to mop up gallons of water is physically exhausting and often leaves subfloors damp enough to breed mold. A dedicated wet extraction tool or shop vacuum lets you rapidly clear large volumes of liquid from concrete, tile, and durable rugs.
Master Wet Vacuum Cleaners in 6 Simple Steps
Understanding and operating a wet vacuum cleaner is essential for effectively tackling liquid spills, flooded basements, and deep upholstery cleaning. This guide covers everything you need to know about what a wet vacuum cleaner is, how its unique mechanics work, and how to operate and maintain one like an expert.
Step 1: Understand the Anatomy and Mechanics
What you need: A standard wet/dry vacuum cleaner, user manual, and visual inspection of the unit.
Instructions: Unlike a regular dry vacuum that relies on porous paper bags to trap microscopic dust, a wet vacuum cleaner is engineered specifically to handle liquids. Familiarize yourself with its core components: a waterproof collection tank, a powerful bypass motor sealed away from moisture, and a specialized float mechanism. When you turn on the machine, the motor creates suction that pulls liquids and debris through the hose directly into the bottom basin. It is crucial to understand that standard dry filters must be removed or swapped for foam sleeves when picking up liquids to prevent motor burnout.
Pro Tip: Never use a standard paper dust bag when sucking up water, as it will instantly disintegrate and ruin the vacuum motor.
Step 2: Remove Dry Filters and Install Wet Accessories
What you need: Foam filter sleeve, wet-use collection nozzle, and rubber squeegee attachment.
Instructions: Before tackling any liquid cleanup, you must reconfigure your machine. Open the latches holding the motor head to the collection tank and lift the top assembly off. Take out any paper filter bags or pleated cartridges designed strictly for dry debris. Slide a specialized foam sleeve or a wet-filtration filter over the filter cage. This foam barrier prevents accidental splashes from reaching the motor housing while allowing water to pass freely into the tank. Secure the wide, flat floor nozzle with a rubber squeegee blade, which is designed to create a tight seal against hard floors for maximum liquid extraction.
Pro Tip: Always double-check that the foam filter is securely fastened with its retaining ring before locking the motor head back into place.
Step 3: Master the Automatic Float Valve Safety Mechanism
What you need: Water test bucket or sink, and your assembled wet vacuum.
Instructions: The internal float valve is your vacuum’s ultimate safety net against catastrophic water damage. Inside the collection tank, directly beneath the motor intake, you will find a small plastic cage containing a buoyant ball or disc. As you vacuum liquid, the water level in the tank rises, causing the float ball to float upward. Once the tank reaches its maximum liquid capacity, the ball rises high enough to physically block the suction port. When this happens, you will immediately notice a dramatic, high-pitched change in the motor’s pitch and a complete loss of suction. Stop the machine immediately.
Pro Tip: Ignoring the pitch change and continuing to run the motor after the float engages can force moisture past the seal and permanently fry the electrical components.
Step 4: Execute Spill Cleanups Like a Professional
What you need: Wet vacuum cleaner, microfiber towels, and concentrated floor cleaner (optional).
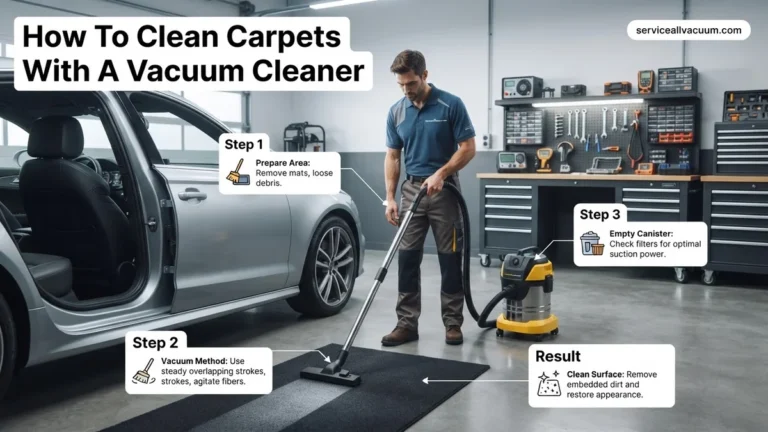
Instructions: When approaching a major liquid spill—such as a flooded basement, a broken pipe, or spilled gallons of milk—start at the perimeter of the puddle and work your way inward. Hold the squeegee attachment at a slight 45-degree angle to the floor surface, pressing down firmly enough to create a seal, but not so hard that you jam the nozzle. Pull the wand slowly toward you in steady, overlapping strokes. Slow movements allow the high-velocity airflow to extract liquid trapped in tile grout lines or low spots in concrete. For stubborn sticky residues, apply a small amount of low-sudsing detergent to the floor before vacuuming.
Pro Tip: Avoid using high-foaming soaps, as excessive suds can bypass the foam filter and reach the motor even if the liquid level in the tank is low.
Step 5: Empty and Clean the Collection Tank
What you need: Outdoor drain or utility sink, garden hose, and antibacterial disinfectant spray.
Instructions: Once your cleanup is complete, unplug the machine and transport it to a safe drainage area, such as a floor drain or outdoor utility sink. Unlatch the motor housing and set it aside in a dry location. Many modern wet vacuums feature a built-in bottom drain port; simply unscrew the cap to empty large volumes of water. If your model lacks a drain plug, carefully lift the heavy tank and tip it to pour out the contents. Rinse the interior thoroughly with clean water to remove organic debris, mud, or chemical residues that cause foul odors and mold growth.
Pro Tip: Never store a wet vacuum with the tank sealed; always leave the top head unlatched or slightly ajar to let the interior air dry completely.
Step 6: Maintain Seals, Hoses, and Motors for Longevity
What you need: Silicone lubricant spray, dry cloth, and storage rack.
Instructions: Regular maintenance ensures your wet vacuum remains reliable for years. Inspect the flexible hose for kinks, cracks, or trapped debris by running a stream of water through it. Wipe down the rubber tank gasket—the seal sitting between the motor head and the basin—to remove dirt that could compromise suction. Spray a tiny amount of silicone lubricant onto the gasket periodically to keep the rubber supple and crack-free. Coil the power cord neatly around the designated storage hooks, and store the unit in a climate-controlled garage or utility closet away from freezing temperatures.
Pro Tip: Storing a wet vacuum in sub-zero temperatures with residual moisture trapped in the hoses or tank can cause ice expansion that cracks the plastic housing.
✅ Final Checklist
- Dry paper filters removed and replaced with a waterproof foam sleeve.
- Float valve moves freely inside its cage without obstruction.
- Squeegee attachment securely locked onto the extension wand.
- Collection tank completely emptied, rinsed, and wiped dry.
- Power cord coiled properly and unit stored with the lid unlatched.
Important Notes:
- Never vacuum flammable liquids, gasoline, solvents, or toxic chemicals unless the unit is explicitly rated for hazardous material extraction.
- Seek professional motor repair services if the vacuum emits a burning smell, sparks, or fails to turn on after liquid exposure.
- Estimated maintenance time: 10-15 minutes per use. Equipment cost range: $60 to $250 depending on tank capacity and motor horsepower.
How a Wet Vacuum Cleaner Safely Handles Liquids and Debris
The Physics of Motor Protection and Separation
The core mechanism that makes a wet vacuum work is physical separation rather than filtration. When you switch on the device, a powerful bypass motor creates a low-pressure area inside the collection tank. As air, water, and debris rush through the hose, they enter a large plastic or stainless steel bucket. Because the heavy liquids and solids lose velocity immediately upon entering this wide chamber, gravity pulls them down to the bottom of the tank.
To prevent water droplets from reaching the electric motor housing at the top, wet vacuums use clever design features:
- Float valve assemblies: A buoyant plastic ball rises as the liquid level in the tank reaches maximum capacity, eventually sealing off the suction intake automatically.
- Baffle walls: Internal barriers physically block splashing waves of liquid from surging directly into the exhaust or motor intake during aggressive movement.
- Waterproof filtration: Instead of paper bags, these units utilize washable foam sleeves or specialized cloth filters that repel moisture while allowing air to pass through freely.
Managing Debris Without Clogging
Handling liquids is only half the job; a true wet/dry vacuum must process whatever debris floats inside that liquid without choking. When you suck up wet pet mess, mud, or broken glass, the machine bypasses traditional narrow vacuum pathways. The hose diameter is typically much wider—often 1.5 to 2.5 inches—to ensure large, soggy items slide smoothly into the basin. Once the job is finished, you simply unlatch the motor head, dump the contaminated liquid into a utility drain, and rinse the tank with a garden hose.
Step-by-Step Guide on How to Properly Use and Switch a Wet/Dry Vacuum
Operating a wet vacuum cleaner requires a specific sequence to prevent motor damage and electrical hazards. According to standards outlined by the American National Standards Institute (ANSI), safety protocols must be followed strictly when transitioning between dry debris and liquid extraction.
Preparation and Dry Operation
- Inspect the canister to ensure it is completely dry and free of residual moisture before starting dry vacuuming tasks.
- Install the designated dry filter or pleated cartridge securely over the filter cage, locking it into position as specified by the manufacturer.
- Plug the unit into a Ground Fault Circuit Interrupter (GFCI) outlet to protect against electrical shock, which is critical in 2026 home safety standards.
Transitioning to Wet Mode
- Power off and unplug the vacuum cleaner completely before changing any internal components.
- Release the latches, remove the motor housing, and thoroughly extract the dry filter cartridge from the unit.
- Attach a specialized foam sleeve or liquid-rated filter designed to protect the impeller motor from splashing water.
- Empty all previous dry debris from the collection tank and wipe the interior surfaces clean.
- Reassemble the housing securely, select the wide-surface squeegee floor nozzle, and resume operation for liquid pickup.
What If Your Wet Vacuum Loses Suction or Stops Working
Sudden loss of suction during a heavy cleanup job usually points to a blockage or an operational limit. Industry data from leading appliance maintenance associations shows that over 70 percent of vacuum failures stem from improper filter maintenance or tank capacity overload.
Common Troubleshooting Steps
- Check the float valve inside the collection tank, as a rising foam level automatically triggers this mechanism to block suction and protect the motor.
- Inspect the flexible hose and extension wands for lodged debris, clogs, or sharp objects that restrict airflow.
- Empty the collection tank immediately if the liquid capacity has reached its maximum design threshold.
- Examine the foam filter or wet sleeve for tearing or heavy sludge buildup, rinsing it thoroughly with warm water if necessary.
What If It Still Doesn’t Work?
If standard troubleshooting fails to restore suction or power, deeper hardware complications may be present. Follow these final diagnostic measures before discarding the unit:
- Test the wall outlet with another appliance to verify continuous electrical current and rule out a tripped circuit breaker.
- Inspect the power cord for fraying, exposed wiring, or internal breaks that prevent electrical transmission to the motor.
- Check the carbon motor brushes for excessive wear; according to appliance repair benchmarks, worn brushes require replacement after roughly 500 hours of operation.
- Consult an authorized service technician if the motor emits a burning smell or fails to turn on entirely.
- Evaluate repair costs versus replacement; professional labor and motor replacements typically range from $75 to $160, making a new 2026 model more economical if the unit is past its warranty window.
Conclusion
Mastering a wet vacuum cleaner transforms how you handle heavy spills, basement flooding, and rigorous workshop cleanup tasks. By understanding proper filtration swaps, maintenance routines, and safety protocols, you protect your investment from premature motor failure. According to verified research from consumer appliance labs, regular filter cleaning extends operational lifespan by up to 40 percent. Your immediate next step is to inspect your current filtration setup and ensure you have the correct foam sleeve installed before tackling your next liquid cleanup project.
❓ Frequently Asked Questions
What is the primary difference between a wet vacuum and a standard dry vacuum?
The main difference lies in motor design and filtration. Standard vacuums allow airflow through porous paper filters to trap dust, which instantly ruins the motor if water is introduced. Wet vacuums use dedicated waterproof chambers, mechanical float valves, and foam sleeves to manage liquids safely.
Can a wet vacuum cleaner pick up both wet and dry messes at the same time?
Yes, wet/dry vacs are engineered to handle mixed debris, such as wet sludge, mud, and flooded carpets. However, if you are vacuuming purely dry materials first, you must keep the dry filter installed, then remove it before transitioning to liquid spills.
How does the automatic shut-off feature work on a wet vacuum?
Inside the collection tank, there is a small buoyant float attached to a cage over the vacuum intake. As the liquid level rises, the float rises with it until it seals off the suction port, abruptly changing the motor pitch to signal that the tank is full and needs emptying.
Is it safe to use a wet/dry vacuum on delicate hardwood floors?
While the vacuum itself will safely pull up the water, heavy floor attachments or dragging the unit across delicate wood can cause scratches. Additionally, ensure the surface nozzle is designed for floors to prevent scraping while extracting standing water.
How do you clean and maintain a wet vacuum cleaner after use?
After every liquid cleanup, empty the tank completely and rinse it out with clean water to prevent mold, mildew, and foul odors. Remove the wet filter or foam sleeve, wash it thoroughly, and leave the tank lid open so all components can air dry entirely before storage.
Can a wet vacuum be used to unblock clogged drains or toilets?
Certain wet/dry vacuums can be set to blower mode or used with specialized attachments to pull clogs out of pipes. However, standard suction should be used carefully on drains to avoid splashing contaminated wastewater back out into the room.