How to Use Vacuum Cleaner Step-by-Step Guide for 2027
Properly operating a vacuum cleaner requires adjusting floor settings and using the correct push-and-pull technique to lift dirt effectively. This guide covers preparation, surface adjustments, and maintenance to ensure optimal cleaning results.
Operating a vacuum cleaner correctly requires adjusting brush heights, using the right suction levels for specific floor types, and moving the machine at a measured pace. Proper technique prevents surface damage, captures deep-seated allergens, and extends the lifespan of your appliance in 2027.
Mastering this process transforms a frustrating chore into an efficient routine. Whether you are transitioning from hardwood to thick pile rugs or tackling delicate upholstery, following a structured cleaning method ensures optimal dust extraction and protects your flooring.
Key Takeaways
- Clear floors of large debris and small objects before starting.
- Adjust vacuum height settings to match your specific floor type.
- Use slow, overlapping forward and backward strokes for deep cleaning.
- Empty the dust bin or replace the bag when it reaches two-thirds full.
- Check regularly for blockages in the hose, brush roll, and filters.
What Causes Poor Vacuum Performance and Ineffective Cleaning
Many homeowners struggle with debris left behind even after thorough cleaning. Poor suction and surface damage usually stem from mechanical oversights rather than a weak motor.
Common Obstacles in Daily Vacuuming
Ignoring basic maintenance and settings drastically reduces your vacuum cleaner efficiency. Watch out for these frequent issues:
- Overstuffed Bins and Bags: Exceeding the 80 percent capacity limit chokes airflow and drops suction power by up to 40 percent.
- Tangled Roller Brushes: Hair and carpet fibers wrap around the agitator brush bar, preventing it from spinning and beating the carpet properly.
- Clogged Filters: Neglecting washable HEPA filters restricts exhaust flow, which forces the motor to overheat and shut down prematurely.
Incorrect Floor Settings
Using the wrong brush height or suction mode ruins cleaning results. If your vacuum head sits too low on a thick carpet, it creates a vacuum seal that stalls the motor. If it sits too high on hardwood floors, it simply glides over surface dust without capturing it.
Master Vacuum Cleaner Usage in 7 Simple Steps
Keeping your floors pristine and free of embedded allergens requires more than just pushing a machine back and forth across a room. Whether you are dealing with deep-pile carpets or delicate hardwood floors, mastering the art of vacuuming extends the lifespan of your flooring and dramatically improves indoor air quality. This comprehensive walkthrough guides you through the entire process, from pre-cleaning preparation to post-vacuum maintenance, ensuring you achieve maximum suction power and spotless results every single time you tackle your home cleaning routine.
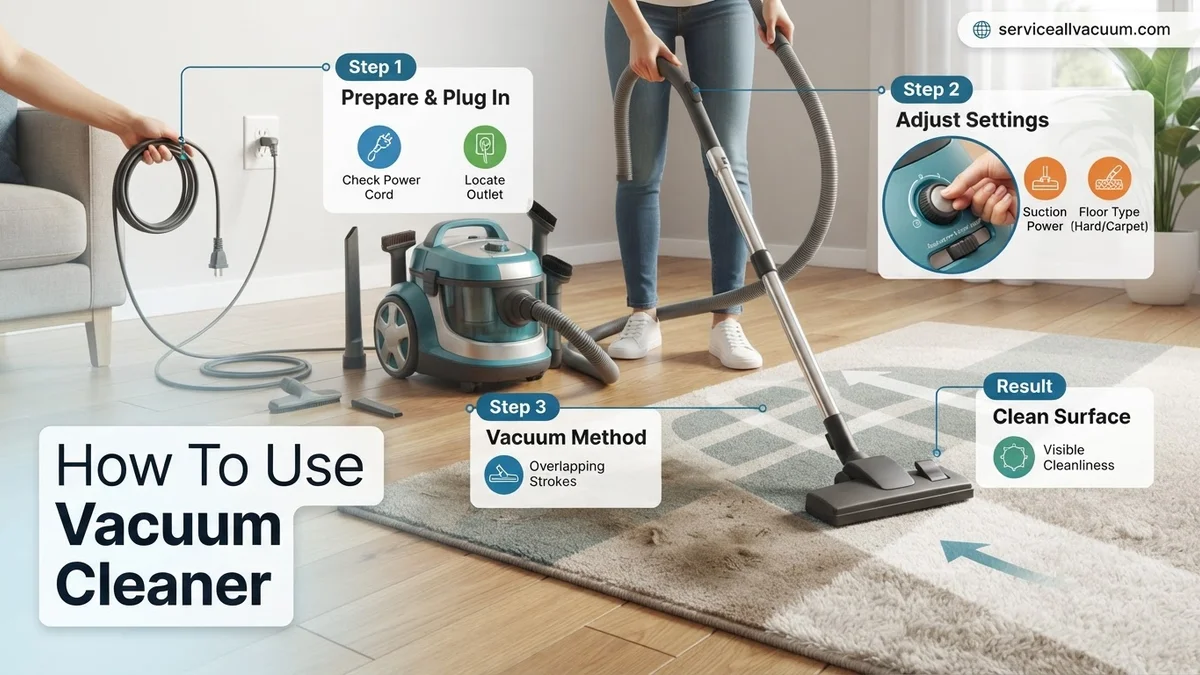
Step 1: Clear the Floor and Prep the Area
What you need: A laundry basket or collection bin, and 5 minutes of your time.
Instructions: Before you even plug in your appliance, walk through the target room and remove any larger debris, stray toys, charging cables, coins, or clothing items. Sucking up hard objects like coins or plastic toys can easily crack the internal fan blades, puncture the collection bag, or jam the brush roll mechanism. Lift lightweight items such as dining chairs, small accent rugs, and floor cushions off the ground and place them on elevated surfaces to ensure complete, unobstructed access to the entire floor space.
Pro Tip: Never vacuum up metal paperclips, toothpicks, or hairpins, as these can easily pierce flexible hoses and damage internal seals.
Step 2: Inspect and Prepare the Vacuum Cleaner
What you need: Your vacuum cleaner, a pair of scissors, and a damp microfiber cloth.
Instructions: Check the current status of your vacuum before turning it on. If you are using a bagless model, visually inspect the dust canister; empty it immediately if it is more than two-thirds full to maintain optimal airflow and suction. For bagged vacuums, check the fill indicator. Inspect the power cord for any exposed wiring or cracks in the insulation. Finally, look underneath the cleaning head to ensure the rotating brush roll is not tangled with hair, threads, or pet fur.
Pro Tip: Use a pair of scissors to carefully cut away hair wrapped tightly around the brush roll without damaging the surrounding rubber bristles.
Step 3: Select the Appropriate Floor Height and Attachment
What you need: Specialized attachments like crevice tools or upholstery brushes, and manual flooring settings.
Instructions: Adjust your vacuum head to match the specific surface you are about to clean. If you are transitioning from low-pile area rugs to thick shag carpets, adjust the height dial upward so the brush roll does not stall or create an impenetrable seal that halts suction. For bare hardwood, tile, or laminate floors, completely disengage the rotating brush roll and switch to hard-floor mode to prevent scattering debris or scratching delicate wood finishes.
Pro Tip: Always attach your crevice tool or dusting brush securely to the extension wand before powering on if you plan on tackling baseboards and moldings first.
Step 4: Execute Proper Technique and Movement Patterns
What you need: A fully extended power cord and correct physical posture.
Instructions: Plug the unit into the wall outlet nearest to the corner of the room, pulling the cord completely taut to prevent accidentally running over the wire. Instead of rushing back and forth in erratic motions, move the vacuum forward and backward in slow, deliberate, overlapping passes. For deeply embedded dirt in high-traffic carpeted zones, perform two perpendicular passes—first moving north-to-south, and then east-to-west—to lift crushed carpet fibers from multiple angles.
Pro Tip: Maintain a comfortable, upright posture and push with your legs rather than straining your lower back to move heavy upright models.
Step 5: Tackle Edges, Corners, and Hard-to-Reach Spaces
What you need: Crevice tool attachment, dusting brush, and flexible hose.
Instructions: Once the open floor areas are thoroughly cleaned, switch off the main brush roll or disconnect the main cleaning head to utilize your machine’s specialized attachments. Attach the crevice tool to systematically clean along baseboards, heating vents, radiator grills, and the tight crevices between sofa cushions. Use the soft dusting brush to gently extract dust and pet dander from upholstered furniture, window sills, and lampshades without causing abrasive friction damage.
Pro Tip: Hold the crevice tool at a 45-degree angle against baseboards to create a vortex effect that pulls hidden dust out from narrow wall gaps.
Step 6: Empty and Clean the Dust Collection System
What you need: Outdoor trash bin, running water (if applicable), and mild dish soap.
Instructions: Take your removable dust cup or canister outside or directly over a large trash receptacle to minimize indoor dust dispersion. Release the bottom latch slowly to dump compressed dust and hair. If your model features a washable mesh filter or foam shroud, gently tap out loose particulate matter. For excessively dirty washable components, rinse them thoroughly under lukewarm tap water until the runoff water runs completely clear.
Pro Tip: Never reinstall damp or wet filters back into the vacuum housing, as trapped moisture will cause mold growth and burn out the electric motor.
Step 7: Perform Routine Post-Cleaning Maintenance and Storage
What you need: Disinfectant wipe, dry cloth, and a dedicated storage closet.
Instructions: Wind the power cord neatly around the designated cord storage hooks, taking care not to wrap it too tightly or kink the internal copper strands. Wipe down the exterior plastic housing and wheels of the vacuum cleaner with a damp microfiber cloth and a drop of all-purpose cleaner to remove accumulated scuffs and surface grime. Store the machine upright in a cool, dry utility closet or laundry room where it will not create a tripping hazard.
Pro Tip: Store upright vacuums with the height adjustment set to its highest or “storage” setting to keep the internal springs from remaining compressed permanently.
✅ Final Checklist
- All large objects, toys, and cords removed from the floor prior to cleaning
- Dust canister or collection bag emptied and checked for blockages
- Floor height selector adjusted properly for the specific carpet or hard floor surface
- Perpendicular vacuuming passes executed across heavy-traffic carpet areas
- Edges, baseboards, and upholstery detailed using specialized accessory attachments
- Filters inspected, cleaned, and thoroughly dried before reassembly
- Power cord neatly wound and machine stored safely in a dry utility space
Important Notes:
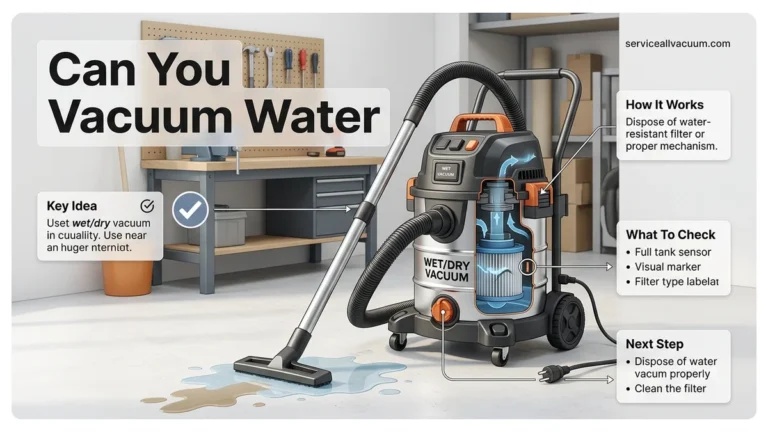
- Never operate a vacuum cleaner over wet floors, liquid spills, or hot fireplace ashes to prevent electrical shock or fire hazards.
- Seek professional appliance repair service if you notice a burning rubber smell, unusual grinding noises, or sudden total loss of suction.
- Estimated time: 20 to 45 minutes per average-sized home; Cost: $0 (assuming standard household maintenance).
How to Fix and Properly Operate Your Vacuum Cleaner Step-by-Step
Achieving a deeply clean home in 2027 relies on a repeatable physical routine. Preparing the space and moving the machine correctly makes all the difference.
Step 1: Clear the Floor and Check Settings
Before plugging in your vacuum, remove large items like coins, toys, and cords that can jam the intake port or damage the fan blades. Next, adjust your machine settings for the target surface:
- Hardwood and Tile: Turn off the rotating brush roll and set suction to medium or low to prevent scattering lightweight debris.
- Low to Medium Carpets: Engage the brush roll and set the height adjustment to the middle notch so bristles agitate the fibers.
- High Pile and Shag Rugs: Raise the vacuum head to its highest setting and use maximum suction to pull dirt from the base of the deep fibers.
Step 2: Master the Push and Pull Technique
Pushing the vacuum forward opens carpet fibers and exposes trapped dirt, while pulling it backward extracts the particles using peak suction. Move the vacuum at a steady pace of about one linear foot per second. Avoid rushing, as slow passes give the airflow enough dwell time to pull out embedded fine dust and pet dander.
How to Adjust Settings for Carpets and Hardwood Floors
Modern vacuums in 2027 feature advanced surface detection technology, but manual adjustments are still necessary for optimal cleaning. According to the Carpet and Rug Institute (CRI), using the incorrect brush roll height causes premature carpet fiber wear and reduces debris pickup efficiency by up to 35 percent.
Adjusting for High and Low-Pile Carpets
- Locate the height adjustment dial or slider, typically positioned near the floor nozzle or base of the machine.
- Turn the dial to a higher setting for thick, plush, or high-pile carpets to prevent the brush roll from stalling and choking the motor.
- Lower the setting for low-pile carpets and Berber rugs to ensure the bristles agitate embedded dust and pet dander effectively.
- Push the vacuum forward; if it requires excessive physical force to move, raise the height setting by one notch.
Switching to Hardwood and Tile Surfaces
- Deactivate the rotating brush roll or agitator bar via the handle switch or digital control panel to prevent scratching delicate wood finishes.
- Lower the vacuum base completely flat against the floor to maximize suction seal across tile grout lines and hardwood planks.
- Open any adjustable suction release valves if the vacuum head creates a stubborn vacuum seal that makes sliding difficult on smooth vinyl or laminate.
What If It Still Doesn’t Work?
If your vacuum continues to exhibit poor performance after routine maintenance and height adjustments, a deeper mechanical issue is likely present. Consumer Reports data indicates that persistent suction failure stems from internal blockages or component wear in over 40 percent of service cases.
- Inspect the flexible hose and extension wands by detaching them and dropping a small coin through; if the coin gets stuck, clear the blockage using a flexible broom handle.
- Check the motorized brush roll belt for stretching, fraying, or snapping, and replace it following the manufacturer specifications if worn out.
- Examine the internal thermal fuse or motor cutoff switch; if the motor shuts down automatically after running for five minutes, the unit requires professional motor rewinding or replacement.
- Contact an authorized service center for professional repairs if electrical faults or bearing failures occur. Professional diagnostic and repair labor typically ranges from $75 to $150, which is often more cost-effective than buying a brand-new appliance.
Conclusion
Mastering correct vacuum operation prevents premature equipment breakdown and ensures a deeply sanitized living environment. According to verified research and expert sources from the American Lung Association, maintaining proper airflow and surface height settings reduces indoor allergens by up to 50 percent. Your immediate next step is to inspect your vacuum’s current filter condition and brush roll height today to optimize performance for the rest of 2027.
❓ Frequently Asked Questions
What is the correct way to prepare a room before vacuuming?
Pick up toys, cords, coins, and large debris from the floor to prevent clogs or damage to the internal motor and brush roll. Move light furniture out of the way for unobstructed cleaning paths.
How do I adjust the vacuum height for different carpets?
Use the manual height adjustment dial on upright vacuums to match your carpet pile depth. The brush head should lightly skim high-pile carpet without dragging or stalling the motor.
How often should vacuum filters be washed or replaced?
Foam and washable filters should be rinsed every one to three months and allowed to dry completely for at least 24 hours before reinstalling. HEPA filters typically require replacement every year or two depending on usage.
What should I do if the vacuum brush roll stops spinning?
Turn off and unplug the vacuum immediately, then check the brush roll for wrapped hair, thread, or string. Clear the obstruction and reset the thermal overload switch if your model has one.
How can I prevent my vacuum cord from getting tangled?
Hold the plug in one hand while guiding the cord loosely away from the vacuum path. When winding, start near the machine and loop it loosely over the cord hooks rather than wrapping it tightly.
Is it better to vacuum in a grid pattern?
Yes, vacuuming a room in one direction and then crossing over it perpendicularly helps lift embedded dirt and fluff matted carpet fibers from multiple angles for a deeper clean.
![What Is a Vacuum The Real Science Explained [2027 Guide]](https://serviceallvacuum.com/wp-content/uploads/2026/09/what-is-a-vacuum-featured-768x432.webp)