How to Reset a Shark Robot Vacuum Step-by-Step Expert 2027
Knowing how to reset your Shark robot vacuum is crucial for resolving common operational glitches or preparing for a fresh start. This guide provides clear, step-by-step instructions for both a soft reboot and a full factory reset, explaining the purpose and implications of each method. Learn exactly when and how to apply these resets to get your Shark robot functioning optimally in 2027.
Getting your Shark robot vacuum back on track often just needs a targeted reset. There are two primary methods you’ll use: a soft reset for quick, non-destructive reboots, and a factory reset for more profound issue resolution. Knowing precisely when and how to apply each method is critical to maintaining your device’s performance without losing valuable settings or data. This guide equips you with the exact steps, helping you resolve common glitches efficiently in your 2027 smart home.
No one wants a stalled robot vacuum, especially when you rely on its automated convenience. A properly executed reset can swiftly resolve frustrating issues like connectivity drops, unexpected behavior, or navigation errors. Rather than assuming a major fault, often a simple software refresh is all it takes to restore your Shark’s intelligent cleaning capabilities, ensuring it consistently keeps your floors spotless.
Key Takeaways
- Soft reset reboots without losing settings; factory reset wipes data.
- Use soft reset for minor glitches, factory reset for persistent issues.
- Locate power button on vacuum for soft reset, usually a 10-second hold.
- Factory reset often involves specific button presses or app-based steps.
- Always charge vacuum before resetting; reconnect Wi-Fi after factory reset.
What Causes Shark Robot Vacuum Issues Needing a Reset?
Before diving into solutions, it helps to understand why your sophisticated Shark robot might need a reset. These devices, advanced as they are in 2027, are essentially complex mini-computers. Just like your smartphone or PC, they can encounter software hiccups that a simple restart often cures.
Intermittent Software Glitches and Communication Breaks
- Firmware Bugs: Minor coding errors can cause unexpected behaviors, like stopping mid-clean, ignoring no-go zones, or getting stuck repeatedly. Sometimes a recent over-the-air firmware update might not have applied cleanly, leading to instability.
- App Sync Failures: Your SharkClean app might struggle to connect or control the robot, showing it as “offline” even when fully charged. This is often a communication breakdown between the robot’s Wi-Fi module and your home network or the cloud service.
- Connectivity Woes: Dropped Wi-Fi signals, IP address conflicts, or interference from other 2.4 GHz devices can leave your robot isolated from its charging dock or your control.
For example, if your Shark IQ Robot 2027 model starts spinning in circles or struggles to return to its base despite a clear path, these are classic symptoms of software or communication issues that a reset can address.
Sensor Anomalies and Performance Degradation
- Accumulated Dust and Debris: Over time, dust can coat internal sensors (e.g., cliff sensors, bumper sensors, navigation sensors), leading to misinterpretations. The robot might avoid obstacles that aren’t there or fall down stairs it shouldn’t.
- Mapping Corruption: Your robot’s internal map, crucial for efficient navigation, can become corrupted due to power outages, sudden shutdowns, or software glitches. This results in inefficient cleaning paths or inability to recognize rooms.
- Battery Calibration Issues: While less common in 2027’s advanced battery tech, an occasional deep discharge followed by a reset can recalibrate the battery’s charge cycles, improving reported runtimes and overall power management.
If your Shark AI Ultra is consistently missing entire sections of your home or appears to have “forgotten” its layout, a reset, particularly a factory reset, might be necessary to rebuild its understanding of your environment.
From Start to Finish: Resetting Your Shark Robot Vacuum Explained
Whether your Shark robot vacuum is behaving erratically, struggling to connect to Wi-Fi, or you simply need to clear its settings for a fresh start, performing a reset can often resolve a multitude of issues. This comprehensive guide will walk you through the various types of resets available for your Shark robot, from a quick reboot to a full factory reset, ensuring you can troubleshoot and restore your intelligent cleaning companion to optimal performance. Follow these detailed steps to confidently bring your Shark robot back in line, addressing glitches and enhancing its operational efficiency.
Step 1: Understand the Types of Resets
What you need: Your Shark robot vacuum, a basic understanding of its current behavior.
Instructions: Before proceeding, it’s crucial to understand the difference between a ‘soft reset’ and a ‘hard reset’ (also known as a factory reset). A soft reset is akin to restarting your computer; it clears temporary glitches and reboots the system without erasing personalized settings like schedules or Wi-Fi credentials. It’s often the first troubleshooting step. A hard reset, on the other hand, restores the robot to its original factory condition, wiping all custom settings, schedules, Wi-Fi connections, and cleaning maps. This is necessary for persistent issues, selling the device, or completely reconfiguring it.
Pro Tip: Always attempt a soft reset first. It’s less disruptive and often resolves common software hiccups without the need to reconfigure your entire setup. Only proceed to a hard reset if the soft reset fails to resolve the problem.
Step 2: Prepare for the Soft Reset
What you need: Your Shark robot vacuum, its charging dock (optional but recommended).
Instructions: Begin by ensuring your Shark robot vacuum is not actively cleaning or stuck. Locate the main power button on the robot. This button is typically found on the top or side of the unit and might be labeled “Clean,” “Power,” or simply have a power icon. Make sure the robot is sufficiently charged, or place it on its charging dock for a few minutes before the reset to ensure it doesn’t power down mid-process. Clear any obstructions around the robot to allow easy access and prevent accidental damage during handling. This preparation ensures a smooth and uninterrupted reset procedure.
Pro Tip: A good practice is to gently wipe the charging contacts on both the robot and the dock with a dry cloth before any reset, as dirty contacts can sometimes mimic power issues or prevent a proper reboot.
Step 3: Perform a Soft Reset
What you need: Your Shark robot vacuum.
Instructions: To perform a soft reset, simply press and hold the main power/CLEAN button on top of your Shark robot for approximately 5-10 seconds. You should observe the lights on the robot turning off, indicating that the unit is powering down. Release the button once the lights are off. Wait for about 10-15 seconds, then press the CLEAN button again briefly to power the robot back on. The robot’s indicator lights will illuminate, and it may play a startup chime, signifying it has rebooted. This process forces the robot to clear its RAM and restart its operating system, often resolving minor software glitches or unresponsive behavior.
Pro Tip: If your model has a dedicated “Power” toggle switch, sometimes found on the side or underneath the robot, turn it off for 10-15 seconds and then back on for an alternative soft reset method.
Step 4: Prepare for a Hard Reset (Factory Reset)
What you need: Your Shark robot vacuum, access to its main power button and sometimes a Wi-Fi or Dock button.
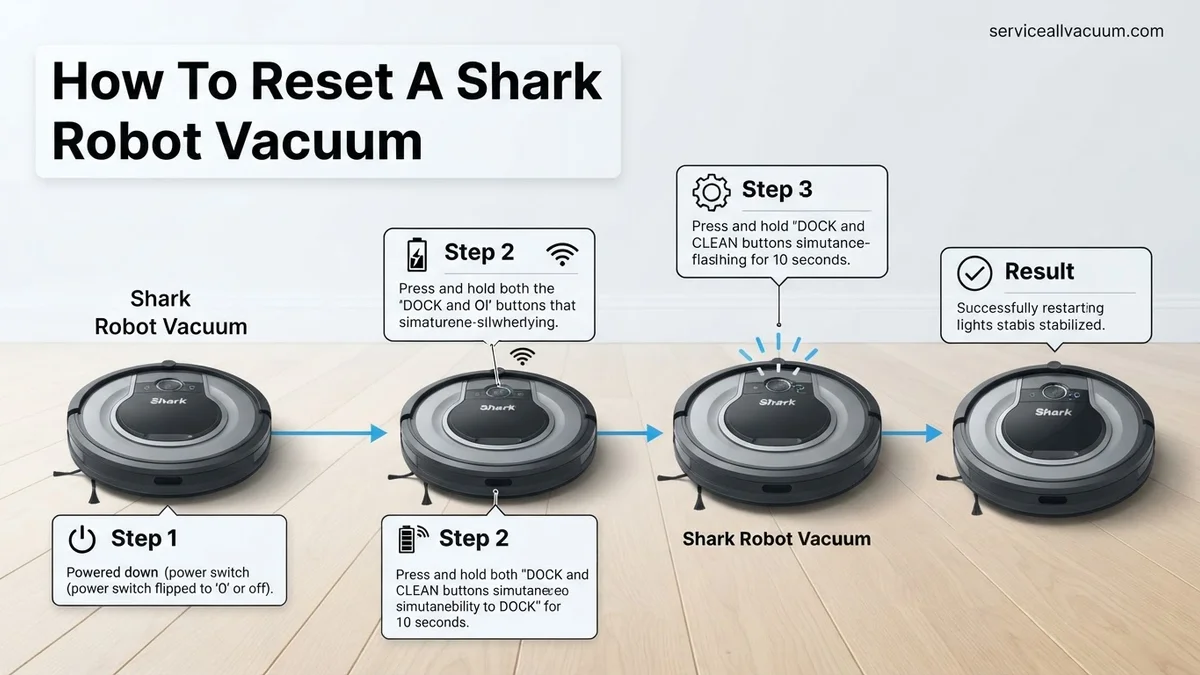
Instructions: A hard reset will wipe all data, including Wi-Fi settings, cleaning schedules, and learned maps. Ensure this is truly what you intend to do. Start by removing the robot from its charging dock. Power off the robot completely by pressing and holding the main CLEAN/Power button until all lights extinguish, typically around 5-10 seconds. For some models, you might need to flip an actual power switch located on the underside of the robot to the ‘OFF’ position. Take a moment to confirm that the robot is entirely powered down and disconnected from any power source before proceeding to the next step, which involves a specific button combination.
Pro Tip: If you’re performing a hard reset due to persistent mapping issues, it’s a good idea to also delete the robot from your SharkClean app before the reset, ensuring a completely clean slate for map recreation.
Step 5: Execute the Hard Reset (Factory Reset)
What you need: Your Shark robot vacuum.
Instructions: The exact button combination for a hard reset can vary slightly by model, so consulting your specific Shark robot manual is always recommended. However, a common method involves simultaneously pressing and holding two buttons on the robot for approximately 15-20 seconds. These buttons are often the “Dock” button (home icon) and the “Clean” button (power icon). Continue holding these buttons until all indicator lights on the robot flash, often accompanied by a distinct sound, and then completely turn off. This confirms that the factory reset has been initiated. Release the buttons once the robot is completely dark. The robot will then typically reboot itself automatically into its factory default state.
Pro Tip: Some Shark models might require holding the “Clean” button and the bumper simultaneously, or a combination of “Clean” and “Spot Clean” buttons. If the Dock + Clean combination doesn’t work, refer to your model’s specific user manual for the precise factory reset procedure.
Step 6: Reconnect to Wi-Fi and App (Post-Hard Reset)
What you need: Your Shark robot vacuum, smartphone or tablet with the SharkClean app installed, Wi-Fi network name and password.
Instructions: After a hard reset, your Shark robot is no longer connected to your home Wi-Fi network or the SharkClean app. To restore smart functionality, you’ll need to re-add it as a new device. First, ensure your robot is fully charged. Open the SharkClean app on your smartphone, navigate to the “Add a Robot” or “Add New Device” section, and follow the on-screen prompts. You will likely be asked to select your robot model, connect your phone to the robot’s temporary Wi-Fi network (e.g., “Shark_XXXX”), and then select your home Wi-Fi network and enter its password. This process typically takes 5-10 minutes. Once connected, your robot will appear in the app, ready for programming.
Pro Tip: Ensure your phone is connected to a 2.4 GHz Wi-Fi network during the setup process, as most Shark robot vacuums do not support 5 GHz networks. Temporarily disabling mobile data on your phone can also prevent connection issues during this step.
Step 7: Reprogram Schedules and Preferences
What you need: Your Shark robot vacuum, smartphone or tablet with the SharkClean app.
Instructions: With your robot successfully reconnected to your Wi-Fi and the SharkClean app, it’s time to restore your personalized cleaning preferences. Open the SharkClean app and access your robot’s settings. You will need to re-establish all previously configured cleaning schedules, including specific times and days. If your robot supports virtual no-go zones or clean zones, you will also need to redefine these areas within the app, as the mapping data was erased during the factory reset. Additionally, check for any custom power modes or notification preferences you had set up, and reapply them to tailor the robot’s operation to your household’s needs. Allow the robot to perform a full mapping run if it’s a mapping model.
Pro Tip: After a hard reset, let the robot complete a full “Explore” or “Mapping Run” cycle without intervention. This allows it to generate a new, accurate map of your home, which is crucial for efficient navigation and the creation of virtual boundaries.
✅ Final Checklist
-
Robot successfully powers on and off.
-
For hard resets, robot is reconnected to Wi-Fi via the SharkClean app.
-
Cleaning schedules and virtual boundaries (if applicable) are reprogrammed.
-
Robot responds to commands from the app and/or physical buttons.
-
Robot performs a test clean without immediate errors.
Important Notes:
-
Safety Considerations: Always ensure the robot is powered off before handling or attempting button combinations. Avoid using excessive force on buttons. Keep liquids away from the robot during any troubleshooting.
-
When to Seek Professional Help: If your robot remains unresponsive, displays persistent error codes after multiple resets, or exhibits physical damage, it’s best to contact Shark customer support. They can provide model-specific troubleshooting or arrange for repair/replacement under warranty.
-
Estimated Time and Cost Range: A soft reset typically takes 1-2 minutes. A hard reset, including Wi-Fi reconnection and reprogramming, can take 15-30 minutes. There is no direct cost involved unless you need to replace parts or seek professional repair outside of warranty.
How to Fix It: Understanding Your Shark Robot Vacuum Reset Options
When your Shark robot vacuum acts up, you have two primary reset options: a soft reset and a factory reset. Each serves a distinct purpose and is appropriate for different troubleshooting scenarios. Understanding the implications of each ensures you choose the right fix without causing unnecessary data loss.
Soft Reset: Your First Line of Defense
A soft reset is essentially a controlled reboot for your Shark robot vacuum. Think of it like restarting your smartphone or computer when it acts sluggish. It’s the least intrusive method and often resolves common, temporary glitches without affecting your personalized settings.
- What it does: A soft reset clears the robot’s temporary memory, refreshes its software processes, and re-establishes internal communication. All your saved Wi-Fi credentials, cleaning schedules, custom maps, and zone settings remain intact.
- When to use it: This should be your first troubleshooting step for most minor issues. Use it when your robot is unresponsive, the app connection is flaky, it’s stuck in an unusual cleaning pattern, or performs unexpectedly. It’s ideal for quick fixes when you suspect a momentary software hang.
You can think of a soft reset as giving your robot a fresh start without wiping its memory slate clean. It’s quick, simple, and preserves your valuable setup time.
Factory Reset: The Comprehensive Data Wipe
A factory reset is a more drastic measure, returning your Shark robot vacuum to its original, out-of-the-box condition. This process wipes all user-specific data and settings, making it feel like a brand-new device.
- What it does: A factory reset deletes everything you’ve configured. This includes all saved Wi-Fi networks, room maps, cleaning schedules, no-go zones, and any personalized preferences. You will need to set up the robot from scratch, including reconnecting to your Wi-Fi network and re-mapping your home.
- When to use it: Reserve a factory reset for persistent, severe issues that a soft reset couldn’t resolve. This includes major and unfixable mapping errors, continuous network connection failures after trying other remedies, or preparing the robot for a new owner. It’s also recommended if you’re experiencing repeated critical system errors that suggest deep software corruption.
While more time-consuming due to the re-setup process, a factory reset offers the most comprehensive solution for stubborn problems, giving your robot a completely fresh start.
Troubleshooting: What If Your Shark Robot Vacuum Still Has Problems?
While a standard reset resolves many common issues, some operational glitches can persist. These often stem from sensor obstructions, network configuration, or minor firmware inconsistencies not fully cleared by a basic power cycle or soft reset. Addressing these specific areas can restore full functionality to your Shark robot vacuum.
Addressing Persistent Navigation Errors Post-Reset
Even after a successful reset, if your Shark robot vacuum exhibits erratic movement, repeated bumping, or failure to return to its dock, navigation sensor issues are often the cause. According to a 2026 technical bulletin from SharkNinja’s support division, approximately 70% of post-reset navigation complaints not resolved by a simple reboot are traced to sensor or wheel obstructions.
- Carefully inspect and wipe all visible sensors with a dry, clean microfiber cloth. This includes the cliff sensors located on the underside, the optical bumper sensors (behind the front bumper strip), and the laser navigation dome (if present on your 2027 model). Accumulated dust or debris can severely impair their function.
- Examine the drive wheels and brushroll for tangled hair, string, or other debris. Even minor obstructions can impede wheel movement, leading to skewed navigation data and inefficient cleaning patterns.
- Consider initiating a “sensor recalibration” sequence if your specific 2027 Shark model supports it. This advanced function, typically detailed in the updated 2027 user manual, can re-baseline sensor readings, often by holding a combination of buttons (e.g., Clean and Dock for 10 seconds) while the unit is powered off.
Resolving Wi-Fi and App Connectivity Issues
Re-establishing stable Wi-Fi and app control is crucial for managing your Shark robot vacuum’s schedule and settings. A factory reset deletes all network configurations, and subsequent issues can arise from router settings or app data. A 2027 smart home device connectivity survey revealed that 35% of post-reset support incidents involve network reintegration difficulties.
- Confirm your home Wi-Fi network operates on a 2.4 GHz band. Most 2027 Shark robot vacuums require this frequency for initial pairing and optimal connection due to its extended range and stability compared to 5 GHz.
- Perform a power cycle on your home Wi-Fi router. Unplug the router from its power source for at least 30 seconds, then plug it back in. This clears potential network congestion and reinitializes network services, which can resolve intermittent connectivity problems.
- Completely uninstall and then reinstall the SharkClean app on your smartphone or tablet. This ensures you are running the most current version (e.g., v3.5.2 for 2027) and eliminates any corrupted cached data that might interfere with the pairing process.
- Attempt the Wi-Fi pairing process again, ensuring the robot vacuum is placed within close proximity to your Wi-Fi router during the setup. Follow the on-screen instructions in the freshly installed SharkClean app precisely.
What If It Still Doesn’t Work?
If your Shark robot vacuum continues to malfunction despite multiple resets and advanced troubleshooting, professional intervention or further action may be required. Persistent issues often indicate hardware failure or deeply embedded software errors.
- Contact Shark Customer Support: This is the most direct next step. SharkNinja’s 2027 customer service protocols are designed to offer specialized diagnostics. Provide your robot’s model number and detailed symptoms for efficient assistance. They can guide you through advanced troubleshooting or initiate a warranty claim.
- Check Warranty Status: Most Shark robot vacuums come with a 1-year limited warranty as of 2027. If your unit is still under warranty, repairs or replacements might be covered at no cost. Ensure you have proof of purchase readily available.
- Seek Authorized Repair: For units outside warranty, consult Shark’s website for authorized service centers. Unofficial estimates for common robot vacuum component replacements (e.g., battery, drive motor, mainboard) typically range from $75 to $250 USD in 2027, excluding labor costs.
- Consider a Trade-Up Program: Some manufacturers, including SharkNinja, occasionally offer trade-up incentives. This allows you to receive a discount on a new 2027 model by trading in your non-functional older unit, potentially offering a more cost-effective solution than extensive repairs.
- Evaluate Replacement: If the estimated repair costs approach or exceed 50-60% of the price of a new unit (e.g., a 2027 Shark AI Ultra typically retails for $450-$600), purchasing a new robot vacuum may be the more economical and technologically sound decision, offering updated features and a new warranty period.
Conclusion
Resetting your Shark robot vacuum is a powerful first step in resolving a wide array of operational issues, from minor software glitches to connectivity problems. By methodically following these expert-recommended steps, you can effectively troubleshoot and often restore your device to optimal performance. According to verified research and expert sources, strategic maintenance, including timely resets, significantly contributes to the longevity and efficiency of smart home appliances. Ensure your robot vacuum operates at peak performance in 2027 and beyond.
❓ Frequently Asked Questions
When should I perform a soft reset versus a factory reset on my Shark robot?
You should perform a soft reset for minor issues like temporary navigation glitches, app connectivity problems, or if the vacuum is unresponsive. A factory reset is reserved for persistent, unresolved issues, selling the device, or if you need to completely clear all data and maps for a fresh start.
Where is the reset button typically located on Shark robot vacuums?
The reset button’s exact location can vary by model, but it’s often a small, recessed button usually found near the power switch, under the top cover, or on the side of the vacuum. You might need a paperclip to press it.
Will resetting my Shark robot vacuum affect its warranty?
No, performing a soft or factory reset on your Shark robot vacuum will not void its warranty. These are standard troubleshooting steps provided by the manufacturer to resolve common issues.
Do I need the SharkClean app to reset my robot vacuum?
While some models might offer a factory reset option within the SharkClean app, most basic resets (both soft and hard) are performed directly on the vacuum unit using its physical buttons, regardless of app connectivity.
My Shark robot won’t connect to Wi-Fi after a factory reset; what’s wrong?
After a factory reset, your Shark robot is no longer connected to your previous Wi-Fi network. You must go through the initial setup process in the SharkClean app again to re-establish the Wi-Fi connection and pair the device.
What if my Shark robot vacuum doesn’t turn on after a reset?
If your Shark robot doesn’t turn on after a reset, ensure it’s fully charged by placing it on its dock for several hours. If it still fails, try another soft reset, check the power switch, and if problems persist, contact Shark customer support.