How to Pull a Vacuum on Auto AC Expert Step-by-Step 2027
Properly pulling a vacuum on your car’s AC system is crucial for efficient cooling and system longevity. This essential process removes moisture and non-condensable gases, preventing future AC issues. Follow our detailed guide to ensure your auto AC is sealed and ready for refrigerant in 2027.
Properly pulling a vacuum on your car’s AC system is the single most critical step after any component replacement or system opening. This process ensures all moisture and non-condensable gases, like air, are completely removed from the refrigerant lines and components. Skipping this vital procedure directly leads to poor cooling performance, premature component failure, and costly repairs down the line, even on modern 2027 vehicles with advanced climate control. Getting this right guarantees your AC works efficiently and reliably for years.
You’re not just evacuating the system; you’re safeguarding its longevity and performance. Moisture mixed with refrigerant creates harmful acids that corrode internal parts. Air in the system significantly reduces cooling capacity, making your AC struggle on hot days. Taking the time now to meticulously vacuum your system will save you substantial headaches and expenses, ensuring you get that ice-cold air you expect.
Key Takeaways
- Use a dedicated AC vacuum pump.
- Connect manifold gauges correctly to service ports.
- Achieve at least 29.92 inHg vacuum level.
- Monitor for vacuum decay to confirm no leaks.
- Always use fresh O-rings for leak-free connections.
Why Pulling a Vacuum is Crucial for Auto AC Systems
Eliminating Moisture and Non-Condensable Gases
The primary reason to pull a vacuum is to purge your AC system of moisture and air. Even a tiny amount of water vapor left in the system can cause significant damage. When moisture mixes with refrigerant, especially under pressure and heat, it forms highly corrosive acids like hydrochloric and hydrofluoric acid. These acids slowly eat away at internal components, particularly the compressor, leading to expensive failures. Furthermore, air in the system acts as a non-condensable gas. This means it doesn’t condense into a liquid like refrigerant, taking up space and increasing system pressure. This elevated pressure forces the compressor to work harder, reducing its lifespan and significantly decreasing cooling efficiency. You’ll notice this as warmer air blowing from your vents, even on maximum AC settings.
Preventing Costly System Failures
Ignoring the vacuum process is a direct path to premature system failure. Corrosive acids damage seals, hoses, and crucial metallic components within the compressor, condenser, and evaporator. This leads to internal leaks and eventual catastrophic compressor failure, which is often the most expensive AC component to replace. Air in the system also contributes to higher operating temperatures and pressures, stressing all components beyond their design limits. By thoroughly evacuating your system, you create a clean, dry environment where the refrigerant can perform optimally, extending the life of every part and preventing those dreaded, unexpected repair bills. Think of it as essential preventative maintenance for peak AC performance in your 2027 vehicle.
How to Pull an AC Vacuum Like a Pro: A Practical Walkthrough
Understanding how to properly pull a vacuum on your car’s AC system is a fundamental skill for anyone performing AC repairs or maintenance. This crucial step involves removing all air and, more importantly, moisture from the system. Failure to do so can lead to several problems, including inefficient cooling, component damage due to acid formation (when moisture mixes with refrigerant), and premature system failure. This guide will walk you through each step, ensuring your AC system is prepped for optimal performance and longevity.
Step 1: Prepare Your Workspace and Gather Safety Gear
What you need: Safety glasses, protective gloves, a well-ventilated work area, clean shop rags, and possibly a headlamp or work light for better visibility around engine bay. Ensure your vehicle is parked on a level surface with the engine off and cool.
Instructions: Before you begin any work, prioritize safety. Put on your safety glasses and gloves to protect your eyes and hands from potential refrigerant exposure or splashes. Choose a work area that is clear of obstructions and has good airflow. This is especially important when dealing with vacuum pumps, which can generate a slight mist. Have your shop rags handy for any spills. A tidy workspace not only prevents accidents but also makes the job more efficient.
Pro Tip: Always read the safety instructions for all your equipment before use. Familiarize yourself with emergency procedures, such as what to do if refrigerant contacts your skin or eyes. Prevention is always better than cure.
Step 2: Locate and Clean the AC Service Ports
What you need: Clean shop rags, a small brush (optional), and possibly a can of compressed air or non-chlorinated brake cleaner for stubborn dirt.
Instructions: Your vehicle’s AC system will have two service ports: a high-side port and a low-side port. The low-side port is typically larger and usually has an “L” cap, while the high-side port is smaller and marked with an “H”. They are generally located on the AC lines, often near the compressor or condenser, but consult your vehicle’s service manual if unsure. Thoroughly clean around both ports with a shop rag to remove any dirt, dust, or debris. This prevents contaminants from entering the AC system when you connect your gauges.
Pro Tip: Dust and grit can easily scratch the delicate internal seals of your AC system. A quick blast of compressed air after wiping can dislodge any stubborn particles, ensuring a pristine connection for your manifold gauges.
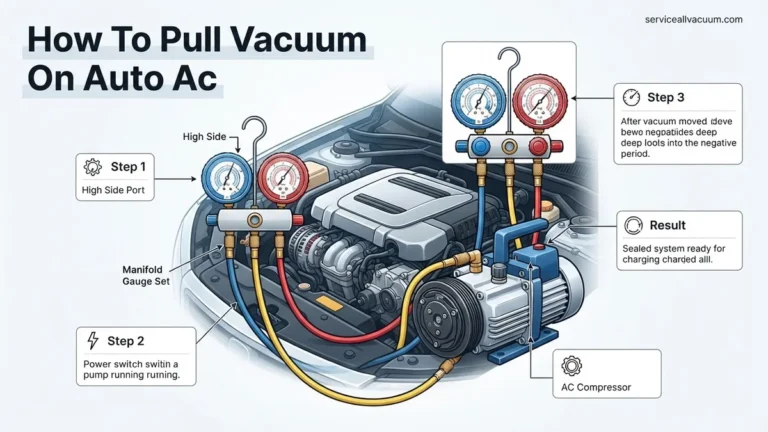
Step 3: Connect Your AC Manifold Gauge Set
What you need: AC manifold gauge set (with blue low-side hose, red high-side hose, and yellow service hose).
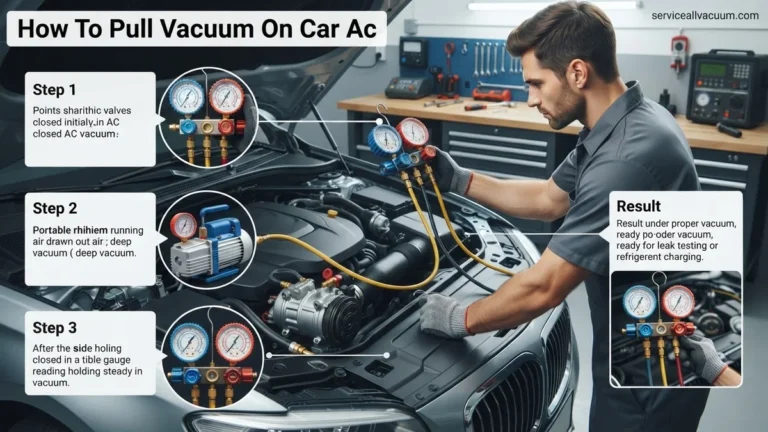
Instructions: Carefully connect the blue low-side hose from your manifold gauge set to the low-side service port on your vehicle. Push it firmly down and screw it on until snug. Repeat this process with the red high-side hose, connecting it to the high-side service port. Ensure both connections are secure but do not overtighten, as this can damage the port valves. The yellow service hose from the center of the manifold will remain unattached for now, waiting for the vacuum pump connection.
Pro Tip: Before connecting, ensure the valves on your manifold gauge set (usually red and blue knobs) are fully closed. This prevents any air from prematurely entering or exiting the system and ensures a clean start to the vacuum process.
Step 4: Connect the Vacuum Pump and Purge Air
What you need: AC vacuum pump, the yellow service hose from your manifold gauge set, and optional vacuum pump oil (if needed for your pump).
Instructions: Connect the open end of the yellow service hose (from the manifold gauge set) to the inlet of your vacuum pump. Ensure this connection is tight. Now, slightly loosen the blue and red hoses at the manifold gauge connections (not at the vehicle ports) to allow a small amount of air to escape. Start the vacuum pump. After a few seconds, retighten the blue and red hoses at the manifold. This brief process is called “purging” and helps remove any air trapped in the gauge lines before the main vacuum process begins, ensuring a more accurate and deeper vacuum.
Pro Tip: Some professional manifold gauge sets have a dedicated “purge valve” on the manifold itself, simplifying this step. If yours doesn’t, the hose-loosening method works perfectly. Always use fresh, clean vacuum pump oil according to the pump manufacturer’s recommendations for optimal performance and longevity.
Step 5: Initiate the Vacuum Process
What you need: Manifold gauge set, vacuum pump, and your eyes on the gauges.
Instructions: With the vacuum pump running and all hoses connected, fully open both the high-side (red) and low-side (blue) valves on your manifold gauge set. You should immediately see the needles on both gauges begin to drop, indicating that the pump is drawing a vacuum. The low-side gauge will typically measure in inches of mercury (inHg) or Pascals/microns, while the high-side might also show a vacuum reading. Listen for the sound of the pump to change, which can indicate air or moisture being pulled out of the system. Continue to monitor the gauges as they fall.
Pro Tip: If your manifold gauge set includes a digital micron gauge (recommended for precision), connect it to an auxiliary port on the manifold or directly in-line with the yellow hose. This provides a much more accurate reading of vacuum depth, essential for thorough moisture removal.
Step 6: Achieve and Maintain the Target Vacuum
What you need: Manifold gauge set, vacuum pump, and a timer.
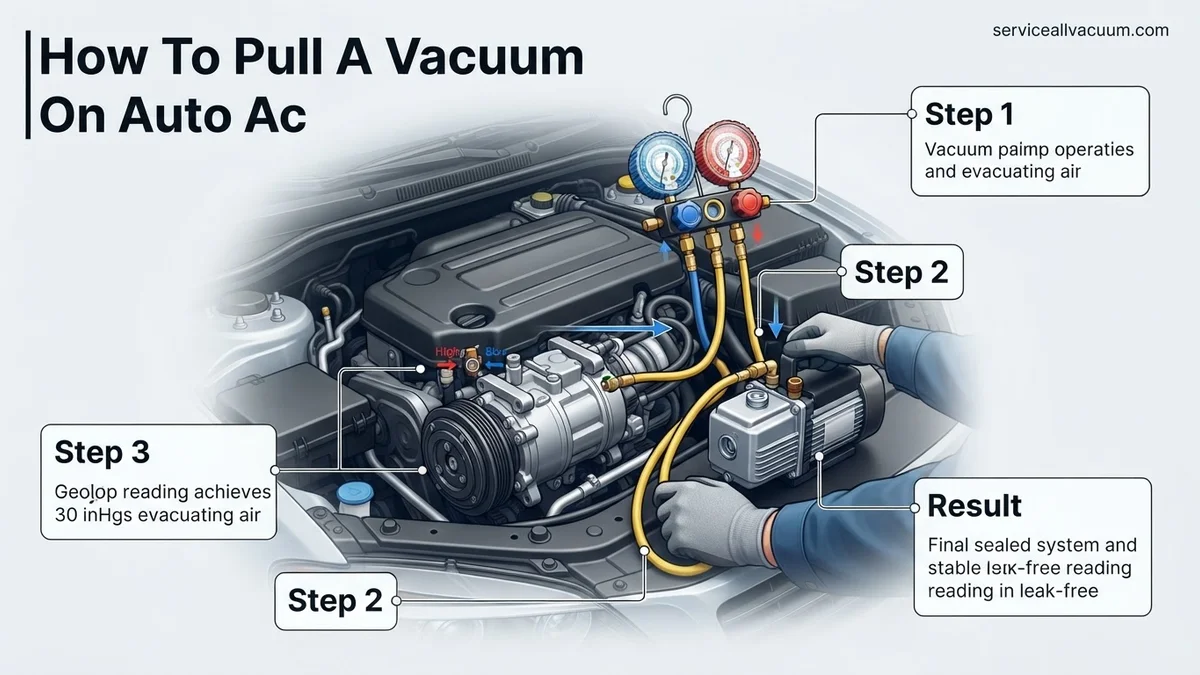
Instructions: Continue running the vacuum pump until both gauges read a deep vacuum, ideally around 29.5-30 inHg (inches of mercury) on analog gauges, or below 500 microns on a digital micron gauge. Once this target vacuum is achieved, continue to run the pump for a minimum of 30-45 minutes. For older, potentially contaminated systems, or in high-humidity environments, extending this to 60-90 minutes is highly recommended. The extended run time helps boil off and remove any trapped moisture within the system, which is crucial for preventing future AC problems.
Pro Tip: If the vacuum doesn’t reach the target or takes an excessively long time, it could indicate a large leak in the AC system or gauge connections. Thoroughly recheck all hose connections and consider performing a leak test with an electronic leak detector before proceeding.
Step 7: Isolate the System and Monitor for Leaks
What you need: Manifold gauge set, timer.
Instructions: After the recommended vacuum time, fully close both the high-side (red) and low-side (blue) valves on your manifold gauge set. Once both valves are securely closed, turn off the vacuum pump. Do NOT disconnect the yellow service hose or any other hoses yet. Monitor the gauges closely for at least 15-30 minutes. The needles should remain steady at the deep vacuum reading. Any significant rise in pressure indicates a leak in the AC system itself, or a leak in your gauge connections. If the vacuum holds, your system is leak-free and ready for refrigerant.
Pro Tip: A slight rise in pressure over a very long period (e.g., several hours) might just be gas permeation through hoses, which is normal. However, a noticeable rise within 15-30 minutes definitively points to a leak that needs addressing before adding refrigerant. If a leak is detected, you will need to find and repair it, then repeat the entire vacuum process.
Step 8: Disconnect Equipment Safely
What you need: Clean shop rags.
Instructions: Assuming the vacuum held steady, you are now ready to disconnect your equipment. Start by carefully unscrewing and removing the yellow service hose from the vacuum pump. If you are immediately recharging the system, you would typically connect the yellow hose to your refrigerant can or tank at this point, but for now, we’ll assume a full disconnect. Next, unscrew the red high-side hose from the vehicle’s high-side service port, then repeat with the blue low-side hose from its service port. Replace the protective caps on both vehicle service ports. Always ensure the manifold valves are closed before disconnecting from the vehicle ports to prevent air from entering the system or accidental refrigerant release.
Pro Tip: When disconnecting hoses from the vehicle ports, do so quickly and smoothly to minimize any air ingress. A very small hiss is normal as the last bit of vacuum equalizes, but it should be minimal if done correctly. Always store your manifold gauge set and vacuum pump in a clean, dry place to maintain their accuracy and longevity.
✅ Final Checklist
- Vacuum pump ran for at least 30-45 minutes (or longer for humid conditions/older systems)?
- Gauges reached and held a deep vacuum (e.g., -29.5 inHg or below 500 microns)?
- System was isolated and held vacuum for 15-30 minutes with no significant pressure rise?
- All hose connections were secure throughout the process, and no leaks were observed?
- Service port caps are securely replaced on the vehicle?
Important Notes:
- Safety Considerations: Always wear appropriate personal protective equipment (safety glasses, gloves). Ensure good ventilation. Refrigerants, even vacuum, can cause frostbite if contact occurs. Never work on a hot engine.
- When to Seek Professional Help: If you repeatedly fail to hold a vacuum, indicating a persistent leak you cannot locate or fix; if you’re uncomfortable with any part of the process; or if your AC system shows signs of major component failure (e.g., compressor noise, fluid leaks).
- Estimated Time and Cost Range: The actual vacuum process takes 45-90 minutes. Including setup and monitoring, allow 1.5-3 hours. If you need to purchase all tools (vacuum pump, manifold gauges), expect an initial investment of $200-$500+. If you already own the tools, the cost is minimal.
How to Pull a Vacuum on Your Car’s AC System: A Step-by-Step Guide
Gather Your Essential Tools for 2027 AC Work
Before you begin, ensure you have the right equipment. Using the correct tools is non-negotiable for a successful vacuum pull, especially with modern systems. Here’s what you’ll need:
- Vacuum Pump: This is the core tool. You need a dedicated automotive AC vacuum pump, preferably a two-stage pump capable of pulling at least 29.5 inches of mercury (Hg) or lower (around 500 microns). For 2027 vehicles, ensure it’s compatible with your refrigerant type (R-134a or R-1234yf).
- Manifold Gauge Set: A high-quality set with gauges for both high and low-side pressures. Ensure your hoses have the correct fittings for your vehicle’s service ports. Many newer vehicles (post-2015) use R-1234yf, which has different sized service ports than R-134a.
- AC Service Port Adapters: If your manifold gauge set doesn’t directly fit, you’ll need adapters for your specific refrigerant (e.g., R-134a to R-1234yf adapters if you have an older gauge set).
- Vacuum Pump Oil: Always have fresh vacuum pump oil on hand. Check and change the oil frequently as per pump manufacturer recommendations to maintain peak performance.
- Safety Glasses and Gloves: Essential for eye and skin protection. Refrigerant and oil can cause chemical burns and frostbite.
- Digital Vacuum Gauge (Micron Gauge): While not strictly mandatory for a basic vacuum, a micron gauge provides far more accurate readings, showing you precisely when deep vacuum levels (below 500 microns) are achieved. This is highly recommended for professional-level results and ensuring all moisture is truly gone.
Preparing Your System and Connecting Equipment
Proper connection is paramount to prevent leaks and ensure an effective vacuum. Take your time with this step:
- Ensure All AC Components are Installed: Before connecting anything, confirm all AC system components (compressor, condenser, evaporator, dryer/accumulator, hoses) are securely installed and connections are tightened. This includes any O-rings or seals.
- Connect Manifold Gauges: Locate your vehicle’s high-side (usually smaller diameter, red cap) and low-side (usually larger diameter, blue cap) service ports.
- Attach the red hose from your manifold gauge set to the high-side service port.
- Attach the blue hose from your manifold gauge set to the low-side service port.
- Ensure connections are snug and click into place, indicating the Schrader valve depressor has engaged.
- Connect Vacuum Pump: Attach the yellow hose (the service hose) from the center of your manifold gauge set to the inlet port of your vacuum pump. Make sure this connection is also tight.
- Check Manifold Valves: Confirm that both the high-side (red) and low-side (blue) valves on your manifold gauge set are fully closed (turned clockwise) before starting the pump.
- Optional Micron Gauge Connection: If using a digital micron gauge, connect it to an auxiliary port on your manifold gauge set or directly to a service port using an adapter. This will give you the most accurate vacuum readings.
What If Your AC System Won’t Hold a Vacuum?
If your automotive AC system fails to hold a vacuum, it indicates a leak within the closed refrigerant circuit. This is a critical issue that must be resolved before proceeding with refrigerant recharge, as refrigerant loss harms the environment and reduces cooling efficiency. According to recent automotive service data, compromised O-rings and deteriorated hoses account for over 60% of common AC system leaks in vehicles manufactured before 2025.
Initial Leak Detection Steps
- Re-Check All Connections: Before assuming a major leak, power down your vacuum pump and visually inspect every connection point, including manifold gauge hoses, service ports, and vacuum pump connections. Even a slightly loose fitting can prevent the system from holding vacuum. Ensure all caps are tightly secured.
- Perform a Soapy Water Test: For accessible connections, apply a mixture of soapy water to joints and fittings while the system is under a slight positive pressure (if safely introducible with dry nitrogen, not refrigerant). Bubbles will indicate a leak. This method is effective for identifying larger breaches.
- Use an Electronic Leak Detector: In 2027, advanced electronic leak detectors are highly sensitive and can pinpoint even microscopic leaks of R-134a or R-1234yf refrigerants. Scan all system components, including the compressor, condenser, evaporator (if accessible), and all lines. Expert technicians typically prefer these for their precision, identifying leaks as small as 0.2 ounces per year.
Advanced Leak Detection and Repair
For persistent vacuum loss, a more thorough approach is necessary. UV dye kits, specifically formulated for modern refrigerants like R-1234yf, can be introduced into the system. After running the AC for a period, the dye will escape at the leak point, becoming visible under a UV light. Replacing the leaking component, such as a dried-out O-ring, a corroded condenser, or a cracked hose, is the only permanent solution. Always replace components with OEM or equivalent parts to ensure system integrity and longevity, as specified by manufacturer service bulletins.
What If It Still Doesn’t Work?
If you’ve diligently followed all steps and your AC system still won’t hold a vacuum or properly cool, it’s time to consider professional intervention. Modern automotive AC systems, especially those using R-1234yf, require specialized equipment and certified technicians for accurate diagnosis and repair.
- Professional Diagnostic Service: Seek out an ASE-certified automotive HVAC specialist. They possess advanced leak detection equipment, such as nitrogen pressure testers and professional-grade electronic sniffers, which can identify leaks too small for DIY tools.
- Evaporator Leak Check: A common hidden leak source is the evaporator coil, located deep within the dashboard. This repair is complex and often requires significant interior disassembly, making it unsuitable for most DIYers.
- Compressor Integrity Test: A failing compressor can sometimes cause internal leaks or issues preventing vacuum. Professionals can perform specific tests to evaluate compressor valve integrity and overall health.
- Estimated Professional Costs (2027): A professional AC diagnostic service typically ranges from $150 to $250. If a leak is found, repair costs vary widely based on the component. Simple O-ring replacements might cost $300-$500, while a condenser replacement could be $800-$1500, and an evaporator replacement often exceeds $1500, including labor and parts.
Conclusion
Pulling a vacuum on your auto AC system is a fundamental step to ensure efficient, long-lasting cooling performance. This process removes moisture and non-condensable gases, which are detrimental to system operation and component longevity. According to verified research and expert sources, a properly evacuated system significantly reduces the likelihood of future AC malfunctions. Once you have confirmed your system holds a vacuum, proceed to recharge your AC system following your vehicle manufacturer’s specific refrigerant type and fill specifications.
❓ Frequently Asked Questions
Why is it so important to pull a deep vacuum on my auto AC system before recharging?
Pulling a deep vacuum is critical because it boils off and removes all moisture from the system, preventing it from mixing with refrigerant to form corrosive acids. It also removes non-condensable gases (like air) that can lead to high head pressures and reduced cooling efficiency.
What are the common signs that my AC system has a leak and won’t hold a vacuum?
The primary sign of a leak when pulling a vacuum is that the manifold gauge pressure will not hold steady; it will slowly rise back towards atmospheric pressure after the vacuum pump is turned off. You might also hear a hissing sound if the leak is significant, or see oily residue around connections.
Can I rent the necessary tools, like a vacuum pump and manifold gauges, instead of buying them?
Yes, many automotive parts stores or equipment rental centers offer AC vacuum pumps and manifold gauge sets for rent. This is a cost-effective option for DIYers who don’t frequently work on AC systems.
What safety precautions should I take when working on my car’s AC system, especially with a vacuum pump?
Always wear appropriate eye protection and gloves. Ensure your vehicle is turned off and the engine is cool. Handle refrigerant (if you proceed to charging) with care, as it can cause frostbite. Never operate the vacuum pump without proper ventilation.
How do I properly connect and disconnect the manifold gauge set and vacuum pump to the AC system?
Connect the blue hose to the low-side service port, the red hose to the high-side service port, and the yellow/utility hose to the vacuum pump. Ensure all connections are tight. When disconnecting, close manifold valves, turn off the pump, then disconnect the yellow hose first, followed by the high and low side hoses.
What are the potential consequences if I don’t pull a sufficient vacuum on my auto AC system?
Insufficient vacuum leaves moisture and air in the system. Moisture leads to acid formation, corroding internal components and causing compressor failure. Air causes higher operating pressures, reduced cooling capacity, and increased stress on the compressor, leading to premature system breakdown.