How to Find Vacuum Leaks Step-by-Step Expert Guide 2027
A vacuum leak introduces unmetered air into the engine, causing symptoms like a rough idle, engine stalling, and a check engine light. Diagnosing the issue requires systematic testing of intake hoses, gaskets, and emission components using visual checks or smoke testing.
An engine vacuum leak happens when unmetered air enters your intake tract past the throttle body, throwing off the precise air-fuel ratio your engine computer expects. To find and fix the leak quickly, you need a systematic approach starting with a detailed visual inspection, followed by targeted diagnostic tests using propane, carb cleaner, or a professional smoke machine.
Ignoring a vacuum leak in 2027 will not only hurt your fuel economy and trigger a check engine light, but it can also cause lean running conditions that lead to severe engine damage. Whether you are wrenching on a modern direct-injection daily driver or a weekend project car, mastering these diagnostic steps will save you hundreds of dollars in diagnostic fees.
Key Takeaways
- Inspect all rubber vacuum lines for dry rot, cracks, and disconnections first.
- A rough idle and fluctuating RPMs are the primary indicators of a leak.
- Carb cleaner or propane tests help locate leaks by changing engine speed.
- Smoke machines offer the most reliable method for finding hidden intake leaks.
- Always prioritize engine safety when working around hot components and flammables.
Common Symptoms and Causes of Engine Vacuum Leaks
Engine Performance Red Flags
When unmetered air sneaks into your intake, your vehicle will exhibit distinct behavioral changes. You might notice a rough, fluctuating idle or an engine that stalls when coming to a stop. Accelerating can feel sluggish or hesitant because the air-fuel mixture is too lean. If you scan your OBD-II port, you will likely see diagnostic trouble codes like P0171 or P0174, indicating a lean condition on Bank 1 or Bank 2.
Vulnerable Components to Inspect
- Rubber vacuum lines that have dried, cracked, or split from engine bay heat.
- Intake manifold gaskets that have compressed and lost their seal over time.
- The PCV (Positive Crankcase Ventilation) valve and its rubber grommet or hoses.
- Brake booster check valves and the large vacuum line feeding the power brakes.
- Throttle body gaskets and loose mounting hardware.
How to Diagnose and Fix Vacuum Leaks Like an Expert
A vacuum leak occurs when unmeasured air slips past the intake manifold, gaskets, or vacuum lines and enters your engine’s combustion chambers. This wreaks havoc on your air-fuel ratio, leading to rough idling, engine stalling, decreased fuel economy, and that dreaded check engine light. Finding these elusive leaks can feel like hunting for a ghost, but with the right methodical approach, you can track down even the smallest hiss. This comprehensive walkthrough guides you through professional-grade techniques to pinpoint vacuum leaks quickly and accurately.
Step 1: Perform a Visual and Tactile Inspection
What you need: A flashlight, a mechanic’s mirror, and heavy-duty work gloves to protect your hands from hot engine components.
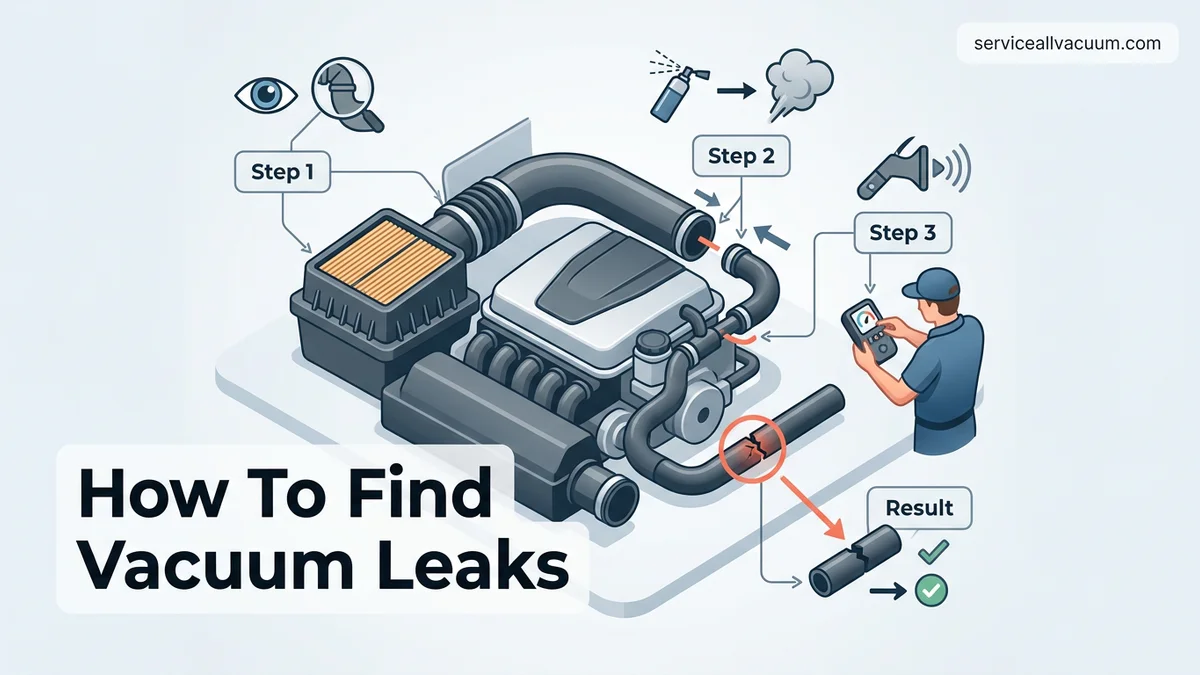
Instructions: Pop your vehicle’s hood and visually scan the entire engine bay with your flashlight. Look closely at all rubber hoses, plastic connectors, and silicone lines connected to the intake manifold, PCV valve, brake booster, and throttle body. Check for dry rotting, cracking, splitting, or completely disconnected lines. Gently squeeze and wiggle the rubber hoses with your gloved hands; a hose that looks fine on the outside might have a gaping split hidden underneath or inside a bend. Pay special attention to factory routing brackets where friction often wears holes through the rubber over time.
Pro Tip: Never perform a tactile inspection on a screaming-hot engine unless you want severe burns. Let it cool down to a warm, safe operating temperature first.
Step 2: Utilize the Propane or Unlit Torch Test
What you need: An unlit propane torch with a flexible hose attachment or a specialized unlit propane enrichment tool.
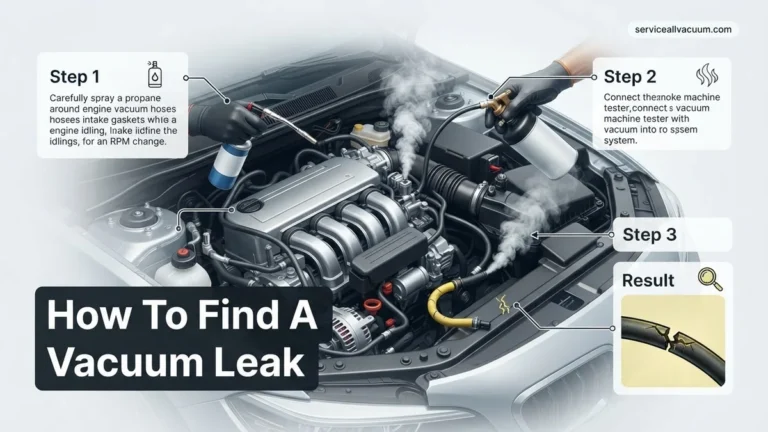
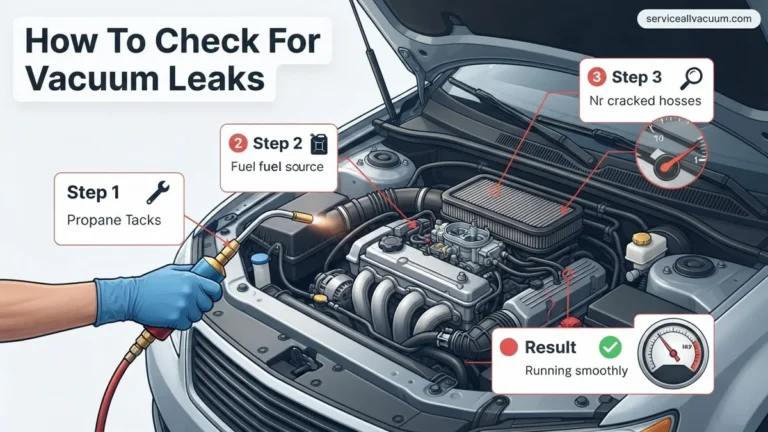
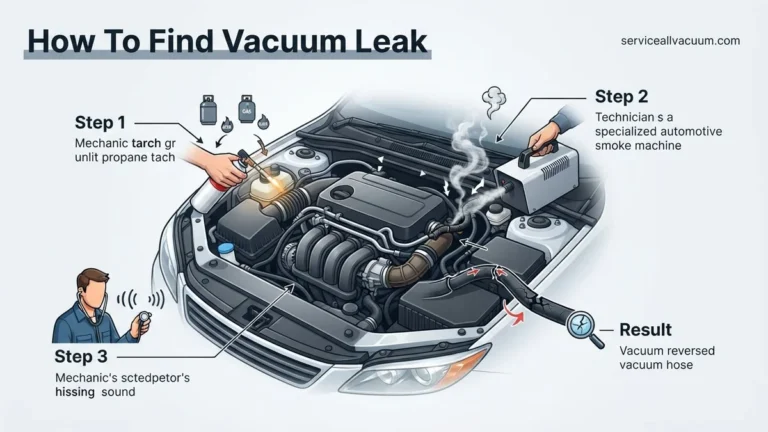
Instructions: Start your engine and let it idle. Carefully wave the open, unlit propane nozzle around suspected vacuum leak areas, including gasket mating surfaces, vacuum lines, and the base of the fuel injectors. Do not open the propane valve too wide; a gentle, controlled stream is all you need. As the propane gas is sucked into the engine through the vacuum leak, the air-fuel mixture temporarily enriches, causing a noticeable, immediate smoothing out of the idle or an increase in engine RPM. This dramatic change in engine speed tells you that you have found the exact location of the leak.
Pro Tip: Exercise extreme caution with flammable gases around a running, hot engine. Always keep a dry chemical fire extinguisher nearby for safety.
Step 3: Deploy the Automotive Smoke Machine Test
What you need: An automotive smoke machine, specialized intake bladder adapters, and a bright flashlight or laser pointer.
Instructions: This is the absolute gold standard for finding vacuum leaks. Turn off the engine and allow it to cool. Attach the smoke machine’s output hose to the intake tract using a rubber intake bladder, sealing off the air filter box. Power on the smoke machine to pump dense, mineral-oil-based smoke into the sealed intake system and vacuum network. Wait one to two minutes for the smoke to pressurize the system. Systematically scan every square inch of the engine bay with your flashlight. The moment you see wisps of white smoke escaping from a hose, fitting, or gasket seam, you have successfully located your leak.
Pro Tip: Use a laser pointer to trace the smoke back to its exact origin in tight, cramped engine bays where your fingers cannot easily reach.
Step 4: Execute the Controlled Water or Spray Bottle Test
What you need: A clean spray bottle filled with plain water and a fine mist nozzle setting.
Instructions: Start your engine and allow it to settle into a normal, albeit rough, idle. Select a suspected area, such as the intake manifold gasket or a questionable vacuum connection. Lightly mist a very small amount of water directly onto the suspected area. If there is a vacuum leak present, the engine will instantly suck the water droplets into the crack, temporarily sealing it and causing the engine idle to sputter, dip, or change sound dramatically. Because water is non-flammable and non-destructive to sensors, this is a very safe method for testing manifold gaskets.
Pro Tip: Use a fine mist rather than a heavy stream. Dumping too much water onto hot metal parts can cause thermal shock and crack your intake manifold.
Step 5: Inspect and Test the PCV System Components
What you need: Pliers, a clean rag, and a replacement Positive Crankcase Ventilation (PCV) valve if necessary.
Instructions: Locate your vehicle’s PCV valve, which is typically pushed into a rubber grommet on the valve cover and connected to the intake manifold via a heavy-duty rubber hose. Pull the valve out while it is still connected to the hose and shake it vigorously. A healthy PCV valve will rattle audibly due to a loose internal check weight. If it does not rattle, it is gummed up and stuck open or closed, creating a massive vacuum leak. Additionally, inspect the rubber grommet holding the PCV valve in the valve cover; these grommets harden and crack with age, creating vacuum leaks around their outer perimeter.
Pro Tip: PCV valves are inexpensive maintenance items. If you are already troubleshooting vacuum issues, it is always best to replace the PCV valve and its rubber grommet proactively.
Step 6: Perform a Digital OBD2 Live Data Analysis
What you need: An OBD2 scanner capable of reading live data streams, specifically Short Term Fuel Trim (STFT) and Long Term Fuel Trim (LTFT).
Instructions: Plug your OBD2 scanner into the diagnostic port under your dashboard and start the engine. Navigate to the live data menu and monitor the fuel trim percentages for Bank 1 and Bank 2. Normal fuel trims should hover close to zero percent at idle. If you notice high positive fuel trims (above +10% to +20%) at idle that drop back down toward normal when you rev the engine to 2,500 RPM, you have definitive electronic proof of a vacuum leak. The computer is desperately adding extra fuel to compensate for the unmeasured air rushing into the engine.
Pro Tip: If your fuel trims remain high at both idle and high RPMs, your issue is likely a failing fuel pump or clogged fuel filter rather than a vacuum leak.
Step 7: Replace Faulty Components and Retest
What you need: High-temperature silicone or rubber replacement vacuum lines, new gaskets, zip ties, and hand tools.
Instructions: Now that you have successfully identified the source of your vacuum leaks, it is time to perform permanent repairs. Cut replacement vacuum lines to the exact length of the old, cracked lines using sharp shears to ensure a clean, flush end. If you found a leaking intake manifold gasket, unbolt the manifold, thoroughly scrape away the old gasket material, clean the mating surfaces with brake cleaner, and install a brand-new gasket torqued to factory specifications. Once all repairs are complete, clear any stored diagnostic trouble codes using your OBD2 scanner and take the car for a 15-minute test drive.
Pro Tip: Always upgrade standard rubber vacuum lines to high-grade silicone tubing. Silicone resists heat degradation and dry rot significantly better than OEM rubber.
✅ Final Checklist
- All cracked, brittle, or disconnected vacuum lines have been replaced with new tubing
- Intake manifold and throttle body gaskets show zero signs of smoke escape during a smoke test
- PCV valve rattles properly and its mounting grommet creates a tight, airtight seal
- OBD2 live data fuel trims return to normal healthy ranges between -5% and +5% at idle
- Check engine light remains off during a thorough 15-minute test drive under various loads
Important Notes:
- Always exercise caution when working around hot engine components, rotating belts, and flammable substances like propane.
- If you perform a smoke test, utilize a professional smoke machine designed specifically for automotive use to avoid damaging sensitive electronic engine components.
- Seek professional mechanic assistance if you suspect a warped aluminum intake manifold or cracked cylinder head that requires machine shop intervention.
- Estimated time: 1 to 3 hours. Estimated cost: $20 to $150 depending on whether you need simple vacuum line replacement or complex gasket kits.
How to Perform a Visual Inspection of Vacuum Hoses
Tools and Preparation
You do not need an advanced toolkit for the first phase of diagnosis. Grab a bright LED flashlight, a mechanic mirror, and a clean rag. Park your vehicle on a flat surface, engage the parking brake, and let the engine cool down enough so you do not burn your hands. Pop the hood and ensure you have clear visibility of the entire upper engine layout, particularly around the intake plenum and accessory lines.
Step-by-Step Hose Examination
- Trace every thin rubber, silicone, or plastic line connected to your intake manifold.
- Look closely at the bends and connection points where hoses slip onto barbed fittings, as these areas experience the highest tension and thermal stress.
- Gently squeeze rubber lines; if they feel rock-hard, spongy, or show visible cracking, they are failing.
- Check hard plastic vacuum lines for hairline fractures that open up when the engine vibrates.
- Inspect rubber elbows connecting emission components, as they frequently collapse or rot from oil exposure.
Step-by-Step Guide to Using the Carburetor Cleaner Test
The carburetor cleaner method is a classic DIY diagnostic technique. Automotive technicians recommend it for locating surface-level leaks on intake manifold gaskets and vacuum lines. Always exercise caution, as pressurized aerosol sprays are flammable.
Preparation and Safety Measures
Ensure the engine is completely cool before starting. Keep a fire extinguisher nearby for safety. Wear protective safety glasses and gloves to prevent chemical irritation.
- Start the vehicle engine and allow it to idle normally in park or neutral.
- Attach the red extension straw securely to the nozzle of your carburetor cleaner can.
- Spray a very small, controlled burst of fluid directly onto suspect vacuum hose connections or gasket seams.
- Listen closely to the engine RPM for any noticeable changes or smoothing out.
- Wait five seconds between applications to accurately isolate which specific component reacted.
Interpreting the Engine Reaction
According to Society of Automotive Engineers (SAE) repair guidelines, a sudden increase in engine RPM indicates a leak. The engine draws the flammable aerosol spray through the fissure into the combustion chamber. This temporarily enriches the air-fuel mixture, causing the speed spike. Conversely, if the idle stumbles, you may be dealing with a liquid-pooling issue rather than an air induction breach.
Advanced Diagnosis with an Automotive Smoke Machine
By 2027, professional automotive diagnostic shops rely heavily on low-pressure smoke machines. This advanced method pumps dense, UV-reactive vapor through the intake system to expose even microscopic cracks instantly. It eliminates guesswork entirely.
Setting Up the Smoke Test Equipment
Professional technicians seal the intake tract using an inflatable bladder adapter connected to the main throttle body. The smoke machine heats specialized mineral oil to generate thick, safe vapor.
- Disconnect the main air intake duct right before the throttle body and insert the smoke bladder.
- Inflate the bladder securely and attach the smoke machine supply hose to the test port.
- Power on the smoke machine and set the pressure regulator below 1.5 PSI to prevent gasket damage.
- Allow two to three minutes for the vapor to completely fill the engine vacuum pathways and crankcase.
- Shine a high-intensity ultraviolet (UV) inspection flashlight around all hoses, fittings, and intake gaskets.
Spotting the Escaping Vapor
Look carefully for wisps of white smoke escaping into the engine bay. The UV dye mixed into professional diagnostic smoke glows brightly under a blacklight. This pinpoints tiny splits in rubber hoses or warped intake manifold gaskets that visual inspections miss completely.
What If It Still Doesn’t Work?
If standard diagnostic tests fail to locate a leak, the underlying issue might stem from internal engine components or electronic sensor failures. Implement these fallback steps to resolve persistent drivability problems:
- Perform a professional cylinder compression and cylinder leakage test to rule out burnt valves or blown head gaskets.
- Inspect the PCV valve and internal crankcase ventilation passages, which frequently clog with carbon deposits.
- Scan the Powertrain Control Module (PCM) for hidden trouble codes using an advanced OBD2 diagnostic scanner.
- Consult a certified professional mechanic if rough idling continues despite zero external vacuum leaks. Professional smoke testing and diagnostics typically cost between $150 and $250.
Conclusion
Unresolved vacuum leaks degrade fuel economy, trigger check engine lights, and cause rough engine idling. Fixing these issues promptly protects your vehicle’s emission systems and restores optimal performance. According to verified research and automotive service data from 2027, catching induction leaks early prevents expensive downstream catalytic converter damage. Your immediate next step is to perform a visual inspection of all rubber vacuum lines under the hood today.
❓ Frequently Asked Questions
How does a propane torch help find vacuum leaks?
By passing an unlit propane torch over suspected areas, you allow the gas to get sucked into any gap. This temporarily enriches the air-fuel mixture and causes the engine RPM to rise, pinpointing the leak location.
Why do rubber vacuum hoses fail over time?
Rubber hoses are constantly exposed to high under-hood temperatures, oil vapors, and engine vibration, which causes them to dry out, harden, crack, or collapse over the years.
What tools do I need to diagnose a vacuum leak at home?
Basic diagnostic tools include a flashlight, a can of carburetor or brake cleaner, a mechanic’s stethoscope, and pliers. For advanced diagnosis, a portable smoke machine is extremely effective.
Can a bad intake manifold gasket cause a vacuum leak?
Yes, intake manifold gaskets degrade over time due to heat cycles. When they fail, they allow unmetered air to enter directly into the cylinders, causing severe idle issues.
How do I use a mechanic’s stethoscope to find a leak?
By removing the probe and attaching a piece of rubber hose, you can move the open end around gasket lines and fittings to listen for a distinct hissing sound caused by escaping air.
What should I do after I locate and fix a vacuum leak?
After replacing damaged hoses or gaskets, clear any stored diagnostic trouble codes using an OBD2 scanner and test-drive the vehicle to ensure the idle returns to normal.