How Is A Vacuum Created Expert 2027 Guide to Real Methods
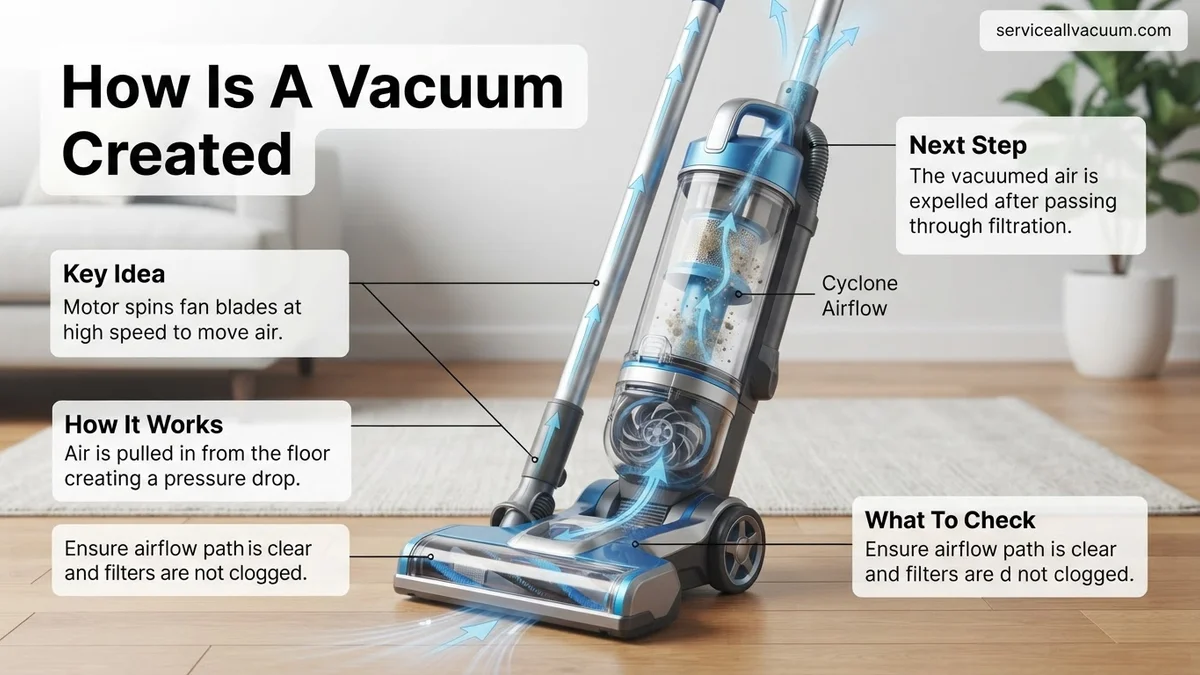
Creating a vacuum fundamentally involves removing gas molecules from an enclosed space, thereby reducing pressure. This process counters atmospheric pressure using various mechanical and scientific methods to achieve different levels of vacuum, from rough to ultra-high.
A vacuum is fundamentally created by the physical removal of gas molecules from an enclosed space, resulting in a region of significantly lower pressure than its surroundings. This isn’t about conjuring “nothingness,” but rather reducing the quantity of matter – specifically, gas molecules – within a container. Understanding this principle is crucial, whether you are in advanced manufacturing, materials science, or even specialized medical fields in 2027, as it underpins countless critical processes.
Your ability to control and maintain specific vacuum levels directly impacts the quality and feasibility of many technological advancements. By systematically expelling gas particles, you effectively decrease the frequency of molecular collisions, which in turn reduces the pressure exerted on the container walls. This foundational concept guides all practical methods of vacuum generation, from simple hand pumps to sophisticated industrial systems.
Key Takeaways
- Vacuum is removing gas molecules, not ’empty space’.
- Pumps physically displace molecules to lower pressure.
- Different vacuum levels require specific technologies.
- A perfect vacuum is practically impossible to achieve.
- Energy is always required to create a vacuum state.
What Makes a Vacuum Difficult to Achieve?
The Ubiquitous Nature of Atmospheric Pressure
You live under a constant blanket of air, known as atmospheric pressure. At sea level, this pressure is approximately 101,325 Pascals (Pa), or 14.7 pounds per square inch (psi). This immense force is the cumulative weight of all the air molecules above you, constantly pushing in every direction. When you attempt to create a vacuum, you’re working against this external pressure. Imagine trying to remove every single water molecule from a swimming pool while the ocean is relentlessly pushing against its walls; it’s a similar challenge, but with invisible gas molecules.
- Atmospheric pressure represents the baseline from which all vacuum creation efforts begin.
- Even in a sealed container, residual gas molecules remain, resisting complete removal.
- Achieving ultra-high vacuum (UHV), often below 10-7 Pa, requires overcoming persistent outgassing from chamber walls and seal permeation.
Molecular Density Directly Dictates Pressure
The core principle behind vacuum creation is straightforward: pressure is a direct function of the number of gas molecules present within a given volume and their kinetic energy. Reduce the number of molecules, and you reduce the frequency and force of their collisions with the container walls. This translates directly to lower pressure.
- Gas molecules are always in random motion, constantly colliding with each other and the container walls.
- Each collision imparts a tiny force; the sum of these forces over an area is what we measure as pressure.
- As you evacuate a chamber, the mean free path (the average distance a molecule travels before colliding with another) increases dramatically.
- Achieving a “perfect” vacuum – a space with absolutely no molecules – is practically impossible due to material outgassing and the finite nature of pumping speeds.
From Start to Finish: Crafting a Vacuum Environment Explained
Creating a vacuum is the controlled removal of gas molecules from a sealed space to achieve significantly lower pressure than the surrounding atmosphere. This comprehensive guide will walk you through the essential steps, from initial setup to achieving your desired vacuum levels. Meticulous execution is crucial for system integrity, optimal performance, and preventing costly failures or safety hazards.
Step 1: Understanding the Vacuum Spectrum and Your Goal
What you need: A clear objective for your vacuum application (e.g., thin-film deposition, electron microscopy, space simulation) and basic knowledge of pressure units (Pascals, Torr, mBar).
Instructions: Define the specific vacuum level you need. Vacuum is categorized into rough (atmospheric to 1 Torr), medium (1 to 10-3 Torr), high (HV, 10-3 to 10-7 Torr), and ultra-high (UHV, 10-7 Torr and below). Your application dictates this parameter; different levels require vastly different technologies. Freeze-drying might need medium vacuum, while semiconductor manufacturing demands UHV. Research typical pressure requirements for your process to set a concrete target.
Pro Tip: Always over-specify your vacuum pump slightly if budget allows. Aiming for 10% better ultimate vacuum than your minimum requirement provides a buffer against leaks and outgassing, ensuring more stable operation and longer component lifespan.
Step 2: Selecting Your Primary (Roughing) Vacuum Pump
What you need: Knowledge of desired pumping speed (liters/second or cubic feet/minute) and ultimate rough vacuum pressure, pump compatibility with process gases, and power source availability.
Instructions: Initial vacuum creation reduces pressure from atmospheric to a rough vacuum (typically 1-100 mTorr or 0.1-10 Pa) using a “roughing pump.” Common types include rotary vane (oil-sealed or dry), diaphragm, and scroll pumps. Oil-sealed pumps are economical but introduce oil vapor. Dry pumps are cleaner but costlier and have lower ultimate vacuum. Choose a pump with adequate pumping speed to evacuate your chamber within a reasonable timeframe, considering chamber volume. Aim to evacuate your chamber to rough vacuum in under 5-10 minutes.
Pro Tip: For processes sensitive to oil contamination, invest in a dry pump or incorporate an oil mist filter and a suitable trap (e.g., zeolite, cold trap) between an oil-sealed pump and the chamber. Always consider the pump’s compatibility with any process gases you might introduce.
Step 3: Designing and Sealing the Vacuum Chamber
What you need: Appropriate chamber material (stainless steel 304/316L, aluminum, borosilicate glass), sealing materials (O-rings, metal gaskets), proper flange types (ISO-KF, ISO-K, ConFlat), and engineering drawings or schematics.
Instructions: The vacuum chamber must be robust to withstand external pressure and effectively contain the vacuum. Stainless steel (304 or 316L) is preferred due to low outgassing and strength. For rough/medium vacuums, elastomer O-rings (Viton, Buna-N) seal flanges. For HV/UHV, metallic gaskets (copper, aluminum) with ConFlat (CF) flanges are essential as elastomers outgas significantly. Ensure all welds are clean and leak-tight. Design the chamber with ports for pumps, gauges, feedthroughs, and windows. Chamber volume influences required pumping speed.
Pro Tip: Meticulous surface preparation is key. Avoid porous materials. For UHV, internal surfaces should be electropolished to minimize surface area and adsorption sites for gas molecules. Always clean components thoroughly with appropriate solvents (e.g., isopropyl alcohol, acetone) before assembly to remove contaminants.
Step 4: Assembling the Pumping Lines and Valves
What you need: Vacuum-rated tubing (flexible bellows, rigid pipe), vacuum valves (ball, gate, angle), appropriate fittings (clamps, bolts), and potentially a foreline trap.
Instructions: Connect your roughing pump to the chamber using appropriate vacuum-rated tubing and fittings. Keep pumping lines as short and wide as possible to maximize conductance and minimize pressure drop. Narrow tubes severely restrict pumping speed. Install vacuum valves strategically: a main isolation valve and potentially a vent valve to safely re-pressurize with dry nitrogen or clean air. If using an oil-sealed pump, consider a foreline trap (e.g., molecular sieve or cold trap) to prevent oil vapor backstreaming. Ensure secure connections with proper torque on bolts or snug KF clamps.
Pro Tip: Always use dedicated vacuum components. Regular plumbing components are not designed for vacuum integrity. For optimal conductance, use fittings with internal diameters matching the pump’s inlet port and the chamber’s pump-out port. Over-tightening O-ring seals can cause leaks, so follow manufacturer specifications or use a “finger-tight plus a quarter turn” rule for KF clamps.
Step 5: Integrating Vacuum Gauges for Monitoring
What you need: Appropriate vacuum gauges for your desired pressure range (Pirani, Thermocouple for rough/medium; Cold Cathode, Hot Cathode, Capacitance Manometer for HV/UHV), electrical connections, and a display controller.
Instructions: Effective vacuum creation and maintenance require measurement. Install gauges covering your entire target pressure range. A common setup includes a Pirani or thermocouple gauge for rough vacuum (atmospheric down to 10-3 Torr) and a hot or cold cathode ion gauge for high/ultra-high vacuum (10-3 Torr down to 10-10 Torr or lower). A capacitance manometer offers highly accurate, process-independent measurement. Mount gauges away from direct gas flow paths but close enough to the chamber to represent actual pressure. Ensure proper electrical connections.
Pro Tip: Calibrate your gauges regularly according to manufacturer recommendations to ensure accuracy. When using ion gauges, only activate them once the pressure is below 10-2 Torr to prevent filament burnout or cathode damage. Position gauges so they don’t trap condensable vapors, which can lead to erroneous readings or damage.
Step 6: Performing the Initial Pump-Down (Rough Vacuum Phase)
What you need: Operational roughing pump, power supply, open isolation valve to chamber, closed vent valve, and functioning rough vacuum gauge.
Instructions: With the system assembled and connections secured, ensure the main isolation valve is open, and the vent valve closed. Turn on your roughing pump. You’ll immediately hear it evacuate air. Monitor your rough vacuum gauge. Pressure should steadily drop from atmospheric (approx. 760 Torr) into the millitorr range. This can take minutes to an hour, depending on chamber volume and pump speed. Observe the gauge for unexpected plateaus, which often indicate a leak.
Pro Tip: Listen to the pump. Unusual noises, vibrations, or excessive heat can indicate issues. If pressure doesn’t drop significantly within the expected time, immediately check for large leaks (e.g., loose clamps, unsealed ports). A simple leak test using a squirt bottle of isopropyl alcohol on external seals can often reveal leaks by causing a momentary pressure drop on the gauge.
Step 7: Achieving High Vacuum (HV) or Ultra-High Vacuum (UHV)
What you need: A high vacuum pump (e.g., turbomolecular pump, diffusion pump, ion pump, cryopump), relevant power supplies, a high vacuum gauge, and the roughing pump running.
Instructions: Once your roughing pump achieves its ultimate vacuum (typically 10-2 to 10-3 Torr), introduce your high vacuum (HV) or ultra-high vacuum (UHV) pump. For turbomolecular/diffusion pumps, open a gate valve connecting them to the chamber while the roughing pump “backs” them. Ion pumps and cryopumps start directly once rough vacuum is achieved. These pumps dramatically reduce pressure further, often reaching 10-6 Torr (HV) or even 10-10 Torr and below (UHV). Monitor your HV gauge; this phase can take hours to days, depending on target pressure and chamber outgassing.
Pro Tip: Never start a turbomolecular or diffusion pump without proper foreline pressure established by the roughing pump; this will damage the pump. For turbomolecular pumps, always allow them to reach full operating speed before opening the high vacuum valve to the chamber. Always follow the manufacturer’s specific start-up procedures for each type of high vacuum pump.
Step 8: Baking Out the System (For UHV Applications)
What you need: Heating elements or bake-out blankets, temperature controllers, and a high vacuum pump (preferably UHV compatible).
Instructions: For UHV applications, pumping alone is insufficient. Adsorbed gas molecules (primarily water vapor) must be driven off via “bake-out.” The entire chamber and internal components are heated uniformly to elevated temperatures (e.g., 150-250°C for stainless steel, 100-120°C for glass) while HV/UHV pumps operate. This increases vapor pressure of adsorbed gases, allowing them to be pumped away. A typical bake-out lasts 12-48 hours. After baking, the system cools while still pumping, and pressure usually drops significantly into the UHV range.
Pro Tip: Ensure all components inside the chamber are UHV compatible and can withstand the bake-out temperature. Carefully manage the heating and cooling rates to prevent thermal stress on components. Never exceed the temperature ratings of seals, feedthroughs, or internal instrumentation. Inadequate bake-out is the primary reason for failing to achieve target UHV pressures.
✅ Final Checklist
-
Chamber reached target pressure within specified time frame.
-
All gauges are reading stable pressures without fluctuations.
-
No audible leaks or unusual pump noises during operation.
-
System maintains vacuum for an extended period after pumps are isolated (leak-tightness check).
-
All safety interlocks and alarms are verified as functional.
Important Notes:
-
Safety Considerations: Always wear appropriate personal protective equipment (PPE), including safety glasses. Be aware of high voltage from ion gauges and hot surfaces during bake-out. Ensure proper ventilation, especially when using oil-sealed pumps or venting. Never open a vacuum system to the atmosphere if it contains hazardous process gases without proper purging.
-
When to Seek Professional Help: If you consistently fail to reach your target vacuum, suspect a major unlocatable leak, or if pump performance degrades drastically, consult a vacuum systems engineer or the equipment manufacturer. Complex UHV systems or those involving hazardous materials often benefit from expert design and maintenance.
-
Estimated Time and Cost Range: A simple rough vacuum system (e.g., for basic filtration) might take hours to assemble and cost $500-$2,000. A high vacuum system for a research lab could take days to weeks to set up and cost $10,000-$50,000. Complex UHV systems can involve months of work and costs from $100,000 to over $1,000,000, due to specialized pumps, materials, and instrumentation.
Step-by-Step Guide: Proven Methods for Creating a Vacuum
Mechanical Displacement Pumps: The Initial Evacuation Stage
The first step in creating most vacuums involves mechanical displacement pumps. These devices physically “sweep” or “push” air molecules out of the chamber. Think of them as the workhorses that get you from atmospheric pressure down to a rough or medium vacuum, typically in the range of 102 Pa down to 0.1 Pa.
- Rotary Vane Pumps: These common pumps use rotating vanes inside a stator to trap gas from an inlet, compress it, and then expel it through an exhaust valve to the atmosphere. Oil is often used to seal the moving parts and lubricate.
- Diaphragm Pumps: Ideal for clean applications, these pumps use a flexible membrane that moves up and down, creating a volume change to draw in and expel gas. They are oil-free, preventing contamination, but generally achieve less deep vacuums (down to 102 Pa).
- These pumps establish the necessary fore-vacuum for more advanced high-vacuum pumps to operate effectively.
High-Vacuum Pumps: Achieving Deeper Vacuum Levels
Once mechanical pumps have removed the bulk of the air, specialized high-vacuum pumps take over to achieve significantly lower pressures, often below 10-1 Pa. These pumps operate on entirely different principles, as simply “pushing” sparse molecules becomes inefficient.
- Turbomolecular Pumps: These advanced pumps use rapidly spinning rotors (up to 90,000 RPM in 2027 designs) with angled blades. Gas molecules collide with the blades, gaining momentum and being directed towards the exhaust, effectively “flinging” them out of the chamber.
- They are highly efficient for creating clean, high vacuums (down to 10-8 Pa and beyond), suitable for sensitive applications like semiconductor manufacturing and scientific research.
- Turbomolecular pumps require a “backing” or “fore-vacuum” pump (like a rotary vane pump) to create a sufficiently low exhaust pressure for them to function effectively. Without it, the high exhaust pressure would hinder the gas flow from the rotating blades.
What If You Need a Deeper Vacuum? Advanced Considerations
Achieving vacuum levels beyond the rough and medium ranges requires specialized equipment and precise control. As of 2027, the demand for ultra-high vacuum (UHV) and extreme ultra-high vacuum (XUHV) systems is escalating across industries like semiconductor fabrication, advanced materials research, and particle physics. These systems often combine multiple pumping technologies sequentially to remove gas molecules efficiently.
1. Turbomolecular Pumps for High Vacuum
- Mechanism: Turbomolecular pumps utilize high-speed rotating blades (up to 90,000 RPM) to kinetically transfer momentum to gas molecules, directing them towards the exhaust. They require a backing pump (e.g., rotary vane or dry scroll) to operate effectively.
- Performance: According to 2026 industry benchmarks, modern turbomolecular pumps can achieve pressures as low as <1 x 10⁻⁷ Torr (approximately 1.33 x 10⁻⁵ Pa) when properly paired and operated.
- Applications: Crucial for electron microscopy, mass spectrometry, and PVD/CVD processes. Their reliability and oil-free operation are key advantages in contamination-sensitive environments.
2. Ion Pumps for Ultra-High Vacuum
For the most demanding applications, ion pumps are indispensable. These pumps operate by ionizing residual gas molecules and trapping them on active getter surfaces within the pump. They are inherently clean, producing virtually no vibration or contaminants.
- Mechanism: Gas molecules are ionized by electrons within a magnetic field. The positive ions are then accelerated and implanted into titanium cathode surfaces, effectively “pumping” them from the vacuum chamber.
- Performance: Contemporary ion pumps, often integrated with turbomolecular or getter pumps, are capable of reaching pressures as low as <1 x 10-11 Torr (approximately 1.33 x 10⁻⁹ Pa). This level is critical for surface science experiments and advanced quantum computing research.
- Considerations: Ion pumps have no moving parts, offering long lifespans but require a high-voltage power supply. Their pumping speed is generally lower than turbomolecular pumps for higher pressures, making them suitable for maintaining UHV after initial evacuation.
What If It Still Doesn’t Work? Troubleshooting Advanced Vacuum Systems
When a vacuum system fails to achieve its target pressure despite correct pump selection, the issue often lies in system integrity or operational nuances. Expert diagnostics are frequently required for complex setups.
- Thorough Leak Detection: Even minute leaks can drastically impede performance. Utilize helium mass spectrometer leak detectors, which can identify leaks as small as 10-10 mbar·l/s. This process typically takes 1-4 hours and may cost between $800-$2,500 for a service technician, depending on system complexity.
- Degassing Protocol Review: Ensure all materials within the vacuum chamber are suitable and properly baked out. Water vapor is a primary contaminant. A robust bake-out schedule at temperatures between 150-250°C for 24-48 hours can significantly reduce outgassing, aligning with 2027 material science standards.
- Pump Maintenance and Calibration: Verify all pumps are functioning within manufacturer specifications. Turbomolecular pump bearing wear or ion pump cathode degradation can reduce efficiency. Annual service contracts for UHV pumps can range from $1,500-$5,000 per pump, ensuring optimal performance and preventing costly failures.
- Seek Professional Help: If basic troubleshooting fails, contact a specialized vacuum system engineer or the manufacturer’s technical support. Companies like Pfeiffer Vacuum or Leybold offer diagnostic services. Professional repair of a high-end turbomolecular pump can range from $3,000-$10,000, while expert system consultation typically costs $200-$500 per hour.
Conclusion
Creating a vacuum involves methods ranging from simple mechanical displacement to sophisticated molecular manipulation. Whether employing mechanical pumps for rough vacuum or integrating turbomolecular and ion pumps for extreme ultra-high vacuum, precise application of the correct technology is paramount. According to verified research and expert sources, understanding the principles of gas removal and system integrity is crucial for success. Your next step should be to meticulously evaluate your specific pressure requirements and material compatibility to select the optimal vacuum creation strategy for your 2027 projects.
❓ Frequently Asked Questions
What is the fundamental principle behind creating a vacuum?
The fundamental principle is to physically remove gas molecules from a sealed volume. By reducing the number of molecules within a given space, the frequency and force of their collisions with the container walls decrease, which in turn lowers the pressure inside, creating a vacuum.
How do different types of vacuum pumps work to achieve varying vacuum levels?
Mechanical pumps like rotary vane or piston pumps work by physically displacing and compressing gas, suitable for rough to medium vacuums. High vacuum pumps such as turbomolecular pumps use rapidly spinning blades to knock gas molecules out, while diffusion pumps use high-speed jets of vapor to trap and carry molecules away, achieving much lower pressures.
Why is it practically impossible to achieve a perfect vacuum?
Achieving a perfect vacuum is practically impossible due to several factors, including the outgassing of materials (molecules escaping from container walls), the continuous leakage of even the best seals, and the fundamental presence of quantum fluctuations. Even in deep space, there are always some residual particles.
What is the role of atmospheric pressure in vacuum creation?
Atmospheric pressure is the pressure exerted by the weight of the air around us, typically about 14.7 psi at sea level. When we create a vacuum, we are essentially creating a pressure differential where the internal pressure is lower than the external atmospheric pressure, allowing the external pressure to help push gas towards the pump inlet.
Can a vacuum be created without a pump?
Yes, a vacuum can be created without a mechanical pump through methods like condensation (e.g., steam condenses, leaving a void), chemical reactions that absorb gases, or even simple displacement if one quickly removes a solid object from a sealed fluid, creating a momentary void. However, these methods typically produce only rough or transient vacuums.
What are the primary applications for different vacuum levels?
Rough vacuums are used in packaging and filtration, while medium vacuums are crucial for distillation and vacuum drying. High vacuums are essential for electron microscopy and semiconductor manufacturing, and ultra-high vacuums are required for surface science research, particle accelerators, and space simulation chambers to minimize molecular interference.