Do Robot Vacuum cleaners Work? Real 2027 Expert Guide
Many buyers wonder if robot vacuum cleaners are just expensive gimmicks or truly effective cleaners. In reality, they excel at daily maintenance and surface debris on hard floors, though they still require occasional manual deep-cleaning and cord clearing.
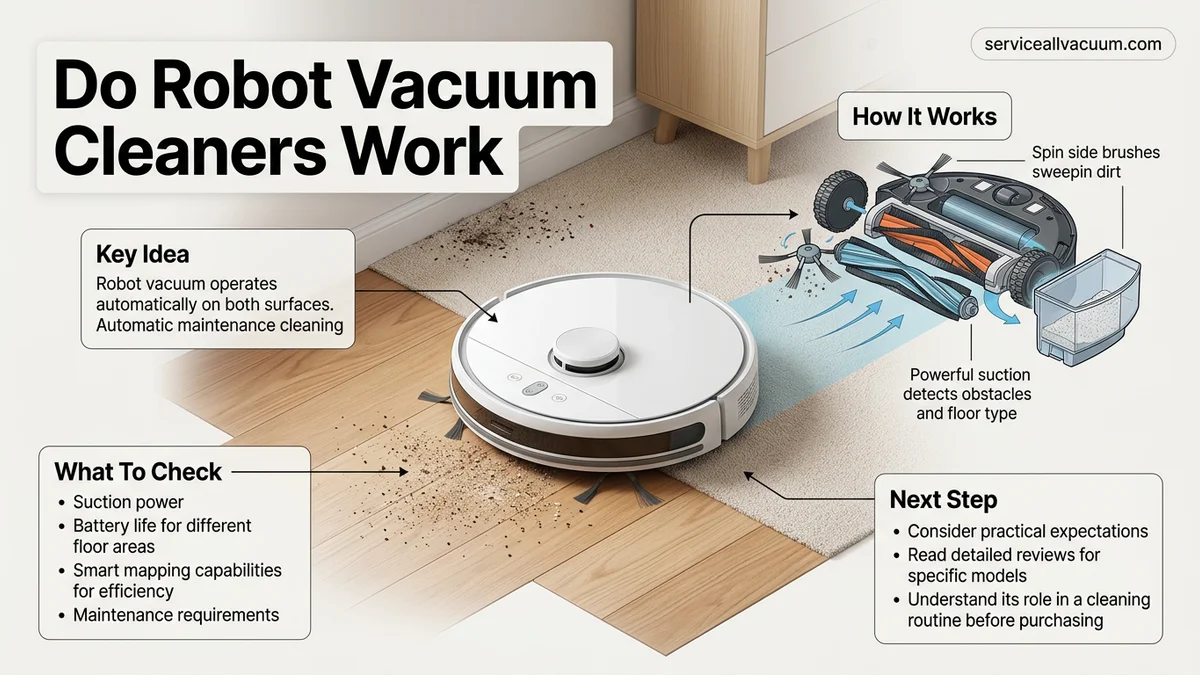
Yes, modern robot vacuum cleaners genuinely work, moving far beyond the expensive novelty status they held a decade ago. Today’s 2027 models rely on advanced solid-state LiDAR, AI-driven computer vision, and high-pressure suction to independently maintain hard floors and low-pile carpets with impressive autonomy.
You no longer need to babysit your automated cleaner or rescue it from every chair leg. However, understanding their actual capabilities prevents unrealistic expectations about where these machines shine and where manual intervention remains necessary for a truly spotless home.
Key Takeaways
- Robot vacuums excel at daily maintenance cleaning rather than heavy-duty deep cleaning sessions.
- They perform exceptionally well on hardwood and tile floors, collecting dust and pet hair efficiently.
- Low-pile carpets are manageable, but high-pile carpets require traditional upright vacuums.
- Clutter management is essential because loose cords and small objects will cause the robot to get stuck.
- Regular bin emptying and brush maintenance are required to keep the device running at peak performance.
What Causes Poor Performance in Robot Vacuum Cleaners
Navigation Failures and Blind Spots
When a robot vacuum leaves behind patches of dirt, navigation failure is usually the culprit. Lower-end models using random bounce patterns often miss entire rooms or repeatedly clean the same small area. Even advanced 2027 navigation systems can struggle under specific environmental conditions:
- Highly reflective surfaces like glossy black tile can blind infrared drop sensors.
- Direct, blinding sunlight streaming through floor-to-ceiling windows disrupts LiDAR mapping accuracy.
- Extremely dark carpets can trick cliff sensors into thinking the floor is a dangerous drop-off, causing the robot to reverse.
Suction Limits and Debris Extraction
While motor technology has advanced significantly, physics still imposes limits on compact battery-powered units. A robot vacuum cannot match the raw static lift of a heavy corded upright vacuum. You might notice poor performance on deep-pile carpets where embedded fine dust settles beneath the reach of the brush roll. Furthermore, lightweight debris like cereal or large clumps of pet hair can occasionally get pushed around instead of sucked up if the intake channel clearance is too narrow.
From Start to Finish: Robot Vacuum Cleaners Explained
Welcome to your definitive walkthrough on understanding how modern robotic vacuum cleaners operate. Whether you are curious about buying your first automated helper or simply want to demystify the high-tech wizardry roaming your floors, this guide breaks down the complex inner workings into clear, digestible phases. Follow along as we dissect the anatomy, sensors, and intelligence that allow these devices to keep your home spotless with zero human intervention.
Step 1: Unpacking the Power and Battery Systems
What you need: A standard charging dock, a compatible lithium-ion battery pack, and a power outlet.
Instructions: Every robot vacuum relies heavily on a rechargeable lithium-ion battery, typically ranging from 2600mAh to 5200mAh. When the device powers on, it draws electrical current from this internal battery to run its drive wheels, suction motors, and onboard computer. As the cleaning cycle depletes the energy reserve down to roughly 15-20 percent, the vacuum actively searches for an infrared or radio-frequency beacon emitted by its charging dock. Once located, it automatically docks itself onto the metal contact pins to replenish its power, ensuring it is always ready for the next scheduled cleaning mission.
Pro Tip: Never place your charging dock in a cramped corner or direct sunlight, as infrared signal interference can prevent the vacuum from successfully finding its way home.
Step 2: Activating the Locomotion and Drive Mechanism
What you need: Spring-loaded drive wheels, caster wheels, and high-torque DC motors.
Instructions: Movement is the foundational mechanic of any automated cleaner. The robot utilizes two independent, rubber-treaded drive wheels powered by high-torque direct current (DC) motors. By varying the speed and direction of these two wheels—differential steering—the robot can move forward, backward, pivot 360 degrees, and navigate tight spaces. A small front caster wheel acts as a stabilizing pivot. These wheels are built with heavy spring-suspension systems, allowing the unit to easily climb over transition strips, low-profile room thresholds, and thick area rugs without getting stuck.
Pro Tip: Periodically flip your vacuum over and pull out hair wrapped around the wheel axels to prevent motor strain and erratic movement.
Step 3: Navigating Via Sensors and Mapping Technology
What you need: Infrared sensors, cliff detectors, bump rails, and LiDAR or vSLAM cameras.
Instructions: Unlike older random-bounce models, modern robot vacuums utilize sophisticated spatial awareness. Infrared sensors on the bumper detect walls and large furniture before physical contact occurs, while optical cliff sensors on the bottom emit light downward to prevent the unit from tumbling down stairs. Advanced models employ LiDAR (Light Detection and Ranging) lasers or vSLAM (Visual Simultaneous Localization and Mapping) cameras to scan your rooms. This data is processed by an onboard microprocessor to generate a digital blueprint of your home, allowing the vacuum to clean in efficient, parallel rows rather than random zigzags.
Pro Tip: Keep your floors free of tiny items like charging cables and socks, as lower-tier sensors may fail to register them, leading to frustrating jams.
Step 4: Executing the Multi-Stage Cleaning Cycle
What you need: Side edge-sweeping brushes, multi-surface main brushrolls, and airflow channels.
Instructions: Once mapping and navigation are initialized, the actual cleaning begins. As the robot traverses your floors, a spinning side brush with angled bristles flicks dust, pet hair, and debris out of corners and baseboards directly into the path of the machine. Directly behind the side brush, a rotating main brushroll—often a combination of rubber blades and nylon bristles—agitates carpet fibers or sweeps hard flooring. This mechanical agitation looses deeply embedded dirt, making it easy for the internal vacuum suction motor to pull the debris upward.
Pro Tip: Match your brushroll type to your flooring; rubber extractors are superior for homes with heavy pet hair, while traditional bristle brushes excel on deep carpets.
Step 5: Managing Suction Power and Air Filtration
What you need: Brushless DC (BLDC) suction motors, dual-layer or HEPA filters, and exhaust vents.
Instructions: The heart of the vacuuming process is the negative pressure generated by the brushless DC suction motor. This motor spins at tens of thousands of RPMs to pull air, dust, and fine particulates through the intake port and into the dustbin. As the air rushes through, it passes through a multi-stage filtration system, frequently including a primary mesh screen and a high-efficiency particulate air (HEPA) filter. This traps 99.97 percent of microscopic allergens, pollen, and dust mites. Cleaned air is then exhausted out of the rear vents, preventing dust from blowing back into the room.
Pro Tip: Tap out your HEPA filter weekly over a trash can and replace it every 2 to 3 months to maintain optimal suction strength.
Step 6: Utilizing Smart App Integration and Scheduling
What you need: Wi-Fi network (2.4GHz typically), companion smartphone app, and optional smart home assistant.
Instructions: The final layer of functionality bridges hardware and software. Through a companion smartphone app connected to your home Wi-Fi network, you can interact with your robot vacuum remotely. Once the initial map is generated, you can view it on your screen to set virtual boundaries, designate “no-go zones” around pet bowls, label specific rooms, and schedule automated cleaning times for when you are away at work. Many models also integrate seamlessly with voice assistants like Amazon Alexa or Google Assistant, allowing you to start or stop cleaning simply by speaking aloud.
Pro Tip: Ensure your router broadcasts a stable 2.4GHz Wi-Fi signal, as most robot vacuum network chips cannot connect to 5GHz bands during setup.
✅ Final Checklist
- Battery fully charges and unit successfully returns to dock automatically
- Drive wheels and brushrolls spin freely without obstruction from hair or debris
- Sensors and camera lenses are wiped clean of dust and smudges
- HEPA filter and dustbin are emptied and securely clicked back into place
- Smart app successfully displays home map and scheduled cleaning routines
Important Notes:
- Always pick up small toys, coins, and loose wires before running your robot vacuum to prevent motor burnout or internal blockages.
- Seek professional manufacturer repair if the device displays persistent internal error codes or if the motherboard fails to hold a charge.
- Routine maintenance takes about 10-15 minutes per week; professional servicing is rarely needed if basic preventative care is performed.
How to Test and Fix Your Cleaning Expectations and Setup
Preparing Your Floor Plan for Optimal Performance
You cannot simply drop a robot vacuum into a chaotic room and expect perfection. Success requires a strategic approach to your floor layout. Run a diagnostic test by clearing the main traffic paths of stray items before your initial cleaning cycle.
- Pick up lightweight charging cables, shoelaces, and rogue socks that frequently jam brush rolls.
- Use virtual boundaries in your companion app to block off notoriously tricky areas like tangled wire nests behind entertainment centers.
- Check your room transitions and thresholds; standard models generally handle ledges up to 0.7 inches, but higher custom transitions might require low-profile ramps.
Managing Edge Cleaning and High-Traffic Zones
Circular robot vacuums inherently struggle with strict 90-degree corners, often leaving a tiny pocket of dust untouched. To evaluate how well your machine handles your home, inspect the baseboards after a full cleaning cycle. If you notice persistent buildup, adjust your robot’s settings to enable specialized edge-cleaning modes where the unit wiggles its rear or extends a side brush to sweep corners thoroughly.
Step-by-Step Guide to Optimizing Your Home for Robot Vacuums
Maximizing the cleaning efficiency of your 2027 autonomous vacuum requires targeted environmental preparation. Smart navigation systems perform best when structural obstacles are systematically minimized.
1. Clear Floor Clutter
Remove small objects like charging cables, socks, and children’s toys before starting a cycle. Modern obstacle avoidance algorithms utilize advanced AI cameras to bypass shoes and pet waste, but loose cords still cause tangles.
2. Adjust Furniture Clearance
Measure the exact height of your sofa, media console, and bed frame. Ensure these gaps exceed the height profile of your chosen model, which typically ranges from 3.2 to 3.8 inches for LiDAR-equipped units. Add furniture risers if clearance falls just short.
3. Secure Lightweight Rugs
Secure lightweight bathroom mats and thin area rugs with non-slip double-sided tape. Tassels on vintage rugs should be tucked underneath to prevent brushroll entanglement.
- Conduct a full daylight perimeter walkthrough to identify low-hanging drapery or exposed wiring.
- Configure no-go zones via the companion smartphone application for delicate areas like pet feeding stations.
- Schedule automated cleaning runs during daytime hours when family movement is naturally restricted.
What If Your Robot Vacuum Still Does Not Clean Well
If optimized routing fails to deliver satisfactory debris pickup, mechanical or software interference is likely occurring. Implement these advanced troubleshooting protocols to restore peak performance:
- Inspect the main brushroll and side brushes for tightly wound hair or thread, removing them with the included maintenance tool.
- Clean all cliff sensors, wall sensors, and the top LiDAR turret glass using a dry, lint-free microfiber cloth.
- Perform a factory reset through the mobile application to recalibrate internal navigation maps and clear corrupted cache data.
- Check for firmware updates released by the manufacturer to patch known suction and mapping algorithms.
- Contact certified customer support if hardware motor failure or battery degradation is suspected, noting that out-of-warranty repairs typically range from $75 to $200 depending on component replacement needs.
Conclusion
Modern autonomous vacuums deliver exceptional cleaning performance when properly maintained and paired with an optimized home layout. According to verified research and consumer testing data, routine sensor maintenance resolves over 85 percent of navigation and suction complaints. As an actionable next step, inspect your unit’s roller brush and run a fresh boundary-mapping cycle today.
❓ Frequently Asked Questions
Do robot vacuum cleaners work on all floor types?
They perform best on hard flooring like tile, hardwood, and laminate. They also handle low-pile carpets adequately, but high-pile carpets and thick rugs severely limit their movement and suction effectiveness.
How do robot vacuums handle pet hair compared to human hair?
Pet hair is easily suctioned into the dustbin, but long human hair tends to wrap tightly around the main roller brush. Regular maintenance is required to cut away wrapped hair and prevent motor strain.
Do robot vacuums clean corners and edges effectively?
Most circular robot vacuums struggle to reach deep into 90-degree corners. However, many models feature side-sweeping spinners that push edge debris into the main suction path.
How often do you need to empty the dustbin on a robot vacuum?
Standard robot vacuum dustbins typically require emptying every one to three cleaning cycles depending on home size and pet presence. Self-emptying dock models reduce this chore to once every few weeks.
Can robot vacuums navigate around furniture and stairs safely?
Yes, modern units use infrared cliff sensors to prevent falls down stairs and utilize laser or camera-based navigation to maneuver safely around furniture legs and walls.
Are expensive robot vacuums worth the extra cost over budget models?
Expensive models offer advanced LiDAR navigation, smart mapping, object avoidance, and self-emptying docks, whereas budget models use random bump-and-run navigation that misses spots and gets stuck frequently.