How to Find a Vacuum Leak in an Engine Expert Guide 2027
A vacuum leak can severely impair engine performance, leading to rough idling, misfires, and poor fuel economy. Diagnosing a vacuum leak effectively requires systematic methods like smoke tests or propane/carb cleaner sprays, focusing on common failure points. Pinpointing and sealing these leaks is crucial for restoring your engine’s optimal operation and efficiency.
A vacuum leak in your engine isn’t just an annoyance; it’s a direct threat to your vehicle’s performance, fuel efficiency, and long-term health. Pinpointing these elusive leaks effectively means understanding both their common hiding spots and the most reliable diagnostic techniques. You’re not just looking for a tiny crack; you’re often searching for subtle changes in engine behavior or specific audible clues that can save you significant repair costs and prevent further engine damage in 2027 and beyond.
Diagnosing a vacuum leak yourself allows you to address issues like rough idling, stalling, or sudden drops in fuel economy before they escalate. This expert guide will equip you with practical, step-by-step methods and a comprehensive list of likely culprits, enabling you to identify and isolate vacuum leaks with confidence and precision, without needing expensive specialized garage equipment for initial diagnosis.
Key Takeaways
- Use smoke, spray, or sound to detect leaks.
- Common leak points:hoses, gaskets, PCV valve.
- Rough idle, misfires indicate a vacuum leak.
- Prioritize safety with ventilation and eye protection.
- Fixing leaks restores engine power and economy.
What Causes Engine Vacuum Leaks: Symptoms & Common Locations
Tell-Tale Symptoms of a Vacuum Leak
Identifying a vacuum leak often begins with recognizing its characteristic symptoms, which can vary in severity. If your vehicle exhibits any of these, a vacuum leak should be high on your diagnostic checklist:
- Rough or Unstable Idle: The most common sign. Your engine might feel like it’s “hunting” or struggling to maintain a steady RPM, especially in park or at a stoplight.
- Misfires: Unmetered air entering the engine can disrupt the air-fuel mixture, leading to incomplete combustion and cylinder misfires.
- Lean Codes (P0171/P0174): Your check engine light (CEL) might illuminate, storing diagnostic trouble codes indicating a lean condition in Bank 1 or Bank 2, as the engine’s oxygen sensors detect too much oxygen.
- Stalling: Particularly at low speeds or when coming to a stop, severe vacuum leaks can cause the engine to stall due to an excessively lean mixture.
- Poor Acceleration or Power Loss: The engine struggles to develop full power, feeling sluggish during acceleration.
- Whistling or Hissing Noises: Often audible near the engine bay, these sounds are air being sucked through a small crack or loose connection.
Where Do Vacuum Leaks Hide? Common Culprits
Vacuum systems are critical for various engine functions, making them susceptible to leaks in many areas. Here are the most common locations you should inspect:
- Intake Manifold Gaskets: These seals between the intake manifold and cylinder head degrade over time, creating a common leak point, especially on older vehicles or those with high mileage.
- Vacuum Hoses and Lines: Numerous rubber or plastic hoses connect various components (e.g., HVAC controls, fuel pressure regulator, EVAP system). These can become brittle, crack, or disconnect due to age, heat cycling, and vibration.
- PCV (Positive Crankcase Ventilation) Valve and Hoses: The PCV valve itself can fail, or its connecting hoses can crack or become clogged, leading to leaks.
- Brake Booster: A large diaphragm inside the brake booster uses engine vacuum. If it fails or its connecting vacuum hose leaks, you’ll often experience a hard brake pedal and an engine vacuum leak.
- EGR (Exhaust Gas Recirculation) Valve: While not always a direct vacuum leak, a faulty EGR valve or its vacuum supply line can mimic vacuum leak symptoms or directly leak vacuum.
- Throttle Body Gasket: The gasket sealing the throttle body to the intake manifold can also fail, allowing unmetered air to enter.
- Vacuum Reservoirs: Some vehicles use plastic vacuum reservoirs to store vacuum, which can crack and leak.
- EVAP System Components: Hoses, solenoid valves, or the charcoal canister within the evaporative emission control system can also develop leaks, impacting engine vacuum.
How to Diagnose and Fix Engine Vacuum Leaks Like an Expert
Engine vacuum leaks can be elusive but are often the root cause of various frustrating symptoms, from rough idling and poor fuel economy to check engine lights. This comprehensive guide will walk you through a series of practical, step-by-step methods, ranging from simple visual inspections to advanced diagnostic techniques using specialized tools. By following these instructions carefully, you’ll gain the knowledge and confidence to pinpoint those hidden leaks, restore your engine’s performance, and avoid costly professional repairs.
Step 1: Understand Symptoms and Prioritize Safety
What you need: Your vehicle’s owner’s manual, a clear head, and a safe, well-ventilated workspace.
Instructions: Before diving in, familiarize yourself with common vacuum leak symptoms: a rough or surging idle, engine hesitation or stalling, a persistent “hissing” sound from the engine bay, reduced fuel economy, and a “Check Engine” light often accompanied by diagnostic trouble codes (DTCs) like P0171 or P0174 (indicating a lean condition). Ensure your vehicle is parked on a level surface, the engine is cool (or only slightly warm for some tests), the parking brake is engaged, and the transmission is in Park or Neutral. Always wear appropriate personal protective equipment, such as safety glasses and gloves.
Pro Tip: Record any specific DTCs present. These codes can often narrow down the bank or system where the leak is likely located, saving you significant diagnostic time.
Step 2: Conduct a Thorough Visual and Auditory Inspection
What you need: Flashlight, small mirror (optional), a quiet environment.
Instructions: Begin by visually inspecting all accessible vacuum lines, hoses, and connections under the hood. Look for obvious cracks, tears, kinks, or disconnections. Pay close attention to rubber and plastic components that can become brittle over time. Trace lines from the intake manifold to accessories like the PCV valve, brake booster, cruise control servo, and various sensors. With the engine running at idle (and safely warmed up if needed for specific systems), listen carefully for any distinct hissing, sucking, or whistling sounds. These noises are often tell-tale signs of air being drawn into the system through a leak. Use your flashlight to peer into tight spaces.
Pro Tip: Gently wiggle vacuum lines and connections while listening. Sometimes, a subtle movement can temporarily open a crack, making the hiss more pronounced and helping you pinpoint the exact location.
Step 3: Utilize the Carburetor Cleaner or Brake Cleaner Spray Method
What you need: Can of un-chlorinated brake cleaner or carburetor cleaner (highly flammable!), fire extinguisher (nearby), safety glasses, gloves.
Instructions: With the engine idling, carefully and in short, controlled bursts, spray small amounts of the cleaner around suspected vacuum leak areas. These include vacuum hoses, the base of the intake manifold gaskets, throttle body gasket, PCV valve, and brake booster diaphragm. Listen intently for a change in engine RPMs or a smoothing out of a rough idle. If the engine momentarily revs up or smooths out, it indicates that the flammable spray was ingested through a leak, temporarily enriching the air-fuel mixture. Work methodically, covering small sections at a time, and allow 10-15 seconds between sprays for the engine to react.
Pro Tip: NEVER spray directly onto hot exhaust components. Use only short bursts and always have a fire extinguisher on hand. This method is effective but carries a fire risk due to the flammability of the sprays.
Step 4: Employ the Propane or Unlit Torch Method (Extreme Caution!)
What you need: Small propane torch (unlit) with a flexible hose attachment or a long extension, fire extinguisher (nearby), safety glasses, gloves.
Instructions: This method is similar to the spray method but uses propane gas, which is often more sensitive to smaller leaks. With the engine idling and cool, open the valve on the unlit propane torch just enough to allow a very small amount of gas to flow. Direct the propane stream (without ignition!) around suspected vacuum leak areas, such as intake manifold runners, vacuum hose connections, and injector O-rings. Listen for a distinct increase in engine RPMs or a noticeable smoothing of the idle. The engine’s computer will detect the increased hydrocarbons and adjust accordingly. Move slowly and methodically, allowing the engine time to react to the propane.
Pro Tip: Propane is heavier than air, so leaks might be found lower down. Always ensure good ventilation to prevent gas buildup. This method is highly effective but requires extreme caution to prevent any ignition of the gas.
Step 5: Leverage a Professional Smoke Machine
What you need: Automotive smoke machine with appropriate adapters, shop air (if required by machine), safety glasses.
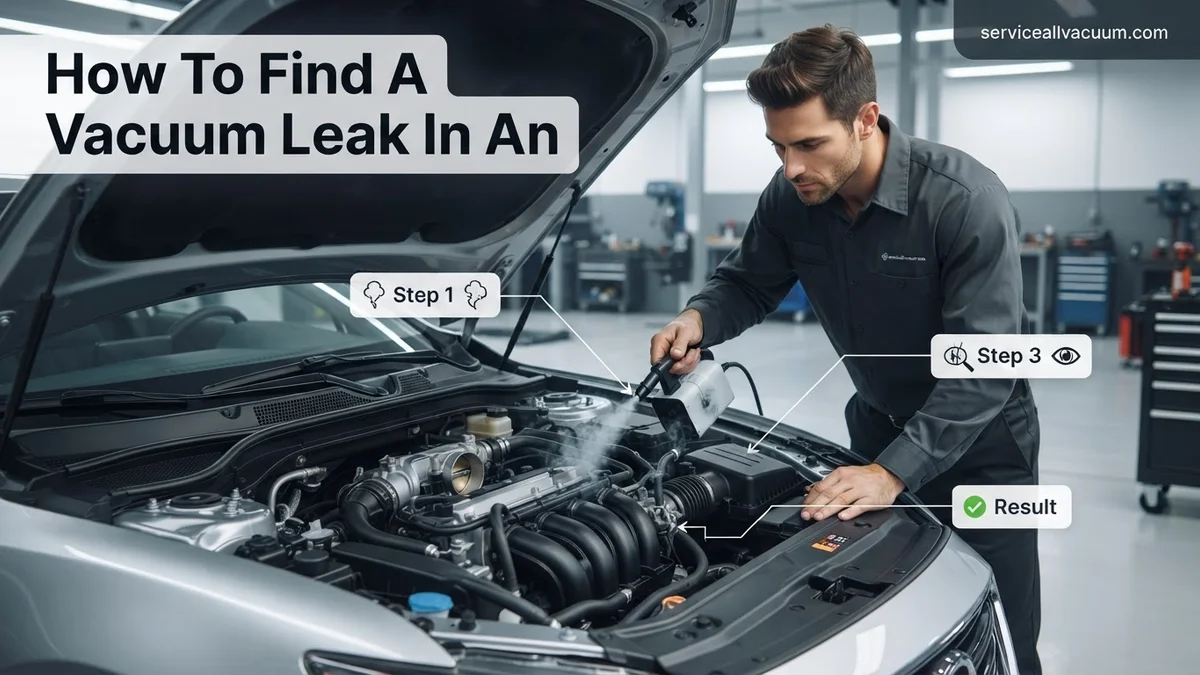
Instructions: For persistent or hard-to-find leaks, a smoke machine is often the most effective tool. Connect the smoke machine’s hose to a main vacuum source, such as the brake booster line or a large vacuum port on the intake manifold, ensuring other ports are temporarily plugged. Turn on the smoke machine and allow it to pressurize the system with non-toxic smoke. Visually inspect the entire engine bay, looking for plumes of smoke escaping from cracks, tears, or loose connections. This method makes even tiny leaks visible and is particularly useful for manifold gaskets or PCV systems that are difficult to access or spray directly.
Pro Tip: Check the filler neck and fuel tank for smoke, as some evaporative emission (EVAP) system leaks can present as vacuum leaks. Also, consider removing the air filter box for better visibility of the intake manifold.
Step 6: Interpret Vacuum Gauge Readings
What you need: Vacuum gauge with appropriate adapters, basic hand tools for connecting.
Instructions: Connect the vacuum gauge to a direct manifold vacuum port (e.g., the brake booster line or a dedicated vacuum port on the intake manifold, bypassing any check valves). Start the engine and let it reach normal operating temperature. A healthy engine should show a steady reading between 17 and 21 inches of mercury (inHg) at idle. A low, steady reading (e.g., 10-15 inHg) can indicate a late ignition timing or continuous vacuum leak. A needle that fluctuates rapidly or drops erratically points to more significant issues, including potential valve problems, but a slow, rhythmic drop and rise could indicate a larger, intermittent leak. A fluctuating needle might mean a vacuum leak is present or the engine has other issues.
Pro Tip: Rev the engine quickly to about 2,500 RPMs and then quickly release the throttle. A healthy engine’s vacuum should surge to 23-25 inHg before settling back to normal idle vacuum. A slow return or insufficient surge can signal a restricted exhaust or a large vacuum leak.
Step 7: Focus on Common Leak Locations
What you need: Knowledge gained from previous steps, possibly a mechanic’s mirror.
Instructions: Based on the results from the previous steps, concentrate your efforts on the most common areas for vacuum leaks. These include the PCV valve and its associated hoses, the large brake booster hose and diaphragm, the intake manifold gaskets (especially common on V-style engines), the throttle body gasket, vacuum reservoir (if equipped), vacuum lines leading to EGR valves, cruise control servos, and HVAC blend doors. Also, inspect the O-rings of the fuel injectors and any plastic runners or flaps within variable intake manifold systems that can degrade over time. Don’t forget the small, often brittle, plastic lines that run to various sensors or solenoid valves.
Pro Tip: On some vehicles, specific hoses are notoriously prone to cracking. Research common vacuum leak points for your specific make, model, and year online to narrow down your search efficiently.
Step 8: Post-Repair Verification and Testing
What you need: Basic hand tools for reassembly, OBD-II scanner (optional but recommended).
Instructions: Once you’ve identified and repaired the vacuum leak (e.g., by replacing a cracked hose, tightening a clamp, or replacing a gasket), reassemble any components removed during the diagnostic process. Start the engine and carefully listen for any remaining hissing sounds. Check for a stable idle and improved engine performance. If a “Check Engine” light was on, clear any stored DTCs using an OBD-II scanner. Take the vehicle for a test drive under various conditions to confirm the repair. Monitor fuel trims with the scanner if available; ideally, short-term and long-term fuel trims should be close to zero (between -10% and +10%).
Pro Tip: After clearing codes, drive the vehicle through a complete drive cycle (which can involve city and highway driving) to allow the engine’s computer to re-evaluate all systems and confirm the absence of new or recurring issues.
✅ Final Checklist
- Engine idle is stable and smooth, without surging or excessive roughness.
- No audible hissing, sucking, or whistling sounds from the engine bay.
- “Check Engine” light is off, and no pending or current vacuum-related DTCs are present.
- Vehicle performance, acceleration, and fuel economy have noticeably improved.
- Vacuum gauge reading (if checked) is steady and within the normal operating range.
Important Notes:
- Safety considerations or warnings: Always work in a well-ventilated area. Engine components can be extremely hot; allow adequate cooling time. Flammable sprays or gases must be used with extreme caution, away from open flames, sparks, or hot exhaust manifolds. Always have a fire extinguisher readily available.
- When to seek professional help: If you’re uncomfortable performing any of these steps, cannot pinpoint the leak after several attempts, or if the problem persists after repair, it’s best to consult a certified mechanic. Some leaks, especially those involving intake manifold removal, require specific torque specifications and specialized tools.
- Estimated time and cost range:
- Time: Simple visual and spray methods can take 30 minutes to 2 hours. Using a smoke machine or extensive troubleshooting might take 2-4 hours. Replacing a simple hose could be 15-30 minutes, while an intake manifold gasket replacement can be 3-8 hours or more.
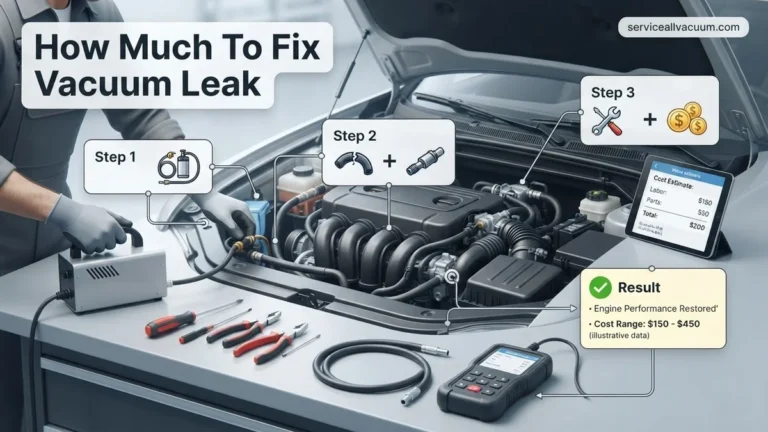
- Cost: Basic sprays and a flashlight might cost $10-$30. A vacuum gauge is around $20-$50. Renting a smoke machine (if available) can be $50-$100 per day, or purchasing one is $150-$500+. Repair costs range from $5 (for a small hose or clamp) to $100-$500+ (for gaskets, PCV valve assembly) if doing it yourself, plus labor if taken to a professional ($200-$1000+ for complex repairs).
Step-by-Step Guide: How to Diagnose Vacuum Leaks Like a Pro
Method 1: The Visual & Auditory Inspection
This is your starting point, requiring no special tools, just keen eyes and ears. It’s often overlooked but can yield quick results for obvious issues.
- Initial Visual Check (Engine Off): With the engine cold and off, open your hood. Systematically trace all visible vacuum lines. Look for hoses that are cracked, brittle, or disconnected. Pay close attention to connections near the intake manifold, PCV valve, and brake booster. Gently squeeze rubber hoses; if they feel stiff or crumble, they’re likely compromised. Check the integrity of any plastic vacuum lines for breaks or splits.
- Auditory Check (Engine On): Start the engine and let it warm up to operating temperature, then place it in Park (or Neutral for manual transmissions) with the parking brake engaged. Carefully listen for any distinct whistling, hissing, or sucking sounds coming from the engine bay. These noises are often clearest around the intake manifold area or where a hose has popped off. You can use a long piece of hose (like a garden hose or vacuum line) as a stethoscope by holding one end to your ear and moving the other end around potential leak points to amplify sounds.
Pros: Free, simple, and can quickly identify large, obvious leaks or disconnected hoses. Cons: Ineffective for small, hidden leaks, and it relies heavily on your senses. Small cracks often produce no audible sound.
Method 2: Propane/Carb Cleaner Spray Test (Use Extreme Caution)
This method is highly effective for finding elusive leaks but requires strict adherence to safety protocols due to the flammable nature of the chemicals involved. Always have a fire extinguisher nearby.
- Preparation and Safety First: Ensure your engine is at operating temperature and idling smoothly in a well-ventilated area. Absolutely do NOT perform this test in an enclosed garage without proper ventilation. Have a fire extinguisher within arm’s reach. Never use starting fluid (ether) for this test, as it is far too volatile and dangerous.
- The Propane Method (Recommended): Using an unlit propane torch (the small handheld type for plumbing), open the valve slightly to allow a small stream of propane gas to escape. Slowly direct the propane stream around suspected vacuum leak areas, such as intake manifold gaskets, vacuum hose connections, and the base of the throttle body. Listen carefully for a sudden increase in engine RPM. When the propane is drawn into a leak, the engine will briefly run richer and speed up.
- The Carb Cleaner/Brake Cleaner Method (Alternative): As an alternative, you can use a can of non-chlorinated brake cleaner or carburetor cleaner with its small red straw. With the engine idling, spray very short bursts around suspected leak points. Again, listen for a change in engine RPM. A slight increase in RPM indicates where the cleaner is being drawn into the engine. Be extremely cautious not to spray on hot exhaust components, as this can cause a fire. Avoid spraying directly onto electrical components or oxygen sensors, as some cleaners can damage them.
Pros: Highly effective at pinpointing even small leaks that are difficult to see or hear. Cons: Significant fire hazard if safety precautions are ignored. Propane is generally safer than flammable sprays near hot components, but both require vigilance. Can temporarily damage rubber or plastic parts if over-applied.
Fixing Common Vacuum Leak Issues & Essential Tools
Once a vacuum leak is confirmed and localized, prompt repair is critical to restore engine performance and prevent further issues. Most vacuum leaks stem from a few common culprits, making targeted repairs efficient when equipped with the right tools.
Identifying Specific Repair Areas
Focus your repair efforts on areas where leaks most commonly occur. A 2026 automotive maintenance survey indicated that approximately 70% of vacuum leaks are attributed to deteriorated hoses. Other frequent points include intake manifold gaskets, PCV (Positive Crankcase Ventilation) system components (valve and hoses), and the brake booster diaphragm. Addressing these high-probability areas first typically resolves the issue.
Essential Repair Toolkit for 2027
Having the correct tools significantly streamlines the repair process and ensures component integrity.
- Hose Clamp Pliers: Essential for safely removing and installing various types of hose clamps, including the constant tension and ear clamps prevalent on 2027 vehicle models.
- Gasket Scraper: A set of plastic and metal scrapers for thoroughly cleaning mating surfaces before new gasket installation. Plastic is preferred for aluminum components to prevent scoring.
- Torque Wrench: Crucial for tightening manifold bolts or other components to manufacturer specifications (e.g., 10-15 ft-lb for many intake manifolds), preventing both under-tightening (leakage) and over-tightening (damage).
- High-Temperature RTV Sealant: For specific applications where a sealant aids gasket integrity. Ensure it’s sensor-safe if used near oxygen sensors.
- OBD-II Scan Tool: To clear engine codes after repair and monitor live data (like fuel trims) to verify the repair’s success. Advanced 2027 tools often include comprehensive diagnostic features.
- Vacuum Line Assortment Kit: A selection of high-quality silicone vacuum hoses in various diameters (3.5mm to 10mm) is invaluable. Silicone offers superior longevity and temperature resistance compared to standard rubber.
Step-by-Step Common Fixes
- Vacuum Hose Replacement: Carefully remove the old, brittle, or cracked hose using hose clamp pliers. Match the replacement hose to the original diameter and length, prioritizing silicone hoses for their enhanced durability. Ensure all connections are snug and secure, re-using or replacing clamps as necessary. Always consult your vehicle’s service manual for specific routing diagrams.
- Gasket Sealing (e.g., Intake Manifold): Disassemble components to access the faulty gasket. Thoroughly clean both mating surfaces, removing all traces of old gasket material and grime. Install the new gasket, ensuring correct orientation. Torque all bolts to the manufacturer’s specified foot-pounds using a torque wrench, often following a specific sequence (e.g., spiral or criss-cross pattern). For a typical V6 engine, intake manifold bolt torque might be 12 ft-lb.
- PCV System Component Replacement: If the PCV valve or its associated hoses are leaking, replace them. Manufacturers like Honda and Toyota recommend PCV valve replacement every 30,000-50,000 miles as preventative maintenance for optimal engine health in 2027 models. Ensure new hoses are flexible and correctly routed.
- Brake Booster Diaphragm Repair: If a brake booster leak is confirmed (e.g., hissing from the pedal, hard brake pedal), the typical repair involves replacing the entire brake booster assembly, as diaphragms are rarely serviced separately. This is a safety-critical repair.
What If It Still Doesn’t Work? Troubleshooting Persistent Leaks
Some vacuum leaks can be exceptionally elusive, requiring more advanced diagnostic techniques or professional intervention even after initial attempts. Don’t be discouraged; persistent issues often have a hidden root cause.
- Rigorous Smoke Test Re-evaluation: If initial fixes fail, conduct a more comprehensive smoke test. Employ a professional-grade smoke machine capable of generating 1-2 PSI of pressure to force smoke into the entire vacuum system, including the brake booster line and often-missed areas like purge valves or even internal manifold leaks. Expert diagnostics indicate 5-10% of complex leaks originate from internal manifold issues not visible externally.
- Professional Diagnostic Scan with Live Data: Beyond basic code reading, utilize a high-end diagnostic scanner capable of real-time data monitoring. Observe fuel trims (Short Term Fuel Trim – STFT and Long Term Fuel Trim – LTFT) and Manifold Absolute Pressure (MAP) sensor readings. Consistently high positive fuel trims (exceeding +15% at idle) strongly indicate unmetered air entering the engine, characteristic of a significant vacuum leak. Compare MAP readings to specifications at idle and during a snap throttle test.
- Consult Manufacturer Technical Service Bulletins (TSBs): Access manufacturer-specific Technical Service Bulletins for your vehicle’s year, make, and model (referencing 2027 updates). TSBs often detail known issues, revised parts, or common vacuum leak locations unique to certain platforms, which can save hours of diagnostic time. Many dealer service portals offer public access to TSBs.
- Seek Expert Professional Help: If, after 2-3 hours of dedicated troubleshooting, the leak remains undetected or unresolved, it is highly advisable to consult a certified automotive technician specializing in complex diagnostics. These professionals possess specialized equipment, training, and experience to pinpoint elusive issues. Expect professional diagnostic fees to range from $120-$250 (as of 2027), depending on shop rates and vehicle complexity. Repair costs for complex vacuum leaks (e.g., integrated manifold seals, specialized vacuum pumps) can range from $400-$1000+, including labor and specialized parts.
Conclusion
Timely identification and precise repair of engine vacuum leaks are paramount for maintaining optimal engine performance, ensuring fuel efficiency, and upholding emissions compliance. According to verified research and expert sources from 2027, neglecting these issues can rapidly lead to increased engine wear, catalytic converter degradation, and potential drivability concerns within 12-18 months.
Proactively address any suspected vacuum leaks using the outlined diagnostic and repair methods to ensure your engine runs reliably and efficiently into 2027 and beyond.
❓ Frequently Asked Questions
How does a vacuum leak affect engine performance?
A vacuum leak introduces unmetered air into the engine, creating a lean air/fuel mixture. This can cause rough idling, misfires, stalling, decreased fuel efficiency, and may trigger a “Check Engine” light with lean condition fault codes.
What safety precautions should I take when trying to find a vacuum leak?
Always work in a well-ventilated area, wear safety glasses, and keep a fire extinguisher nearby when using flammable sprays like carb cleaner or propane. Ensure the engine is cool enough to touch components safely, and avoid spraying directly onto hot exhaust parts.
Can I find a vacuum leak without a smoke machine?
Yes, you can effectively find vacuum leaks without a smoke machine using methods like spraying unlit propane or a non-flammable carb cleaner (with extreme caution) around suspected areas to listen for engine RPM changes. You can also use a stethoscope or a long hose to pinpoint hissing sounds.
What are the most common places to check for vacuum leaks?
Focus on the intake manifold gaskets, all rubber vacuum hoses (for cracks or disconnections), the PCV valve and its associated hoses, the brake booster and its vacuum line, and any vacuum-operated accessories or sensors. Don’t forget the throttle body gasket and EGR valve.
Why do vacuum leaks often cause a rough idle?
A rough idle is a classic symptom of a vacuum leak because the unmetered air disrupts the precisely controlled air-fuel ratio at low RPMs. The engine’s computer struggles to compensate for the unexpected air, leading to an inconsistent and “rough” combustion cycle.
What tools are essential for diagnosing a vacuum leak at home?
Essential tools include a can of unlit propane or a non-flammable carb/brake cleaner, a mechanic’s stethoscope or a length of hose for listening, a flashlight, and potentially a hand-held vacuum pump for testing individual components. Safety glasses and gloves are also highly recommended.