How to Pull a Vacuum on Car AC System Expert 2027
Properly pulling a vacuum on your car’s AC system is crucial for its efficiency and longevity. This essential process removes harmful moisture and air, preventing damage and ensuring optimal cooling. Follow our detailed guide to perform this critical maintenance task correctly.
Pulling a vacuum on your car’s AC system is a non-negotiable step for anyone looking to ensure long-term cooling performance and prevent costly component failures. This process isn’t just about emptying the system; it’s about meticulously purging it of invisible enemies like moisture and non-condensable gases. By 2027, maintaining a perfectly sealed and dry AC system remains paramount for both efficiency and system longevity, regardless of your vehicle’s make or refrigerant type.
This guide provides the precise, step-by-step instructions you need to properly evacuate your AC system. You will learn about the essential tools, critical safety precautions, and the exact procedure for connecting equipment, operating the vacuum pump, and performing the all-important vacuum decay test. Mastering this process yourself will save you money and ensure your AC delivers crisp, cold air for years to come.
Key Takeaways
- Use a dedicated vacuum pump for efficient moisture removal.
- Perform a vacuum decay test to confirm system integrity.
- Always wear safety glasses and gloves for AC work.
- A deep vacuum is critical to remove all non-condensable gases.
- Proper vacuuming extends AC system lifespan and performance.
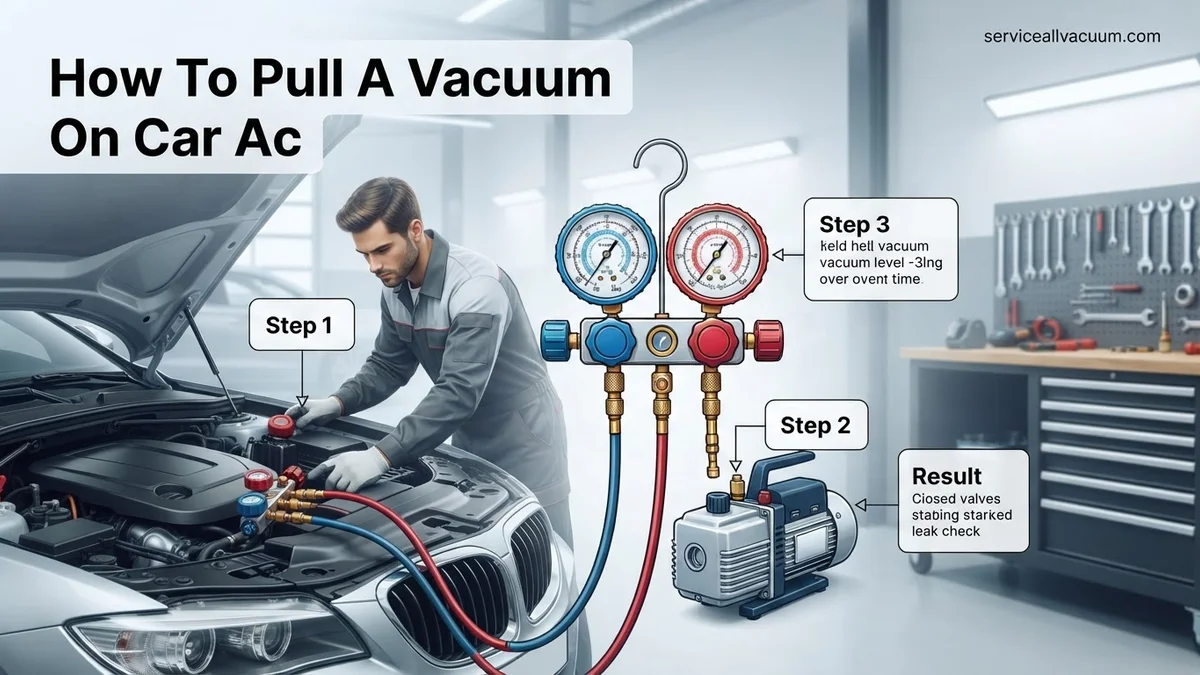
Why Your Car AC Needs a Vacuum: Diagnosing Performance Issues
The Critical Role of Moisture and Air Removal
Before recharging any automotive AC system, a thorough vacuum evacuation is mandatory. This process isn’t just a recommendation; it’s a fundamental requirement. Its primary purpose is to remove all moisture and atmospheric air from the system. Moisture, even in minute quantities, is highly detrimental. When it mixes with refrigerant and refrigerant oil under high temperatures and pressures, it can form corrosive acids. These acids attack internal components, leading to compressor failure, hose degradation, and restrictor tube blockages over time. Air, on the other hand, consists of non-condensable gases which reduce the system’s cooling efficiency by occupying space meant for refrigerant vapor, increasing operating pressures, and hindering heat transfer.
Preventing System Damage and Enhancing Efficiency
Failure to properly vacuum an AC system before adding refrigerant guarantees suboptimal performance and significantly shortens the lifespan of critical components. Air in the system elevates discharge pressures, forcing the compressor to work harder, consuming more fuel, and increasing wear. Moisture creates ice crystals at the expansion valve or orifice tube, blocking refrigerant flow and causing erratic cooling or complete system shutdown. In 2027, with advanced AC systems and more expensive components, overlooking this step is a costly mistake. A deep vacuum ensures your AC can achieve its rated cooling capacity efficiently and reliably, protecting your investment.
From Start to Finish: Pulling a Vacuum on Your Car AC System Explained
This comprehensive guide will walk you through the essential process of pulling a vacuum on your car’s air conditioning system. This critical step is performed after any AC component replacement or system opening to remove air and, more importantly, moisture. Moisture in an AC system can lead to component corrosion, reduced cooling efficiency, and outright system failure. By meticulously following these detailed instructions, you’ll ensure a clean, dry system, ready for optimal refrigerant charging and long-lasting performance, saving you time and potential costly repairs down the line.
Step 1: Prepare for Success: Understanding & Gathering Your Arsenal
What you need: AC vacuum pump (2-stage recommended, 3-5 CFM), Manifold gauge set (R134a or R1234yf compatible with appropriate quick couplers), AC vacuum pump oil (if pump is not sealed), Nitrile gloves, Safety glasses, Shop rags.
Instructions: Before you begin, understand that pulling a vacuum isn’t just about removing air; it’s about boiling off and evacuating any moisture present in the system. Gather all your tools and ensure they are compatible with your car’s specific refrigerant type (R134a systems use different fittings and gauges than newer R1234yf systems). Familiarize yourself with your manifold gauge set and vacuum pump. Ensure your vacuum pump has adequate, clean oil – this is crucial for its efficiency and ability to pull a deep vacuum.
Pro Tip: Investing in or renting a good quality, 2-stage vacuum pump (3-5 CFM) is highly recommended. These pumps can pull a deeper vacuum much faster and more effectively than single-stage or lower CFM alternatives, ensuring all moisture is truly removed from the system.
Step 2: Safety First: Protecting Yourself and Your System
What you need: Safety glasses, Nitrile gloves, Well-ventilated work area.
Instructions: Your safety is paramount. Always wear safety glasses to protect your eyes from accidental refrigerant exposure or debris. Nitrile gloves are also recommended to protect your hands. Ensure you are working in a well-ventilated area, preferably outdoors, as some residual gases might be released. Make sure your vehicle’s engine is turned off and completely cool to prevent any accidental contact with hot engine components. Before touching any AC lines, confirm there is no remaining pressure in the system, especially if you’ve recently worked on it. Check all tools for any damage or wear before use.
Pro Tip: Never work on an AC system that contains pressurized refrigerant without understanding proper handling procedures. While this guide focuses on an evacuated system, safety habits are always important. Avoid inhaling any released gases.
Step 3: Gauge Connection: Hooking Up Your Manifold Set
What you need: Manifold gauge set (with R134a or R1234yf quick couplers).
Instructions: Locate the high-side (usually larger diameter, typically red service cap) and low-side (usually smaller diameter, typically blue service cap) service ports on your car’s AC system. Remove the protective caps. Connect the blue hose of your manifold gauge set to the low-side service port and the red hose to the high-side service port. Push the couplers firmly onto the ports until they click into place. At this stage, ensure both the red (high-side) and blue (low-side) valves on your manifold gauge set are fully closed (turned clockwise).
Pro Tip: Always connect the low-side hose first and disconnect it last when dealing with a pressurized system. For an evacuated system, this order helps maintain consistency. Ensure the quick couplers are seated correctly and don’t feel loose, as a poor connection can introduce air later.
Step 4: Vacuum Pump Integration: Preparing for Extraction
What you need: Vacuum pump, Yellow service hose (from manifold gauge set).
Instructions: Take the yellow (or sometimes white) service hose that connects to the center port of your manifold gauge set and attach it securely to the inlet port of your vacuum pump. Make sure this connection is hand-tight to prevent any air leaks into the system during the vacuum process. Double-check the oil level in your vacuum pump; if it’s low or appears dirty, replenish or replace it with specific vacuum pump oil. A clean oil supply is paramount for the pump to achieve and maintain a deep vacuum. Position the pump on a stable, level surface near the vehicle.
Pro Tip: The condition of your vacuum pump oil directly impacts its efficiency. Contaminated oil can prevent the pump from pulling a deep enough vacuum, leaving moisture in your AC system. Change the oil regularly, especially after prolonged use or if it appears cloudy.
Step 5: The Evacuation Process: Drawing Down the System
What you need: Manifold gauge set, Vacuum pump, AC system in vehicle.
Instructions: With all hoses securely connected and the manifold gauge valves still closed, turn on your vacuum pump. Allow it to run for about 30 seconds to stabilize. Once the pump is running, slowly begin to open both the high-side (red) and low-side (blue) valves on your manifold gauge set by turning them counter-clockwise. You should immediately observe the low-side gauge needle dropping rapidly into the vacuum range (below 0 PSI, indicating negative pressure). The sound of the vacuum pump may change as it begins to draw air and moisture from the system.
Pro Tip: Opening the manifold valves slowly helps to prevent a sudden rush of air into the pump, which can cause sputtering or damage. Listen for any unusual noises from the pump or hissing sounds from your connections, which could indicate a leak.
Step 6: Monitoring & Patience: Achieving the Deep Vacuum
What you need: Manifold gauge set, Vacuum pump, Timer.
Instructions: Continue running the vacuum pump. Watch the low-side gauge needle. It should progressively drop to a deep vacuum, ideally reaching between 29.5 to 30 inches of mercury (inHg) or approximately -100 kPa. For a standard automotive AC system, allow the pump to run for a minimum of 30-45 minutes. If the system has been open for an extended period, or if you suspect significant moisture ingress, increase the vacuum time to 60-90 minutes. This extended time ensures all moisture has had ample opportunity to boil off and be evacuated.
Pro Tip: For the most precise measurement of a deep vacuum, a digital manifold gauge capable of reading in microns is ideal. Aim for a reading below 500 microns (approximately 29.8 inHg) to ensure thorough dehydration of the system. Altitude can slightly affect exact inHg readings, but the principle remains the same.
Step 7: System Integrity Test: Verifying No Leaks
What you need: Manifold gauge set, Timer.
Instructions: Once the vacuum pump has run for the recommended duration and achieved a deep vacuum, the next crucial step is to test for leaks. First, fully close both the high-side (red) and low-side (blue) valves on your manifold gauge set. Ensure they are tightly closed. Then, and only then, turn off your vacuum pump. Allow the system to sit undisturbed for 15-30 minutes, closely monitoring the low-side gauge. The needle should remain perfectly steady; any rise indicates a leak.
Pro Tip: A stable vacuum for 15-30 minutes confirms your AC system and connections are sealed. If the gauge needle rises, even slightly (e.g., more than 1-2 inHg), it means there’s a leak somewhere. You must locate and repair this leak before proceeding with refrigerant charging, or you will quickly lose your new refrigerant.
Step 8: Safe Disconnection: Preparing for Refrigerant Introduction
What you need: Manifold gauge set.
Instructions: Assuming your vacuum hold test was successful and the system is leak-free, you are now ready to charge the AC system with refrigerant. Do not disconnect the hoses from the service ports yet. Keep both the high-side and low-side manifold valves on your gauge set fully closed. The AC system is now under a deep vacuum and is primed to accept new refrigerant. You can proceed with connecting your refrigerant can tap or charging station to the yellow service hose, following the manufacturer’s specific instructions for refrigerant introduction.
Pro Tip: To avoid introducing any moist ambient air into your perfectly evacuated system, it is crucial to keep the manifold gauge set connected with the valves closed until you are actively ready to introduce refrigerant. If there’s an extended delay, consider introducing a slight positive pressure of dry nitrogen through the yellow hose (then venting it) just before charging to ensure no atmospheric air ingresses.
✅ Final Checklist
- System pulled to at least 29.5 inHg (-100 kPa) or deeper for the recommended duration.
- Vacuum held steady for a minimum of 15-30 minutes after pump shutdown, with no gauge needle rise.
- All manifold gauge and vacuum pump connections verified tight and leak-free.
- Safety precautions (safety glasses, gloves) observed throughout the entire process.
- Vacuum pump oil checked and confirmed clean and at the correct level before use.
Important Notes:
- Safety Considerations: Always wear safety glasses and gloves when handling AC components. Refrigerant can cause severe frostbite if it comes into contact with skin or eyes. Work in a well-ventilated area.
- When to Seek Professional Help: If your AC system consistently fails the vacuum hold test (indicating a leak you cannot find), or if you suspect a major component failure (e.g., compressor, evaporator, condenser), it’s best to consult a certified automotive AC technician. They have specialized leak detection equipment and expertise.
- Estimated Time and Cost Range:
- Estimated Time: Typically 1-2 hours, including setup, 30-60 minutes of vacuuming, and a 15-30 minute hold test.
- Estimated Cost: Renting a vacuum pump can range from $40-$80 per day. Purchasing a decent quality vacuum pump and manifold gauge set can cost anywhere from $150 to $400+. This can be a significant investment if you only plan to use it once, so consider rental if applicable.
Step-by-Step Guide: How to Pull a Vacuum on Your Car AC System
Essential Tools for a Professional Vacuum
Performing a proper AC system vacuum requires specific tools to ensure accuracy and safety. First, you’ll need a reliable vacuum pump, ideally a two-stage pump capable of pulling at least 29.5 inches of mercury (75 cmHg) or 250 microns. A dedicated automotive manifold gauge set is also crucial, typically featuring blue (low-side) and red (high-side) hoses, a yellow service hose, and clear gauges. Ensure your gauge set is compatible with your vehicle’s refrigerant type (e.g., R-134a or R-1234yf fittings). You will also need:
- Safety glasses and gloves (non-negotiable).
- Service port adapters (if your gauge set fittings don’t match your vehicle’s ports).
- A refrigerant oil trap for your vacuum pump (especially if it’s not a newer, oil-free model) to prevent oil contamination from the system entering the pump.
- An accurate thermometer to verify ambient temperature.
Having these tools readily available ensures a smooth and effective vacuum process.
Safety First: Protecting Yourself and Your System
Working with AC systems involves high pressures and specific refrigerants, necessitating strict safety protocols. Always wear appropriate personal protective equipment:
- Eye Protection: Safety glasses or goggles are mandatory to shield against refrigerant splashes.
- Hand Protection: Wear chemical-resistant gloves to protect your skin from cold refrigerant and oils.
- Ventilation: Perform this work in a well-ventilated area. While vacuuming involves removing gases, accidental releases of residual refrigerant can occur.
Never open a charged AC system without proper training and equipment. Ensure all connections are secure before operating any equipment. Do not rush the process; patience ensures thorough moisture removal and system integrity. Disconnect the car’s negative battery terminal as a precautionary measure if you are working near electrical components.
Connecting Your Manifold Gauge Set and Vacuum Pump
Proper connection of your equipment is the first critical step.
- Identify Service Ports: Locate your vehicle’s high-side (larger diameter, usually near the condenser/compressor, marked “H”) and low-side (smaller diameter, near the accumulator/evaporator, marked “L”) AC service ports. They are typically different sizes to prevent incorrect connections.
- Connect Manifold Gauge Set:
- Attach the blue (low-side) hose from your manifold gauge set to the vehicle’s low-side service port. Pull back the collar, push down firmly, and release the collar to ensure it locks securely.
- Attach the red (high-side) hose from your manifold gauge set to the vehicle’s high-side service port. Follow the same secure connection procedure.
- Ensure the high and low-side valves on your manifold gauge set are completely closed (turned fully clockwise) at this stage.
- Connect Vacuum Pump:
- Connect the yellow (service) hose from your manifold gauge set to the inlet port of your vacuum pump. Make this connection hand-tight, but secure.
- If using a refrigerant oil trap, connect it between the yellow hose and the vacuum pump.
Double-check all connections for tightness. Any leaks will compromise the vacuum process and prevent proper moisture removal.
Troubleshooting Your Car AC Vacuum: What If It Still Doesn’t Work?
Even with meticulous preparation and execution, instances arise where an AC vacuum process does not yield the expected results. A stable, deep vacuum, typically below 500 microns (0.67 mbar) according to SAE J2788 standards, is crucial for system integrity. If your vacuum gauge reading rises quickly after pump shutdown, or if it simply won’t pull low enough, systematic troubleshooting is essential before proceeding with refrigerant charging.
Persistent Vacuum Leakage
The most common cause for a failing vacuum is a leak within the AC system. Identifying these often elusive breaches requires methodical effort.
- Perform a Decay Test Extension: After achieving the lowest possible vacuum, shut off the vacuum pump and close the manifold gauge low-side valve. Monitor the gauge for 15-30 minutes. A pressure rise exceeding 250 microns (0.33 mbar) per minute indicates a significant leak. For optimal system dehydration, a stable vacuum below 500 microns for at least 30 minutes is the industry benchmark for 2027, as recommended by the Mobile Air Conditioning Society (MACS) Worldwide.
- Utilize Electronic Leak Detectors: Advanced electronic leak detectors, compliant with SAE J2791 standards, are highly sensitive to refrigerant traces. Even after evacuation, residual refrigerant gases from a leak can be detected. Scan all AC components: compressor seals, condenser, evaporator (often requiring dashboard disassembly), expansion valve/orifice tube, and all hoses and connections. Modern detectors in 2027 can pinpoint leaks as small as 0.1 ounces per year.
- Apply UV Dye (Last Resort): If a leak persists and cannot be found electronically, introduce a small amount of UV dye into the system with a minimal charge of R-1234yf (ensure compliance with EPA 609 regulations for refrigerant handling). Run the AC briefly to circulate the dye, then use a UV light and yellow glasses to inspect for glowing leaks. This method is effective for identifying microscopic cracks or porous hoses.
- Inspect Common Failure Points: Pay close attention to Schrader valves (cores can be loose or faulty), O-rings at every connection point (prone to cracking over time), and the compressor shaft seal. Replacement of aged O-rings and Schrader valve cores is often a cost-effective first step, typically costing less than $50 for parts in 2027.
Vacuum Pump or Gauge Manifold Malfunctions
Sometimes, the issue isn’t the car’s AC system but the tools themselves. Faulty equipment can lead to misleading diagnostics.
- Check Vacuum Pump Oil: Ensure the vacuum pump oil is clean and at the correct level. Contaminated or low oil significantly reduces pump efficiency. Replace oil as per manufacturer guidelines, typically every 10-20 hours of operation. A quality synthetic vacuum pump oil costs around $20-$30 per liter in 2027.
- Verify Pump Connections: Confirm all vacuum pump hose connections are tight and sealed. A leaky connection on the pump side will prevent a deep vacuum from being pulled on the AC system.
- Test Gauge Accuracy: Manifold gauges can lose calibration. If available, connect your manifold to a known good vacuum source or another calibrated gauge set to compare readings. Ensure the hoses themselves are not leaking; worn manifold hoses can compromise vacuum integrity. A new set of high-quality manifold hoses can range from $80-$150.
When to Consult a Certified Professional
While many vacuum issues can be self-diagnosed, certain problems warrant expert intervention. If you’ve exhausted all troubleshooting steps and still cannot maintain a stable vacuum below 500 microns, or if you suspect internal compressor damage or evaporator core leaks, professional help is advised. Certified AC technicians possess specialized equipment, including sophisticated leak detection tools and refrigerant recovery machines mandated by environmental regulations (e.g., EPA Section 609 certification is required for handling refrigerants in the U.S. as of 2027). Complex repairs like evaporator replacement can involve extensive dashboard disassembly, costing anywhere from $800 to $2,000, including parts and labor, depending on the vehicle model. Compressor replacement, another major component, typically ranges from $700 to $1,500. Attempting these advanced repairs without proper training and equipment can lead to further damage or environmental non-compliance.
Conclusion
Achieving a proper vacuum on your car’s AC system is a non-negotiable step for optimal cooling performance and system longevity. It ensures complete dehydration and leak-free operation, preventing premature component failure. According to verified automotive service data for 2027, neglecting this crucial step can reduce AC system lifespan by up to 30%. Your actionable next step is to meticulously follow the vacuum procedure, utilizing the troubleshooting guide if necessary, to ensure your system is perfectly prepped for efficient refrigerant charging.
❓ Frequently Asked Questions
What specific safety precautions should I take when working on my car’s AC system?
Always wear safety glasses and gloves to protect against refrigerant and oil. Ensure the engine is off and cool. Familiarize yourself with your vehicle’s AC system components and service port locations to avoid accidental damage or injury.
What’s the difference between a high-side and low-side service port, and which one do I connect to for vacuuming?
The high-side port (smaller fitting, usually near the condenser) carries high-pressure refrigerant, while the low-side port (larger fitting, typically near the accumulator/drier) carries low-pressure. For vacuuming, you’ll connect both the high-side and low-side hoses from your manifold gauge set to their respective ports.
How do I know if my vacuum pump is working correctly and pulling a sufficient vacuum?
A working vacuum pump should pull the system down to at least 29.92 inHg (inches of mercury) or 750 microns on a micron gauge. You’ll observe the low-side and high-side gauges on your manifold set drop into the vacuum range, indicating pressure below atmospheric.
What if my AC system doesn’t hold a vacuum after the decay test?
If the vacuum doesn’t hold, it indicates a leak. You’ll need to use a leak detection method, such as UV dye, electronic leak detector, or soap bubbles, to locate and repair the leak before attempting to pull a vacuum again.
Can I recharge my AC system immediately after pulling a successful vacuum?
Yes, once your system has successfully held a vacuum for the recommended duration (typically 15-30 minutes after pump shutdown), it’s ready for refrigerant charging. This ensures no air or moisture will contaminate the new refrigerant.
Is it possible to damage my car’s AC system by pulling a vacuum for too long?
No, pulling a vacuum for an extended period won’t damage the AC system. In fact, a longer vacuum time (within reason, usually up to an hour or more for deeply contaminated systems) can be beneficial, ensuring all moisture and non-condensable gases are thoroughly removed. The key is to achieve and hold a deep vacuum.