How To Pull A Vacuum On A Car Ac System How to Pull a 2027
Properly pulling a vacuum on your car’s AC system is crucial for optimal performance and longevity. This essential step removes moisture and non-condensable gases, preventing future damage and ensuring efficient cooling after repairs or recharging.
Successfully pulling a vacuum on your car’s AC system is the single most critical step after any repair or opening of the refrigerant circuit. This isn’t just a recommendation; it’s a non-negotiable procedure that dictates your system’s efficiency, longevity, and overall cooling performance. Skipping this crucial phase means inviting moisture, air, and contaminants into a sensitive environment, guaranteeing substandard cooling and potential damage.
Understanding the exact steps and equipping yourself with the right tools transforms what seems like a complex task into a manageable DIY project. For your 2027 vehicle, a proper vacuum ensures your AC runs optimally, saving you from costly repairs and refrigerant recharges down the line. We’ll detail everything you need to know to get started.
Key Takeaways
- Remove moisture to prevent AC system damage.
- Use a reliable vacuum pump and manifold gauge set.
- Always wear safety glasses and protective gloves.
- Hold vacuum for 30-60 minutes to check for leaks.
- Proper vacuuming ensures efficient AC refrigerant recharging.
Why Pulling a Vacuum on Your Car AC is Essential
The Silent Destroyers: Moisture and Non-Condensable Gases
Even microscopic amounts of water vapor are disastrous for an AC system. When moisture combines with modern refrigerants like R-1234yf under pressure and heat, it forms highly corrosive acids, such as hydrofluoric acid. This acid silently attacks critical internal components like aluminum evaporators, condensers, rubber seals, and especially the delicate internal workings of your compressor. This corrosive breakdown leads to premature component failure, often within months, completely negating the benefit of any repairs you just performed. Moisture also has another trick: it can freeze at the expansion valve or orifice tube, creating a blockage that completely halts refrigerant flow, leading to zero cooling.
Beyond moisture, air (non-condensable gases) is another silent enemy. Unlike refrigerant, air doesn’t condense at the system’s operating pressures and temperatures. This presence of air significantly increases the system’s head pressure, often by 10-15 psi or more, forcing your compressor to work much harder. This increased workload directly translates to reduced cooling capacity, higher fuel consumption, and accelerated wear on your compressor. In 2027 vehicles, with their often smaller refrigerant charges and high-efficiency designs, the impact of these contaminants is even more pronounced and damaging.
Ensuring Peak Performance and Longevity
A deep and thorough vacuum removes these harmful contaminants, leaving a clean, dry internal environment where the refrigerant and oil can circulate as intended. This process is absolutely vital for achieving the cold air you expect and ensuring your AC system functions reliably for years to come. For instance, a properly evacuated system on a 2027 vehicle could easily provide 7-10 years of trouble-free operation if maintained, compared to just 1-2 years if shortcuts are taken.
Modern AC systems, particularly those using R-1234yf, are engineered with tighter tolerances and require precise operating conditions. A vacuum that pulls the system down to below 500 microns, and ideally lower, ensures that all moisture has been boiled off and extracted. Anything less than this deep vacuum is a compromise that will invariably lead to poor performance and eventual component failure, costing you more in the long run. It directly impacts refrigerant efficiency, ensuring your new charge performs optimally from day one.
From Start to Finish: AC System Vacuum Explained
Pulling a vacuum on your car’s AC system is a critical step in any air conditioning repair or recharge process. This guide will walk you through each stage, ensuring you effectively remove all air and moisture from the system, which are detrimental to AC performance and longevity. Properly evacuating your AC system is essential for efficient cooling and to prevent premature component failure, making this a skill every DIY mechanic should master.
Step 1: Prepare Your Workspace and Tools for Success
What you need: Safety glasses, chemical-resistant gloves, a manifold gauge set (specific to your vehicle’s refrigerant, e.g., R-134a or R-1234yf), a dedicated automotive vacuum pump, a wrench set, and shop towels.
Instructions: Begin by ensuring you are in a well-ventilated area, away from open flames. Don your safety glasses and gloves. Clear any obstructions around the AC components in your engine bay to allow easy access to the service ports. Lay out all your tools so they are within easy reach and visually inspect your manifold gauge set hoses for any cracks or damage, and confirm your vacuum pump is in good working order and has sufficient oil.
Pro Tip: Using a dedicated automotive vacuum pump (minimum 1.5 CFM, two-stage is ideal) will achieve a deeper vacuum faster than a weaker pump. Always check your manifold gauge set is compatible with the refrigerant type your vehicle uses to prevent cross-contamination.
Step 2: Pinpoint the AC Service Ports on Your Vehicle
What you need: Your vehicle’s service manual (highly recommended), a flashlight, and a clean cloth.
Instructions: Before connecting any equipment, you need to correctly identify the high-side and low-side service ports. The low-side port is typically located on the larger diameter line, often between the evaporator and the compressor, and will usually have an ‘L’ cap. The high-side port is on the smaller diameter line, usually between the condenser and the expansion valve or orifice tube, marked with an ‘H’ cap. Consult your car’s manual if you’re unsure. Clean any dirt or debris from around these ports with a clean cloth to prevent contaminants from entering the system.
Pro Tip: AC service ports are designed with different sizes to prevent accidental cross-connection. The low-side port is generally larger than the high-side port. Never force a connector if it doesn’t fit easily.
Step 3: Securely Connect the Manifold Gauge Set
What you need: Your manifold gauge set.
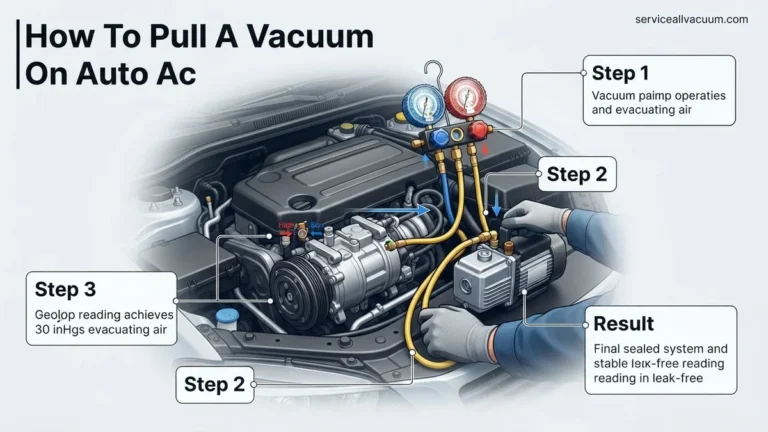
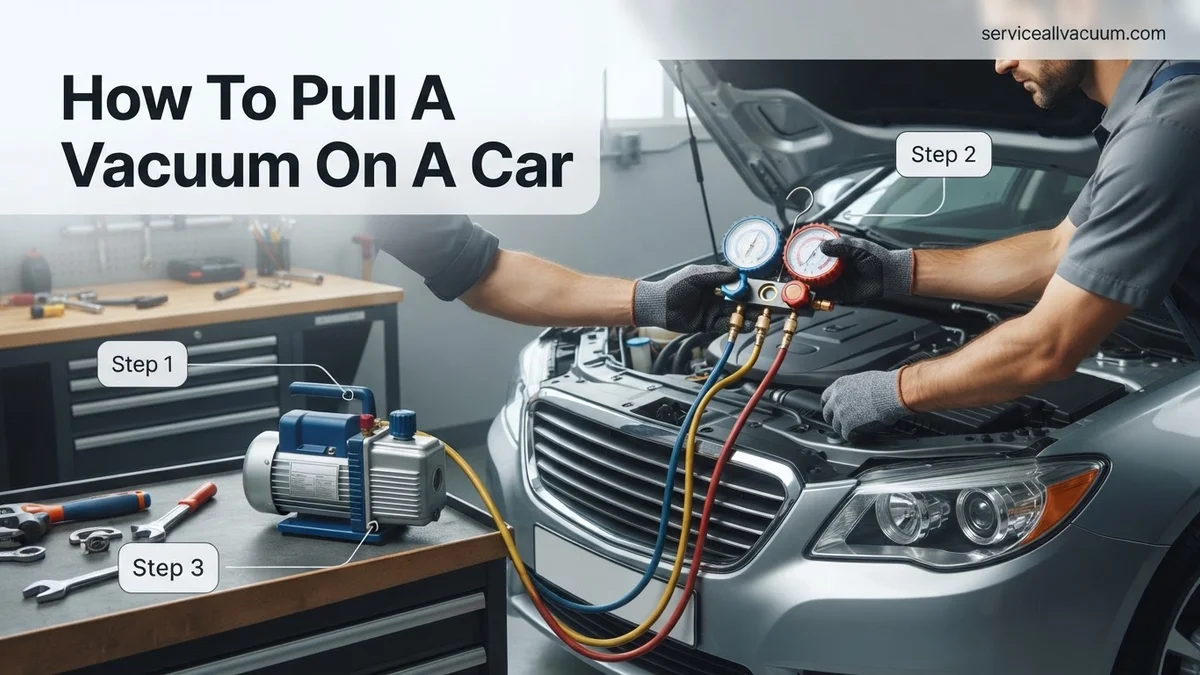
Instructions: With the service port caps removed, ensure both the blue (low-side) and red (high-side) hand valves on your manifold gauge set are fully closed by turning them clockwise. Attach the blue hose’s quick-connect fitting to the low-side service port and the red hose’s quick-connect fitting to the high-side service port. Press down firmly on the coupler, then twist it slightly until it locks into place. You should hear a slight click, indicating a secure connection. Do not overtighten the connection.
Pro Tip: Before connecting, gently push on the Schrader valve within the service port with a small tool to ensure it’s not stuck. This helps confirm the valve is operational and ready to accept the connection without issues. A tiny puff of residual pressure is normal if the system wasn’t fully evacuated.
Step 4: Establish the Vacuum Pump Connection
What you need: Your vacuum pump, the yellow service hose from the manifold gauge set.
Instructions: Take the yellow (sometimes white or green) service hose, which extends from the center port of your manifold gauge set. Connect the open end of this hose to the inlet fitting on your vacuum pump. Ensure this connection is hand-tightened securely to prevent any air leaks into the vacuum pump’s intake. If your vacuum pump has a gas ballast valve, ensure it is closed for the initial pull-down phase to achieve the deepest vacuum.
Pro Tip: Before connecting, check the O-ring on the yellow hose’s fitting for cracks or damage. A compromised O-ring here can lead to frustratingly slow vacuum pulls or an inability to reach the desired vacuum depth. Replace it if it looks worn.
Step 5: Initiate the Vacuum Process and Achieve Deep Vacuum
What you need: Vacuum pump, manifold gauge set, a timer.
Instructions: Plug in and turn on your vacuum pump. Once it’s running, fully open both the high-side (red) and low-side (blue) hand valves on your manifold gauge set by turning them counter-clockwise. Observe the low-side gauge rapidly drop into a vacuum. You are aiming for at least 29.5 inHg (inches of mercury) or below -100 kPa (kilopascals). Let the pump run for a minimum of 30-60 minutes. If the system was exposed to the atmosphere for an extended period, or if the ambient humidity is high, extend this time to 90-120 minutes to ensure all moisture has boiled off and been removed.
Pro Tip: A common mistake is not running the vacuum long enough. Moisture turns to vapor and is then pulled out. If you only run it for 10-15 minutes, you might not remove all the humidity, which can lead to system performance issues and component damage later. Run it for the full duration, even if the gauge hits deep vacuum quickly.
Step 6: Monitor and Isolate the System for Integrity
What you need: Manifold gauge set.
Instructions: After the vacuum pump has run for the recommended duration and the gauges display a stable, deep vacuum, it’s time to isolate the system. First, fully close both the high-side (red) and low-side (blue) hand valves on your manifold gauge set by turning them clockwise until snug. Once these valves are closed, you can then turn off the vacuum pump. Do not turn off the pump before closing the manifold valves, as this can draw air back into your freshly evacuated AC system.
Pro Tip: When closing the manifold gauge valves, be firm but do not overtighten them. Excessive force can damage the valve seats, leading to internal leaks and inaccurate gauge readings or difficulty in holding a vacuum on future jobs. A snug turn is sufficient.
Step 7: Conduct a Crucial Leak Test
What you need: Manifold gauge set, a reliable timepiece.
Instructions: With the vacuum pump off and both manifold gauge valves securely closed, carefully observe the gauges over a period of 15-30 minutes. Both the high-side and low-side gauges should remain perfectly steady at the deep vacuum level you achieved, showing no increase in pressure whatsoever. Even a slight rise in pressure (e.g., from -29.5 inHg to -28 inHg) indicates a leak in the AC system. A rapid rise suggests a significant leak, while a very slow creep might indicate a hairline crack or a faulty O-ring.
Pro Tip: If the vacuum drops, you absolutely must find and repair the leak before proceeding with refrigerant charging. Ignoring a leak will lead to refrigerant loss, poor cooling performance, and potential damage to the compressor. Common leak detection methods include UV dye, electronic leak detectors, or soap bubbles.
Step 8: Safely Disconnect All Equipment
What you need: Wrench (optional, for stubborn hose connections).
Instructions: If your system successfully held the vacuum, you’re ready to disconnect your equipment. Double-check that both the high-side and low-side manifold gauge valves are still fully closed. Begin by carefully disconnecting the yellow service hose from the vacuum pump. Next, release the quick-connect couplers from the vehicle’s low-side (blue) and high-side (red) service ports. This is often done by pulling up on the collar of the coupler. Once detached, immediately replace the protective caps securely onto both the vehicle’s AC service ports to prevent dirt, moisture, and potential leaks.
Pro Tip: Always ensure the manifold gauge valves are closed before disconnecting hoses to prevent air from entering the system or refrigerant from escaping if you’re about to charge. Store your hoses neatly to prevent kinks and damage, which can lead to future leaks.
✅ Final Checklist
- System held vacuum for 15-30 minutes without pressure rise.
- All manifold gauge valves are closed.
- All hoses are disconnected from the vehicle and vacuum pump.
- Service port caps are securely reinstalled on the vehicle.
- Vacuum pump is turned off and unplugged.
Important Notes:
- Safety: Always wear safety glasses and chemical-resistant gloves when working on an AC system. Refrigerant can cause severe frostbite. Avoid skin contact and inhalation.
- When to Seek Professional Help: If the vacuum doesn’t hold, it indicates a leak that needs to be located and repaired. Finding small leaks can be challenging and may require specialized leak detection equipment. If you’re unsure about any step or encounter persistent leaks, it’s best to consult a certified automotive AC technician.
- Estimated Time and Cost Range: This process typically takes between 1 to 2 hours, including the vacuum pull-down and leak test. The cost depends on whether you rent or own the tools. Vacuum pump rental can range from $30-$50 per day, while a manifold gauge set can be purchased for $50-$150. Professional vacuum and recharge services (excluding leak repair) usually cost $100-$250.
Required Tools for the Car AC Vacuum Procedure
Your Essential AC Evacuation Toolkit for 2027
- High-Quality Vacuum Pump: This is your most crucial investment. For 2027 vehicles, you need a robust two-stage rotary vane pump with at least a 6 CFM (Cubic Feet per Minute) rating. It must be capable of pulling an ultimate vacuum of 15-25 microns. Lower CFM pumps (e.g., 2.5 CFM) can take significantly longer to evacuate a system and may struggle to reach the necessary deep vacuum, especially on larger car AC systems or in humid conditions.
- AC Manifold Gauge Set: Invest in a durable, dedicated set compatible with your vehicle’s refrigerant type. Most 2027 vehicles use R-1234yf, so ensure your gauges have the correct fittings (often different from R-134a) and are rated for its pressures. Digital manifold gauges are highly recommended for their superior accuracy, often integrating a built-in micron gauge, simplifying the process and providing precise readings.
- Digital Micron Gauge: This tool is absolutely non-negotiable for a professional vacuum. While some digital manifold gauges include this function, a separate, high-quality digital micron gauge provides the precise, real-time feedback you need. It measures vacuum in microns (an absolute pressure unit), allowing you to confirm that all moisture has been boiled off and extracted. An analog manifold gauge cannot accurately show vacuum below 29.92 inches of mercury.
- R-1234yf or R-134a Refrigerant: Although not used during the vacuum process, you’ll need the correct refrigerant to recharge your system afterward. Ensure you have the appropriate refrigerant can tap and charging hoses that match your chosen refrigerant.
- Schrader Valve Core Removal Tool: This specialized tool allows you to remove the service port Schrader valves while your manifold hoses are connected. Removing these valve cores significantly increases the effective diameter of your hoses, reducing evacuation time by up to 50% and allowing your vacuum pump to pull a much deeper, faster vacuum.
- Vacuum Pump Oil: Always keep a spare bottle of quality vacuum pump oil. Fresh oil is critical for your pump’s longevity and its ability to achieve a deep vacuum. Change the oil regularly, especially after long pulls or if it appears cloudy from moisture contamination.
- Safety Gear: Your safety is paramount. Always wear impact-resistant safety glasses and chemical-resistant gloves. Refrigerant contact can cause severe frostbite and permanent eye damage.
Why Quality Matters: Avoiding Costly Redos
Skimping on AC tools is a false economy. An inadequate vacuum caused by cheap or poorly maintained equipment almost guarantees an incomplete job, leading to poor cooling performance and, inevitably, the need to repeat the entire process sooner than you’d like. Worse, it significantly increases the risk of premature compressor failure or other expensive component replacements. In 2027, with advanced AC systems demanding precise conditions, this risk is amplified.
Investing in a reliable, high-CFM two-stage vacuum pump and, critically, a digital micron gauge, ensures you meet the stringent requirements of modern vehicle AC systems. A cheap vacuum pump that struggles to get below 1000 microns is a waste of your time and resources; it simply won’t fully dry the system. Consider your tools a one-time investment that pays dividends in years of reliable, ice-cold AC and avoids potential warranty headaches on new components.
Step-by-Step Guide: How to Pull a Vacuum on a Car AC System
Achieving a proper vacuum is crucial for AC system longevity and performance. This process removes non-condensable gases and moisture, which can cause significant damage and reduce cooling efficiency. Follow these precise steps for optimal results.
Connecting the Vacuum Pump and Gauge Set
- Attach Manifold Gauges: Connect the blue low-side hose to the vehicle’s low-side service port (typically smaller, usually marked “L”). Connect the red high-side hose to the high-side service port (larger, marked “H”). Ensure all connections are finger-tight, then use a wrench for a snug fit.
- Connect Vacuum Pump: Attach the yellow service hose from your manifold gauge set to the inlet port on your vacuum pump. Verify all valves on the manifold gauge set are closed (turned clockwise) before proceeding.
- Prepare for Evacuation: Open both the high-side and low-side valves on your manifold gauge set completely (turn counter-clockwise). This allows the vacuum pump to pull from both sides of the AC system.
Operating the Vacuum Pump for System Evacuation
- Start the Vacuum Pump: Turn on your vacuum pump. You should immediately see the low-side gauge needle begin to drop into the negative pressure range, indicating vacuum is being pulled.
- Monitor Vacuum Level: Allow the pump to run until the low-side gauge reads between -29 to -30 inHg (inches of mercury) or -100 kPa. According to SAE J2788 standards for modern R-1234yf systems, achieving a deep vacuum is essential for full moisture removal.
- Run for Recommended Duration: Continue running the vacuum pump for a minimum of 30 minutes after reaching the target vacuum. For systems that have been open for an extended period or in humid conditions, a 45-60 minute run time is recommended by HVAC industry experts to thoroughly boil off and remove moisture.
Performing a Vacuum Hold Test
- Close Manifold Valves: Once the vacuum pump has run for the appropriate duration, close both the high-side and low-side valves on your manifold gauge set (turn clockwise) before turning off the vacuum pump. This isolates the AC system from the pump.
- Turn Off Vacuum Pump: Switch off the vacuum pump after the manifold valves are closed.
- Monitor for Leaks: Observe the low-side gauge for 15-20 minutes. A healthy, leak-free AC system should maintain the vacuum with no discernible rise in pressure. A rise of more than 1-2 inHg within 20 minutes indicates a leak that must be addressed before recharging.
Troubleshooting & Next Steps After Vacuuming Your AC
Successfully pulling a vacuum is a critical step, but issues can arise. Understanding how to interpret the results and what to do next ensures your AC system functions correctly and efficiently.
Addressing a Failing Vacuum Hold Test
If your AC system fails to hold a vacuum, indicating a leak, immediate action is required. According to automotive AC specialists, even small leaks can lead to refrigerant loss and eventual compressor failure due to insufficient lubrication.
- Re-Check Connections: Power off the vacuum pump and disconnect it. Carefully re-tighten all connections on your manifold gauge set to the service ports and hoses. Loose fittings are a common source of vacuum leaks.
- Inspect O-Rings: Examine the O-rings on your service port connections and manifold hoses. Damaged, cracked, or worn O-rings prevent a proper seal. Replace any suspect O-rings.
- Leak Detection: If connections are secure, use an electronic refrigerant leak detector or UV dye (if the system had residual refrigerant) to pinpoint the leak. Common leak points include compressor seals, condenser, evaporator, and hose connections. Addressing the leak is paramount before attempting another vacuum.
What to Do After a Successful Vacuum
A successful vacuum hold test confirms your AC system is sealed and ready for the next phase: recharging. This step is irreversible without further evacuation, so ensure precision.
- Prepare for Refrigerant Charging: With the manifold valves closed, disconnect the yellow service hose from the vacuum pump. Connect it to your refrigerant can tap or charging station.
- Purge Air from Charging Hose: Briefly open the refrigerant can valve (or charging station) and slightly loosen the yellow hose connection at the manifold gauge center port for a second. This purges any air from the hose before it enters the system.
- Proceed with Refrigerant Charging: Follow the vehicle manufacturer’s specifications for the correct type and amount of refrigerant (e.g., R-134a or R-1234yf) to recharge the system. Overcharging or undercharging can impair performance and damage components.
What If It Still Doesn’t Work?
Even after a meticulous vacuum and recharge, AC systems can sometimes remain problematic. If your system still isn’t cooling, further diagnosis is necessary.
- Check for Electrical Issues: Verify the compressor clutch engages when the AC is turned on. A faulty clutch relay, pressure switch, or fuse can prevent compressor operation. Utilize a multimeter to test continuity and voltage.
- Examine Compressor Functionality: If the compressor clutch engages but the system still doesn’t cool, the internal components of the compressor may be failing. Listen for unusual noises (grinding, squealing) when the compressor is engaged.
- Inspect Orifice Tube/Expansion Valve: A clogged orifice tube or a malfunctioning expansion valve can restrict refrigerant flow, leading to poor cooling. These components require specialized tools and knowledge to diagnose and replace.
- Seek Professional Help: If basic troubleshooting fails, or you suspect a major component failure (e.g., compressor, evaporator), it is best to consult a certified automotive AC technician. Modern AC systems, especially those using R-1234yf, require specialized equipment for accurate diagnostics and repairs. Professional AC system diagnostics typically range from $120-$250 in 2027. Major repairs, such as compressor replacement, can cost between $800 and $1800, depending on the vehicle and labor rates.
Conclusion
Pulling a vacuum on your car’s AC system is a fundamental maintenance task that ensures efficient cooling and prolongs component life. This critical procedure removes damaging moisture and non-condensable gases, preventing costly repairs. According to verified research and expert sources, proper vacuuming is the cornerstone of any successful AC service. By following these steps, you safeguard your system. Your next actionable step is to ensure your refrigerant levels are precisely matched to manufacturer specifications for optimal 2027 performance.
❓ Frequently Asked Questions
What are the common signs that my car AC system needs a vacuum?
If your AC system has been opened for repairs or if you’re recharging after a leak repair, it definitely needs a vacuum. Signs of air or moisture include poor cooling, intermittent operation, or compressor issues that reduce efficiency.
What specific vacuum pump features should I look for?
Look for a vacuum pump rated for at least 3 CFM (cubic feet per minute), preferably a two-stage pump, which pulls a deeper vacuum more efficiently. Ensure it has a reliable vacuum gauge and a good oil capacity for consistent performance.
Is it possible to vacuum an AC system without a dedicated vacuum pump?
While some might consider using an air compressor in reverse, it is not effective for pulling a deep enough vacuum to properly remove moisture and non-condensable gases. A dedicated automotive vacuum pump is essential for thorough system dehydration.
How long should the vacuum hold test last to confirm no leaks?
After reaching the desired vacuum, close the manifold gauge valves and shut off the pump. The vacuum should hold steady for at least 30-60 minutes, with no significant rise in pressure, to indicate a sealed, leak-free system.
What safety precautions are critical when working with car AC systems?
Always wear safety glasses and protective gloves to shield against refrigerant and oil exposure. Ensure you work in a well-ventilated area, and never expose skin to liquid refrigerant, as it can cause severe frostbite and injury.
What’s the difference between a single-stage and two-stage vacuum pump for AC work?
A single-stage vacuum pump pulls a vacuum more slowly and may struggle to reach the low micron levels necessary to completely boil off all moisture. A two-stage pump is more efficient, pulling a deeper vacuum faster, which is crucial for thorough system dehydration and optimal AC performance.