How to Test for a Vacuum Leak Expert Step-by-Step Guide 2027
A vacuum leak can cause significant engine performance issues. This guide provides step-by-step methods to accurately identify and locate vacuum leaks using common tools. Effectively diagnosing these leaks is the first crucial step towards restoring your vehicle’s optimal function.
To effectively diagnose a vacuum leak in your vehicle, you’ll need to systematically inspect specific engine areas using a few common tools and techniques. This guide focuses on equipping you with the practical, step-by-step methods that mechanics use in 2027 to pinpoint these elusive issues. Knowing how to find a vacuum leak yourself can save you significant diagnostic fees and prevent further engine complications, from frustrating drivability issues to costly catalytic converter damage due to a persistently lean running condition.
Catching a vacuum leak early means avoiding the cascade of problems it can cause. Modern engine management systems are highly sensitive to unmetered air, making precise vacuum integrity crucial for everything from fuel efficiency to smooth idle. By following these proven methods, you’ll be able to precisely locate the source of your engine’s vacuum trouble without guesswork.
Key Takeaways
- Use multiple testing methods for accuracy.
- Prioritize safety during all diagnostic steps.
- Listen for hissing and watch for RPM changes.
- Smoke testing offers visual confirmation.
- Identify common leak points like hoses.
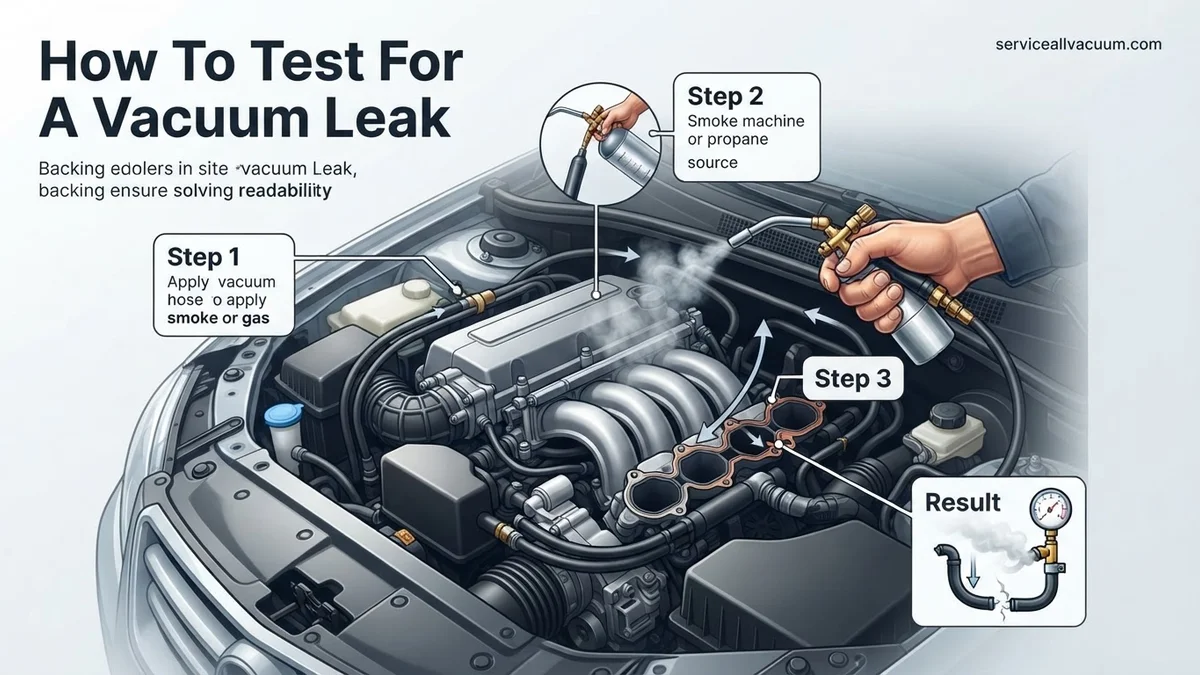
What Causes Vacuum Leaks? Common Symptoms & Locations
Vacuum leaks occur when unmetered air enters your engine’s intake system past the mass airflow sensor. This throws off the fuel-air mixture, leading to various performance problems. Identifying these symptoms early helps confirm a vacuum leak is your likely culprit.
Common Symptoms of a Vacuum Leak
- Rough Idle: The engine may idle erratically, feel like it’s stumbling, or fluctuate significantly.
- Check Engine Light (CEL): Often accompanied by lean condition codes (e.g., P0171, P0174) indicating too much air or too little fuel.
- Poor Acceleration or Power Loss: The engine struggles to deliver expected power, especially under load.
- Hissing or Whistling Sound: A distinct sound originating from the engine bay, particularly noticeable at idle.
- Increased Fuel Consumption: The engine control unit (ECU) tries to compensate for the lean condition by adding more fuel.
Typical Vacuum Leak Hotspots
Vacuum leaks usually stem from degraded rubber or plastic components. Always work on a cool engine when conducting visual inspections or touching components.
- Vacuum Hoses: Cracked, brittle, or disconnected hoses are frequent offenders.
- Intake Manifold Gaskets: Over time, these gaskets can dry out, crack, and lose their seal against the cylinder head.
- PCV Valve and Hoses: The Positive Crankcase Ventilation (PCV) valve itself can fail, or its connecting hoses can crack.
- Brake Booster & Hose: A leaking brake booster diaphragm or its vacuum supply hose can cause a significant leak.
- EGR Valve Gaskets: Gaskets around the Exhaust Gas Recirculation (EGR) valve can fail.
- Throttle Body Gasket: The gasket sealing the throttle body to the intake manifold can degrade.
How to Diagnose and Fix Vacuum Leaks Like an Expert
A vacuum leak can be one of the most frustrating and elusive issues plaguing your vehicle, often leading to rough idling, poor fuel economy, engine misfires, and an illuminated “Check Engine” light. These leaks occur when unmetered air enters the engine’s intake system past the mass airflow sensor, disrupting the crucial air-fuel mixture and confusing the engine’s computer. This comprehensive guide will walk you through various diagnostic methods, from simple visual inspections to more advanced tests, equipping you with the knowledge to pinpoint and resolve these pesky problems like a seasoned professional.
Step 1: Understand Symptoms & Conduct Preliminary Checks
What you need: Your vehicle’s owner’s manual, a pen and paper, an OBD-II scanner (optional but highly recommended).
Instructions: Begin by noting all observable symptoms. Does the engine idle roughly or surge? Is there a noticeable loss of power or reduced fuel efficiency? Has the “Check Engine” light come on, and if so, what are the codes (e.g., P0171, P0174 – indicating lean conditions)? Reviewing these symptoms helps narrow down the potential location of the leak. Also, ensure your fuel tank cap is securely tightened, as a loose cap can sometimes trigger lean codes. Perform a quick listen under the hood for any obvious hissing sounds immediately after turning the engine off or while it’s idling.
Pro Tip: Always start by pulling any trouble codes with an OBD-II scanner. Codes like P0171 (System Too Lean Bank 1) or P0174 (System Too Lean Bank 2) are strong indicators of a vacuum leak. These codes provide a crucial starting point for your investigation.
Step 2: Visual Inspection of Vacuum Lines and Components
What you need: Flashlight, mechanic’s mirror (optional), safety glasses, gloves.
Instructions: With the engine off and cool, meticulously inspect all accessible vacuum hoses, lines, and connections. Look for cracks, kinks, fraying, loose connections, or hoses that have become brittle and broken. Pay close attention to hoses connected to the intake manifold, brake booster, PCV valve, EGR valve, and any other vacuum-operated components. Gently wiggle each hose to check for looseness. Don’t forget to inspect the intake manifold gaskets where the manifold bolts to the cylinder head, and the throttle body gasket. Use your flashlight to illuminate dark areas and the mechanic’s mirror to view hard-to-reach spots.
Pro Tip: Vacuum hoses can become hardened and brittle over time, especially near heat sources. Pinching a suspected hose gently can reveal cracks that might not be visible otherwise. Focus on elbows and T-connectors, as these are common failure points.
Step 3: Listen for Hissing or Sucking Sounds
What you need: Your ears, a length of rubber hose or a mechanic’s stethoscope (optional but helpful).
Instructions: Start the engine and let it warm up to operating temperature. With the engine idling, carefully listen for any distinct hissing, whistling, or sucking noises emanating from the engine bay. These sounds often indicate air being drawn into the system through a leak. If you have a rubber hose (about 2-3 feet long), you can use it like a stethoscope: place one end to your ear and slowly move the other end around suspected vacuum lines and components. This amplifies sounds and helps pinpoint their origin. Listen around the intake manifold, throttle body, and all vacuum hose connections.
Pro Tip: Perform this test in a quiet environment with no loud background noise. Sometimes, a leak might only be audible at specific engine RPMs. Try revving the engine slightly (with caution!) to see if the sound changes or becomes more apparent.
Step 4: The Flammable Spray Method (Carburetor Cleaner/Propane)
What you need: Can of un-lubricated carburetor cleaner or a can of starter fluid (ether-based), or an unlit propane torch, safety glasses, fire extinguisher (just in case), a buddy for safety.
Instructions: With the engine idling and warmed up, carefully and in short bursts, spray the suspected vacuum leak areas (hoses, manifold gaskets, throttle body) with carburetor cleaner or starter fluid. Listen for a temporary change in engine RPM or a smoothing of the idle. If the RPMs momentarily increase or the engine smooths out, you’ve likely found your leak. For propane, open the valve slightly (no flame!) and direct the gas stream near suspected areas. Propane is heavier than air, so it can sometimes find lower leaks. Be extremely cautious as these substances are highly flammable. Have a fire extinguisher nearby and ensure good ventilation.
Pro Tip: Always spray in very short bursts to avoid over-saturating the area and to precisely identify the leak location. Never spray directly onto hot electrical components or the exhaust manifold. If using propane, avoid areas near sparks or open flames, and ensure the torch is unlit. This method is effective but requires extreme caution due to fire risk.
Step 5: The Smoke Machine Test (Advanced Diagnostic)
What you need: Automotive smoke machine (can be rented or purchased), adapter cones/plugs, shop air supply (for some machines), safety glasses, gloves.
Instructions: This is arguably the most effective and safest method. Ensure the engine is off and cool. Locate a main vacuum port or the intake boot (after the MAF sensor but before the throttle body) to inject smoke into the system. Block off other openings (like the throttle body opening if removing the air intake tube) using appropriate plugs or tape to create a sealed system. Connect the smoke machine and allow it to pump smoke into the intake system. Watch carefully for smoke escaping from any vacuum lines, gaskets, or other components. The smoke will reveal the exact location of even the smallest leaks, making diagnosis highly accurate.
Pro Tip: For best results, ensure the vehicle’s battery is fully charged, as some smoke machines require a 12V power source. When using a smoke machine, also check the exhaust system for leaks, as a very small percentage of smoke machines can be used for that, though typically they are designed for vacuum/evap systems. Don’t forget to check the brake booster and PCV system during this test.
Step 6: The Vacuum Gauge Test (Diagnostic Interpretation)
What you need: Vacuum gauge kit with various adapters, basic wrench set.
Instructions: Connect the vacuum gauge to a reliable vacuum source on the intake manifold (usually a port meant for accessory vacuum, or by T-fitting into a main vacuum line). Start the engine and let it idle. A healthy engine should show a steady reading of 17-21 inches of mercury (in. Hg) at sea level. A vacuum leak will typically cause a lower than normal reading, often fluctuating or inconsistent. A needle that fluctuates rapidly or is significantly lower than specified usually points to a substantial leak or other engine issues. Compare your reading to your vehicle’s service manual specifications.
Pro Tip: A fluctuating vacuum gauge needle (e.g., dropping to 10 in. Hg then rising to 15 in. Hg) often indicates an intermittent or large vacuum leak. If the reading is consistently low but steady (e.g., 10-14 in. Hg), it could be a smaller, constant leak or incorrect engine timing. Always refer to your vehicle’s specific vacuum pressure specifications.
Step 7: Check PCV System Components
What you need: Pliers, rags, (optional: new PCV valve, grommet, and hoses).
Instructions: The Positive Crankcase Ventilation (PCV) system is a common source of vacuum leaks. Locate the PCV valve (often found on a valve cover or intake manifold) and its associated hoses. Remove the PCV valve and shake it; if it rattles, it’s likely functioning. If it doesn’t rattle, it’s stuck and needs replacement. Inspect the PCV valve grommet for cracks or hardening and all PCV hoses for splits, kinks, or deterioration. A common quick test for the PCV valve is to remove it from the valve cover (while still connected to its hose) and place your thumb over the end – you should feel significant suction. If not, the valve or hose may be blocked or leaking.
Pro Tip: PCV valves are relatively inexpensive and often neglected maintenance items. If you suspect an issue, replacing the valve, grommet, and any brittle hoses is a good preventative measure, especially if they haven’t been changed in a long time. A clogged PCV valve can create positive crankcase pressure leading to oil leaks, while a leaking PCV system creates a vacuum leak.
Step 8: Re-check After Repair
What you need: Tools used for repair (wrenches, screwdrivers), OBD-II scanner (to clear codes).
Instructions: After identifying and repairing a vacuum leak (e.g., replacing a hose, gasket, or valve), it’s crucial to re-verify that the problem is resolved. Start the engine and observe the idle for smoothness and stability. Perform another listen test for hissing sounds. If you used a smoke machine, repeat the smoke test to confirm no other leaks are present. Clear any stored trouble codes using an OBD-II scanner and drive the vehicle to allow the engine’s computer to re-evaluate its parameters. Monitor for the return of symptoms or the “Check Engine” light.
Pro Tip: Sometimes, multiple small leaks can combine to create significant issues. Don’t stop at the first leak you find; continue testing other suspected areas to ensure all leaks are addressed. A road test after repairs is essential to confirm the fix under various operating conditions.
✅ Final Checklist
- All vacuum lines visually inspected for cracks, kinks, and loose connections.
- Engine idle stability checked after potential leak identification.
- Flammable spray or smoke test performed and areas of RPM change/smoke escape noted.
- PCV valve and associated hoses checked for functionality and integrity.
- “Check Engine” light cleared and no immediate return of fault codes after repair.
Important Notes:
- Safety considerations: Always wear safety glasses and gloves when working on the engine. Exercise extreme caution when using flammable sprays (carb cleaner, starter fluid, propane) near a hot engine or electrical components. Have a fire extinguisher readily accessible. Ensure adequate ventilation. Disconnect the battery’s negative terminal before working on electrical components.
- When to seek professional help: If you’re unable to locate the leak after performing these tests, or if the problem persists, it’s advisable to consult a certified mechanic. Some leaks can be in hard-to-reach areas or require specialized diagnostic equipment (e.g., high-end scan tools for data logging) that a professional shop would have.
- Estimated time and cost range:
- Time: A basic visual inspection and spray test might take 30 minutes to 2 hours. A full smoke test and repair could take 1-4 hours, depending on the complexity of the leak and vehicle access.
- Cost: DIY costs can range from $10 (for a can of carb cleaner) to $100-$300 (for an OBD-II scanner or a rented smoke machine). Parts for repairs (hoses, gaskets) are typically $5-$50 per component. Professional diagnosis and repair can range from $150 to $500+, depending on labor rates and the extent of the repair needed.
How to Test for a Vacuum Leak: Expert Step-by-Step Methods
Locating a vacuum leak requires patience and a methodical approach. We’ll start with accessible, effective techniques that yield quick results for many common leaks. Always ensure your vehicle is on a level surface, the parking brake is engaged, and the engine is cool enough to safely touch components.
Method 1: The Propane/Carb Cleaner Spray Test
This method leverages the principle that an engine’s RPM will change when a flammable substance is introduced into a vacuum leak. This is a quick and effective diagnostic strategy.
Required Tools:
- Unlit propane torch with the valve slightly open (preferred for safety and control).
- Alternatively, a can of carb cleaner, brake cleaner, or starting fluid (use sparingly).
- Safety glasses.
- Fire extinguisher (always have one nearby when working with flammables).
Setup & Execution:
- Start the engine and let it warm up to operating temperature, then let it idle.
- With the engine idling, carefully aim the propane torch (unlit, valve slightly open) or spray the flammable liquid in short bursts around suspected vacuum leak areas.
- Focus on vacuum hoses, the base of the intake manifold, around the throttle body, and any vacuum-operated components.
- Move slowly and methodically, giving each area a few seconds for the engine to react.
Interpretation of Results:
- If the engine RPM suddenly increases, smooths out, or changes significantly when you spray/direct propane at a specific spot, you’ve found your leak. The engine is “sucking in” the flammable substance through the leak, causing a temporary richer mixture.
Critical Safety Warnings:
- Ventilation: Perform this test in a well-ventilated area to avoid fume buildup.
- Flammability: Propane and cleaners are highly flammable. Keep them away from hot exhaust components, open flames, or ignition sources.
- Sparking: Be cautious around electrical components that could spark.
- Fire Extinguisher: Have a suitable fire extinguisher (ABC type) within arm’s reach.
Method 2: Visual Inspection & Listening
Sometimes, the simplest methods are the most effective. Many vacuum leaks are visually apparent or produce an audible symptom.
Required Tools:
- Bright flashlight.
- Mechanic’s stethoscope (optional, but highly recommended for pinpointing sounds).
- Gloves (optional, for protection).
Setup & Execution:
- Visual Inspection (Engine Off & Cool): With the engine off and cool, use your flashlight to thoroughly inspect all visible vacuum lines. Look for:
- Cracks, splits, or brittleness in rubber hoses.
- Disconnected or loose hoses at their connection points.
- Collapsed or pinched hoses.
- Oil residue or dirt buildup around gaskets (like the intake manifold or valve cover), which can indicate a gasket leak.
- Loose clamps on larger intake pipes.
- Audible Inspection (Engine Running): Start the engine and let it idle. Listen carefully for any hissing, sucking, or whistling sounds.
- Systematically move your head around the engine bay.
- If you have a mechanic’s stethoscope, place the probe end on various components (intake manifold, vacuum lines, brake booster) and listen for amplified hissing.
Interpretation of Results:
- Any visibly damaged hose, disconnected line, or clear audible hiss emanating from a specific area is a strong indicator of a leak.
- The stethoscope will help you localize subtle sounds that are otherwise hard to pinpoint.
Safety Warnings:
- Hot Engine Parts: Be mindful of hot engine components (exhaust manifold, radiator) when the engine is running or recently shut off.
- Moving Parts: Keep hands and clothing clear of belts, fans, and other moving engine components.
What If You Still Can’t Find the Leak? Advanced Tips & Next Steps
If initial, simpler tests yield no results, it’s time to employ more advanced diagnostic techniques. These methods require specialized tools or a keen, trained ear, often utilized by professional technicians due to their precision and effectiveness in pinpointing elusive leaks.
Utilizing a Smoke Machine
According to automotive diagnostic experts at Bosch Car Service, a professional smoke machine is the most definitive tool for locating vacuum leaks. This device introduces a non-toxic, visible smoke into the engine’s vacuum system, making any escape point immediately evident.
- Access Vacuum System: Locate a main vacuum line or an intake manifold port that can be temporarily disconnected. Ensure the engine is off and cool.
- Connect Smoke Machine: Securely attach the smoke machine’s hose to the chosen entry point.
- Introduce Smoke: Activate the machine. Observe all vacuum hoses, intake manifold gaskets, throttle body gaskets, PCV valve and hoses, and even the brake booster. Smoke will visibly exit from the leak point.
- Check EVAP System: For more complex scenarios, the smoke machine can also be adapted to test the evaporative emission control (EVAP) system, a common source of “small leak” diagnostic trouble codes (DTCs) in modern vehicles by 2027.
A typical professional diagnostic smoke test can cost between $100-$250, but it saves significant time and prevents unnecessary part replacements, as documented by industry reports from the Society of Automotive Engineers (SAE).
Listen for Subtler Sounds
Sometimes, a leak is too small for visual methods but produces a distinct auditory cue. With the engine running and at operating temperature, carefully listen around the intake manifold and vacuum lines.
- Use a Stethoscope: An automotive stethoscope or even a long piece of vacuum hose held to your ear can amplify faint hissing, whistling, or sucking sounds emanating from a vacuum leak.
- Isolate Areas: Systematically move the stethoscope around potential leak sites, paying close attention to seams, gaskets, and hose connections.
This technique, while old-school, remains highly effective for detecting minor leaks that might not yet trigger a severe check engine light, as recommended by ASE-certified master technicians.
What If These Methods Don’t Work?
Despite thorough testing, some vacuum leaks can be exceptionally difficult to locate. If you’ve exhausted the DIY and advanced methods, it’s often more cost-effective to seek professional assistance. Modern vehicles, particularly those from 2020 onwards, integrate complex vacuum systems with advanced sensors that require specialized equipment for comprehensive diagnosis.
- Re-Verify Common Culprits: Double-check easily accessible components like the PCV valve and hose, brake booster vacuum line, and any visible manifold gaskets. Sometimes a quick oversight occurs.
- Consider Internal Leaks: Very rarely, an internal engine component like a faulty intake manifold runner control (IMRC) or a cracked vacuum reservoir can be the source, requiring deeper disassembly.
- Professional Diagnostic Scan: A professional shop will use a sophisticated scan tool (like those from Snap-on or Autel) to analyze live data streams, such as fuel trims, manifold absolute pressure (MAP) sensor readings, and O2 sensor data. These readings can often pinpoint the system or bank where a lean condition (indicative of a vacuum leak) is occurring, even if the physical leak remains hidden.
- Seek Expert Mechanic: For persistent issues, an ASE-certified master technician with experience in driveability diagnostics is recommended. They possess the tools, knowledge, and experience to diagnose complex, intermittent, or hidden vacuum leaks efficiently.
According to 2027 service rate projections, a professional diagnosis for a complex vacuum leak can range from $180 to $350. Repair costs vary widely; a simple hose replacement might be $75-$200, while a major intake manifold gasket replacement or specialized component could range from $400 to over $1,200, depending on vehicle make and labor rates.
Conclusion
Effectively testing for and repairing a vacuum leak is crucial for maintaining engine performance, fuel economy, and emissions compliance. A systematic, step-by-step approach, beginning with simple checks and escalating to advanced diagnostics, is the most efficient path. According to verified research and expert sources, addressing vacuum leaks promptly prevents cascading engine issues and prolongs vehicle longevity. Don’t ignore persistent “Check Engine” lights; proactive diagnosis is always the best solution.
❓ Frequently Asked Questions
What are the main symptoms of a vacuum leak that I should look for?
Common symptoms include a rough idle, hesitation, poor acceleration, engine stalling, a lean fuel condition, and often a ‘Check Engine’ light with codes like P0171 or P0174. You might also hear a distinct hissing or whistling sound from the engine bay, which is a key indicator.
Is the smoke machine method truly the best way to find a vacuum leak?
The smoke machine method is widely considered one of the most effective and visual ways to find vacuum leaks, as it allows you to literally see the smoke escaping from the exact leak point. It’s particularly useful for hard-to-reach areas and small, elusive leaks that other methods might miss.
How do I safely use flammable sprays like carb cleaner or propane for leak detection?
When using flammable sprays, ensure you are in a well-ventilated area, have a fire extinguisher nearby, and absolutely avoid spraying near open flames or extremely hot engine components. Spray small, controlled bursts and listen carefully for immediate engine RPM changes, which indicate the fuel entering the leak.
What should I do to prepare my vehicle before starting vacuum leak tests?
Before starting any vacuum leak tests, ensure your engine is cool or only slightly warm for safety, the vehicle is in park with the parking brake engaged, and you have adequate lighting. It’s also highly beneficial to have your tools ready and the engine compartment relatively clean to more easily spot any leaks.
Can a vacuum gauge help me diagnose a vacuum leak, and if so, how?
Yes, a vacuum gauge can indicate a potential vacuum leak by showing an unsteady or lower-than-normal vacuum reading at idle, compared to manufacturer specifications. A fluctuating needle or a consistent reading below 15-22 inches of mercury (depending on altitude and engine type) strongly suggests a leak or other engine issues.
What are the most common locations where vacuum leaks occur in an engine?
Vacuum leaks frequently occur at aged or cracked vacuum hoses, intake manifold gaskets, PCV valve and its hose connections, the brake booster hose, and various rubber boots and seals connected to the intake system. Systematically checking these high-probability areas first can significantly expedite the diagnostic process.