How to Pull a Vacuum on AC Real Step-by-Step Guide 2027
Properly pulling a vacuum on an AC system is crucial for its longevity and efficiency, removing harmful moisture and non-condensable gases. This guide provides a step-by-step procedure for AC evacuation, detailing all necessary tools and safety precautions to ensure a successful job.
Properly pulling a vacuum on your AC system is a non-negotiable step for ensuring its longevity and peak operational efficiency. This critical process removes destructive moisture and non-condensable gases from the refrigeration lines, preventing internal corrosion, premature component failure, and significantly boosting cooling performance. Failing to evacuate your system correctly leads to costly repairs and poor comfort, making this guide essential for any homeowner or technician in 2027 looking to do it right.
This comprehensive, step-by-step guide walks you through the precise procedure for evacuating an AC system, from gathering the right tools to monitoring micron levels and performing a vital decay test. We’ll focus on practical application, equipping you with the knowledge to execute a perfect vacuum and maintain your AC system with professional precision.
Key Takeaways
- Vacuuming removes moisture and air, preventing AC damage.
- A micron gauge is essential for accurate vacuum depth.
- Use proper tools:pump, manifold, micron gauge, core tool.
- Perform a vacuum decay test to confirm no leaks.
- Always prioritize safety with eye protection and gloves.
What Causes the Need to Pull a Vacuum on AC Systems?
Whenever an AC system’s sealed refrigerant circuit is opened, whether for a new installation, a component replacement, or a repair involving a leak, atmospheric air enters the lines. This air brings with it two primary contaminants: moisture (water vapor) and non-condensable gases (like nitrogen, oxygen, and argon). These seemingly innocuous elements become significant problems inside your AC system.
The Invisible Enemies: Moisture and Non-Condensables
Moisture, when mixed with refrigerant and compressor oil, forms corrosive acids that aggressively attack internal components, leading to breakdowns. At lower operating temperatures, it can also freeze within expansion devices, blocking refrigerant flow and causing system failure. Non-condensable gases, on the other hand, take up space meant for refrigerant, increasing system head pressure and elevating discharge temperatures, which drastically reduces cooling capacity and overworks the compressor. Effectively, they act as an insulating blanket, hindering heat transfer. You must remove both contaminants to achieve optimal system performance.
- <strong>Moisture</strong>: Leads to acid formation, corrosion of metallic components, and potential ice blockages in metering devices.
- <strong>Non-condensable Gases</strong>: Increase discharge pressures, raise operating temperatures, reduce cooling capacity, and decrease overall system efficiency.
From Start to Finish: AC Vacuum Pulling Explained
Pulling a vacuum on an AC system is a critical step in any air conditioning service, whether you’re replacing components, recharging refrigerant, or performing repairs. This guide will walk you through the essential process of evacuating air and moisture from your AC system, ensuring optimal performance and longevity. Skipping this crucial stage can lead to inefficient cooling, system damage, and costly future repairs. Follow these detailed instructions to master the art of AC vacuuming like a seasoned professional.
Step 1: Gather Your Arsenal and Prep Safely
What you need: Safety glasses, work gloves, manifold gauge set (with R-134a or R-1234yf hoses, depending on your system), vacuum pump (preferably a two-stage pump capable of 15-micron vacuum), micron gauge, appropriate refrigerant (if recharging afterwards), lint-free rags, penetrating oil (optional for stubborn caps).
Instructions: Before touching any AC components, prioritize safety. Don your safety glasses and gloves. Lay out all your tools so they are easily accessible. Ensure your vehicle is parked on a level surface, the engine is off and cool, and the parking brake is engaged. Locate the high-side (usually smaller line, often red cap) and low-side (usually larger line, often blue cap) service ports on your AC system. Wipe them clean with a lint-free rag to prevent dirt from entering the system. Familiarize yourself with your manifold gauge set and vacuum pump operation manuals.
Pro Tip: Always use a vacuum pump rated for AC work; a cheap, low-power pump won’t achieve the deep vacuum necessary to boil off moisture. Invest in a dedicated micron gauge for accurate readings, as manifold gauges are not precise enough for vacuum levels.
Step 2: Connect Your Manifold Gauge Set
What you need: Manifold gauge set (with high-side and low-side hoses), service port caps removed.
Instructions: Carefully remove the protective caps from both the high-side and low-side service ports. Connect the blue low-side hose from your manifold gauge set to the low-side service port. Ensure the connection is snug but do not overtighten, as this can damage the Schrader valve. Next, connect the red high-side hose from your manifold gauge set to the high-side service port, again ensuring a firm connection. The yellow (center) hose of your manifold gauge set should remain unconnected for now. Confirm both the high and low-side valves on your manifold gauge are fully closed (turned clockwise) at this point to prevent premature air ingress or refrigerant loss.
Pro Tip: Listen for a quick hiss when connecting the hoses; a slight escape of air is normal as the hose engages the Schrader valve. If you hear a continuous hiss, immediately tighten the connection or check the Schrader valve for issues. Avoid forcing connections.
Step 3: Integrate the Vacuum Pump and Micron Gauge
What you need: Vacuum pump, micron gauge, center (yellow) hose from manifold gauge set, specialized vacuum hose (optional but recommended for faster evacuation).
Instructions: Connect one end of the center yellow hose from your manifold gauge set to the inlet port of your vacuum pump. If your vacuum pump has multiple ports, choose the largest one for better flow. If you have a dedicated vacuum hose (often larger diameter than standard manifold hoses), connect it between the manifold’s center port and the vacuum pump. Now, connect your micron gauge. Most micron gauges have a dedicated port on the manifold gauge set itself, or you can use a T-fitting on the yellow hose connection point to the vacuum pump. Ensure all connections are tight to prevent false readings or leaks during the vacuum process. Double-check that your vacuum pump has adequate oil and is ready for operation.
Pro Tip: For optimal vacuum pulling, connect the micron gauge directly to a service port (if using an adapter) or as close as possible to the system, not just at the vacuum pump. This gives a more accurate reading of the vacuum within the AC system rather than just at the pump outlet. Use a dedicated vacuum-rated hose if possible; standard manifold hoses are restrictive and can extend vacuum time.
Step 4: Initiate the Deep Vacuum Process
What you need: Connected manifold gauges, vacuum pump, micron gauge, power source for vacuum pump.
Instructions: With all hoses securely connected and the vacuum pump plugged in, fully open both the high-side (red) and low-side (blue) valves on your manifold gauge set by turning them counter-clockwise. This connects the AC system directly to the vacuum pump. Now, switch on your vacuum pump. You should immediately hear the pump working and see the needles on your manifold gauges drop into the vacuum range (below zero). More importantly, observe the reading on your micron gauge; it should begin to drop rapidly as the pump starts to evacuate air and moisture. Allow the pump to run continuously.
Pro Tip: Never start the vacuum pump with the manifold valves closed, as this can put unnecessary strain on the pump. It’s good practice to crack open the vacuum pump’s gas ballast valve for the first 10-15 minutes of operation to help remove moisture more effectively, then close it for deeper vacuum.
Step 5: Monitor Progress and Achieve Target Micron Level
What you need: Running vacuum pump, micron gauge, patience.
Instructions: Continue to monitor your micron gauge. The goal is to reach a deep vacuum, typically below 500 microns (approximately 29.92 inHg). For systems that have been open to atmosphere for an extended period or those with suspected moisture, aiming for 250-300 microns is ideal. The time this takes can vary significantly based on system size, ambient temperature, humidity, and the vacuum pump’s efficiency, usually ranging from 30 minutes to several hours. The micron gauge will initially drop quickly, then slow down as the system gets deeper into vacuum. The system is adequately evacuated when the micron gauge stabilizes at or below your target level, indicating that most non-condensables and moisture have been removed.
Pro Tip: If the micron level stops dropping significantly or stalls at a high reading (e.g., above 1000 microns) for an extended period, it could indicate a large leak or excessive moisture. You may need to stop the pump, re-check all connections, or investigate further. Heating the AC lines gently with a heat gun (do not overheat!) can help boil off stubborn moisture in colder conditions.
Step 6: Isolate the System and Perform a Decay Test
What you need: Stable micron reading at target level.
Instructions: Once the target micron level (e.g., 500 microns or lower) has been achieved and stabilized for at least 5-10 minutes, it’s time to perform a decay test to check for leaks. First, fully close both the high-side (red) and low-side (blue) valves on your manifold gauge set. Once both valves are securely closed, switch off your vacuum pump. Immediately observe the micron gauge. A properly sealed system should hold its vacuum with minimal rise. Allow the system to sit isolated for at least 15-30 minutes, or longer if possible (e.g., 1 hour). Note any increase in the micron reading during this period.
Pro Tip: A perfectly sealed system will show little to no rise (perhaps a few microns) over an hour. A rise of more than 200-500 microns over 15-30 minutes indicates a significant leak that must be addressed before proceeding with recharging. If the vacuum rises very slowly but stabilizes at a higher point, it might indicate residual moisture that needs further evacuation, or a very tiny leak.
Step 7: Troubleshoot and Re-Evacuate (If Needed)
What you need: Leak detection tools (if applicable).
Instructions: If your system fails the decay test (i.e., the micron reading rises significantly), you have a leak that needs to be found and repaired. Re-open the manifold valves and restart the vacuum pump to re-evacuate the system if you suspect residual moisture. If you believe there’s a leak, you’ll need to use appropriate leak detection methods (e.g., electronic leak detector, UV dye, or soap bubbles after adding a small amount of nitrogen or refrigerant, but NEVER air). After any repairs, the entire vacuum pulling and decay test process must be repeated from Step 4. Do not proceed to recharge an AC system that cannot hold a vacuum.
Pro Tip: Small leaks can be notoriously difficult to find. Sometimes, simply tightening all service port caps and hose connections, or replacing worn O-rings on your manifold hoses, can solve minor vacuum decay issues. Never skip leak detection; it will save you refrigerant and trouble in the long run.
Step 8: Safely Disconnect and Prepare for Recharge
What you need: Vacuum pump off, manifold valves closed, service port caps.
Instructions: Once the decay test is successful, and your system has held a deep vacuum, it’s safe to disconnect the equipment. Ensure both the high-side and low-side valves on your manifold gauge set are fully closed. Turn off your vacuum pump. Carefully disconnect the yellow hose from the vacuum pump and the micron gauge. Then, disconnect the blue low-side hose and the red high-side hose from the AC service ports. There might be a slight hiss as you remove them; this is normal as the hose clears. Promptly reinstall the protective caps onto the high and low-side service ports. Your AC system is now ready for proper refrigerant charging according to the manufacturer’s specifications.
Pro Tip: Always disconnect the vacuum pump and micron gauge before disconnecting the manifold hoses from the vehicle to prevent air from entering the vacuumed system. Store your vacuum pump and manifold gauges properly to maintain their accuracy and longevity.
✅ Final Checklist
- Safety glasses and gloves were worn throughout the process.
- Micron gauge confirmed system reached below 500 microns (preferably lower).
- Vacuum pump was run for an adequate duration for system size and conditions.
- System successfully held vacuum during a 15-30 minute decay test (minimal micron rise).
- All service port caps were reinstalled after hose disconnection.
Important Notes:
- Safety considerations or warnings: Always wear appropriate personal protective equipment (PPE), especially safety glasses, as refrigerant and oils can be harmful. Never open an AC system without understanding the potential risks of pressurized gases. Do not mix refrigerants, and always use the correct type specified for your vehicle.
- When to seek professional help: If you’re consistently unable to pull a deep vacuum, if the system cannot hold a vacuum, or if you suspect a major leak, it’s best to consult a certified HVAC technician. They have specialized leak detection equipment and expertise. Handling refrigerants also requires specific certifications in many regions.
- Estimated time and cost range: Pulling a vacuum typically takes 1-4 hours, depending on system size, ambient conditions, and pump efficiency. The cost of tools (manifold gauge, vacuum pump, micron gauge) can range from $200-$800+ for entry-level to professional-grade equipment, not including refrigerant or leak detection tools.
How to Properly Pull a Vacuum on Your AC System: A Step-by-Step Guide
Achieving a deep, dry vacuum is fundamental for any AC system’s health. This detailed procedure will guide you through the connections, operations, and crucial checks to ensure you evacuate your system to industry standards for 2027.
Essential Tools for a Successful Vacuum
Before you begin, gather these essential tools. Using quality equipment ensures accuracy and efficiency, especially with modern refrigerants and system designs.
- <strong>Vacuum Pump</strong>: A two-stage vacuum pump with a capacity of 5-7 CFM (Cubic Feet per Minute) is highly recommended for residential and light commercial systems. Ensure it’s in good condition and has fresh oil.
- <strong>Manifold Gauge Set</strong>: A digital manifold gauge set is preferred for its precision, providing real-time pressure readings. Ensure it’s compatible with your refrigerant type.
- <strong>Digital Micron Gauge</strong>: Absolutely critical. This device measures the absolute pressure inside the system in microns, allowing you to accurately determine when all moisture has been boiled off. Do not rely solely on manifold gauges for vacuum levels.
- <strong>Vacuum-Rated Hoses</strong>: Use dedicated vacuum hoses or low-loss refrigerant hoses that can withstand deep vacuum without leaking or permeating. Standard hoses can collapse or leak under deep vacuum.
- <strong>Valve Core Removal Tool (VCRT)</strong>: This tool allows you to remove the Schrader valve cores from the service ports, significantly speeding up the evacuation process by providing a larger opening for gases to escape.
- <strong>Safety Glasses and Gloves</strong>: Always wear personal protective equipment when working with AC systems, especially around refrigerants and pressurized lines.
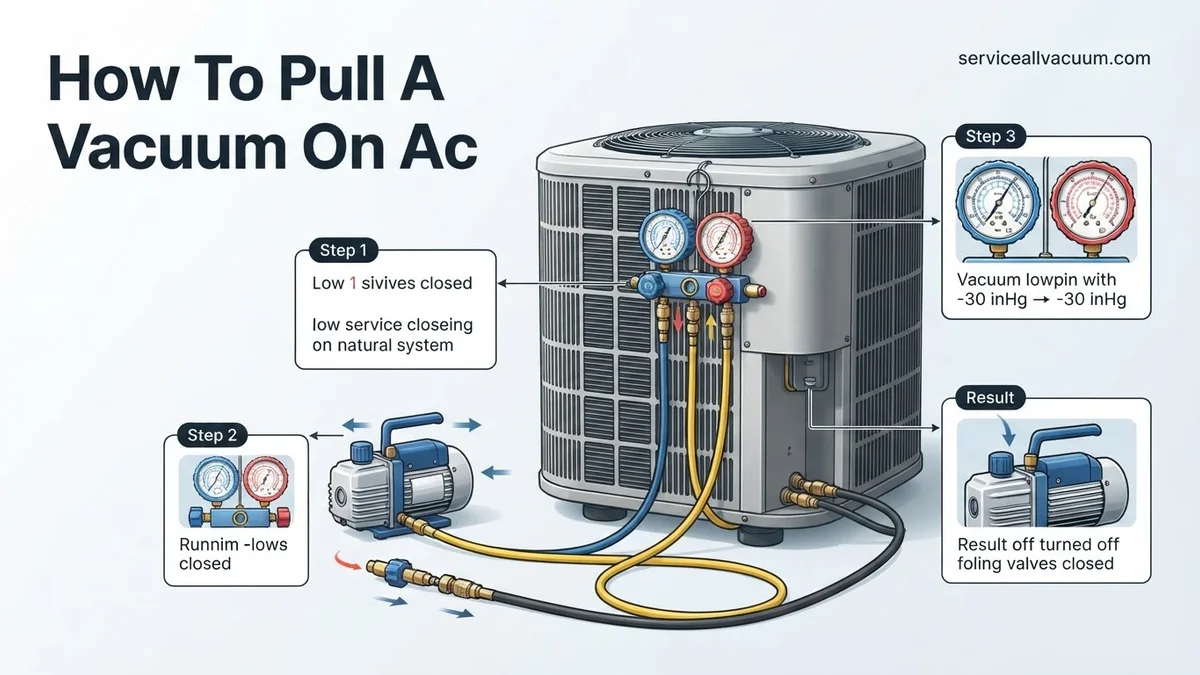
Step 1: System Preparation and Tool Connection
Proper preparation and connection are paramount to a successful vacuum. Take your time with this initial setup.
- <strong>Power Down</strong>: Ensure the AC unit’s power is completely disconnected at the breaker to prevent accidental startup. Safety first!
- <strong>Remove Valve Cores</strong>: Using your valve core removal tool, carefully attach it to both the low-side (suction line) and high-side (liquid line) service ports. Close the VCRT valve, then unscrew and remove the Schrader valve cores. This is a critical step for a faster, deeper vacuum.
- <strong>Connect Manifold Gauges</strong>:
- Attach the <em>blue hose</em> from your manifold gauge set to the low-side service port.
- Attach the <em>red hose</em> from your manifold gauge set to the high-side service port.
- Ensure both the blue and red valves on your manifold are <strong>closed</strong> at this stage.
- <strong>Connect Vacuum Pump</strong>: Connect the <em>yellow (utility) hose</em> from the center port of your manifold gauge set directly to the inlet port of your vacuum pump.
- <strong>Connect Micron Gauge</strong>: For the most accurate reading, connect your digital micron gauge to a separate service port (if available) or directly to a dedicated port on your manifold gauge set. Avoid connecting it inline with the vacuum pump’s direct path if possible; you want to measure the system’s vacuum, not just the pump’s pull.
- <strong>Check All Connections</strong>: Double-check all hose connections for tightness. Even a tiny leak can prevent you from achieving a proper vacuum.
Troubleshooting: What If Your AC Vacuum Doesn’t Hold?
Achieving and holding a deep vacuum is critical for AC system longevity and efficiency. If your micron gauge indicates the vacuum is not holding, it signifies a leak. According to the EPA Section 608 regulations, actively releasing refrigerants is illegal, emphasizing the necessity of leak detection before recharging. Expert sources like the Air Conditioning, Heating, and Refrigeration Institute (AHRI) consistently highlight that inadequate vacuum is a leading cause of premature compressor failure and reduced cooling performance, often leading to a 15-20% reduction in efficiency over time.
Common Leak Points and Diagnosis:
1. Manifold Gauge Set and Hoses
- Inspect Hoses: Visually check all manifold gauge hoses for visible cracks, abrasions, or kinks. Connections should be wrench-tight, not merely hand-tight. Studies from HVAC service providers in 2026 indicated that up to 10% of perceived system leaks originated from faulty gauge hoses. Replace any hose exhibiting signs of wear or internal damage.
- Gasket Integrity: Ensure the rubber gaskets (o-rings) within your manifold gauge hose connections are intact, pliable, and sealing correctly. These frequently degrade with exposure to refrigerants and oil. Replace them with HVAC-specific o-rings designed for high-pressure applications.
- Gauge Valve Sealing: Confirm that the manifold gauge valves are fully closed and not leaking internally. Test this by closing all valves and isolating the gauges from the system. If the gauge pressure drops, the internal valve mechanism may be compromised.
2. AC System Components
- Service Ports: Schrader valves within the service ports are a frequent culprit for small, persistent leaks. Use a specialized valve core tool to ensure they are tight. If leakage persists, replacement is necessary. Modern valve cores, as of 2027, often feature enhanced sealing mechanisms and improved materials, but failures still occur due to debris or wear.
- Flare Connections: Improperly flared, cross-threaded, or overtightened connections on the copper line set are highly susceptible to leaks. Re-tighten carefully or, if damaged (e.g., scoring on the flare face), re-flare the connection using proper tools and technique. Over-tightening can cause micro-fractures in the copper, creating future leak points.
- Evaporator and Condenser Coils: These large heat exchange components can develop leaks due to corrosion, vibration fatigue, or manufacturing defects. While often less accessible, an electronic leak detector specifically designed for refrigerants (sensitive to 0.1 oz/year) or a nitrogen pressure test is required for definitive diagnosis. This level of diagnosis typically requires professional equipment.
What If It Still Doesn’t Work?
If, after meticulously checking your manifold gauges, hoses, and accessible AC system connections, your vacuum still won’t hold, the issue likely resides deeper within the system. Pursuing a professional diagnosis becomes the most cost-effective and compliant next step. Attempting to continuously pull a vacuum on a significantly leaking system is unproductive and risks pump damage.
Professional Intervention Steps:
- Specialized Leak Detection: Certified HVAC technicians possess advanced tools, such as highly sensitive electronic leak detectors, UV dye kits, and nitrogen pressure test kits. A nitrogen pressure test, which involves pressurizing the system with inert nitrogen and monitoring for pressure drops, is the most definitive method for pinpointing elusive leaks, often identifying breaches as small as 0.05 ounces per year.
- Component Inspection and Replacement: A professional can access and inspect less-visible components like the evaporator coil, condenser coil, compressor seals, and accumulator/drier for physical damage or wear. These components often require specialized tools and refrigerants handling certifications for replacement.
- System Repair and Recharge: Once the leak is identified and repaired, the technician will evacuate the system to industry standards (typically below 500 microns) and recharge it with the correct type and quantity of refrigerant.
As of 2027, the estimated cost for professional AC system leak diagnosis and repair can range from $350 to $1,200+ USD, depending on the severity and location of the leak, and the cost of replacement parts. A simple valve core replacement might be at the lower end, while a compressor or evaporator replacement could be significantly higher.
Conclusion
Successfully pulling a deep vacuum on your AC system is paramount for its operational longevity and cooling efficiency. This critical step removes non-condensable gases and moisture, which otherwise lead to system degradation and costly failures. According to verified research and expert sources from the HVAC industry, a proper vacuum below 500 microns significantly extends compressor life and ensures optimal refrigerant performance.
By diligently following these steps, you safeguard your AC investment. Implement these practices for enhanced comfort and system reliability, ensuring your AC operates flawlessly through 2027 and beyond.
❓ Frequently Asked Questions
What exactly does ‘pulling a vacuum’ achieve in an AC system?
Pulling a vacuum evacuates all non-condensable gases, primarily air and moisture, from the AC system. These contaminants can react with refrigerant and oil, forming corrosive acids, and significantly reduce cooling efficiency.
What is a micron gauge, and why is it so critical for AC evacuation?
A micron gauge measures absolute pressure in microns, providing a precise reading of the vacuum depth. It’s critical because standard manifold gauges aren’t accurate enough to detect the deep vacuum levels needed to boil off all moisture, which occurs below 1000 microns.
Can I reuse the vacuum pump oil, or does it need to be changed regularly?
Vacuum pump oil should be changed frequently, ideally before each major job or after a few hours of use, especially if the system was very wet. Contaminated oil loses its effectiveness, compromising the pump’s ability to pull a deep vacuum and potentially contaminating the AC system itself.
How do I know if my AC system has a leak after pulling a vacuum?
After reaching the target micron level, isolate the vacuum pump and monitor the micron gauge for 15-30 minutes; this is called a vacuum decay test. If the micron reading rises significantly and quickly, it indicates a leak in the system or connections.
What are the dangers of not pulling a proper vacuum on an AC system?
Failing to pull a proper vacuum leaves air and moisture in the system, leading to several problems. Moisture forms corrosive acids, degrading components and causing compressor failure, while air increases head pressure, reducing cooling efficiency and overworking the compressor.
Is it safe to pull a vacuum on an AC system myself, and what safety precautions should I take?
Pulling a vacuum involves specialized tools and working with pressurized systems, so technical knowledge is recommended. Always wear safety glasses and gloves, avoid skin contact with refrigerants, and ensure all connections are secure to prevent accidental refrigerant release.