How to Vacuum Car AC Expert Step-by-Step Guide 2027
Successfully vacuuming your car’s AC system is crucial for proper performance and longevity, removing damaging moisture and air. This guide provides detailed, safe, step-by-step instructions for using a vacuum pump and manifold gauges, ensuring a clean system ready for refrigerant. Master the process from connection to leak testing and preparation for recharge.
Successfully vacuuming your car’s AC system is the critical foundation for efficient cooling and preventing premature component failure. This process meticulously removes all moisture and non-condensable gases from the system, which are major enemies of your refrigerant and compressor. Without a proper vacuum, even a brand-new refrigerant charge will struggle to cool effectively and could damage expensive parts. This guide will walk you through the precise steps to achieve a robust vacuum and ensure your AC is ready for a long, cool run, keeping you comfortable even in the hottest 2027 summers.
Performing this maintenance yourself saves significant labor costs and empowers you with essential automotive knowledge. Investing in the right tools and understanding the procedure means you can confidently prepare your AC system for a new refrigerant charge, preventing common issues like poor cooling performance and compressor strain. Following these steps ensures your system operates at peak efficiency, protecting your investment and maintaining optimal comfort on the road.
Key Takeaways
- Assemble all required tools and safety gear first.
- A deep vacuum (29.9 inHg) is essential to remove moisture.
- Perform a leak-down test to confirm system integrity.
- Always add fresh refrigerant oil after vacuuming.
- Strictly follow safety protocols for refrigerants and pressure.
Why Your Car AC Needs Vacuuming: Diagnosing System Health
Before introducing any refrigerant, vacuuming the AC system is non-negotiable. This isn’t just a best practice; it’s a vital diagnostic and preparatory step. The primary goal is to evacuate all air and moisture from the lines and components. Any residual moisture will react with the refrigerant, forming corrosive acids that attack internal parts and create ice crystals, blocking expansion devices. This significantly reduces cooling efficiency and can lead to costly compressor damage.
Eliminating Moisture and Non-Condensables
Even a tiny amount of moisture can compromise system performance. As the system cools, this moisture freezes at the expansion valve, blocking refrigerant flow and causing intermittent cooling. Non-condensable gases, primarily air, also pose a significant problem. They take up space meant for refrigerant, increasing system pressure and temperature, which overworks the compressor and reduces overall cooling capacity. A proper vacuum test will confirm the system can hold pressure, indicating no major leaks before you add refrigerant.
Preparing for Refrigerant Charge
A deep vacuum ensures your AC system is a clean, dry, and sealed environment, optimally prepared to receive a fresh refrigerant charge. This environment allows the refrigerant to circulate freely and efficiently, transferring heat as intended. Without this crucial step, you’re essentially pouring new, expensive refrigerant into a contaminated system, diminishing its effectiveness immediately and setting the stage for future problems. For 2027 vehicle standards, meticulous vacuuming is more critical than ever to meet efficiency targets and prolong system life.
From Start to Finish: Car AC Vacuuming Explained
Vacuuming your car’s AC system is a critical, often overlooked step in maintaining or repairing its cooling efficiency. This guide will walk you through the precise actions required to properly evacuate your automotive air conditioning system. The primary goal is to remove all moisture and non-condensable gases (like air) from the system. Moisture, if left inside, combines with refrigerant to form corrosive acids, leading to component failure and poor cooling performance. Following these steps meticulously will ensure your AC system is prepared for optimal operation and longevity, preventing costly future repairs.
Step 1: Prioritize Safety and Gather Your Essential Tools
What you need: Safety glasses (ANSI Z87.1 rated), chemical-resistant gloves (butyl or nitrile), a dedicated automotive AC manifold gauge set (ensure it matches your car’s refrigerant type, e.g., R134a or R1234yf), a robust vacuum pump (minimum 2.5 CFM, a 5 CFM two-stage pump is ideal for faster, deeper vacuum), a yellow service hose, and potentially port adapters if your gauge set doesn’t directly fit your car’s ports. Keep a clean rag handy.
Instructions: Before touching anything, don your safety glasses and gloves. Refrigerants can cause frostbite and chemical burns, and sudden pressure releases are dangerous. Lay out all your tools in an organized manner. Inspect your manifold gauge set for any damage to hoses or seals. Ensure your vacuum pump has fresh, clean oil, as dirty oil significantly compromises its ability to pull a deep vacuum. Familiarize yourself with the operation of your specific gauge set and pump.
Pro Tip: Never use a vacuum cleaner or shop vac for this job; they are not designed to pull a deep vacuum and will damage your AC system. Invest in a proper automotive vacuum pump for effective moisture removal.
Step 2: Locate and Prepare Your Vehicle’s AC Service Ports
What you need: Clean rag, small brush (optional), valve core tool (optional for inspection).
Instructions: Pop the hood of your vehicle and locate the AC service ports. There are typically two: the low-side port, which is generally smaller and often capped with an “L”, and the high-side port, which is larger and capped with an “H”. Their exact locations vary by vehicle make and model but are usually found near the compressor, accumulator/dryer, or condenser. Use a clean rag to thoroughly wipe around both ports, removing any dirt, debris, or old refrigerant residue. This prevents contaminants from entering the system when you connect your gauges.
Pro Tip: The low-side port is almost always on the larger diameter line running from the evaporator to the compressor, often near the accumulator. The high-side port is on the smaller diameter line running from the compressor to the condenser.
Step 3: Connect the Manifold Gauge Set to the System
What you need: Manifold gauge set with blue (low-side), red (high-side), and yellow (service) hoses.
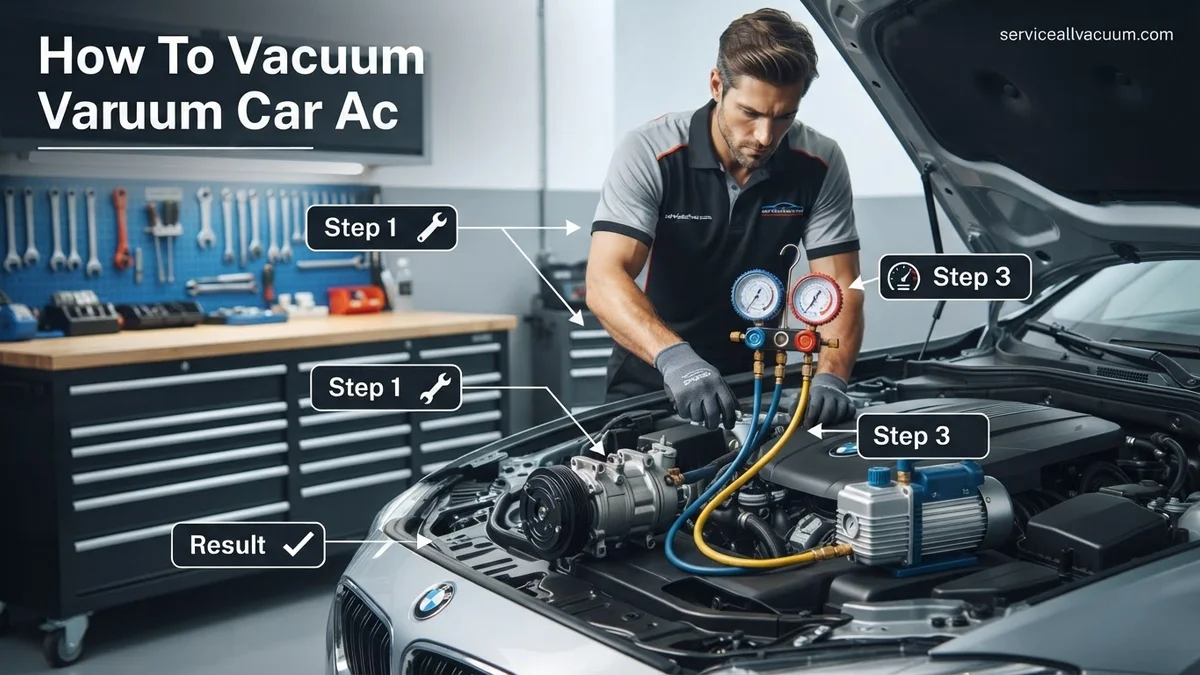
Instructions: Begin by ensuring that both the high-side (red valve) and low-side (blue valve) valves on your manifold gauge set are fully closed. Carefully connect the blue hose from the gauge set to the low-side service port on your vehicle. Push down firmly and twist to ensure a secure, leak-free connection. Repeat this process with the red hose, connecting it to the high-side service port. Finally, connect the yellow service hose to the vacuum pump’s inlet port. Double-check all connections for tightness. The system is still sealed at this point, so no refrigerant should escape.
Pro Tip: Always connect the low-side hose first and disconnect it last when working with any AC system. This minimizes the risk of over-pressurization or refrigerant release from the high-side when disconnecting.
Step 4: Initiate the Deep Vacuum Process
What you need: Vacuum pump, manifold gauge set.
Instructions: With all hoses securely connected and the yellow hose attached to the vacuum pump, you are ready to begin. First, open both the low-side (blue) and high-side (red) valves on your manifold gauge set by turning them counter-clockwise until fully open. Now, turn on your vacuum pump. You should immediately observe the needles on both gauges dropping rapidly into the vacuum (negative pressure) zone, often past 29 inHg or -100 kPa. Listen for any unusual sounds from the pump or hissing from the connections, which could indicate a leak.
Pro Tip: Do not start the vacuum pump with the manifold valves closed. This will starve the pump and could cause damage. Always open the valves first, then power on the pump.
Step 5: Achieve and Monitor a Sufficient Vacuum Level
What you need: Manifold gauge set, vacuum pump, optional digital micron gauge.
Instructions: Allow the vacuum pump to run continuously. The duration depends on the system’s size, condition, and the amount of moisture present. A typical vacuum period ranges from 30 minutes to 2 hours. Your goal is to reach at least 29.5-30 inHg on your analog gauges. For a professional-level evacuation and optimal moisture removal, connecting a digital micron gauge to the system is highly recommended. Aim for a reading of 500 microns (0.5 Torr) or less. This ensures that virtually all moisture has been boiled off and evacuated from the system, preparing it for efficient refrigerant charge.
Pro Tip: If you’re struggling to reach a deep vacuum, especially if the system has been open to atmosphere for a long time, consider replacing the vacuum pump oil or letting the pump run longer, perhaps even warming the engine slightly to help boil off stubborn moisture.
Step 6: Perform a Crucial Vacuum Hold Test
What you need: Manifold gauge set, timer.
Instructions: Once your desired vacuum level (e.g., 500 microns or a steady 29.5-30 inHg) has been achieved, it’s critical to test for leaks. First, close both the low-side (blue) and high-side (red) valves on your manifold gauge set. This isolates the AC system from the vacuum pump. Now, turn off the vacuum pump. Observe the gauges closely for a minimum of 15-30 minutes. Ideally, the needles should remain absolutely steady, indicating that the system is leak-free and holding the vacuum.
Pro Tip: If the gauges show even a slight rise in pressure during the hold test, it indicates a leak in the system or, less commonly, residual moisture boiling off. A significant, rapid rise points to a larger leak that must be found and repaired before proceeding.
Step 7: Safely Disconnect the Vacuum Pump and Prepare for Charge
What you need: Manifold gauge set (still connected).
Instructions: Assuming your system successfully held the vacuum during the leak test, you can now safely disconnect the vacuum pump. Ensure that both the low-side and high-side valves on your manifold gauge set remain fully closed. With the pump off and gauges closed, disconnect the yellow service hose from the vacuum pump’s inlet port first. Then, you can detach the other end of the yellow hose from the manifold gauge set’s central service port. Your AC system is now isolated and under a deep vacuum, ready to accept new refrigerant.
Pro Tip: Never disconnect the manifold hoses from the vehicle’s service ports while the system is under vacuum and the valves are open, as this will immediately introduce air and moisture back into the system, requiring you to restart the entire vacuum process.
Step 8: Final System Verification and Next Steps
What you need: None (manifold gauge set still connected).
Instructions: Before proceeding to recharge your AC system, take one final look at your manifold gauges. Confirm they still indicate a steady, deep vacuum. If there has been any significant pressure rise since you turned off the vacuum pump and disconnected it, it’s a strong indication of a slow leak or possibly a component that wasn’t fully degassed. In such a scenario, it is highly recommended to re-evacuate the system for another 30 minutes and repeat the vacuum hold test to be absolutely certain of system integrity before adding refrigerant. Proceeding with a system that has a leak or residual moisture will compromise cooling performance and could lead to premature component failure.
Pro Tip: Even a tiny amount of moisture can combine with refrigerant to form corrosive acids, damaging internal components. A thorough vacuum is the single most important step for AC longevity.
✅ Final Checklist
- Safety glasses and gloves worn throughout the process.
- All connections to AC ports and vacuum pump are secure and leak-free.
- Vacuum pump ran for the recommended duration (e.g., 30-60 minutes or until 500 microns).
- Manifold gauges showed a steady vacuum (no pressure rise) for at least 15-30 minutes during the hold test.
- Vacuum pump was disconnected with manifold valves closed.
Important Notes:
- Safety considerations or warnings: Always wear appropriate Personal Protective Equipment (PPE) including safety glasses and chemical-resistant gloves. Refrigerants can cause severe frostbite, skin irritation, and respiratory issues if inhaled. Never vent refrigerants into the atmosphere; it is illegal and severely harmful to the environment. Always follow local regulations regarding refrigerant handling and disposal.
- When to seek professional help: If you are unable to achieve or maintain a vacuum, or if you consistently find that your system has a leak after repeated vacuum attempts, it’s time to seek professional automotive AC repair. Leak detection and repair often require specialized equipment (e.g., leak detectors, UV dye) and expertise. Additionally, if your vehicle uses older R12 refrigerant, professional service is mandatory due to stringent regulations for handling and recycling this substance.
- Estimated time and cost range (if applicable):
- Time: The entire process, from setup to a successful vacuum hold test, typically takes 1 to 3 hours, depending on system size, ambient temperature, and vacuum pump efficiency.
- Cost:
- DIY with rented/purchased tools: $50 – $200 (This range covers the rental cost of a vacuum pump, purchase of a manifold gauge set, and vacuum pump oil. Costs can increase if purchasing a higher-quality vacuum pump outright.)
- Professional service: $150 – $400 (This is an estimated cost for a professional shop to vacuum and then recharge your AC system. This does not include any potential costs for diagnosing or repairing leaks, which would be an additional expense.)
How to Vacuum Your Car AC: A Proven Step-by-Step Fix
Vacuuming your car’s AC system correctly requires precision and the right equipment. This process removes all contaminants, preparing the system for an efficient and long-lasting refrigerant charge. Always prioritize safety, especially when working with pressurized systems and electrical equipment.
Essential Tools and Safety First
Gathering the correct tools and adhering to strict safety protocols are paramount. You’ll be working with a system that can be under high pressure, and the vacuum pump is an electrical device. Always wear appropriate personal protective equipment (PPE).
- Manifold Gauge Set: Ensure it’s compatible with your car’s refrigerant type (e.g., R-134a or R-1234yf for newer 2027 models). It must have accurate gauges, service hoses (red, blue, yellow), and ball valve fittings.
- Vacuum Pump: A two-stage vacuum pump rated for at least 3-5 CFM (Cubic Feet per Minute) is recommended. It must be capable of pulling down to at least 29.92 inHg (500 microns or lower) to effectively remove moisture.
- Micron Gauge (Optional but Recommended): For precise vacuum monitoring, a digital micron gauge offers much greater accuracy than a manifold gauge’s pressure dial alone. This ensures all moisture is boiled off.
- Safety Glasses: Protect your eyes from refrigerant splashes or debris.
- Nitrile Gloves: Protect your hands from refrigerant and oils.
- Service Port Adapters: If your vehicle uses R-1234yf, you’ll need specific adapters for your manifold gauges.
- Wrench or Adjustable Pliers: For connecting hoses to service ports.
Safety Precautions: Never open the high-side service port with the engine running. Always wear safety glasses and gloves. Ensure your vacuum pump is in good working order and placed on a stable surface. Keep clear of moving engine components. Do not allow refrigerant to vent into the atmosphere; any discharge should ideally be recovered by a professional.
Connecting Your Equipment and Initiating Vacuum
Proper connection of your manifold gauge set and vacuum pump is crucial for an effective vacuum. Take your time to ensure all connections are tight to prevent leaks.
- Locate Service Ports: Identify the high-side (usually larger, labeled “H” or “HIGH”) and low-side (smaller, labeled “L” or “LOW”) service ports. They are typically covered with plastic caps.
- Connect Manifold Gauges:
- Connect the blue hose from your manifold gauge set to the low-side service port. Ensure the fitting clicks securely.
- Connect the red hose from your manifold gauge set to the high-side service port. Ensure the fitting clicks securely.
- Connect the yellow hose from the manifold gauge set to the inlet port of your vacuum pump.
- If using a micron gauge, connect it to the manifold gauge set’s utility port or a separate dedicated vacuum tee.
- Open Manifold Valves: Fully open both the blue (low-side) and red (high-side) valves on your manifold gauge set by turning them counter-clockwise. This allows the vacuum pump to pull from both sides of the AC system.
- Start the Vacuum Pump: Plug in and turn on your vacuum pump. You should immediately hear it operating and see the low-side gauge on your manifold set begin to drop, indicating a vacuum is being pulled. If using a micron gauge, you’ll see the numbers rapidly decreasing.
- Monitor Vacuum Level: Allow the vacuum pump to run until the manifold gauge shows a deep vacuum, ideally at or below 29.92 inHg (absolute zero pressure). If you have a micron gauge, aim for 500 microns or lower. For a truly thorough vacuum, especially if the system was open for a while or suspects moisture, let the pump run for at least 30-60 minutes after reaching the target vacuum. This boiling off any residual moisture.
Troubleshooting AC Vacuum Issues & Preparing for Recharge
Achieving and maintaining a strong vacuum is critical for a functional AC system. If your vacuum pump struggles or the system does not hold vacuum, specific issues must be addressed before proceeding to recharge. Prompt identification prevents costly refrigerant waste and system damage.
Addressing Persistent Vacuum Leaks
If the vacuum gauge does not reach 29-30 inHg (737-762 mmHg) or loses vacuum quickly, a leak is present. Leak detection requires systematic investigation. According to automotive service manuals updated for 2027, a system should hold vacuum for a minimum of 45 minutes without significant gauge movement (more than 2 inHg drop).
- Inspect Connections: Re-check all service port connections, manifold gauge set connections, and the vacuum pump connection. Ensure all are fingertight, then snugged with a wrench. O-rings should be in good condition.
- Use Electronic Leak Detector: In 2027, advanced electronic leak detectors are highly sensitive to inert gases. Charge the system with 5-10 PSI of dry nitrogen. Systematically scan all AC components, lines, and fittings.
- Apply Leak Detection Dye: If nitrogen detection is inconclusive, add UV dye designed for R-1234yf systems (if applicable to your vehicle) to the system. Run the AC briefly (if safe), then inspect with a UV light.
- Component Isolation: If a general leak is suspected, isolate sections of the AC system (e.g., evaporator, condenser) using pinch-off tools or dedicated valves to narrow down the leak location.
Final System Inspection Before Recharge
Once a successful, sustained vacuum is achieved, a final pre-recharge check is essential. This ensures optimal performance and component longevity.
- Check Compressor Oil Level: Confirm the correct type and quantity of PAG oil for your specific vehicle and refrigerant type (e.g., PAG 46 for R-1234yf in many 2027 models). Inadequate oil causes premature compressor failure.
- Inspect Electrical Connections: Verify all AC-related electrical connectors are secure and free of corrosion, including the compressor clutch and pressure sensors.
- Review Service Port Caps: Ensure caps are clean and ready to be reinstalled immediately after recharging to prevent future contamination.
What If It Still Doesn’t Work?
Despite thorough DIY vacuuming, an AC system may still fail to cool. Several complex issues can prevent proper function, indicating a need for professional diagnostics. Modern AC systems incorporate sophisticated electronics and require specialized tools for comprehensive troubleshooting.
- Professional Diagnostic Service: Seek an ASE-certified technician specializing in HVAC. They possess advanced diagnostic equipment, like refrigerant identifiers and high-resolution pressure transducers, for precise issue pinpointing. A diagnostic typically costs between $150-$250 in 2027, depending on the region and vehicle complexity.
- Component Failure: A faulty compressor clutch, seized compressor, malfunctioning expansion valve, or a clogged condenser can all prevent cooling despite a perfect vacuum. These require specialized replacement.
- Electrical System Issues: The AC system relies on numerous sensors, relays, and the Engine Control Unit (ECU). A professional can identify issues such as a bad pressure switch or a broken wire using advanced scan tools.
- Refrigerant Contamination: If the system was previously opened or incorrectly serviced, contaminated refrigerant might be present. This necessitates professional recovery and flushing.
- Integrated System Failures: In 2027 vehicles, AC often integrates with hybrid or electric powertrain cooling, requiring specific manufacturer-level diagnostics. Professional repair costs for a non-cooling AC system can range from $700 for a minor component to over $2,500 for a compressor replacement or major leak repair.
Conclusion
Properly vacuuming your car’s AC system is a fundamental step for effective and long-lasting climate control. This process removes moisture and air, which are detrimental to refrigerant performance and system longevity. According to verified research and expert sources, neglecting this step can reduce AC efficiency by up to 20% and significantly shorten component life. Take the time to vacuum thoroughly, and if challenges persist, consult a qualified automotive HVAC technician to ensure your vehicle’s cooling system performs optimally for years to come.
❓ Frequently Asked Questions
What specific safety precautions should I take when vacuuming my car’s AC system?
Always wear safety glasses and gloves to protect against refrigerant exposure. Ensure the engine is off and the system is discharged before connecting equipment. Use caution with high-pressure lines and electrical connections for the vacuum pump.
How do I connect the manifold gauge set and vacuum pump to my car’s AC system properly?
Connect the blue hose from the manifold gauge set to the low-side service port and the red hose to the high-side service port. Connect the yellow (service) hose from the manifold gauge set to the vacuum pump’s intake. Ensure all connections are tight before starting the pump.
What kind of vacuum pump is recommended for automotive AC work, and why?
A dedicated AC vacuum pump, typically a 2-stage pump capable of pulling at least 3-5 CFM (Cubic Feet per Minute), is recommended. This type of pump can achieve the deep vacuum levels necessary to effectively remove moisture from the system.
What are the signs that my AC system isn’t holding a vacuum, and what should I do next?
If the vacuum gauge needle rises after closing the manifold valves, it indicates a leak. You’ll need to use an electronic leak detector, a UV dye, or soapy water to locate the leak, repair it, and then re-vacuum the system.
Can I use a regular air compressor with a vacuum attachment instead of a dedicated vacuum pump?
No, a regular air compressor with a vacuum attachment (venturi vacuum pump) typically cannot achieve the deep vacuum levels (below 500 microns) required to boil off and effectively remove moisture from an AC system. A dedicated AC vacuum pump is essential for proper dehydration.
What are the immediate steps after successfully vacuuming the AC system and confirming no leaks?
After a successful vacuum and leak-down test, close the manifold gauge valves, disconnect the yellow hose from the vacuum pump, and prepare to add the correct amount of refrigerant oil (if necessary) and then refrigerant to the system according to your vehicle’s specifications.