How to Wash a Vacuum Filter Step-by-Step Guide 2026
Knowing how to wash a vacuum filter properly restores maximum suction and extends the lifespan of your appliance. This guide covers safe removal, cold-water rinsing without detergents, and the essential 24-hour air-drying process to prevent mold and motor damage.
Washing your vacuum filter correctly requires removing loose debris, rinsing it under cold running water without detergent, and letting it air-dry completely for at least 24 hours before reinstalling. Skipping any of these steps can ruin your motor or trap lingering mold inside your machine.
By 2026, modern bagless and cordless vacuums feature advanced HEPA and foam filtration systems that demand proper maintenance. If your vacuum smells bad or leaves dust behind, a simple filter wash is usually the fix you need to restore peak suction.
Key Takeaways
- Always unplug your vacuum cleaner before removing any filters for maintenance.
- Check manufacturer labels to verify whether your specific filter is actually washable.
- Use lukewarm or cold water only; never use hot water, soap, or harsh detergents.
- Allow filters to air-dry completely for a full 24 hours before reinstalling them.
- Never use heat sources like hair dryers to speed up the drying process.
Why Vacuum Filters Lose Suction and Need Cleaning
The Mechanics of Clogged Filtration
Your vacuum relies on unobstructed airflow to create the suction pressure needed to lift dirt from your floors. When you vacuum your home, microscopic dust particles, pet dander, and fine pollen pass through the main debris chamber and embed themselves deep inside the porous material of your filter.
As these microscopic particles accumulate over weeks of cleaning, they form a dense, impenetrable barrier that chokes off the airflow. Modern high-efficiency particulate air (HEPA) filters used in 2026 models are especially prone to this buildup because they capture 99.97 percent of particles down to 0.3 microns.
Performance Decline Indicators
- Your vacuum motor sounds higher-pitched or strained during normal operation.
- The housing of the vacuum feels unusually hot after running for just five minutes.
- A musty or burning dust odor exhausts from the machine while you clean.
- Visible dirt remains on low-pile carpets even after multiple slow passes.
Master Vacuum Filter Maintenance in 7 Simple Steps
Keeping your vacuum running at peak efficiency requires more than just emptying the dust bin; it demands regular, proper maintenance of the filtration system. Over time, microscopic dust, pet dander, and fine debris clog the porous material of your vacuum filter, starving the motor of airflow and drastically reducing suction power. This comprehensive guide will walk you through the exact process of safely washing and drying your vacuum filters to restore maximum suction, eliminate foul odors, and significantly extend the lifespan of your cleaning appliance without damaging sensitive components.
Step 1: Check Your Manual and Identify Filter Types
What you need: Your vacuum cleaner user manual (or smartphone to look up the digital PDF), and a well-lit workspace.
Instructions: Before you even touch water, you must determine whether your specific vacuum filter is actually washable. Modern vacuums typically feature two types of filters: foam/felt pre-filters (which are almost always washable) and HEPA exhaust filters (which may be paper-based and permanently ruined by water). Consult your user manual or check the labeling directly printed on the plastic rim of the filter. Look for explicit terms like “Washable” or “Permanent.” If the manufacturer states the filter is non-washable or disposable, attempting to wash it will dissolve the internal paper media, destroying its ability to trap allergens.
Pro Tip: Never assume a filter is washable just because it looks like sponge or cloth; always verify the manual to avoid destroying expensive HEPA cartridges.
Step 2: Power Down and Disassemble the Vacuum Safely
What you need: Your vacuum cleaner, a flat surface, and optionally a pair of disposable gloves if you are sensitive to dust.
Instructions: Unplug the vacuum cleaner from the electrical outlet to eliminate any risk of accidental startup or electrical shock. Locate the filter compartment, which is usually housed directly beneath the dirt canister or behind a side/rear access door. Gently unlatch or twist open the compartment cover. Carefully lift the filter assembly out of the housing, taking care not to spill accumulated surface dust back onto your freshly cleaned floors. Pay close attention to how the filters are oriented and stacked—some systems use a combination of a coarse foam sleeve wrapped around a finer felt or pleated cone.
Pro Tip: Work over a large trash can or take the vacuum outside to the porch when removing heavily soiled filters to prevent fine dust clouds from settling in your living space.
Step 3: Perform Dry Debris Removal
What you need: A large household trash can, a soft-bristled brush (like an old clean paintbrush), or a can of compressed air.
Instructions: Before introducing water, you need to knock off the heavy, loose layer of caked-on dirt and debris. Hold the filter firmly over your trash can and gently tap the hard plastic rim against the inside edge of the bin. For pleated filters, use a soft-bristled brush to gently sweep away loose dust bunnies trapped between the accordion folds, moving strictly in the direction of the folds to avoid tearing the delicate material. If stubborn pet hair is woven into the mesh, use your gloved fingers to carefully peel it away. Clearing this dry layer first prevents mud from forming when water hits the filter.
Pro Tip: Avoid banging the filter too violently against hard surfaces, as this can crack the rigid plastic frame or warp the shape of pleated paper elements.
Step 4: Rinse Gently Under Lukewarm Water
What you need: Access to a kitchen or utility sink with a flexible faucet sprayer.
Instructions: Turn on your faucet and adjust the temperature until it is strictly lukewarm—never hot, as high heat can warp the plastic housing or melt glues, and never ice cold, which fails to break down oils. Hold the filter under the running water, allowing the stream to pass through the inside out (or through the clean side to the dirty side) to push trapped particles back out the way they entered. Rotate the filter continuously to ensure even saturation. Use a gentle massaging motion with your fingertips if cleaning a foam filter, but be extremely gentle if rinsing a pleated mesh filter.
Pro Tip: Never use harsh dish soaps, laundry detergents, bleach, or chemical solvents unless the manufacturer’s manual explicitly mandates it; plain water is 99 percent of the time all you need.
Step 5: Inspect and Apply Mild Soap If Necessary
What you need: A drop of mild, residue-free dish soap (such as original Blue Dawn) and warm water.
Instructions: Inspect your filter under bright lighting. If the filter has absorbed greasy cooking oils, heavy pet odors, or sticky kitchen residue, water alone will not suffice. Place a single drop of mild dish soap onto the filter surface. Gently lather the foam or mesh using circular motions with your fingertips, working the soap into the fibers without stretching or tearing them. Rinse the filter thoroughly under a steady stream of lukewarm water for at least 60 seconds. Continue rinsing until the water running out of the filter is completely clear and free of any foam, bubbles, or soapy slickness.
Pro Tip: Leftover soap residue acts as a magnet for future dust, causing the filter to clog twice as fast once you start vacuuming again, so rinse twice as long as you think is necessary.
Step 6: Remove Excess Moisture
What you need: Two or three clean, lint-free microfiber towels or paper towels.
Instructions: Once rinsing is complete, resist the urge to violently wring out or twist the filter like a dish towel, as this permanently warps the structure and ruins pleated filters. Instead, gently squeeze the filter with your hands to press out the bulk of the trapped water. Next, place the filter between two clean microfiber towels and press down firmly across the entire surface to absorb lingering moisture. For pleated filters, stand them vertically and gently tap them against a dry towel to shake droplets out of the deepest folds.
Pro Tip: Never use a hairdryer, clothes dryer, oven, or direct outdoor sunlight to speed up the drying process, as excessive heat will melt or warp the filter materials.
Step 7: Air Dry Completely Before Reinstallation
What you need: A well-ventilated room with good air circulation and a clean drying rack.
Instructions: Place the damp filters on a drying rack or a clean, dry towel in an area with steady airflow, such as near an open window or with a ceiling fan running. Allow the filters to air dry undisturbed for a minimum of 24 hours (often 48 hours for thick foam or multi-layered HEPA-style washable designs). To test if they are truly ready, press your cheek or the back of your hand against the thickest part of the filter; if you feel even the slightest hint of coolness or dampness, give it another 12 hours. Reinstalling a damp filter into a vacuum motor is extremely dangerous as it can cause electrical shorts, rust the motor bearings, and breed black mold inside your machine.
Pro Tip: Place your filters out to dry immediately after routine cleaning days so they have the full weekend or overnight window to achieve 100 percent dryness.
✅ Final Checklist
- Verified in the user manual that the specific filter model is rated as washable
- Removed all loose surface dust and trapped pet hair over a trash can before washing
- Rinsed thoroughly with lukewarm water until the runoff was crystal clear
- Allowed the filter to air dry completely in a well-ventilated space for at least 24 hours
- Inspected the dried filter for lingering dampness, cracks, or torn mesh before snapping it securely back into the vacuum housing
Important Notes:
- Always unplug your vacuum cleaner before accessing internal compartments to prevent accidental electrical shock or mechanical injury.
- If your vacuum emits a burning smell or extremely loud whining noise even after a deep filter wash and dry, stop use immediately and seek professional appliance repair.
- Washing takes approximately 15 minutes of active labor, but factor in 24 to 48 hours of total passive drying time; cost range is $0 (using mild household dish soap) or $15 to $30 if replacement filters are required due to wear and tear.
How to Identify if Your Vacuum Filter Is Washable
Checking Manufacturer Specifications and Labels
Before you let any water touch your filter, you must confirm whether it is actually designed to be washed. Rinsing a non-washable paper or treated fiberglass filter will instantly destroy its structural integrity and render it completely useless.
Look directly at the plastic frame or the top surface of the filter element for printed icons. Manufacturers typically stamp a water faucet symbol or the explicit word washable right onto the component. If your user manual or the part itself specifies non-washable or disposable, you must replace it rather than trying to clean it with water.
Distinguishing Between Filter Types
Foam and Felt Filters: These layered, spongy components are almost always fully washable and designed to trap coarse and medium debris.
Pleated HEPA Cartridges: Some modern HEPA cartridges feature a washable outer plastic and mesh housing, while the inner paper pleats must remain completely dry.
Paper or Cardboard Frames: Any filter utilizing rigid paper borders or cardboard backing will disintegrate under water and must be replaced dry.
Step-by-Step Guide on How to Wash and Dry Your Vacuum Filter
Proper technique prevents damage to delicate filter fibers during the cleaning process. Follow these manufacturer-approved steps to clean your filter safely in 2026.
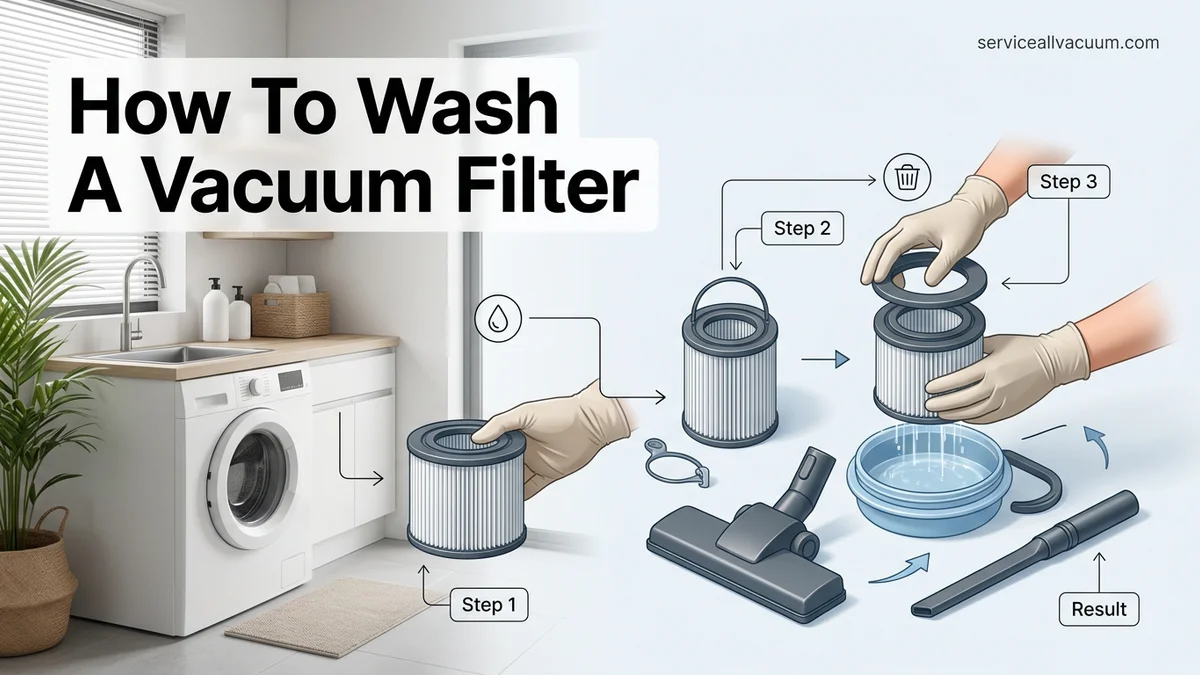
Step 1: Knock Away Loose Debris
Take the filter outside or hold it directly over a garbage can. Gently tap the plastic frame against the side of the bin to dislodge trapped dirt, dust, and pet hair. Never use sharp tools or a knife to scrape the filter, as this punctures the delicate mesh or paper pleats.
Step 2: Rinse Under Cold Water
Hold the filter under a running tap of lukewarm or cold water. Avoid hot water, which warps plastic frames and breaks down the adhesive binding the filter layers together. Rotate the filter continuously so the water flows from the clean side out through the dirty side, pushing trapped particles backward.
Step 3: Gently Massage the Material
For foam and sponge filters, apply a single drop of mild dish soap if recommended by the manufacturer. Gently squeeze the material to work out deep-seated oils and fine dust. Never twist, wring, or scrub the filter aggressively, because mechanical stress permanently deforms foam and ruins HEPA paper integrity.
Step 4: Air-Dry Completely (24 to 48 Hours)
Shake off excess water and place the filter in a well-ventilated area out of direct sunlight. Appliance engineering data from leading brands like Dyson and Shark emphasizes that a damp filter reinstalled in 2026 will instantly attract fine dust, form a muddy sludge, and cause mold growth inside the motor housing. Allow a full 24 to 48 hours for complete drying before reassembly.
What If It Still Doesn’t Work?
If your vacuum still lacks suction after a thorough filter wash and dry cycle, the issue lies elsewhere in the system. Appliance repair statistics show that lingering airflow loss usually stems from secondary blockages or mechanical wear.
- Inspect the Hose and Wand: Disconnect the main hose and extension wand. Shine a flashlight through or drop a small coin down the tube to check for lodged toys, paper clips, or compacted dust balls.
- Check for Brush Roll Jams: Unplug the vacuum and inspect the motorized floor head. Tangled hair, carpet fibers, and threads often wrap tightly around the brush roll bearing, choking off airflow and triggering thermal shutoffs.
- Examine Pre-Motor and Post-Motor Seals: Rubber gaskets degrade over time. If a seal is cracked or missing, air bypasses the filter entirely, reducing overall suction performance.
- Consider Professional Repair or Replacement: If the motor sounds strained or smells like burning ozone, internal components may have failed. Professional diagnostics typically range from $40 to $80, while a replacement motor often costs between $75 and $150, making replacement a more cost-effective option for older units.
Conclusion
Maintaining strong suction and prolonging the lifespan of your cleaning appliance ultimately depends on proper filter maintenance. By rinsing away microscopic debris and allowing a full drying cycle, you protect the motor from premature burnout. According to verified research and expert appliance sources, washing your filter every month ensures optimal airflow and peak cleaning efficiency. Take the next step today by checking your vacuum manual and setting a monthly cleaning reminder on your calendar.
❓ Frequently Asked Questions
How do I know if my vacuum filter is washable?
Check the user manual or look for printed icons on the filter housing itself, such as a water droplet symbol or text indicating ‘washable foam/felt.’ If it is a paper or true HEPA filter, it is typically dry-clean only and must be replaced rather than washed.
What happens if I use hot water to clean my vacuum filter?
Hot water can warp or shrink synthetic filter materials like foam or plastic frames, destroying the tight seal required for proper vacuum suction. Always stick to cold or lukewarm water when rinsing.
Can I speed up the drying process with a hair dryer?
No, applying direct heat from a hair dryer, clothes dryer, or heater can melt delicate filter fibers and warp plastic components. Filters must always be air-dried naturally in a well-ventilated area.
How do I remove trapped dust before washing?
Take the filter to an outdoor trash can and gently tap it against the inside wall to knock loose thick layers of dust and debris. You can also use a soft-bristled brush to sweep away surface particles before rinsing.
When is it time to replace a vacuum filter instead of washing it?
If the filter remains stained, smells musty even after thorough drying, or shows physical tears and degradation, it should be replaced immediately. Most washable filters also have a maximum lifespan of one to two years.
Why does my vacuum smell bad even after washing the filter?
If a washed filter still smells, it likely wasn’t completely dry when reinstalled, which causes mold and bacteria to grow inside the damp material. Wash it again, let it dry for a full 48 hours, and check the canister or brush roll for trapped debris.