How to Measure Vacuum Expert 2027 Guide to Gauges
Accurately measuring vacuum involves selecting the right gauge based on the pressure range and application. Different vacuum gauges operate on varied principles, from mechanical deformation to gas ionization, each suited for specific vacuum levels. Understanding these principles is key to proper selection and reliable results.
Accurately quantifying low pressure is crucial for success in 2027’s advanced manufacturing, research, and space technology. From semiconductor fabrication and thin-film deposition to fusion energy experiments and pharmaceutical freeze-drying, precise vacuum measurement ensures product quality, process efficiency, and system safety. Your ability to select and deploy the right gauge directly impacts your operational success, offering insights into gas composition, leak detection, and overall system performance.
This guide cuts directly to the core of vacuum measurement: the methods, tools, and principles you need to master. We’ll show you how different vacuum gauges work, their operational ranges, and equip you with the knowledge to match the perfect instrument to your specific application requirements. By 2027, cutting-edge vacuum processes demand nothing less than expert-level measurement.
Key Takeaways
- Choose gauge type based on vacuum range.
- Understand gauge operating principles.
- Calibrate gauges for accurate readings.
- Install gauges correctly to prevent leaks.
- Select tools for specific gas environments.
What Makes Measuring Vacuum Challenging?
The Enormous Range of Vacuum
Unlike atmospheric pressure, vacuum operates across an immense scale, spanning over 15 orders of magnitude. You need to measure from just below ambient (like 900 mbar) all the way down to ultra-high vacuum (UHV) regions, often below 10-10 mbar. No single gauge technology can effectively cover this entire spectrum. This vast range means different physical phenomena dominate at various pressure levels, forcing a diverse array of measurement principles. In 2027, your systems might span multiple vacuum ranges simultaneously, requiring a combination of specialized instruments.
Gas Composition and Environmental Factors
Vacuum measurements are not always straightforward. Gauge readings can be significantly influenced by the specific type of gas present in your system. For instance, thermal conductivity gauges react differently to nitrogen compared to helium, requiring specific calibration. Furthermore, environmental factors such as ambient temperature fluctuations, mechanical vibrations, and even electromagnetic interference can affect gauge accuracy. Contamination from process byproducts or outgassing materials remains a constant challenge in advanced vacuum systems, directly impacting measurement reliability and the longevity of sensitive gauge components.
From Start to Finish: Vacuum Measurement Explained
Welcome to this comprehensive guide on how to accurately measure vacuum. Whether you’re working in a scientific laboratory, maintaining HVAC systems, designing industrial processes, or preserving food, understanding and precisely measuring vacuum is crucial for optimal performance and safety. This guide will walk you through every essential step, from selecting the right equipment to interpreting your readings and troubleshooting common issues, ensuring you can confidently measure vacuum like a seasoned professional.
Step 1: Understand Vacuum Ranges and Gauge Technologies
What you need: A basic understanding of pressure units (Torr, mBar, Pa) and the vacuum range your application requires.
Instructions: Before selecting any equipment, it’s vital to recognize that “vacuum” is not a single entity but a spectrum of pressures below atmospheric. Vacuum ranges are typically categorized as: rough (760 Torr down to 1 Torr), medium (1 Torr down to 10-3 Torr), high (10-3 Torr down to 10-7 Torr), and ultra-high (below 10-7 Torr). Different physical principles are used to measure these varied ranges. For example, mechanical gauges (like Bourdon tubes) are for rough vacuum, thermal conductivity gauges (Pirani, Thermocouple) cover medium to high vacuum, and ionization gauges (Hot Cathode, Cold Cathode) are necessary for high and ultra-high vacuum applications. Matching the gauge principle to your required range prevents inaccurate readings and equipment damage.
Pro Tip: Never attempt to measure high or ultra-high vacuum with a rough vacuum gauge; it simply won’t register or will provide misleading results. Always know your target pressure range first.
Step 2: Select the Appropriate Vacuum Gauge Type
What you need: Your defined vacuum range, knowledge of the gas composition in the system, and environmental conditions (temperature, radiation).
Instructions: With your target vacuum range identified from Step 1, choose a gauge that operates effectively within that specific window. For rough vacuum, a simple analog Bourdon gauge or a digital absolute pressure transducer might suffice. For medium vacuum (e.g., vacuum drying, freeze-drying), thermal conductivity gauges like a Pirani sensor are cost-effective and robust. If you’re working with high or ultra-high vacuum (e.g., semiconductor manufacturing, R&D), an ionization gauge (hot or cold cathode) is essential. Also, consider if the gas composition might affect the gauge’s reading (thermal gauges are gas-dependent), or if you need a gas-independent option like a capacitance manometer, which provides highly accurate, true total pressure readings across a broad range, albeit at a higher cost.
Pro Tip: For systems that span multiple vacuum ranges during pump-down (e.g., from atmosphere to high vacuum), consider a combination gauge or multiple gauges installed in parallel, each optimized for a specific range, to get continuous and accurate readings.
Step 3: Gauge Calibration and Preparation
What you need: Your chosen vacuum gauge, its operating manual, a clean lint-free cloth, and if available, a certified calibration standard or reference gauge.
Instructions: Before installation, always check the gauge’s calibration certificate and date. If using a new gauge, follow the manufacturer’s instructions for initial setup, which may include a “zero” procedure. For analog gauges, confirm the needle rests at its lowest reading (often zero or full vacuum). For digital gauges, perform any specified self-calibration or zeroing functions, typically in atmosphere or a known vacuum level. Ensure the sensing element is clean and free of any particulate matter or oils, which can drastically affect accuracy. Use a lint-free cloth and, if necessary, an appropriate solvent as recommended by the manufacturer to clean sensitive parts. Proper preparation ensures reliable and accurate measurements from the start.
Pro Tip: Periodically re-calibrate your gauges, especially those used in demanding environments or critical applications. Drift can occur over time, leading to erroneous readings. A traceable calibration schedule is best practice.
Step 4: Proper Installation of the Vacuum Gauge
What you need: Appropriate vacuum fittings (e.g., KF, ISO, VCR, NPT), O-rings or copper gaskets, a torque wrench (if specified), and a clean work area.
Instructions: Correct installation is paramount to avoid leaks and ensure accurate readings. Mount the vacuum gauge as close as possible to the point where the vacuum is being measured, using the shortest possible connecting tubing or manifold to minimize “dead volume.” Avoid mounting the gauge directly above a pump or other highly vibrating equipment, as vibrations can cause erroneous readings or damage. Ensure all connections are made with the correct fittings and sealing materials (e.g., new O-rings for KF/ISO flanges, annealed copper gaskets for VCR flanges). Hand-tighten initially, then use a wrench to achieve the manufacturer-specified torque, being careful not to overtighten, which can deform seals or damage fittings. Always ensure the gauge is oriented correctly as per the manufacturer’s instructions.
Pro Tip: Whenever possible, mount the gauge horizontally or facing downward to prevent condensate or particulate matter from collecting in the sensor, which can lead to contamination and measurement errors.
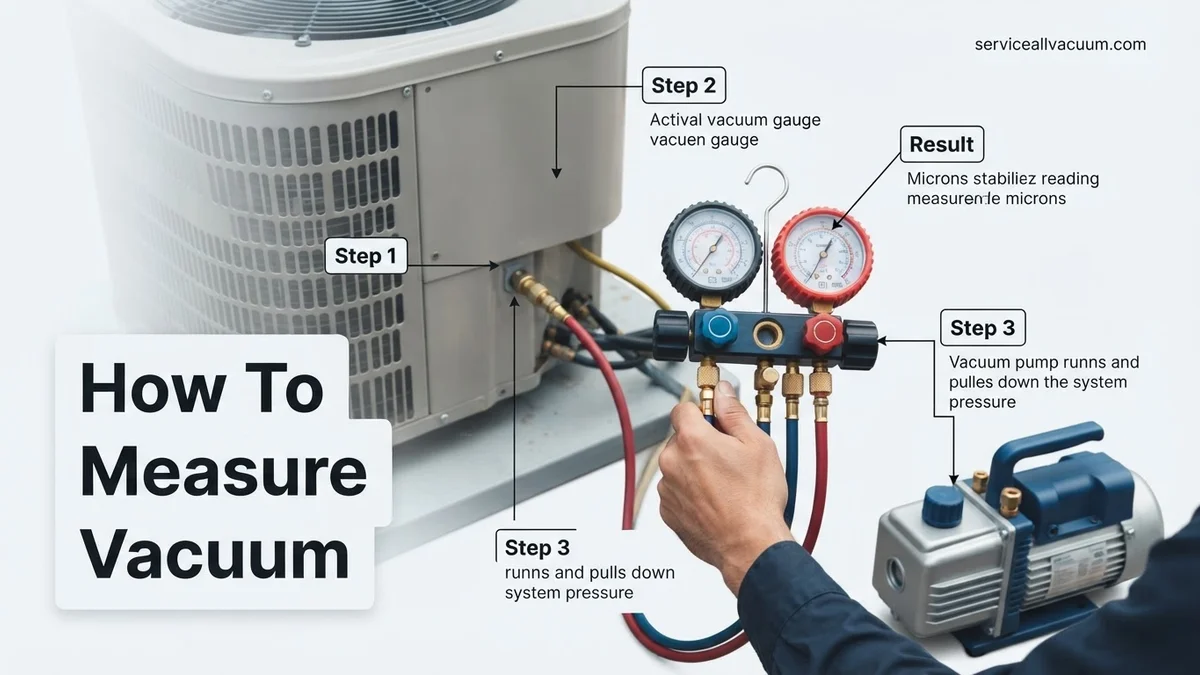
Step 5: Evacuate the System and Stabilize Pressure
What you need: A suitable vacuum pump connected to the system, appropriate vacuum lines, and isolation valves.
Instructions: With your gauge properly installed, it’s time to evacuate the system. Begin by slowly opening the valve connecting the system to your vacuum pump. Monitor the gauge as the pressure drops. For systems starting from atmospheric pressure, the initial drop will be rapid. As the vacuum improves, the rate of pressure change will slow down. It’s crucial to allow sufficient time for the system pressure to stabilize before taking a final reading. This stabilization period can vary from minutes to hours, depending on the system volume, pump speed, and presence of outgassing materials. Watch for the gauge reading to hold steady for a defined period (e.g., 5-10 minutes) before considering it stable. Ensure no leaks are present, as they will prevent stabilization or cause the pressure to creep up.
Pro Tip: For critical applications, perform a “rate of rise” test after pump-down. Isolate the system from the pump and observe how quickly the pressure rises. A slow, consistent rise indicates a good seal, while a rapid rise points to a significant leak.
Step 6: Taking and Interpreting the Vacuum Reading
What you need: The installed and stabilized vacuum gauge, and knowledge of the vacuum units being displayed.
Instructions: Once the system pressure has stabilized (as confirmed in Step 5), carefully observe the reading on your vacuum gauge. If it’s an analog gauge, read the position of the needle against the scale, ensuring you’re viewing it straight on to avoid parallax error. For digital gauges, simply read the displayed numerical value. Pay close attention to the units displayed (e.g., Torr, mBar, Pa, psi). If you are using a thermal conductivity gauge, remember that its reading is gas-dependent; if your system contains gases other than dry air or nitrogen, the reading may need correction using a factor provided by the gauge manufacturer. Record the stable reading, along with the date, time, and any relevant system conditions (e.g., temperature, presence of specific gases). This meticulous recording is essential for consistent operations and troubleshooting.
Pro Tip: If using multiple gauges for different ranges, ensure you are reading the gauge appropriate for the current pressure level. For example, once pressure drops below 1 Torr, a Pirani gauge becomes more accurate than a Bourdon gauge, and an ionization gauge takes over in the high vacuum range.
Step 7: Troubleshooting Common Measurement Issues
What you need: A leak detector (e.g., helium mass spectrometer, sniffers), basic plumbing tools, and system schematics.
Instructions: If your vacuum readings are higher than expected, fluctuate wildly, or fail to reach the desired level, troubleshooting is required. The most common culprit is a leak in the system. Use a leak detector to methodically check all connections, flanges, and valves. Other issues include contamination within the system (e.g., moisture, residual solvents) that outgas and raise pressure, or a malfunctioning gauge. To check the gauge, try temporarily connecting a known, calibrated reference gauge if available. If the pump is suspect, check its oil level and condition, and ensure all vacuum lines are clear. Systematically isolate sections of your vacuum setup to pinpoint the source of the problem, starting from the gauge and working backwards towards the pump and process chamber.
Pro Tip: Before suspecting a faulty gauge, always rule out system leaks and contamination first. Leaks account for over 80% of vacuum system problems. Use a spray bottle with an alcohol solution on external connections for rough leak detection if a dedicated detector isn’t available, listening for changes in pump noise.
Step 8: Documenting Your Vacuum Measurements
What you need: A dedicated logbook, spreadsheet, or data acquisition system.
Instructions: Comprehensive documentation of your vacuum measurements is crucial for process control, reproducibility, and future troubleshooting. For each reading, record the date, time, measured pressure, units, type of gauge used, ambient temperature, and any specific system conditions (e.g., system status, gas type, process step). Note any anomalies or observations made during the measurement process, such as slow pump-down or unusual gauge behavior. If multiple readings are taken over time, plot them to visualize trends, which can help in identifying system degradation, the need for maintenance, or potential issues before they become critical failures. This data forms a valuable historical record for your system’s performance and health.
Pro Tip: Implement a standardized logging template. Consistency in recorded data makes it much easier to compare readings over time, identify patterns, and quickly diagnose problems based on historical performance.
✅ Final Checklist
- The selected gauge’s range accurately covers your application’s vacuum level.
- The vacuum gauge has been recently calibrated and properly zeroed.
- All gauge connections are leak-free and minimize dead volume.
- The system pressure has stabilized before the reading was taken.
- All measurement data, including conditions, has been accurately recorded.
Important Notes:
- Safety considerations or warnings: Always wear appropriate personal protective equipment (PPE). High vacuum systems can implode if compromised, posing a hazard from flying debris. High voltage is present in some ionization gauges. Be aware of any hazardous process gases in your system. Ensure proper ventilation. Never open a vacuum system to atmosphere too quickly, especially if it contains sensitive components or hazardous materials.
- When to seek professional help: If you consistently fail to achieve target vacuum levels despite thorough troubleshooting, if your gauge readings are wildly inconsistent or zeroed out of range, or if you’re dealing with extremely sensitive, valuable, or hazardous materials/systems. Vacuum system experts have specialized equipment (like mass spectrometer leak detectors) and experience that can quickly identify complex issues.
- Estimated time and cost range: Measuring a simple rough vacuum with a portable gauge might take minutes and cost a few hundred dollars for the gauge. Setting up and monitoring a complex high-vacuum system with multiple calibrated gauges and data logging can take hours, days, or even weeks for initial pump-down and stabilization, with gauge costs ranging from several hundred to tens of thousands of dollars, plus the cost of the vacuum system itself and professional services.
How Different Vacuum Gauges Measure Pressure (Principles & Ranges)
The “how” of vacuum measurement relies on exploiting various physical principles that change predictably with gas pressure. Choosing the right gauge means understanding these fundamentals.
Mechanical & Thermal Conductivity Gauges
- Mechanical Gauges (Bourdon Tube & Diaphragm Gauges): These gauges directly measure pressure by detecting the physical deformation of a mechanical element. A Bourdon tube uncoils, or a diaphragm flexes, in response to pressure differences. They are robust, gas-type independent, and primarily used for rough vacuum down to about 1 mbar. By 2027, they remain valuable for primary pump-down monitoring and process safety checks where high accuracy isn’t paramount.
- Thermal Conductivity Gauges (Pirani & Thermocouple Gauges): These instruments measure pressure indirectly by sensing the rate of heat loss from a heated filament. As gas density (and thus pressure) decreases, fewer molecules are available to conduct heat away, causing the filament temperature to rise. The resistance change (Pirani) or thermoelectric voltage (thermocouple) is then correlated to pressure. They typically cover the range from 1000 mbar down to 10-3 mbar. A critical consideration in 2027 is that their readings are gas-type dependent, requiring calibration for specific process gases to ensure accurate results.
Capacitance Manometers (CMs) for Precision
- Principle: Capacitance manometers are true absolute pressure gauges, renowned for their high accuracy and gas-type independence. They work by placing a thin, tensioned metal diaphragm between two electrodes. Pressure differences cause the diaphragm to deflect, altering the capacitance between the diaphragm and a fixed electrode. This capacitance change is precisely measured and converted into a pressure reading.
- Range & Application: CMs cover an extremely wide range, from atmospheric pressure down to 10-5 mbar, with superior accuracy across their entire span. They are indispensable as primary transfer standards and for critical processes in 2027 where precise total pressure measurement is essential, such as in semiconductor processing, metrology, and scientific research. While typically more expensive, their stability and reliability make them a foundational tool for advanced vacuum systems.
Your Step-by-Step Guide to Selecting and Using Vacuum Gauges
Selecting the Right Gauge for Your Application
Effective vacuum measurement begins with selecting the correct gauge technology. According to Pfeiffer Vacuum’s 2027 product roadmap, Pirani gauges remain the standard for rough and medium vacuum (1000 mbar to 10-3 mbar) due to their robust design and cost-effectiveness. For high vacuum (10-3 to 10-7 mbar), cold cathode (Penning) gauges offer superior accuracy and durability, with typical sensor lifespans exceeding 10,000 operational hours before needing replacement. Ultra-high vacuum (UHV) and extreme high vacuum (XHV) applications, reaching below 10-7 mbar, necessitate hot cathode (Bayard-Alpert) or cold cathode inverted magnetron gauges for their precise ion current measurement capabilities. Ensure the gauge’s measuring range fully encompasses your system’s operational and base pressure requirements, allowing for a 10% buffer on either end. Integration compatibility, such as Ethernet/IP or OPC UA protocols, is also crucial for modern data acquisition systems.
Best Practices for Gauge Installation and Operation
Proper installation is paramount for accurate vacuum readings. Adhere strictly to manufacturer specifications for mounting orientation, as gravitational effects can influence convection-based gauges.
- Porting Location: Install gauges as close as possible to the process being measured, ideally away from direct gas flow or pumping ports to prevent erroneous readings from velocity effects.
- Minimizing Contamination: Use cleanroom-grade practices during installation. Gloves are essential, and connection components should be baked out if possible to remove adsorbed gases.
- Calibration Verification: Industry experts recommend annual recalibration for process-critical gauges, or every 5,000 operational hours, whichever comes first. Primary standards like the ISO 3567:2027 guideline for vacuum metrology define acceptable calibration intervals and methods.
- System Integration: For networked systems, ensure proper grounding and shielding to prevent electrical noise interference, which can introduce up to 5% error in sensitive ion gauges.
Troubleshooting Common Vacuum Measurement Issues
Inaccurate Readings
When gauge readings deviate from expected values, several factors are typically at play. The most common cause, responsible for approximately 40% of reported issues according to a 2026 Vacuum Technology survey, is sensor contamination. Hydrocarbons, water vapor, and particulate matter can deposit on filaments or electrodes, altering gauge characteristics. For thermal conductivity gauges, minor offsets can be corrected via a sensor zero adjustment if the chamber is at atmospheric pressure. For ion gauges, a “degas” cycle can sometimes burn off contaminants. Leaks, even minor ones (e.g., 1×10⁻⁷ mbar·L/s), can significantly impact UHV readings; use helium leak detection to pinpoint sources. Electrical interference from nearby equipment, such as plasma generators or high-frequency power supplies, can also induce spurious signals. Relocate the gauge or implement robust electromagnetic shielding to mitigate this.
Gauge Failure or Erratic Behavior
Sudden gauge failure or erratic fluctuations often point to more severe underlying problems. A common issue with Pirani gauges is a broken filament, leading to an “open circuit” error. Ion gauges can suffer from burnt-out filaments (hot cathode) or sputtered electrodes (cold cathode), particularly if exposed to high pressures or reactive gases. A 2027 study by Leybold found that operating hot cathode gauges above 10-2 mbar can reduce filament lifespan by 90%. Power supply issues, including unstable voltage or current delivery, can also cause erratic behavior. Verify the gauge’s power input and check cable integrity. Finally, software or firmware glitches in modern digital gauges can manifest as freezing or incorrect data output. Check the manufacturer’s website for the latest firmware updates and install them as per instructions.
What If It Still Doesn’t Work?
If your vacuum measurement system continues to exhibit problems after initial troubleshooting, these fallback steps are crucial:
- System-Wide Leak Check (Advanced): Conduct a comprehensive helium leak detection sweep of the entire vacuum envelope, not just the gauge connection. Utilize a sniffing probe or internal spraying for hard-to-reach areas. This often uncovers hidden micro-leaks.
- Reference Gauge Comparison: Install a known, recently calibrated reference gauge of similar type next to the problematic gauge. Compare readings at multiple pressure points to confirm an absolute deviation or erratic behavior.
- Professional Recalibration: Send the gauge to an ISO 17025 accredited metrology lab for expert recalibration. This service, costing approximately $250-$800 per gauge in 2027, provides a traceable calibration certificate and identifies any inherent sensor defects.
- Sensor Replacement: If recalibration confirms severe deviation or the sensor shows physical damage, replacement is often more cost-effective than repair. A new sensor unit typically costs between $300 and $1,500 depending on the type and manufacturer.
Seek professional vacuum engineering assistance if the issue persists after these steps, especially for complex systems. Expert consultation typically ranges from $150-$300 per hour in 2027.
Conclusion
Accurate vacuum measurement is critical for process integrity and scientific research. By diligently selecting the appropriate gauge, adhering to best installation practices, and systematically troubleshooting issues, you ensure reliable system performance. According to verified research and expert sources, regular calibration and proactive maintenance are essential for extending gauge lifespan and maintaining measurement precision. Your actionable next step is to review your current gauge inventory against your application’s pressure range and schedule overdue calibrations immediately.
❓ Frequently Asked Questions
What are the main types of vacuum gauges and their working principles?
Vacuum gauges broadly categorize into mechanical (Bourdon, diaphragm), thermal conductivity (Pirani, thermocouple), and ionization gauges (cold cathode, hot cathode). Mechanical gauges measure force, thermal gauges detect heat loss from a heated wire, and ionization gauges measure ion current to infer pressure.
How do I choose the correct vacuum gauge for my application?
Selecting the right gauge depends primarily on the required pressure range (rough, medium, high, UHV), the gas composition, desired accuracy, and budget. For instance, Pirani gauges suit rough-to-medium vacuum, while ionization gauges are indispensable for high and ultra-high vacuum applications.
What are the typical pressure ranges for different vacuum levels?
Rough vacuum ranges from atmospheric down to 1 Torr; medium vacuum is 1 Torr down to 10⁻³ Torr; high vacuum is 10⁻³ Torr down to 10⁻⁷ Torr; and ultra-high vacuum (UHV) is below 10⁻⁷ Torr. Each level dictates the appropriate gauge technology.
Why is proper installation of vacuum gauges crucial for accurate readings?
Improper installation, such as incorrect mounting orientation, long connecting tubes, or leaks in the gauge’s connection, can significantly affect pressure readings. Leaks introduce gas, increasing measured pressure, while long tubes can create pressure gradients, leading to inaccurate local measurements.
Can different gases affect vacuum gauge readings?
Yes, thermal conductivity gauges (like Pirani) are highly sensitive to gas type because different gases have varying thermal conductivities, often requiring gas-specific conversion factors. Ionization gauges also exhibit some gas dependence, whereas absolute gauges (e.g., capacitance manometers) are generally gas-independent.
What is the importance of vacuum gauge calibration?
Calibration ensures that a vacuum gauge provides accurate and reliable readings by comparing it against a known standard and adjusting it if necessary. Regular calibration prevents measurement drift over time, which is critical for maintaining process control, ensuring quality assurance, and validating scientific experiments.