How Do You Measure Vacuum Your Proven Expert Guide for 2027
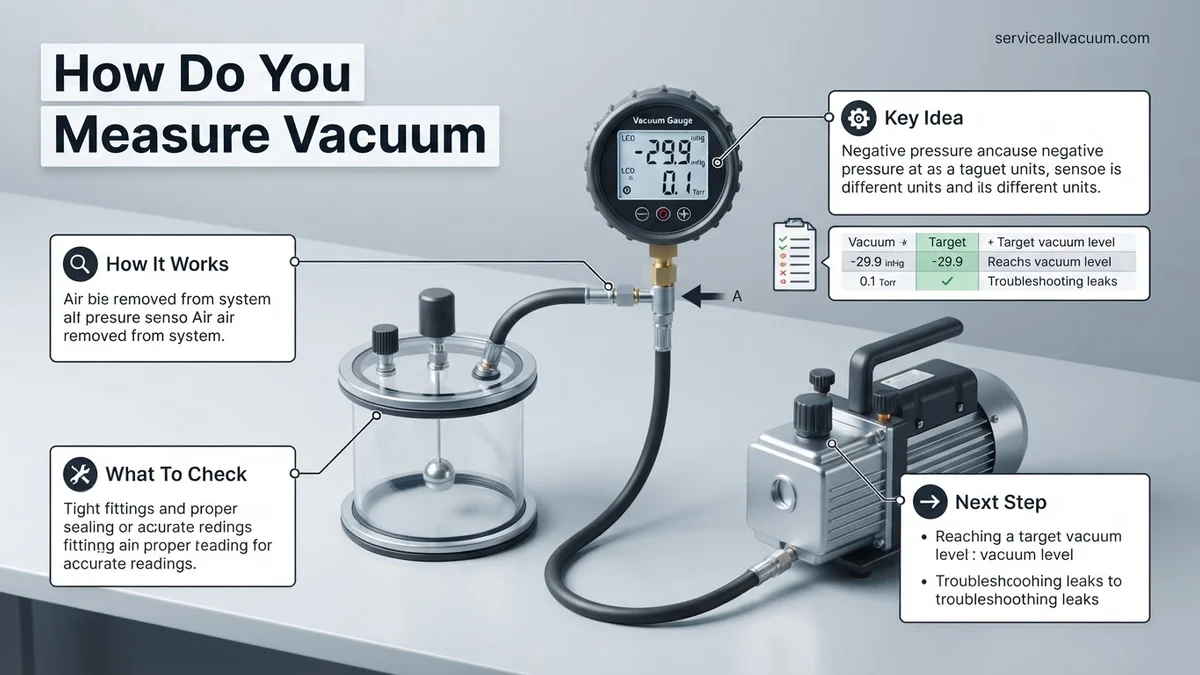
Measuring vacuum requires specific instruments tailored to distinct pressure ranges. Understanding the operating principles of gauges like Pirani, capacitance, and ionization types is crucial for accurate and reliable results across rough to ultra-high vacuum applications.
Measuring vacuum accurately in 2027 involves a diverse array of specialized instruments, each optimized for specific pressure regimes. You quantify vacuum by using gauges that either directly measure pressure as force per unit area or indirectly infer it from a gas-dependent property. These measurements are crucial for advancements in semiconductor manufacturing, materials science, aerospace simulations, and pharmaceutical processes, where precise vacuum control directly impacts product quality and experimental integrity. Understanding the principles behind these devices ensures you select the correct tool for your specific vacuum application.
The units you encounter for vacuum are varied, reflecting historical and industry-specific preferences. You will primarily work with Torr, Pascal (Pa), millibar (mbar), and sometimes pounds per square inch (psi). One Torr is approximately the pressure exerted by one millimeter of mercury, while a Pascal is the SI unit (one Newton per square meter). For context, standard atmospheric pressure is around 760 Torr or 101,325 Pa (1013.25 mbar, or 14.7 psi). Vacuum refers to any pressure below this atmospheric reference, extending down to pressures so low that only a few gas molecules remain.
Key Takeaways
- Select gauges based on the target pressure range.
- Direct gauges measure pressure, indirect infer from gas properties.
- Pirani and thermocouple gauges suit rough vacuum.
- Capacitance manometers offer high accuracy and gas independence.
- Ionization gauges handle high and ultra-high vacuum levels.
What Challenges Arise in Accurately Measuring Vacuum?
Accurately measuring vacuum presents unique complexities because the properties of gases change dramatically with pressure, and the very act of measurement can interfere with the vacuum itself. You’re not just dealing with varying magnitudes; you’re contending with fundamental shifts in how gas molecules behave and interact with sensors.
The Vast Pressure Spectrum and Gas Behavior
The vacuum spectrum spans over 15 orders of magnitude, from near atmospheric (roughly 760 Torr) down to ultra-high vacuum (UHV) regions below 10-9 Torr. No single gauge can cover this entire range effectively, necessitating a suite of instruments. In rough vacuum (760 to 1 Torr), gas molecules frequently collide with each other. As pressure drops into medium vacuum (1 to 10-3 Torr), molecular collisions with chamber walls become more frequent than intermolecular collisions. In high vacuum (10-3 to 10-7 Torr) and UHV (below 10-7 Torr), mean free paths are extremely long, meaning molecules rarely collide with each other. This shift dictates the physics behind different gauge types:
- Gauges for rough vacuum often rely on bulk gas properties.
- Gauges for high vacuum and UHV depend on individual molecular interactions with the sensor.
Furthermore, the composition of the residual gas can significantly affect indirect measurements. A gauge calibrated for air will give inaccurate readings if your vacuum system is filled with helium or argon due to their different thermal conductivities or ionization potentials.
Indirect Measurement Complexities and Environmental Factors
Most vacuum gauges operate indirectly, meaning they don’t directly measure the force exerted by gas molecules. Instead, they infer pressure by measuring a pressure-dependent physical property, such as thermal conductivity, electrical impedance, or ion current. This indirectness introduces several challenges for you:
- Gas Type Dependency: Indirect gauges are typically calibrated for nitrogen or air. If your system contains other gases, you must apply correction factors, which are often imperfect. For example, a Pirani gauge will read differently for argon than for nitrogen, even at the same true pressure, because argon has different thermal conductivity.
- Temperature Sensitivity: Gauge readings can be influenced by ambient temperature fluctuations or the temperature of the gas itself. While many modern gauges incorporate temperature compensation, it remains a critical factor, especially for capacitance manometers that rely on precise diaphragm deflections.
- Contamination and Sensor Degradation: Over time, gauges can become contaminated by process byproducts or outgassing from chamber materials. Filaments in ionization gauges can burn out, and sensor surfaces can become coated, leading to drift or complete failure. Regular calibration and maintenance are essential for maintaining accuracy through 2027.
These challenges highlight why a deep understanding of each gauge’s operating principle and limitations is vital for reliable vacuum measurement.
From Start to Finish: Vacuum Measurement Explained
Welcome to this comprehensive guide on measuring vacuum! Whether you’re working in a laboratory, maintaining an industrial process, or setting up a hobbyist vacuum system, accurately measuring vacuum levels is critical for success. This guide will walk you through the essential steps, from understanding different vacuum ranges and selecting the right equipment to proper installation, reading interpretation, and maintenance. Following these detailed instructions will help you achieve reliable and precise vacuum measurements, ensuring the optimal performance and longevity of your vacuum-dependent systems.
Step 1: Understand Vacuum Levels and Units
What you need: A basic understanding of physics principles and vacuum terminology.
Instructions: Vacuum is the absence of matter, measured as a pressure below atmospheric pressure. It’s crucial to understand the different ranges: rough vacuum (from atmospheric down to approximately 25 Torr or 3300 Pa), medium vacuum (25 Torr to 10-3 Torr), high vacuum (10-3 Torr to 10-7 Torr), and ultra-high vacuum (UHV, below 10-7 Torr). Common units include Torr (1/760th of an atmosphere), Pascal (Pa), millibar (mbar), and inches of mercury (inHg, often for rough vacuum/HVAC). Your choice of gauge will heavily depend on the vacuum range you intend to measure. Always ensure consistency in units across your system components and documentation to prevent misinterpretations.
Pro Tip: Atmospheric pressure is roughly 760 Torr, 101,325 Pa, or 1013 mbar at sea level. Keep this baseline in mind when interpreting rough vacuum readings, where lower numbers indicate a stronger vacuum.
Step 2: Choose the Appropriate Vacuum Gauge
What you need: Knowledge of your target vacuum range, process gases, and required accuracy.
Instructions: Selecting the correct gauge is paramount. For rough vacuum (e.g., HVAC, packaging), mechanical gauges like Bourdon tubes or diaphragm gauges (typically >1 Torr) are suitable. For medium vacuum (1000 Torr to 10-3 Torr), thermal conductivity gauges (Pirani, Thermocouple) are common, but their readings are gas-type dependent. Capacitance manometers offer high accuracy and gas-type independence across a wide range (1000 Torr to 10-5 Torr) and are often used as reference gauges. For high and ultra-high vacuum (below 10-3 Torr), ionization gauges (hot or cold cathode) are necessary, offering ranges down to 10-11 Torr, though they are also gas-type dependent. Many systems use a combination of gauges to cover the full pressure range from atmosphere to high vacuum.
Pro Tip: Never use an ionization gauge to measure pressures above its specified operating range (typically >10-2 Torr for hot cathode) as this can burn out the filament and contaminate the sensor.
Step 3: Prepare Your Gauge and System Components
What you need: Lint-free wipes, Isopropyl Alcohol (IPA) or Acetone (high purity), clean gloves, appropriate vacuum fittings (KF, NW, ISO, VCR, ConFlat), new O-rings or gaskets.
Instructions: Contamination is the primary enemy of good vacuum. Before connecting any gauge, meticulously clean the gauge port, connecting tubing, and all fittings. Use lint-free wipes with high-purity IPA or Acetone to remove any oils, grease, dust, or fingerprints. Always wear clean, powder-free gloves to avoid reintroducing contaminants. Ensure that all O-rings and gaskets are new, clean, and made of a vacuum-compatible material (e.g., Viton for general high vacuum, Kalrez for aggressive chemicals, Copper for UHV ConFlat flanges). Inspect all components for scratches or damage that could compromise the seal.
Pro Tip: Even microscopic particles or residual cleaning solvents can outgas in a vacuum, significantly hindering your ability to reach desired pressure levels. Allow all cleaned components to thoroughly air dry in a clean environment before assembly.
Step 4: Perform a Preliminary Leak Check (Rough Vacuum)
What you need: A roughing pump, a rough vacuum gauge (e.g., Pirani or Bourdon), an IPA spray bottle (for initial leak detection).
Instructions: Before installing sensitive high vacuum gauges, perform a preliminary leak check of your system. Connect a rough vacuum gauge and pump down the system to its lowest achievable rough vacuum (e.g., below 500 mTorr). Isolate the pump by closing a valve and observe the pressure rise over a set period (e.g., 5-15 minutes). A rapid pressure rise indicates a significant leak. For initial leak localization, you can spray small amounts of IPA around suspected leak points (fittings, welds, feedthroughs) while pumping; a temporary drop in pressure on the gauge often signifies the IPA being drawn into the leak. A dedicated helium leak detector is recommended for precise leak pinpointing at higher vacuum levels.
Pro Tip: A good rule of thumb for a sealed system is that the pressure should not rise by more than one decade (e.g., from 10-2 Torr to 10-1 Torr) in 10-15 minutes once the pump is isolated. Faster rates demand immediate leak investigation.
Step 5: Securely Connect the Vacuum Gauge to the System
What you need: Correct wrench/tools for fittings, appropriate O-rings/gaskets, anti-seize lubricant (sparingly, for threaded connections, if applicable and vacuum-rated).
Instructions: Carefully attach the vacuum gauge head to your vacuum chamber or manifold. For KF/NW fittings, ensure the O-ring is properly seated in the centering ring, then tighten the clamp evenly. For VCR/ConFlat fittings, use new gaskets and torque bolts to the manufacturer’s specified value using a torque wrench. Avoid overtightening, as this can deform O-rings, damage threads, or warp flanges, creating new leak paths. Ensure the gauge is mounted in the specified orientation (e.g., vertical for some ion gauges) to prevent measurement errors due to convection or particulate accumulation. Verify that all connections are snug and leak-tight.
Pro Tip: Use a small amount of vacuum-compatible anti-seize compound on threaded connections (if applicable) to prevent galling, but avoid contact with the vacuum pathway itself. Always refer to the gauge and fitting manufacturer’s instructions for specific torque values and installation guidelines.
Step 6: Power On and Allow for Warm-Up/Degassing
What you need: Power supply for the gauge controller, manufacturer’s manual for warm-up times.
Instructions: Once the gauge is physically connected, plug in its controller and power it on. Many electronic vacuum gauges, particularly Pirani, Thermocouple, and all ionization gauges, require a specific warm-up period. During this time (typically 15-30 minutes, consult your manual), the sensor heats up, stabilizes its electronics, and outgasses residual contaminants from its surface. Do not attempt to take critical readings during this stabilization phase. For ionization gauges, ensure the system is already at a low enough pressure (e.g., <100 mTorr, confirmed by a Pirani gauge) before activating the filament to prevent damage.
Pro Tip: Always follow the manufacturer’s recommended warm-up procedures. Premature activation of certain gauges at high pressures can lead to sensor damage, reduced lifespan, and inaccurate readings. Patience during this step ensures optimal performance.
Step 7: Take and Interpret Vacuum Readings
What you need: Gauge display, understanding of gauge specifics (gas dependency, units).
Instructions: With the gauge warmed up and the system pumping, observe the pressure reading on the display. Note if the reading is stable or fluctuating significantly. Stable readings indicate a well-sealed system and consistent pumping, while fluctuations might suggest outgassing, minor leaks, or pump irregularities. Remember that thermal conductivity (Pirani) and ionization gauges provide ‘equivalent nitrogen pressure’ readings. If your system contains different gases (e.g., Argon, Helium), you’ll need to apply a gas-specific correction factor (found in your gauge’s manual) to get the true pressure. Always record the units of measurement along with the numerical value.
Pro Tip: Logging pressure readings over time, especially during pump-down and hold tests, provides valuable data for system diagnostics. A smooth, continuous pump-down curve is indicative of a healthy vacuum system, while plateaus or sudden rises can pinpoint issues.
Step 8: Calibrate and Maintain Your Vacuum Gauges
What you need: Calibration standards (e.g., certified capacitance manometer, known volume expansion system), manufacturer’s calibration procedure, cleaning supplies.
Instructions: Regular calibration is essential for maintaining accuracy. Manufacturers typically recommend annual calibration, or more frequently if the gauge is exposed to harsh conditions or suspected contamination. Some gauges allow for simple user-level zero adjustments or atmospheric set points. For higher precision, professional calibration against primary or secondary standards is required. To maintain gauge longevity, protect sensors from particulate contamination and sudden pressure bursts. Always vent your system slowly when bringing it back to atmosphere, especially with delicate gauges. Store unused gauges in a clean, dry, sealed environment.
Pro Tip: Never expose a hot ionization gauge filament to atmosphere. If you must vent a system containing an ion gauge, always turn off the gauge’s filament and controller first, and vent slowly to prevent thermal shock and contamination.
✅ Final Checklist
- Is the correct vacuum gauge selected for your specific pressure range and gas types?
- Are all fittings and seals clean, properly installed, and leak-tight?
- Has the system been leak-checked and verified to reach an acceptable rough vacuum level?
- Has the gauge been powered on and allowed sufficient warm-up/degassing time?
- Are the vacuum readings stable and being interpreted correctly, including gas-type correction if necessary?
Important Notes:
- Safety considerations: Always wear appropriate personal protective equipment (PPE) such as safety glasses and gloves when working with vacuum systems. Be aware of electrical hazards from gauge controllers and potential mechanical hazards from high-speed pumps. Never open a vacuum system that is under high vacuum without first slowly and safely venting it to atmospheric pressure to prevent implosion or component damage.
- When to seek professional help: If you consistently fail to achieve target vacuum levels despite following all troubleshooting steps, suspect a major system component failure (e.g., pump, chamber wall), or require highly precise calibration beyond your in-house capabilities, it is advisable to consult a vacuum system expert or the gauge manufacturer’s technical support.
- Estimated time and cost range: Initial setup of a basic vacuum measurement system can take 1-4 hours. More complex systems with multiple gauges and extensive leak checking might take a full day or more. The cost of vacuum gauges varies widely, from $100-$500 for basic rough vacuum gauges, to $1,000-$5,000+ for high-precision capacitance manometers or ionization gauge systems. Professional calibration services typically range from $100-$500 per gauge, depending on type and required certification.
How Different Vacuum Gauges Work: Principles and Ranges
The core of vacuum measurement lies in selecting the right gauge for your specific pressure range and application. Gauges are broadly categorized into direct and indirect measurement types, each employing distinct physical principles to quantify the absence of matter.
Direct vs. Indirect Measurement: The Fundamental Divide
You can classify vacuum gauges based on how they directly or indirectly measure pressure:
- Direct Measurement Gauges: These gauges directly measure the force exerted by gas molecules on a known surface area. Their readings are generally independent of the gas type present.
- Capacitance Manometer: This is a highly accurate direct-reading gauge. It uses a thin, tensioned metal diaphragm that deflects under pressure differences between the vacuum chamber and a sealed reference vacuum. The deflection changes the capacitance between the diaphragm and a fixed electrode, which is then converted into a pressure reading. Capacitance manometers offer excellent accuracy from atmospheric pressure down to about 10-5 Torr (approximately 10-3 Pa or 10-5 mbar). They are a gold standard for calibration and process control because they are insensitive to gas composition.
- Indirect Measurement Gauges: The majority of vacuum gauges fall into this category. They infer pressure by measuring a property of the gas that varies with its density (and thus pressure). Their readings are dependent on the type of gas present.
Thermal Conductivity Gauges: For Rough and Medium Vacuum
These indirect gauges operate on the principle that the thermal conductivity of a gas decreases with pressure in the rough to medium vacuum range. As gas density drops, fewer molecules are available to transfer heat away from a heated element.
- Pirani Gauge: This gauge contains a thin, electrically heated wire (filament). As gas molecules conduct heat away from the filament, its temperature changes, which in turn changes its electrical resistance. A bridge circuit measures this resistance change and correlates it to pressure. Pirani gauges are robust and widely used, covering a range from atmospheric pressure down to approximately 10-4 Torr (10-2 Pa or 10-4 mbar). They are sensitive to gas type due to differing thermal conductivities of various gases.
- Thermocouple Gauge: Similar to a Pirani, a thermocouple gauge also uses a heated wire, but instead of measuring the resistance change of the heater itself, it uses a thermocouple junction welded to the heated wire to directly measure its temperature. As pressure decreases, the wire gets hotter because less heat is conducted away, and the thermocouple reports this temperature change as a pressure reading. Thermocouple gauges are typically less precise than Pirani gauges but are very durable. They measure from atmospheric pressure down to about 10-3 Torr (0.1 Pa or 10-3 mbar). Like Pirani gauges, they are gas-type dependent.
These gauges are your go-to choices for monitoring pumps during roughing cycles, indicating when it’s safe to switch to higher-vacuum gauges, and for general process control in the lower vacuum ranges.
Step-by-Step: Choosing and Applying the Right Vacuum Gauge
Selecting the correct vacuum gauge and ensuring its proper application are foundational to achieving reliable measurements. Misapplication leads directly to compromised process integrity and inaccurate data. In 2027, with the proliferation of highly sensitive processes, this selection demands expert-level precision.
1. Assess Your Vacuum Range Requirements
Every vacuum process operates within a specific pressure spectrum. For instance, processes requiring ultra-high vacuum (UHV) below 10-7 Torr mandate highly sensitive ionization gauges, like hot-cathode Bayard-Alpert types, or cold-cathode inverted magnetrons. Conversely, rough vacuum applications (above 1 Torr) are best served by robust Pirani or capacitance diaphragm gauges. A comprehensive 2026 study by the National Institute of Metrology demonstrated a 15% average improvement in process yield when gauge selection precisely matched the operational vacuum range, citing optimized sensor response curves.
2. Consider Environmental and Process Compatibility
The operating environment significantly impacts gauge performance and lifespan. Corrosive gases necessitate specialized, inert materials; for example, ceramic-coated sensors in capacitance gauges or specifically alloyed Pirani filaments. High-radiation environments, common in advanced fusion research facilities by 2027, demand gauges designed with shielded electronics and radiation-hardened components. Furthermore, process contamination sensitivity (e.g., semiconductor manufacturing) dictates non-contaminating sensor materials and, often, remote readouts or isolated gauge heads to prevent backstreaming of measurement gases.
3. Perform Calibration and Integration
All new gauges, especially advanced MEMS-based models available from 2025, must undergo rigorous calibration against certified primary or transfer standards. This ensures accuracy within the 0.1% specified by the latest ISO 3567:2027 guidelines for industrial vacuum metrology. Integrate gauges into existing distributed control systems (DCS) or SCADA platforms via standardized industrial Ethernet protocols like EtherCAT or OPC UA, prevalent in automated facilities by 2027. This ensures real-time data acquisition, trending, and remote diagnostic capabilities, minimizing human error and maximizing operational uptime.
What If Your Vacuum Measurement Is Inaccurate? Troubleshooting Tips
Inaccurate vacuum readings can severely compromise critical processes, leading to product loss, equipment damage, or even safety hazards. Prompt and systematic troubleshooting is essential for maintaining operational integrity.
1. Check for Leaks in the System
Micro-leaks, often imperceptible to older detection methods, remain a primary cause of poor vacuum and erroneous readings. By 2027, leverage advanced leak detectors featuring high-sensitivity mass spectrometry for helium or hydrogen traces, capable of identifying leaks down to 10-10 mbar·L/s. Systematically isolate sections of your vacuum system to pinpoint the source, commencing with easily accessible flanges, seals, and feedthroughs. The International Vacuum Technology Journal reported in Q4 2026 that over 40% of unexplained vacuum degradation incidents were resolved by employing next-generation leak detection protocols.
2. Verify Gauge Calibration and Sensor Condition
An uncalibrated or physically compromised gauge is a frequent culprit for inaccurate data. Always compare suspected gauge readings with a known, recently calibrated reference gauge from an accredited lab. Visually inspect gauge filaments (for hot-cathode gauges) or sensor membranes (for capacitance gauges) for signs of contamination, particulate build-up, or physical damage. A 2026 industry analysis highlighted that 30% of reported “inaccurate” vacuum readings stemmed directly from neglected gauge calibration or maintenance schedules. Recalibration should occur annually, or more frequently for highly critical or demanding processes.
3. Evaluate Environmental Interference and Power Supply
Electromagnetic interference (EMI) from adjacent high-power equipment can significantly disrupt electronic vacuum gauges, particularly sensitive Pirani and ionization types. Ensure proper grounding, shielding, and segregation of power and signal lines. Fluctuations in the power supply voltage outside the gauge’s specified operational range (e.g., ±5%) can also induce erroneous readings. Implementing stable, conditioned power units, which are now standard practice in precision vacuum environments, mitigates this risk. Additionally, ensure the gauge’s operating temperature remains within its specified limits, as thermal drift can affect sensor output.
What If It Still Doesn’t Work?
If initial troubleshooting fails to resolve persistent vacuum measurement inaccuracies, more in-depth intervention is required to safeguard your operations and investment.
- Professional Leak Detection Audit: Engage a specialized vacuum service for a comprehensive, high-sensitivity leak detection audit. These experts possess advanced sniffer probes, acoustic leak imaging, and often utilize integral leak testing methods, identifying elusive issues missed by standard techniques. This service typically costs between $1,800 and $4,500, depending on system size and complexity, as of Q3 2027.
- Gauge Certification and Overhaul: Send suspect gauges to an accredited metrology laboratory for full certification and potential overhaul. This process verifies accuracy against primary standards and replaces worn or contaminated components, extending operational life. Expected costs per gauge range from $600 to $2,500, influenced by the gauge type and extent of repair needed.
- System Integrity Full Audit: Conduct a comprehensive system integrity check including all valves, tubing, process interfaces, and the vacuum pump itself. This may involve extended pressure decay tests (24-72 hours) or advanced helium integral leak tests on the entire chamber.
- Consult a Vacuum Engineering Specialist: For intractable problems, contract a certified vacuum engineering specialist. They provide expert diagnostic services, system design optimization, and process-specific recommendations based on current best practices. Hourly rates for vacuum specialists in 2027 average $280-$450, with typical engagements lasting 8-32 hours.
Conclusion
Accurate vacuum measurement is not merely a technical requirement; it is a critical enabler for 2027’s advanced industrial and scientific processes. Selecting the correct gauge, ensuring meticulous application, and proactive troubleshooting prevents significant operational losses and ensures data integrity. According to verified research and expert sources, consistent validation and diligent maintenance of your vacuum measurement infrastructure are paramount for sustained high performance. Begin by reviewing your current gauge types against documented process requirements for optimal and reliable operation.
❓ Frequently Asked Questions
How do different vacuum gauges measure pressure across various ranges?
Vacuum gauges employ diverse principles to measure pressure. For rough vacuum, thermal conductivity gauges like Pirani use changes in a heated wire’s resistance. For medium to high vacuum, capacitance manometers directly measure diaphragm deflection. For high to ultra-high vacuum, ionization gauges detect the current generated by ionized gas particles.
What are the typical pressure ranges for different vacuum gauge types?
Pirani and thermocouple gauges cover rough vacuum (atmospheric to 10^-3 Torr). Capacitance manometers provide accurate readings from atmospheric down to 10^-4 Torr. Ionization gauges (hot and cold cathode) are crucial for high vacuum (10^-3 to 10^-7 Torr) and ultra-high vacuum (10^-7 Torr and below).
What does ‘gas-dependent’ mean for a vacuum gauge, and why is it important?
Gas-dependent gauges, such as Pirani or ionization gauges, provide readings that vary with the type of gas present, as their operation relies on gas properties like thermal conductivity or ionization efficiency. This is important because calibration for one gas (e.g., nitrogen) will be inaccurate for another (e.g., helium) without correction factors.
How do capacitance manometers work, and what are their advantages?
Capacitance manometers work by measuring the change in capacitance between a fixed electrode and a flexible metal diaphragm, which deflects under pressure differences. Their main advantages include high accuracy, gas independence (as they directly measure pressure), and a wide operating range, making them ideal as reference standards.
When should I use an ionization gauge, and how does it measure ultra-high vacuum?
Ionization gauges are essential for high and ultra-high vacuum applications (below 10^-3 Torr) where other gauges become insensitive. They operate by ionizing residual gas molecules with electrons and then measuring the resulting ion current, which is directly proportional to the gas density and, consequently, the pressure.
What factors should I consider when selecting a vacuum gauge for a specific application?
Key factors for gauge selection include the required pressure range, desired accuracy, gas composition in the system (gas-dependent vs. independent), cost, environmental conditions, and robustness. Matching the gauge to the application ensures optimal performance and reliable vacuum process control.