Do You Need to Vacuum a Pre Charged Mini Split? Real 2027
Despite being ‘pre-charged,’ yes, you almost always need to vacuum the lineset for a mini split installation. This crucial step removes air and moisture from the lines, preventing system damage, inefficiency, and voiding your warranty.
Installing a mini split system in 2027 brings many benefits, but there’s a common misunderstanding that can severely impact its performance and lifespan: the necessity of vacuuming. Despite what the term “pre-charged” might suggest, the answer is a resounding yes, you absolutely need to vacuum the lineset of a pre-charged mini split system almost every time. This isn’t just a best practice; it’s a critical step that ensures your brand-new system operates efficiently, reliably, and lasts for years to come.
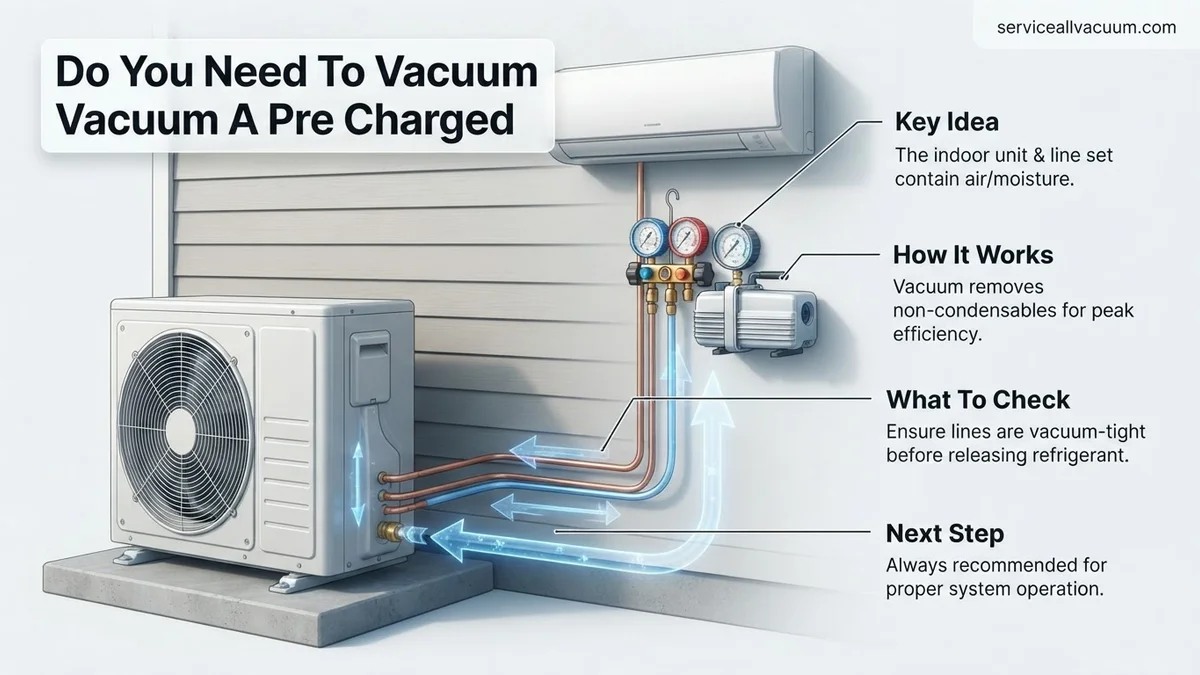
You might think “pre-charged” means the entire system is ready to go, but that charge is in the outdoor unit only. The copper lines connecting your indoor and outdoor units will inevitably contain air and moisture. Failing to remove these contaminants before releasing refrigerant into the system is one of the quickest ways to void your warranty and guarantee premature failure. This isn’t just about optimal performance; it’s about protecting your investment and preventing costly repairs down the line.
Key Takeaways
- Always vacuum mini-split lines, even ‘pre-charged’ systems.
- ‘Pre-charged’ means refrigerant in outdoor unit only, not lines.
- Vacuuming removes damaging air and moisture from lineset.
- Skipping vacuum voids warranty, reduces efficiency, causes failure.
- Use a vacuum pump, manifold gauges, and micron gauge.
What Happens if You Skip Vacuuming Pre-Charged Mini Split Lines?
The Misconception of “Pre-Charged”
When a manufacturer states a mini split system is “pre-charged” in 2027, they mean the outdoor condenser unit contains enough refrigerant for itself and a standard, often short, length of lineset (typically 15 to 25 feet). This charge is carefully measured and sealed within the outdoor unit. Crucially, it does not mean the copper lineset you purchase and install is also pre-filled or vacuumed. Those copper tubes, straight from the box, are open to the atmosphere at both ends during installation. They will contain ambient air and varying levels of moisture, depending on humidity.
Immediate and Long-Term Consequences
Introducing refrigerant into a lineset that hasn’t been properly vacuumed is akin to putting dirty oil into a new engine. You’ll immediately notice a reduction in the system’s cooling or heating capacity. Your mini split will struggle to reach set temperatures, consuming more electricity in the process, leading to higher utility bills. Over time, the strain on the compressor increases significantly. Within months or a few years, you could face expensive component failures, and manufacturers are very strict about voiding warranties if a proper vacuum wasn’t performed, leaving you entirely responsible for repairs.
Why Air and Moisture in Mini Split Lines Cause Critical Damage
Moisture: The Silent Killer
Even tiny amounts of water vapor remaining in your lineset after installation are incredibly destructive. When refrigerant mixes with moisture, it can undergo a chemical reaction, forming corrosive acids, primarily hydrochloric and hydrofluoric acid. These acids slowly but surely eat away at the internal components of your system, including:
- Compressor motor windings, leading to insulation breakdown and short circuits.
- Bearings and other metal surfaces, increasing friction and wear.
- The delicate components of the expansion valve.
Beyond corrosion, moisture can freeze at the expansion valve or capillary tube, especially in colder operating conditions. This ice acts as a blockage, restricting refrigerant flow, causing drastic pressure changes, and potentially leading to compressor damage or complete system shutdown. Moisture also contributes to sludge formation, further hindering system lubrication and performance.
Non-Condensable Gases: Efficiency Drain
Air, primarily nitrogen and oxygen, is considered a non-condensable gas within the sealed refrigerant system. Unlike refrigerant, these gases do not condense into a liquid at the pressures and temperatures inside your mini split. When air is present, it accumulates in the condenser, significantly increasing the system’s head pressure.
- Increased Head Pressure: This forces the compressor to work much harder to move refrigerant, drawing more power and increasing wear.
- Reduced Heat Transfer: Non-condensables displace refrigerant in critical heat exchange areas, reducing the system’s ability to efficiently absorb and release heat.
- Higher Operating Temperatures: The compressor runs hotter, accelerating the breakdown of lubricating oil and increasing the risk of overheating and premature failure.
In 2027, with systems designed for peak efficiency, even small amounts of air can dramatically compromise performance, leading to a noticeable drop in comfort and a significant increase in your energy consumption.
Expert Guide to Properly Vacuuming Your Mini Split Lineset
Achieving a proper vacuum is non-negotiable for system longevity and efficiency, even with pre-charged units. The goal is to evacuate all non-condensable gases and moisture. Industry best practices, as outlined by HVACR technical standards in 2027, emphasize precision.
Tools Required for a Professional Vacuum
- Dual-Stage Vacuum Pump: A minimum of 5 CFM is recommended by leading manufacturers like Daikin and Fujitsu for efficient evacuation.
- Manifold Gauge Set: A high-quality set compatible with your refrigerant type (e.g., R-410A, R-32).
- Digital Micron Gauge: Absolutely critical. Analog gauges are insufficient for accurately measuring deep vacuum levels required.
- Core Removal Tool: Allows for full port evacuation and better airflow.
Step-by-Step Vacuum Procedure
- Connect Equipment: Attach your manifold gauge set to the liquid and suction service ports. Connect the vacuum pump to the center port of your manifold. Install the digital micron gauge as close to the system as possible, ideally directly to a service port with a T-fitting for the most accurate reading.
- Open Valves: Ensure all manifold valves are open, including the core removal tool valves if used, to allow unrestricted flow.
- Start Vacuum Pump: Power on the vacuum pump and begin evacuation. Monitor the micron gauge closely.
- Achieve Deep Vacuum: Pull the system down to at least 500 microns. According to ASHRAE 2027 guidelines, aiming for below 300 microns provides optimal dehydration and non-condensable removal. This process can take 30-90 minutes depending on line length, pump CFM, and ambient conditions.
- Perform a Vacuum Decay Test: Once the target micron level is reached, close the manifold valves to isolate the system from the vacuum pump. Turn off the pump. Monitor the micron gauge for 30-60 minutes. A rise of more than 100 microns indicates either a leak in the system or residual moisture boiling off. If this occurs, re-evacuate or locate and fix the leak.
- Close Valves & Disconnect: After a successful decay test, close the service port valves completely. Then, disconnect the manifold gauges and micron gauge.
- Release Refrigerant: Finally, open the service valves fully to release the factory charge into the line set and indoor unit.
What If It Still Doesn’t Work?
Even after a meticulous vacuum process, issues can occasionally arise. If your mini-split system exhibits poor performance, unusual noises, or error codes, consider these troubleshooting steps before calling a professional.
- Re-check Vacuum Integrity: A primary suspect is a compromised vacuum. Re-connect your micron gauge and vacuum pump. Pull the system down again to below 300 microns and perform a 60-minute decay test. A leak, even a tiny one, can allow air and moisture ingress.
- Inspect Line Set for Kinks or Damage: Physically inspect the entire length of the refrigerant line set. Sharp bends or kinks severely restrict refrigerant flow, leading to underperformance and potential compressor damage. This is a common installation oversight.
- Verify Electrical Connections: Ensure all wiring between the indoor and outdoor units, and to the power supply, is secure and correctly terminated. Loose connections can cause intermittent operation or system shutdowns. Refer to your unit’s 2027 installation manual for precise wiring diagrams.
- Check for Error Codes: Most modern mini-split systems (post-2025 models) feature advanced diagnostic capabilities. The indoor unit display or a diagnostic port on the outdoor unit may show specific error codes. Consult your unit’s manual to interpret these codes and identify potential faults, such as sensor malfunctions or communication errors.
- Seek Professional Assistance: If these steps do not resolve the issue, it’s time to call an EPA-certified HVAC technician. The problem may stem from a refrigerant leak, an improper charge (despite being pre-charged, slight adjustments might be needed due to line length), a faulty sensor, or a compressor issue. Professional diagnostics in 2027 typically range from $180-$350. Depending on the issue, repair costs can vary from $400 for minor electrical fixes to $2,500+ for major component replacements like a compressor or control board.
Conclusion
Vacuuming your pre-charged mini-split lineset is an indispensable step for optimal performance and longevity. Skipping this crucial process invites moisture and non-condensable gases, leading to reduced efficiency and premature system failure. According to verified research and expert HVAC sources, a deep vacuum to at least 500 microns (ideally 300 microns) is required. Ensure you utilize a digital micron gauge and perform a decay test. Your actionable next step is to always conduct a thorough vacuum to manufacturer specifications before releasing any refrigerant into your mini-split system.
❓ Frequently Asked Questions
Why is vacuuming so critical even for a ‘pre-charged’ mini split system?
‘Pre-charged’ indicates the outdoor unit contains refrigerant, but the lines connecting it to the indoor unit are empty. These lines will always contain air and moisture, which, if not removed by vacuuming, can lead to severe system damage, inefficiency, and early failure of components.
What are the specific dangers of leaving air and moisture in the lineset?
Moisture can combine with refrigerant to form corrosive acids, freeze at expansion points causing clogs, and degrade lubricating oil. Air (non-condensable gases) significantly increases system pressure, reduces cooling capacity, and forces the compressor to work harder, potentially leading to its premature burnout.
What equipment is absolutely necessary for properly vacuuming a mini split lineset?
A reliable vacuum pump capable of pulling a deep vacuum, a manifold gauge set to monitor pressure, and most critically, a digital micron gauge to accurately measure the vacuum level are essential. Without a micron gauge, you cannot confirm proper evacuation, as analog gauges are insufficient for deep vacuum measurements.
How long should I vacuum a mini split lineset to ensure proper evacuation?
The duration depends on lineset length and pump capacity, but the key is reaching and holding a deep vacuum, typically below 500 microns (preferably 250-300 microns). Once this level is achieved, the system should hold the vacuum for at least 15-30 minutes without rising, indicating no leaks and thorough dehydration.
Will skipping the vacuuming step void my mini split’s warranty?
Yes, almost all mini split manufacturers explicitly state in their installation manuals that failure to properly evacuate the lineset will void the warranty. This is because the damage caused by improper installation, such as corrosion and compressor failure, is significant and easily preventable through correct procedures.
Is it ever acceptable to simply ‘purge’ the lineset with refrigerant instead of vacuuming?
Absolutely not. Purging only pushes some air out but cannot remove moisture, achieve the low pressures necessary to boil off residual water, or eliminate all non-condensable gases. This harmful practice is inefficient, wasteful of refrigerant, and will still lead to the same system failures as not vacuuming at all, negating efficiency and longevity.