How Much Is Central Vacuum System How Much is a 2027
Installing a central vacuum system in 2027 typically ranges from $1,500 to $4,000+, covering both the power unit and professional installation. Prices vary significantly based on home size, system features, and installation complexity, especially between new and existing homes.
How Much Is Central Vacuum System How Much is a 2027
Investing in a central vacuum system in 2027 means budgeting for a total cost typically ranging from $1,800 to $5,500, though more elaborate setups can easily push past $7,000. This includes both the hardware and professional installation. Knowing this upfront range helps you set realistic expectations for your home’s upgrade. Your final expenditure will largely depend on your home’s size, the system’s power, and the complexity of the installation process.
Understanding these costs is crucial for making an informed decision about integrating a central vacuum into your home. It’s not just about the sticker price of the unit; installation labor, accessory choices, and even the type of filtration significantly impact the bottom line. Let’s break down what you can expect to pay and the factors driving these numbers.
Key Takeaways
- Total costs vary widely; budget $1,500-$4,000+ for unit and install.
- Installation in existing homes is significantly more expensive.
- Power unit features, filtration type impact system price.
- Get multiple on-site quotes for accurate pricing tailored to your home.
- Consider long-term benefits beyond initial investment costs.
What Drives Central Vacuum System Costs?
Your central vacuum system investment in 2027 primarily splits into two categories: the equipment itself and the professional installation services. Each component has its own set of variables affecting the price. Getting a clear picture of these elements helps you tailor a system to your needs and budget.
Overall System & Installation Cost Ranges (2027)
Here’s a snapshot of typical price ranges you’ll encounter:
- Entry-Level Systems (Smaller Homes, Basic Features): Expect to pay around $1,800 – $3,000. This often includes a standard power unit, a basic hose kit, a few inlets, and straightforward installation.
- Mid-Range Systems (Average Homes, Enhanced Features): Budgets of $3,000 – $5,500 are common here. This tier typically offers a more powerful motor, better filtration, a full accessory package (including a powered brush head), and more inlets.
- Premium Systems (Larger Homes, Advanced Features): For expansive homes or those desiring top-tier performance and extensive automation, costs can range from $5,500 to $7,000+. This includes high-performance power units, advanced filtration, comprehensive accessory kits, and potentially specialized inlet systems like automatic dustpans.
These figures represent a total, installed price. Separating them helps in understanding where your money goes. The power unit and accessories generally account for 40-60% of the total cost, while installation services make up the remaining 40-60%.
Why the Price Tag Varies
The sheer variability in pricing stems from several key decisions you’ll make. Factors like the desired suction power, the number of cleaning zones (inlets) in your home, and the specific attachments you need for different cleaning tasks all play significant roles. Additionally, the type of home you have—new construction versus an existing, finished dwelling—profoundly affects labor costs. Each choice adds layers to the complexity and ultimately, the final cost of your central vacuum system.
From Start to Finish: Central Vacuum System Costs Explained
Embarking on the journey of installing a central vacuum system can feel overwhelming, especially when trying to understand the financial commitment involved. This comprehensive guide will meticulously break down every factor that influences the total cost of a central vacuum system, from the core components to installation and ongoing maintenance. By following these practical steps, you’ll gain a clear understanding of the investment required, enabling you to make informed decisions and budget effectively for a cleaner, more efficient home. Let’s demystify the pricing and help you navigate this significant home improvement.
Step 1: Understand the Core Components & Their Cost Ranges
What you need: A basic understanding of central vacuum system parts, pen and paper for notes, internet access for initial price checks.
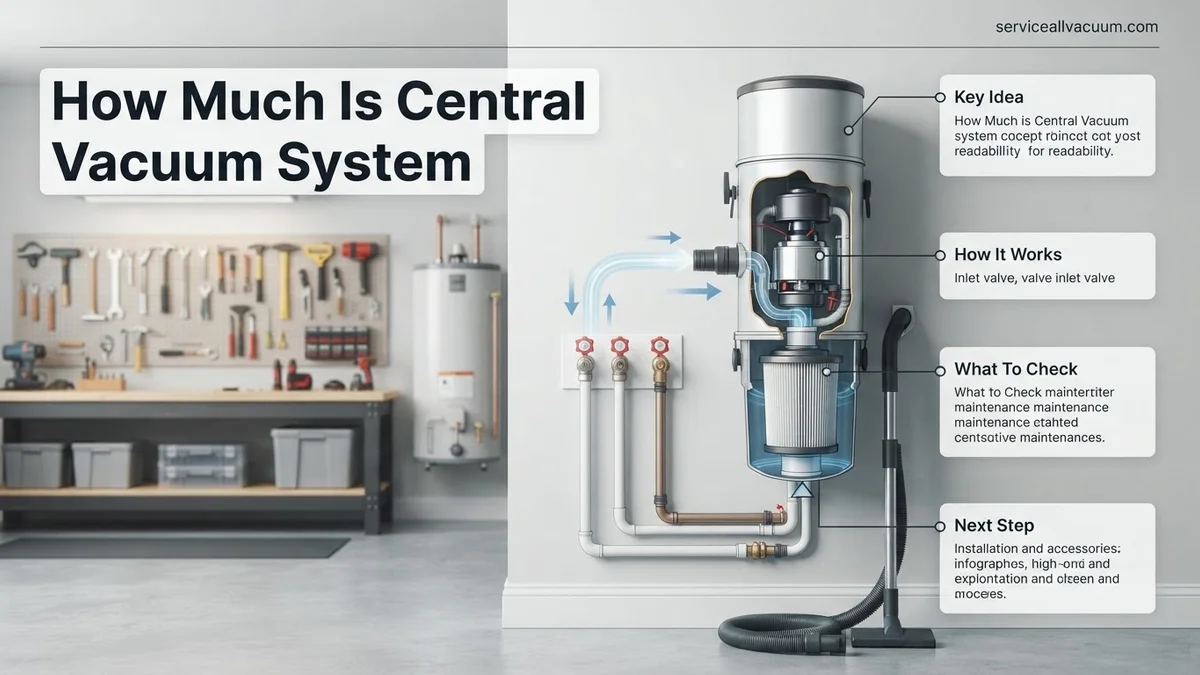
Instructions: Before diving into specific pricing, familiarize yourself with the main elements: the power unit (the motor and collection canister), the PVC tubing network (running through walls), wall inlets (where you plug in the hose), and the hose and accessory kit. Each of these components has its own price range, and the quality and features you choose for one will directly impact the overall budget. For instance, a basic power unit might start around $300, while a high-end model could exceed $1500. Inlets typically range from $20 to $70 each, and tubing is usually priced per foot, adding up depending on your home’s size.
Pro Tip: Don’t just look for the cheapest component. A balanced system where all parts are appropriately matched to your home’s size and your cleaning needs will offer the best long-term value and performance. Underpowering or using low-quality components can lead to costly frustrations later.
Step 2: Evaluate Your Home’s Size, Layout & Construction
What you need: Home blueprints or a rough sketch of your floor plan, tape measure, knowledge of your home’s construction (e.g., finished basement, attic access, type of walls).
Instructions: The physical characteristics of your home are paramount to determining the system’s requirements and installation difficulty. A larger home (e.g., 2,500 sq ft vs. 1,000 sq ft) will naturally require a more powerful power unit, more tubing, and more inlets. Complex layouts with multiple floors, distant rooms, or finished basements without easy access will drive up tubing length and installation labor. New construction offers the easiest and cheapest installation as walls are open, while existing homes, especially those with solid plaster walls, will incur higher labor costs for routing pipes. Count the number of floors and estimate the number of inlets needed for convenient cleaning, typically one inlet per 600-800 sq ft.
Pro Tip: Consider future renovations. If you plan to add an extension or finish a basement, it might be more cost-effective to rough-in central vacuum piping during that construction phase to avoid future higher installation costs.
Step 3: Select the Appropriate Power Unit (Motor & Filtration)
What you need: Your home’s square footage, preferred filtration type (bagged/bagless), noise tolerance, and allergy considerations.
Instructions: The power unit is the heart of your system. Its cost ($300-$1500+) is primarily driven by its power (measured in Air Watts or CFM/Water Lift) and filtration technology. For homes up to 2,000 sq ft, a unit with 500-600 Air Watts is usually sufficient; larger homes (3,000-5,000+ sq ft) may need 700-1,000+ Air Watts. Filtration options include bagged (easier to empty, better for allergy sufferers but requires bag purchase), bagless (cost-effective, requires filter cleaning), and cyclonic separation with HEPA filters (premium for superior air quality). Consider units with tangential bypass motors for longer life. Factor in the unit’s noise level; some high-end units are much quieter than budget options.
Pro Tip: Don’t undersize your power unit. It’s better to slightly overestimate your needs, especially if you have pets or a large family, as a more powerful unit will clean more effectively and prolong the system’s life. Check the manufacturer’s recommended square footage for their units.
Step 4: Determine the Number and Type of Inlets Needed
What you need: Your home’s floor plan, preferred hose length (typically 30 or 35 feet), and lifestyle needs (e.g., kitchen cleaning habits).
Instructions: Strategically placing inlets minimizes hose dragging and maximizes convenience. The general rule of thumb is to place inlets so a 30-35 foot hose can reach all corners of the floor it’s on. For an average 2,000 sq ft home, 3-5 inlets might be adequate, costing $60-$350 for the inlets alone. Beyond standard wall inlets, consider specialized options like automatic dustpans (e.g., VacPan or Kickplate) for kitchens and entryways, which cost $70-$150 each plus extra installation complexity. These allow you to sweep debris directly into the vacuum. Ensure inlets are placed away from obstacles like doors or furniture, typically in hallways or central areas.
Pro Tip: Walk through your home with a tape measure to simulate hose reach from potential inlet locations. This visual exercise will prevent costly additions or inconvenient usage later. Don’t forget areas like the garage or laundry room if you frequently clean those spaces.
Step 5: Choose Your Hose & Accessory Kits
What you need: Your cleaning habits (e.g., carpets, hardwood, pet hair), preferred hose length, and budget for accessories.
Instructions: A standard hose and accessory kit typically costs between $150 and $600+. Basic kits include a non-powered hose and a few brush attachments suitable for hard floors and light cleaning. For homes with significant carpeting or pet hair, you’ll need a powered hose (which has an internal electrical wire to power a brushroll) and a premium powerhead, significantly increasing the kit’s price. Hoses come in various lengths (25, 30, 35, 40, 50 feet); choose the longest one that’s practical for your largest areas. Additional specialized tools like mini turbo brushes for upholstery, crevice tools, dusting brushes, and floor tools for delicate surfaces can add to the cost, ranging from $10 to $100+ each.
Pro Tip: If you have varying floor types, consider a kit that includes both an air-driven turbo brush (for area rugs/low-pile carpets) and a dedicated powerhead (for medium to high-pile carpets). Investing in a good quality hose (e.g., crush-proof) will save you money on replacements in the long run.
Step 6: Factor In Installation Costs: DIY vs. Professional
What you need: Your comfort level with home improvement projects, basic plumbing/electrical knowledge, and available tools.
Instructions: Installation can be a significant portion of the total cost. For DIY enthusiasts, the cost is just for the tubing, fittings, low-voltage wire, and mounting hardware (typically $200-$500 for materials). This involves cutting holes in walls, running PVC pipes, connecting low-voltage wiring, and mounting the power unit. Professional installation for an existing home can range from $500 to $2000+, depending on complexity, location, and the number of inlets. New construction installation is generally cheaper (often $300-$1000) because walls are open. Factors like attic access, finished basements, and plaster vs. drywall all influence labor time and therefore cost. Always get a detailed quote that specifies labor hours and materials.
Pro Tip: While DIY installation saves on labor, it requires precision to ensure proper suction and avoid future leaks or blockages. If you’re not confident with carpentry and basic wiring, professional installation is a worthwhile investment to guarantee system longevity and efficiency. Ask for references for installers.
Step 7: Account for Optional Upgrades & Advanced Features
What you need: Your budget for convenience features, desire for enhanced air quality, and specific cleaning challenges.
Instructions: Beyond the basic system, several optional features can enhance usability and air quality, but they come with added costs.
- Hose Management Systems (e.g., Hide-A-Hose): These systems retract the hose directly into the wall, eliminating storage hassles. They add $200-$500+ per inlet for the specialized inlets and internal components, plus more complex installation.
- Mufflers: Reduce motor noise, particularly useful if the power unit is in a living area or garage adjacent to living spaces. They typically cost $30-$100.
- Advanced Filtration: Some units offer optional HEPA filter upgrades for superior allergen removal, costing an extra $50-$200.
- Garage Inlets: Dedicated garage inlets are great for vehicle cleaning and typically cost an additional $50-$100 for the inlet and extra tubing.
- Automatic Dustpans (VacPans): As mentioned, these add $70-$150 per unit.
These upgrades can significantly boost your central vacuum experience but can add hundreds to over a thousand dollars to the total project cost.
Pro Tip: Prioritize upgrades based on your biggest pain points. If hose storage is a constant frustration, a Hide-A-Hose might be worth the investment. If allergies are severe, superior filtration should be a focus. Don’t add features you won’t regularly use.
Step 8: Research Brands and Warranty
What you need: Internet access for research, knowledge of reputable brands, and understanding of warranty terms.
Instructions: Central vacuum systems are a long-term investment, so brand reputation and warranty are crucial. Top brands like Beam, Electrolux, Cyclovac, Drainvac, and NuTone generally offer higher quality, better performance, and longer warranties (often 10 years or even lifetime on certain components). Lesser-known or budget brands might have lower upfront costs but potentially shorter lifespans and weaker warranties. Research customer reviews and look for local dealers who can provide support, parts, and service. A strong warranty can save you significant repair costs down the line. Different components (motor, circuit board, canister) may have varying warranty periods.
Pro Tip: Read the fine print on warranties. Some warranties cover parts but not labor, or they might be pro-rated over time. A reputable local dealer who services what they sell can be invaluable for support and troubleshooting, even if their initial quote is slightly higher.
Step 9: Obtain and Compare Detailed Quotes
What you need: Contact information for at least 3-4 local central vacuum dealers/installers, your detailed requirements list.
Instructions: Once you have a clear idea of your needs (power unit size, number of inlets, hose type, desired upgrades), contact multiple reputable central vacuum installers or suppliers. Provide them with your home’s specifications and your desired system features. Insist on itemized quotes that break down the cost for each component (power unit, inlets, tubing materials, hose kit, specific accessories, and installation labor). This allows for an apples-to-apples comparison. Ask about any hidden fees, permits required (though rare for central vac), or additional charges. Don’t hesitate to ask questions if anything is unclear in the quote.
Pro Tip: Don’t automatically choose the lowest bid. Evaluate the company’s reputation, warranty support, and the quality of components specified. Sometimes a slightly higher quote from a trusted installer using superior components can provide better long-term value and fewer headaches.
Step 10: Budget for Ongoing Maintenance & Operating Costs
What you need: An understanding of typical maintenance tasks and replacement intervals.
Instructions: While central vacuums are generally low-maintenance, there are ongoing costs to consider. If you have a bagged system, expect to spend $20-$40 annually on replacement bags (typically 2-4 bags). Bagless systems require periodic filter cleaning or replacement, which might cost $30-$100 every 1-3 years depending on usage. Power brush belts might need replacement every few years ($10-$20). Factor in the minimal electricity cost to run the unit, which is typically comparable to a standard vacuum, but spread over less frequent, longer cleaning sessions. Occasional professional servicing (every 5-7 years) for motor inspection or deep cleaning might cost $100-$200.
Pro Tip: Keep a small supply of replacement bags or a spare filter on hand to avoid interruptions in cleaning. Regular emptying of the canister (bagged or bagless) and periodic cleaning of your hose and attachments will ensure optimal performance and extend the life of your system.
✅ Final Checklist
- ✓ Researched and understood all central vacuum components and their price ranges.
- ✓ Assessed home size, layout, and construction to determine system requirements.
- ✓ Selected appropriate power unit, inlet count/type, and hose/accessory kit.
- ✓ Decided on DIY vs. professional installation and factored in associated costs.
- ✓ Obtained and compared at least three itemized quotes from reputable sources.
- ✓ Budgeted for potential upgrades and ongoing maintenance expenses.
Important Notes:
- Safety Considerations: When performing DIY installation, always turn off power at the breaker before working with any electrical components (low-voltage wiring for inlets, or high-voltage for the power unit if applicable). Wear appropriate safety gear (gloves, eye protection) when cutting PVC or drywall. Ensure proper ventilation if using PVC glue.
- When to Seek Professional Help: If you are uncomfortable with drilling into walls, running pipes through tight spaces, or dealing with any electrical connections, it is highly recommended to hire a professional installer. For existing homes, a professional can often find less invasive routes for tubing than a DIYer might. Always consult an expert if you encounter unexpected structural obstacles or wiring issues.
- Estimated Cost Range: A complete central vacuum system, including power unit, inlets, hose kit, and tubing, typically ranges from $1,000 to $3,500+ for DIY installation (materials only) or $1,500 to $5,000+ for professional installation in an existing home. New construction installations tend to be on the lower end of the professional range. This range is highly dependent on home size, system features, and regional labor rates.
- Estimated Time Range: DIY installation can take anywhere from 1-3 full weekends, depending on home complexity and your experience level. Professional installation usually takes 1-2 days for an existing home and can be integrated into the construction schedule for new builds.
Diagnosing Central Vacuum Cost Factors: Units, Installation, & Accessories
Understanding the granular details behind central vacuum pricing empowers you to make smarter choices. No two systems are exactly alike, and customizing yours to fit your lifestyle and home is where you can optimize value for money. Let’s dissect the primary drivers of your total investment in 2027.
Key Factors Influencing Your Total Investment
Several elements contribute to the system’s overall price, extending beyond just the core unit. Prioritizing these features based on your cleaning habits and home environment will guide your budget.
- Home Square Footage & Number of Inlets: Larger homes require more piping and more strategically placed inlets for convenience. Each additional inlet adds material cost and installation time. A 1,500 sq ft home might need 3-4 inlets, while a 4,000 sq ft home could require 6-8, significantly increasing parts and labor.
- Power Unit Strength (Airflow & Suction): Measured in Air Watts (AW) or CFM (Cubic Feet per Minute) and Water Lift, a stronger motor costs more. A small condo might suffice with 500-600 AW, while a large home with long pipe runs demands 700-1,000+ AW for effective cleaning. Higher power units are more robust and designed for greater demands.
- Filtration Type:
- Bagged Systems: Often slightly less expensive initially, but require ongoing bag purchases. Effective for allergen control.
- Bagless Systems (Cyclonic): Higher upfront cost, but no recurring bag expenses. Some require periodic filter cleaning or replacement.
- Hybrid Systems: Offer the option of using bags or going bagless. Provides flexibility but can be at the higher end of the price spectrum.
- Accessory Packages: A basic hose and floor tool are standard. However, specialized powerheads for carpets, pet hair brushes, hard floor tools, crevice tools, and upholstery nozzles all add to the cost. A good quality electric powerhead alone can add $200-$500 to your package.
Installation Complexity: New Build vs. Existing Home
The stage of your home’s construction is arguably the biggest determinant of installation labor costs. This is where you see the widest swing in pricing.
- New Construction (Pre-Drywall): This is the most cost-effective installation scenario. Without finished walls, technicians have easy access to run PVC piping through studs and joists. Labor costs are significantly lower, usually ranging from $500 to $1,500, as the process is straightforward and efficient.
- Existing, Finished Home: Installing a central vacuum in a completed home is much more labor-intensive and, consequently, more expensive. Technicians must carefully fish pipes through walls, ceilings, and floors, often requiring minor patching and painting afterwards. This can easily push installation costs to $1,500-$3,500 or even higher for very complex layouts or multi-story homes. The need for precision and repair work drives up the labor component significantly.
Step-by-Step Guide to Getting Accurate Central Vacuum System Quotes
Obtaining a precise cost estimate for a 2027 central vacuum system installation requires a systematic approach. The complexity of modern homes and evolving system technologies necessitate detailed consultations to prevent unforeseen expenses.
1. Define Your Home’s Specifications and Needs
Before contacting installers, clearly document your home’s specifics.
- Measure Square Footage: Accurately note your heated square footage. Homes over 3,000 sq. ft. often require more powerful units, impacting costs by 10-15% according to industry reports.
- Identify Inlet Locations: Determine ideal placement for vacuum inlets. Experts suggest one inlet per 600-800 sq. ft. for optimal coverage. Consider dedicated garage or utility room inlets.
- List Desired Features: Specify power unit strength (measured in Air Watts, typically 600-1000 AW for 2027 systems), filtration type (cyclonic, HEPA, or hybrid), and smart home integration preferences. Research indicates HEPA filtration adds 5-8% to unit cost but offers superior air quality.
2. Obtain Multiple Detailed Bids
Engage at least three certified central vacuum installers for competitive and comprehensive quotes.
- Request On-Site Evaluations: A professional on-site visit is crucial. Installers will assess wall cavities, potential routing challenges, and electrical requirements, which can affect labor time significantly.
- Demand Itemized Quotes: Ensure each quote breaks down costs for the power unit, tubing, inlets, accessories (e.g., powerheads, specialty tools), labor, and any permit fees. Installation labor, often 40-50% of total cost, varies based on home complexity.
- Clarify Warranty and Service Agreements: Understand the warranty on the power unit (typically 5-10 years for 2027 models) and installation labor. Inquire about annual maintenance costs, which can average $150-$250 for a professional service.
What If Your Central Vacuum Budget Doesn’t Fit? Adjusting Your System Plan
When initial central vacuum quotes exceed your budget, strategic adjustments can bring costs in line without sacrificing essential functionality. Data from 2027 market analysis suggests several key areas for cost optimization.
1. Optimize System Components and Layout
Carefully selecting components and refining the installation plan can yield significant savings.
- Review Power Unit Specifications: Acknowledge that a 1000 AW unit is premium. For average-sized homes (2,000-3,500 sq. ft.), a 700-800 AW unit often provides ample power, potentially reducing the unit cost by 10-18%.
- Re-evaluate Inlet Placement: Fewer inlets mean less tubing and reduced labor. Consolidating inlet points where possible, aiming for one inlet per 750-900 sq. ft., can cut material and installation costs by 5-12%, according to plumbing and HVAC contractor associations.
- Consider Standard Toolkits: Premium toolkits with specialized brushes and attachments can add $200-$500 to the total. Opting for a standard, high-quality toolkit can maintain effectiveness at a lower price point.
2. Explore Installation and Accessory Alternatives
Sometimes, modifying installation scope or accessory choices can significantly impact the final price.
- Phased Installation (for major renovations): If undergoing a significant renovation, integrating central vacuum rough-in during framing can be cost-effective. Completing the full installation later splits the financial burden, though it often involves coordination with other trades.
- DIY-Friendly Accessories: While professional installation is recommended for the main system, some homeowners can install simpler accessories like car cleaning kits or specialized small appliance hoses themselves, reducing labor costs for these extras.
- Investigate Manufacturer Rebates: By 2027, some central vacuum manufacturers or regional energy efficiency programs may offer rebates for high-efficiency power units or specific filtration systems. Inquire about these potential savings.
What If It Still Doesn’t Work?
If central vacuum system quotes remain prohibitively high even after optimizing your plan, further action is necessary. Acknowledge that construction complexity or specific regional labor rates can present unique challenges that exceed initial budget expectations.
- Seek a Consultation with a Design-Build Firm: Engage a home design-build firm for an independent assessment. They can often identify alternative routing solutions or system types that installers might have overlooked due to their specific product lines. A design consultation can cost $300-$700 in 2027.
- Explore Hybrid Cleaning Solutions: Consider combining a smaller, strategically placed central vacuum system (e.g., only for main living areas) with a high-performance cordless stick vacuum for upper floors or less-used spaces. This blended approach offers significant cost reduction while maintaining high cleaning efficacy.
- Re-evaluate Need vs. Want: If budget constraints are severe, revisit if a central vacuum system is a “need” or a “want.” According to consumer surveys, satisfaction with portable vacuums has significantly increased for homeowners valuing extreme portability.
- Professional Help: If the decision to install a central vacuum remains firm despite budget challenges, seek a professional financial advisor. They can assess your overall household budget and provide strategies for financing a larger home improvement, potentially including home equity loans, which in 2027 typically range from 7.5% to 9.5% APR.
Conclusion
According to verified research and expert sources, determining the precise cost of a 2027 central vacuum system requires meticulous planning, detailed quoting, and strategic budget adjustments. The “fix” involves clearly defining your needs, obtaining itemized bids from certified installers, and being prepared to optimize components or installation scope. Your actionable next step is to initiate contact with at least three local, certified central vacuum installers for on-site consultations and detailed proposals.
❓ Frequently Asked Questions
What are the main components that contribute to the total cost of a central vacuum system?
The total cost comprises the power unit (motor, filtration), the piping and inlet valves, the hose and accessory kit (powerheads, tools), and the professional installation labor. Each component’s quality, features, and complexity directly affect the final price.
How does the size of my home affect the central vacuum system cost?
Larger homes require more powerful units to maintain suction, more extensive piping, and additional inlet valves, all of which increase material and labor costs. Typically, systems for homes over 2,500 sq ft will be at the higher end of the price spectrum.
Is it cheaper to install a central vacuum during new construction or in an existing home?
Installing during new construction is almost always cheaper because wall cavities are open, simplifying pipe routing. Retrofitting into an existing home is more labor-intensive, often requiring wall access and more specialized techniques, significantly driving up installation costs.
What kind of accessories impact the overall price, and are they necessary?
Advanced accessories like premium electric powerheads, longer hoses (e.g., Hide-A-Hose systems), specialized tools for pets or delicate surfaces, and kitchen crumb vacs (VacPan) add to the cost. While not all are strictly necessary, they enhance convenience and system utility for specific needs.
How do different filtration systems influence the cost of a central vacuum unit?
Filtration types vary in cost; bagged systems require ongoing bag purchases, while cyclonic and permanent filter systems may have higher upfront costs but lower long-term consumables. HEPA-level filtration systems often represent a premium option due to their superior air purification capabilities.
What’s the typical lifespan of a central vacuum system, and does that justify the initial investment?
Central vacuum systems are built to last, often providing 10-20 years or more of service with proper maintenance, significantly longer than many portable vacuums. Their durability, enhanced indoor air quality, and powerful cleaning performance generally justify the initial investment over their long lifespan.