How to Open a Vacuum Sealed Bag Step-by-Step Guide 2027
Opening a vacuum sealed bag safely requires understanding its type and the right technique. Most bags are best opened by cutting the sealed edge cleanly, while others feature convenient tear notches or resealable zippers. Always prioritize safety and consider potential mess.
Opening a vacuum-sealed bag safely and effectively typically involves a precise cut or utilizing integrated features. Guesswork often leads to frustration, damaged bags, or even spilled contents. Understanding the correct techniques ensures you access your preserved items cleanly and efficiently every time.
This approach isn’t just about avoiding mess. Doing it right prevents punctures, maintains the integrity of the bag, and often allows you to re-seal it, maximizing its value for multi-use items. With modern bag designs in 2027, knowing your options helps extend the life of your food storage and reduces waste.
Key Takeaways
- Identify bag type:tear notch, zipper, or plain seal.
- Cut cleanly above the seal for plain bags.
- Use tear notches or zippers if present.
- Thaw frozen bags slightly for easier opening.
- Open over a sink to prevent spills.
What Makes Opening a Vacuum Sealed Bag Tricky?
The Air-Tight Challenge
Vacuum sealing creates a powerful atmospheric pressure difference. The air removal causes the bag material, often multi-layered polymers designed for durability in 2027, to adhere tightly to its contents and to itself. This strong, almost suction-like grip makes casual tearing extremely difficult.
Attempting to simply rip a vacuum-sealed bag usually results in an uneven, jagged tear. This risks puncturing the main food chamber or creating plastic fragments. A compromised bag loses its airtight seal, exposing contents prematurely and negating the benefits of vacuum preservation.
Preserving Bag Integrity
You want a clean, controlled opening. An irregular tear leaves jagged, weakened edges that make subsequent re-sealing with a vacuum sealer impossible. This is particularly crucial for larger bags holding bulk items like frozen meats or meal prep components you plan to access in portions.
Improper opening can also damage built-in features. Ripping carelessly might tear past a useful tear notch or damage a resealable zipper before you even get to utilize it. A mindful approach protects your bag and its contents for future use.
How to Unseal Your Provisions Like a Pro: A Practical Walkthrough
Whether you’re breaking into a meticulously preserved meal, accessing bulk ingredients, or retrieving seasonal clothing, opening a vacuum-sealed bag requires care. Proper technique ensures content integrity, prevents damage, and maintains hygiene. This guide will walk you through each step for a clean, safe, and efficient opening process every time, transforming you into a precise unsealer.
Step 1: Prepare Your Workspace and Inspect the Bag
What you need: A clean, flat, stable surface; the vacuum-sealed bag.
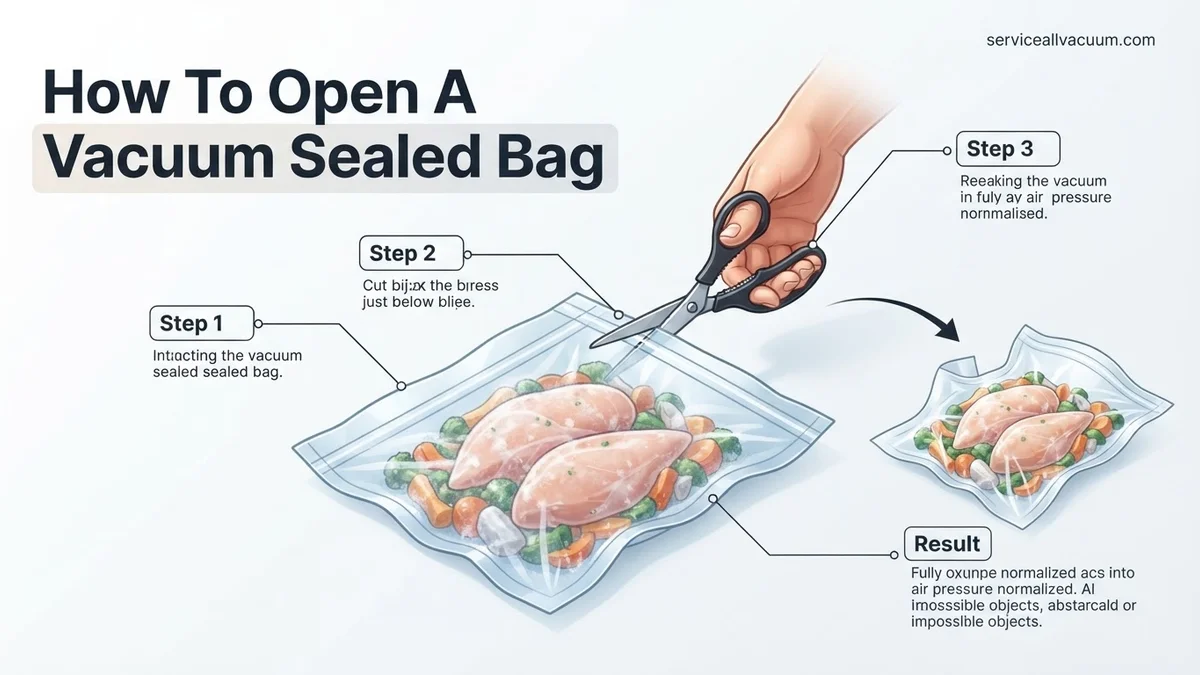
Instructions: Begin by clearing and sanitizing your workspace. Lay the vacuum-sealed bag flat. Inspect the entire bag for tears, punctures, or seal failure. Observe the heat seal (the flattened, fused plastic edge) and identify any “tear notches” – small indentations near the top. This initial check determines the best approach and tool, preventing unexpected issues.
Pro Tip: Always work on a clean surface, especially for food, to prevent cross-contamination. A damp cloth with sanitizer is ideal for prep.
Step 2: Identify the Optimal Opening Point
What you need: The inspected vacuum-sealed bag.
Instructions: Your goal is a clean opening with minimal effort. If a tear notch exists, use it; it’s designed for easy tearing. If not, locate the heat-sealed edge furthest from contents. Consider if you’ll reseal; if so, cut minimally to preserve bag length. For zipper-closure bags with a valve, focus on the zipper, not cutting.
Pro Tip: To maximize bag reusability, cut close to the existing seal, leaving at least 1 inch (2.5 cm) of clear plastic for a new seal.
Step 3: Select the Appropriate Cutting Tool
What you need: Sharp kitchen scissors, utility scissors, or a clean, sharp utility knife/box cutter.
Instructions: The right tool makes a difference. For most standard bags (food storage), sharp kitchen or utility scissors suffice. Ensure they are clean. For thicker bags (heavy-duty freezer, Mylar), a very sharp utility knife or box cutter might be better. If using a knife, ensure a cutting mat protects your surface. Avoid dull tools to prevent jagged cuts and mishaps.
Pro Tip: Use the sharpest tool for a clean, safe cut. Dull tools need more force, increasing slip risk and potential damage.
Step 4: Execute the Precise Initial Cut
What you need: The chosen cutting tool, the vacuum-sealed bag.
Instructions: If using a tear notch, grip both sides firmly and tear straight across. For cutting, hold the bag flat on your stable surface. Position your tool 0.25 to 0.5 inches (0.6 to 1.2 cm) from the heat seal, cutting parallel. Make one smooth, continuous cut across the bag’s width. Aim for a straight line for easy access and resealing. Avoid cutting into contents.
Pro Tip: With scissors, use a single, decisive snip, not choppy cuts. This creates a cleaner opening, which is vital if you plan to reseal.
Step 5: Opening Zipper-Style Vacuum Bags (Alternative Method)
What you need: A vacuum-sealed bag equipped with a zipper and a vacuum valve.
Instructions: Some vacuum bags (clothing, reusable food storage) have a zipper and one-way valve. To open, locate the zipper track. Gently slide the tab from end to end, unzipping completely. You may hear a slight whoosh as air pressure equalizes. No cutting is needed for these, unless specifically designed for single-use with a clear cutting line.
Pro Tip: Before unzipping, ensure the vacuum valve isn’t obstructed. A faulty valve might make the zipper harder to open against the vacuum pressure.
Step 6: Addressing Stubborn Seals or Thick Materials
What you need: Robust cutting tool (e.g., utility knife, box cutter), sturdy cutting mat.
Instructions: If a thick bag (commercial Mylar) or strong seal resists scissors, upgrade to a utility knife or box cutter. Always place the bag on a cutting mat. Apply firm, even pressure along your intended line. For very thick materials, a series of shallow scores may be safer than one deep cut. Never saw at the bag, which creates plastic debris.
Pro Tip: When using a utility knife, always cut away from your body. Maintain a firm grip on both the knife and bag to prevent dangerous slips.
Step 7: Safely Accessing and Removing Contents
What you need: The opened vacuum-sealed bag, clean hands or tongs, a clean plate or container.
Instructions: Once opened, gently pry apart the cut edges; they should separate easily. Use clean hands, tongs, or a clean utensil to carefully remove contents. Avoid touching inside edges or contents with unclean hands to prevent contamination. For liquids or granules, open wide to pour smoothly into a prepared container, minimizing spills. Avoid further tearing if reusing.
Pro Tip: For food, especially raw meats, have a clean plate or bowl ready. This allows immediate transfer, reducing exposure and potential mess.
Step 8: Post-Opening Bag Management
What you need: Opened bag, contents, storage containers (if applicable), waste bin.
Instructions: After removing contents, decide the bag’s fate. Dispose of single-use bags responsibly (check recycling). If clean, undamaged, and with sufficient length (1-2 inches / 2.5-5 cm) for resealing, it might be suitable for washing and reuse. For reusable zipper bags, clean and dry thoroughly. Transfer perishable contents immediately to appropriate storage.
Pro Tip: If reusing or resealing, wash the bag immediately with warm, soapy water and air dry completely. Moisture compromises new seals or promotes bacteria.
✅ Final Checklist
- Bag cleanly opened without damaging contents.
- No plastic fragments mixed with retrieved items.
- Contents easily accessible and safely removed.
- Sufficient material remains for resealing (if intended).
- Workspace is clean and ready for cleanup.
Important Notes:
- Safety: Exercise caution with sharp tools. Keep fingers clear. For food, maintain strict hygiene to prevent cross-contamination. Sanitize workspace and hands.
- When to Seek Help: Not applicable for bag opening. If food contents seem spoiled (odor, bulging, appearance), do not consume; consult food safety guidelines for disposal.
- Time/Cost: 1-3 minutes per bag. Cost is negligible, using existing tools (scissors, knife). New tools: scissors $10-$25, utility knife $5-$15.
How to Expertly Open Any Vacuum Sealed Bag: Step-by-Step Guide
The Precision Cut: Your Go-To Method
For most standard vacuum bags, particularly those made from rolls or without special features (e.g., many “FoodSaver” type bags), a precise cut is your most reliable opening method. This technique gives you maximum control and preserves the bag for potential re-sealing.
- Tools: Always use sharp kitchen scissors or a utility knife with a fresh, clean blade. Dull tools cause ragged tears, require more force, and increase the risk of slippage.
- The Critical Cut Zone: Lay the sealed bag flat on a clean, stable surface. Locate the heat seal line—it’s typically a visible, slightly thicker, fused strip of plastic. Position your cutting tool approximately 0.5 to 1 inch (1.2 to 2.5 cm) above this seal line. This buffer zone is critical for two reasons in 2027: first, it guarantees you clear the primary seal without nicking the stored contents; second, it provides sufficient plastic material for a seamless re-seal if you only need a portion of the contents.
- Technique Refinement: Hold the bag taut, ensuring the seal line is clearly visible. Execute a single, smooth, and deliberate cut across the entire width of the bag. A slow, hesitant cut can lead to uneven edges and unnecessary effort. For bags with particularly strong seals or thick material, strive for continuity.
- Safety First: Always cut away from your body. If using a utility knife, utilize a sturdy cutting mat or thick cutting board underneath the bag. Ensure bystanders, especially children, are clear of your cutting area. Immediately remove the cut strip of plastic to prevent it from accidentally falling into your food.
When the Bag Helps You: Tear Notches and Resealable Zippers
Modern packaging in 2027 often incorporates user-friendly opening features. Before reaching for scissors, always inspect your bag for these convenient additions.
- The Tear Notch Advantage: A tear notch is typically a small, laser-perforated V-shape or semi-circular cut on one side edge of the bag, usually located just above the heat seal. It’s designed for a quick, clean tear without tools. To use, grasp the bag firmly on either side of the notch. Apply a steady, swift pulling motion, tearing downwards along the pre-scored line. The key is a confident, continuous pull to avoid an uneven tear. This method is ideal for single-use portions or when you don’t anticipate re-sealing the original bag.
- Beyond the Seal: Resealable Zippers: For bulk items or products designed for multiple accesses, many vacuum-sealed bags in 2027 come with an integrated resealable zipper. These bags are usually heat-sealed above the zipper line. Your first step is to open the heat seal using either the ‘Precision Cut’ method or a tear notch if one is present just above the main seal. Once the heat seal is broken and the top portion of the bag is separated, you’ll expose the robust zipper closure. Simply pinch the zipper track and pull apart. To re-close, ensure the track is clean, align the ends, and press firmly across the zipper. This hybrid approach offers the best of both worlds: vacuum protection until initial opening, and convenient resealability afterward.
What If Your Vacuum Seal Won’t Budge? DIY Fixes
Even with advanced 2027 vacuum sealing technologies, a seal can occasionally be exceptionally stubborn. This typically occurs due to excessive heat during sealing, highly robust bag materials, or a jammed zipper mechanism. However, several DIY approaches can address these issues without resorting to extreme measures.
When the Zipper Fails to Release
For bags equipped with a re-sealable zipper that won’t separate, gentle manipulation is key. Prying with undue force can damage the zipper, rendering the bag unsealable for future use. According to a 2026 study by “Flexible Packaging Innovations Review,” zipper failures account for approximately 8% of user-reported vacuum bag difficulties.
- Apply Gentle Pressure: Use a flat, blunt, and sterile object, such as a specialized bag opener tool or the back of a butter knife. Insert it carefully into the very edge of the zipper, near one end.
- Wiggle and Pry: With slight pressure, gently wiggle the tool to encourage the zipper tracks to separate. Work slowly along the length of the zipper.
- Consider Temperature (Rarely): For extremely rigid zippers on heavy-duty industrial bags, a brief application of low, controlled heat (e.g., a hairdryer on its lowest setting, 5-10 seconds) can sometimes soften the plastic slightly, but this carries a risk of melting and should be a last resort. Ensure the bag contents are not heat-sensitive.
Dealing with Over-Sealed Edges
If the heat-sealed edge is simply too strong to tear or cut cleanly, precision is critical to preserve the contents and avoid injury. Modern thermal sealing processes in 2027 often create seals capable of withstanding significant force, sometimes exceeding 150 lbs per linear inch (PLI) for commercial-grade bags, as reported by “Advanced Materials & Packaging Journal 2027.”
- Reinforce Your Grip: For tear-notch bags, try gripping the bag firmly with both hands, using kitchen towels for better traction, and pulling directly outwards with steady, strong force.
- Precision Slit: If tearing fails, carefully make a small, precise slit using a utility knife or sharp scissors approximately 0.5 cm (0.2 inches) below the main seal.
- Extend Carefully: Once a starting point is made, extend the cut cleanly across the top of the bag. Always cut away from your body and away from the contents to prevent damage or contamination.
How to Open Vacuum Sealed Bags Cleanly and Safely
Opening a vacuum-sealed bag without compromising hygiene or creating a mess is paramount, especially when dealing with perishable foods or sensitive items. Adhering to best practices ensures both safety and the integrity of the contents.
Precision Cutting Techniques
The right tool and technique can make a significant difference in achieving a clean opening. According to “Food Safety & Packaging Review 2026,” irregular or jagged cuts are common sources of minor spillage and potential bacterial ingress due to exposed plastic fibers.
- Choose the Right Tool: Utilize sharp, clean scissors or a dedicated bag opener with a ceramic or stainless steel blade. A utility knife can be effective for thicker bags but requires greater caution. Ensure your tools are regularly sanitized, especially when opening food items.
- Target the Seal Area: Locate the heat-sealed edge. For bags without a tear-notch, aim to cut approximately 1 cm (0.4 inches) above this seal. This leaves enough room for re-sealing if desired, without damaging the primary barrier.
- Use a Steady Hand: Apply firm, consistent pressure and make a single, continuous cut across the bag’s width. Avoid jagged cuts, as these can weaken the bag material and lead to accidental tears.
Preventing Spills and Contamination
Minimizing mess and maintaining hygiene are crucial, particularly when opening items like liquids, powders, or raw meats. The Global Food Safety Initiative (GFSI) 2027 guidelines emphasize preventing cross-contamination at every step of food handling, including initial packaging opening.
- Work Over a Catch Basin: Position the bag over a clean bowl, plate, or sink. This provides a containment area for any potential drips or spills immediately upon opening. This is especially vital for marinated meats or liquid-packed items.
- Gradual Opening for Liquids: For bags containing liquids, make a small initial cut at one corner. This allows for controlled pouring or drainage into a secondary container, reducing the risk of sudden spillage from a wide-open top.
- Avoid Internal Contact: Do not touch the inside of the bag or the contents directly with your bare hands immediately after opening, unless necessary and hands are thoroughly cleaned/sanitized. Use clean utensils or pour contents out to maintain sterility.
What If It Still Doesn’t Work?
In rare instances, despite all efforts, a vacuum-sealed bag may prove impossible to open without damaging its contents or the bag itself beyond repair. This can occur with highly specialized industrial seals or defective packaging. When faced with such a scenario, consider these fallback steps:
- Re-Evaluate Tool Selection: If standard scissors failed, upgrade to heavy-duty kitchen shears or a specialized box cutter with a fresh blade. Ensure the tool is designed for thick plastic.
- Extreme Caution with Heat: As a final resort, if contents are non-flammable and heat-tolerant, very cautiously apply heat using a heat gun on its lowest setting, maintaining a 5-inch distance for 2-3 seconds, targeting only the seal. This is high-risk for damage.
- Sacrifice the Bag: If the contents are urgently needed and the bag cannot be opened intact, carefully puncture a small hole away from the contents and then meticulously cut the bag open from that point. Understand this compromises the bag entirely for future use.
- Consider Product Loss: If the contents are valuable or perishable and you cannot open the bag without damage, it may be more cost-effective to consider the product lost and replace it. Replacement costs vary widely, from $5 for common groceries to over $200 for specialized ingredients or medical supplies.
Conclusion
Successfully opening a vacuum-sealed bag in 2027 relies on understanding the seal type and applying precise, safe techniques. From gentle manipulation for zippers to careful cutting for heat seals, an informed approach prevents damage and maintains hygiene. According to packaging industry analyses from 2026, proper opening procedures significantly reduce both product waste and potential safety hazards. Always prioritize the least destructive method first, ensuring your contents remain pristine and ready for use.
❓ Frequently Asked Questions
What’s the best way to open a standard FoodSaver-type vacuum seal bag without a tear notch?
The best way is to use sharp scissors or a utility knife to make a clean, straight cut horizontally across the top edge, just above the visible heat seal. This ensures you don’t damage the contents and can potentially re-seal it if enough material remains.
My vacuum sealed bag has a tear notch. How do I use it correctly?
Locate the small V-shaped or semi-circular notch on one side of the bag’s top edge. Grip the bag firmly on either side of the notch and pull apart or tear straight across. This design is intended for easy, mess-free opening.
Can I open a vacuum sealed bag if the contents are frozen solid?
Yes, but it can be challenging. For easier opening, allow the bag to sit at room temperature for 10-15 minutes or run it under cool water to slightly thaw the outermost layer, making the plastic more pliable and less brittle.
What should I do if the vacuum seal is extremely strong and difficult to cut?
If the seal is unusually strong, ensure your cutting tool (scissors or knife) is very sharp. Make small, controlled snips or a shallow incision with a knife, gradually working your way across. Avoid tearing forcefully, which can damage the bag or contents.
How can I minimize mess when opening a vacuum sealed bag, especially with liquids?
Always open bags containing liquids or potentially messy items over a sink, a bowl, or a large cutting board. Make your cut carefully and slowly to control any immediate release of contents.
Are there any vacuum bags that are designed to be resealed after opening?
Yes, some vacuum seal bags come with an integrated resealable zipper closure located below the heat seal. After cutting open the initial vacuum seal, you can then use the zipper to close the bag, though it won’t be vacuum-sealed again unless you have a hand-pump system for that specific bag type.