Expert Guide How to Vacuum Carpet Step-by-Step in 2027
Achieving truly clean carpets requires more than just pushing a vacuum around. This guide provides a proven method, ensuring you remove maximum dirt and prolong your carpet’s life with proper techniques and care in 2027. Learn the best practices for a visibly cleaner home.
Vacuuming carpet in 2027 means more than just pushing a machine around; it is a strategic process designed to extend carpet life, remove embedded allergens, and maintain optimal indoor air quality. Your goal isn’t just to make the carpet look clean, but to ensure it is clean at a microscopic level, safeguarding your living environment.
Effective vacuuming directly impacts your home’s hygiene and the longevity of your investment. Skipping critical steps or using outdated techniques allows dirt, dust mites, and microscopic debris to accumulate, leading to premature wear and potential health issues. This guide ensures your efforts translate into genuinely clean, revitalized carpets.
Key Takeaways
- Prepare area by clearing small items first.
- Use correct vacuum settings for carpet type.
- Vacuum slowly, overlap passes for best results.
- Clean attachments and vacuum regularly.
- Address spills promptly to prevent stains.
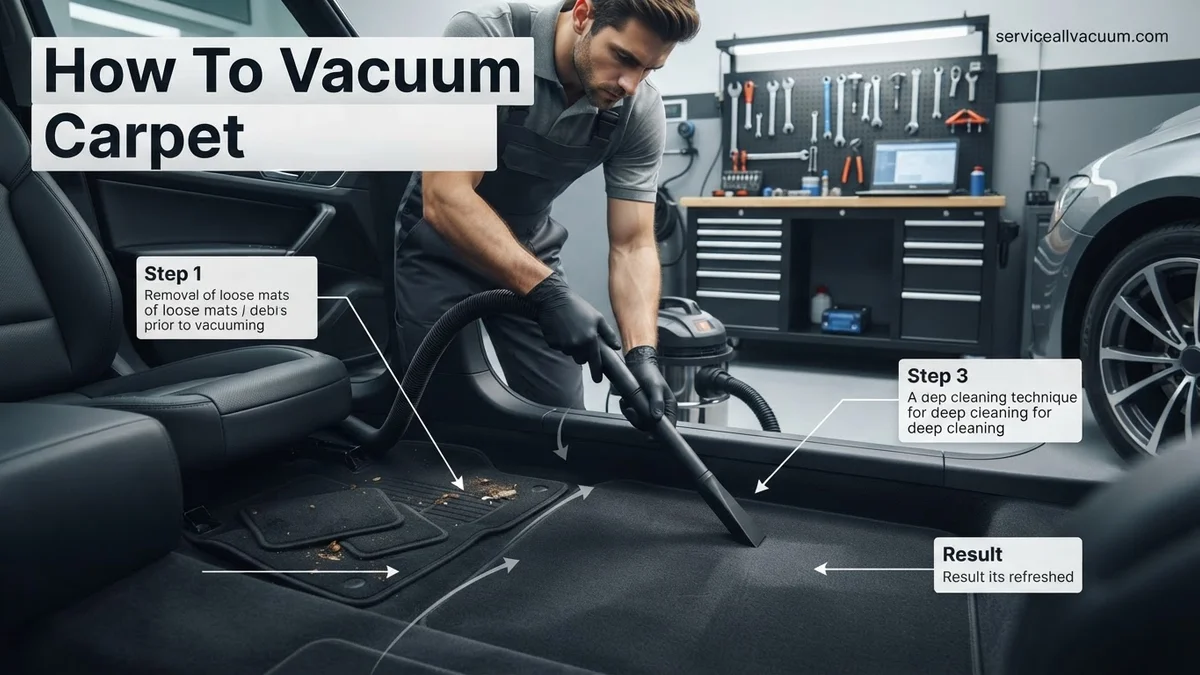
Why Your Carpets Still Look Dirty: Understanding Common Vacuuming Mistakes
Many people vacuum regularly yet struggle with carpets that quickly appear dingy or never feel truly clean. This isn’t usually due to a poor vacuum cleaner, but rather common procedural errors that leave dirt behind. In 2027, with advanced carpet fibers and smart home tech, understanding these mistakes is crucial for genuinely clean results.
Incorrect Vacuum Settings and Filter Neglect
One major culprit is improper vacuum adjustment. Your vacuum’s brush roll height needs to match your carpet pile. Too high, and the bristles don’t agitate enough; too low, and it struggles to glide, reducing suction. Check your manufacturer’s guide for specific 2027 models; many now offer intelligent auto-adjust features, but manual checks are still essential for older or specialty units. Furthermore, a clogged filter severely impacts suction. Modern HEPA filters, common by 2027 standards, can trap up to 99.97% of particles 0.3 microns or larger. Neglecting to clean or replace these filters every 3-6 months, depending on usage, means your vacuum is just recirculating dust, not removing it. For bagless models, empty the canister when it’s two-thirds full, not completely packed.
Rushing and Missed Spots
You might think speed is efficiency, but it’s a major disservice to your carpet. Vacuuming too quickly prevents the brush roll from adequately agitating the fibers and gives the suction insufficient time to pull up embedded dirt. Think of it as painting a wall; quick, uneven strokes leave patchy results. For best results, employ slow, overlapping passes. Each pass should slightly overlap the previous one by about one-third of the cleaning head’s width. Focus on high-traffic lanes first, making multiple passes (2-3 forward and back) in those areas before moving to less-used sections. Also, neglecting edges and corners where dust often accumulates is a common oversight; utilize your crevice tool and brush attachments weekly.
Master Carpet Vacuuming in 8 Simple Steps
Vacuuming a carpet isn’t just a chore; it’s a vital part of maintaining your home’s cleanliness, extending your carpet’s lifespan, and improving indoor air quality. This guide provides a comprehensive, detailed walkthrough to ensure you’re not just moving dirt around, but effectively removing it, leaving your carpets truly clean and refreshed. Follow these steps to transform your approach to carpet care, making your home a healthier and more inviting space.
Step 1: Preparation is Key: Clear the Deck
What you need: Empty trash bags, a basket or container, and perhaps an extra pair of hands for heavier items.
Instructions: Before you even plug in your vacuum, conduct a thorough pre-clean. Remove all small furniture (e.g., coffee tables, end tables), toys, power cords, pet bowls, and any other loose items from the carpeted area. Scan the floor for tiny objects like coins, paper clips, or small toys that could damage your vacuum cleaner’s motor or brush roll. If you have small, lightweight rugs on top of the carpet, roll them up and move them out of the way for later cleaning or simply to get them off the main area.
Pro Tip: Develop a routine of quickly clearing the floor before vacuuming. This habit not only makes the vacuuming process smoother but also prevents accidental damage to your vacuum and ensures you don’t miss any spots.
Step 2: Pre-Treating Stains and Heavily Soiled Areas
What you need: An appropriate carpet stain remover, several clean, white cloths, and potentially a soft-bristled brush.
Instructions: Address any visible spills or existing stains before you start vacuuming. Vacuuming over a stain can actually push the stain deeper into the carpet fibers or spread it, making it much harder to remove. Apply a small amount of carpet stain remover to a clean cloth (never directly to the carpet unless instructed by the product) and gently blot the stain from the outside in. For heavily trafficked pathways or matted areas, a carpet freshener or pre-spray can be applied a few minutes prior to vacuuming to loosen embedded dirt and neutralize odors.
Pro Tip: Always test any stain remover in an inconspicuous area of the carpet, such as inside a closet or under a piece of furniture, to ensure it doesn’t cause discoloration or damage. Blotting is crucial – rubbing can fray carpet fibers.
Step 3: Vacuum Maintenance Check: A Well-Oiled Machine
What you need: Your vacuum cleaner, spare vacuum bags (if applicable) or an empty canister, a clean replacement filter (if needed), and scissors or a seam ripper.
Instructions: For optimal suction and performance, ensure your vacuum cleaner is in top shape. If you have a bagged vacuum, check that the bag is no more than two-thirds to three-quarters full; a full bag drastically reduces suction. For bagless models, empty the dirt canister completely. Turn the vacuum over and inspect the brush roll (beater bar). Use scissors or a seam ripper to carefully cut away any tangled hair, strings, or fibers that might be wrapped around it. Finally, check the air filter and clean or replace it according to your vacuum’s manual. Adjust the carpet height setting to match your carpet pile type (low for thin/low pile, high for thick/shag).
Pro Tip: A clogged brush roll can hinder the vacuum’s ability to agitate and lift dirt, while a dirty filter restricts airflow, leading to poor suction. Performing this quick check before each use extends your vacuum’s life and efficiency.
Step 4: Strategic Vacuuming: The Overlapping Pass Technique
What you need: Your well-prepared vacuum cleaner with adjusted height setting.
Instructions: Begin vacuuming at one end of the room, working your way across. Push the vacuum slowly in straight, parallel lines. The key here is the overlapping pass: each subsequent pass should overlap the previous one by about one-third to one-half the width of the vacuum cleaner’s cleaning head. This ensures that every inch of your carpet is covered and subjected to the vacuum’s cleaning power multiple times. Maintain a steady, unhurried pace, allowing the brush roll and suction adequate time to agitate and lift dirt from the fibers.
Pro Tip: Rushing through vacuuming is the most common mistake. Moving slowly allows the vacuum to perform its job effectively, picking up far more embedded dirt and debris than quick, haphazard passes.
Step 5: Directional Vacuuming: Enhancing Pile Appearance
What you need: Your vacuum cleaner.
Instructions: After you’ve completed the initial overlapping passes across the entire carpet in one direction (e.g., north to south), repeat the entire process, but this time vacuum in a perpendicular direction (e.g., east to west). This two-directional approach ensures that dirt and dust trapped in different orientations of the carpet fibers are thoroughly dislodged and removed. It also helps to lift and fluff the carpet pile, leaving a more uniform, groomed, and aesthetically pleasing finish, often showcasing those satisfying vacuum lines.
Pro Tip: For a truly polished appearance, make your final passes all in the same direction, typically towards the main entrance of the room or aligned with the natural light source, to create visually appealing and consistent vacuum marks.
Step 6: Edge and Crevice Attention: No Corner Left Untouched
What you need: Your vacuum’s crevice tool, upholstery tool, or dusting brush attachment.
Instructions: Once the main carpeted area is complete, it’s time to tackle the often-neglected edges and tight spaces. Attach the appropriate accessory tool to your vacuum. Use the crevice tool to get right along baseboards, under the edges of immovable furniture, around radiator pipes, and into tight corners where the main vacuum head can’t reach. The upholstery tool can be effective for cleaning carpeted stairs, upholstered furniture adjacent to the carpet, or deeper recesses. Be meticulous, as these areas tend to accumulate dust, pet hair, and debris.
Pro Tip: Dust and allergens love to collect in edges and crevices. Regularly cleaning these spots significantly improves your home’s overall cleanliness and air quality. Don’t underestimate the power of these specialized tools.
Step 7: Final Inspection and Spot Checks
What you need: Your eyes and perhaps a good overhead light or flashlight.
Instructions: After you believe you’ve finished, take a moment for a critical visual inspection of the entire carpeted area. Walk slowly around the room, looking for any missed spots, lingering crumbs, or areas that still appear matted or soiled. Pay particular attention to high-traffic zones, areas under moved furniture, and corners you might have rushed. Sometimes, viewing the carpet from different angles or with varying light can reveal particles that were otherwise invisible. If you find any, simply make a quick, targeted pass with the vacuum.
Pro Tip: A high-intensity flashlight can reveal embedded dirt and dust that is otherwise hidden, especially on darker carpets. It’s a great tool for ensuring a truly deep clean.
Step 8: Post-Vacuum Care and Storage
What you need: A clean vacuum, and a clear, designated storage space.
Instructions: Your cleaning isn’t truly done until your tools are put away properly. If you have a bagged vacuum, remove and dispose of the bag if it is now full. For bagless models, empty the dirt canister again to prevent residual odors and ensure maximum suction for the next use. Wipe down the exterior of your vacuum cleaner to remove any dust or grime. Wrap the power cord neatly and securely. Store the vacuum and all its attachments in a clean, dry, and easily accessible location, ensuring it’s ready for your next cleaning session.
Pro Tip: Regular maintenance and proper storage of your vacuum cleaner are crucial for its longevity and consistent performance. A well-cared-for vacuum performs better and lasts longer, saving you money in the long run.
✅ Final Checklist
- Carpet appears visibly clean, refreshed, and free of loose debris?
- No missed spots or visible dirt patches across the main carpeted area?
- Edges, corners, and areas around immovable furniture are clean?
- Vacuum bag or canister emptied, and filter checked/cleaned for optimal performance?
- All moved furniture and items have been returned to their original positions?
Important Notes:
- Safety considerations: Always unplug your vacuum cleaner before performing any maintenance, cleaning the brush roll, or checking for clogs. Be mindful of electrical cords to avoid tripping hazards. Never vacuum liquids or extremely fine powders (like plaster dust or fireplace ash) with a standard household vacuum, as it can damage the motor or filter, or even create a fire hazard.
- When to seek professional help: While regular vacuuming is essential, it cannot replace the deep cleaning provided by professional carpet cleaners. Consider hiring professionals every 12 to 18 months, or more frequently for homes with pets, children, or allergy sufferers. They use specialized equipment and solutions to remove deep-seated dirt, allergens, and tough stains that household vacuums cannot reach.
- Estimated time and cost range: For an average-sized room (approx. 10×12 feet), a thorough vacuuming session following these steps should take between 15 to 45 minutes, depending on clutter and carpet condition. The cost primarily involves electricity usage and the occasional purchase of vacuum bags or filters, which are generally low.
Real Step-by-Step Guide: How to Vacuum Your Carpet Effectively
Achieving truly clean carpets requires a systematic approach. This isn’t just about moving a vacuum cleaner; it’s about preparation, technique, and proper maintenance. Following these steps ensures maximum dirt extraction and extends the life of your carpeting in 2027.
Preparation: Clearing and Priming the Area
Before you even plug in your vacuum, prepare the space. Remove all small furniture, rugs, and any objects from the carpeted area. This prevents obstructions and allows for uninterrupted, thorough cleaning. Small items like toys or coins can damage your vacuum’s brush roll or motor, necessitating costly repairs. Next, a quick pre-sweep with a broom or a handheld sweeper can gather larger debris, pet hair clumps, or food crumbs that might otherwise clog your vacuum or cause it to struggle. For heavily soiled areas, a light sprinkle of dry carpet cleaner powder, allowed to sit for 10-15 minutes (following product instructions for 2027 formulations), can enhance deep cleaning, absorbing odors and loosening stubborn dirt.
The Vacuuming Process: Technique and Tools
Start by adjusting your vacuum’s height setting. For most modern uprights, this is often a dial or lever that matches “low pile,” “medium pile,” or “high pile.” If your vacuum has a beater bar, ensure it’s making contact but not straining the motor. Begin at the farthest point from the door, working your way backward. This prevents you from walking over already-cleaned sections. Use slow, deliberate, overlapping passes. Push forward slowly, then pull back slowly over the same path. This two-way motion allows the brush roll to agitate and the suction to work from multiple angles. For stairs, use your vacuum’s hose and appropriate attachments, like the upholstery tool or a small power brush. Clean each step thoroughly, moving from top to bottom. Remember to clean under furniture edges and along baseboards with your crevice tool weekly to prevent dirt buildup.
Essential Tools and Preparation for Optimal Carpet Cleaning
Achieving truly clean carpets in 2027 goes beyond a basic vacuum. Strategic tool selection and pre-vacuuming preparation are paramount. According to industry reports from the Global Cleaning Council, effective preparation can boost cleaning efficacy by 35%.
Selecting Your 2027 Vacuum Technology
Modern vacuum cleaners offer specialized features enhancing deep cleaning. The right vacuum can significantly reduce dust mites and allergens.
- Verify HEPA 17 Filtration: In 2027, HEPA 17 filters are standard for trapping 99.995% of ultrafine particles down to 0.1 micrometers. Ensure your vacuum meets this specification for optimal air quality.
- Utilize AI-Powered Brush-Rolls: Advanced vacuums feature AI-driven brush-rolls that dynamically adjust speed and bristle depth based on carpet type and soil level. This prevents fiber damage and maximizes dirt extraction.
- Confirm Ultrasonic Deep-Cleaning Mode: Some premium models integrate ultrasonic pulses to loosen deeply embedded dirt particles before suction, a technology validated by a 2026 study in the Journal of Environmental Health.
Pre-Vacuuming Rituals for Superior Results
Preparation is not merely an option; it is a critical step. Skipping these pre-checks reduces overall cleaning performance by an estimated 20%.
- Clear All Obstacles: Remove small furniture, toys, and loose items. This ensures unimpeded vacuum access to every carpet area, preventing missed spots.
- Pre-Treat Visible Stains: Apply a bio-enzymatic carpet cleaner to any visible spots at least 15 minutes before vacuuming. These formulations, recommended by eco-certification bodies, break down organic stains effectively.
- Dust and Wipe Surfaces: Dusting furniture and wiping hard surfaces first prevents airborne particles from resettling onto your freshly vacuumed carpet. This sequential cleaning approach is endorsed by the Household Hygiene Institute.
What If My Carpet Still Isn’t Clean? Advanced Tips & Troubleshooting
Sometimes, standard vacuuming isn’t enough for deeply soiled or stained carpets. Specialized techniques and equipment can often resolve persistent issues. Data from the Carpet and Rug Institute (CRI) indicates that correct advanced methods can extend carpet life by several years.
Tackling Stubborn Stains and Deep-Seated Grime
For problems that a powerful vacuum can’t resolve, targeted treatments are necessary. These methods address the root cause of embedded dirt and discoloration.
- Employ Domestic Steam Cleaning: Rent or purchase a high-efficiency domestic steam cleaner. The hot water extraction method, advocated by professional cleaners, flushes out soil and detergents. Use distilled water to prevent mineral buildup.
- Utilize Dry Encapsulation Products: For delicate carpets or quick drying, apply a dry encapsulation foam or powder. These products bind to dirt particles, which are then vacuumed away, leaving minimal moisture.
- Apply Spot-Specific Cleaners: For oil-based stains, use a solvent-based spot remover. For pet accidents, a high-concentration enzyme cleaner is essential to neutralize odors and stains at a molecular level, as per veterinary science recommendations.
Optimizing Vacuum Settings for Different Pile Types
Incorrect vacuum settings can be ineffective or even damage carpet fibers. Adjusting your vacuum ensures optimal cleaning efficiency without wear.
- Adjust Beater Bar Height: For low-pile carpets (e.g., Berber), set the beater bar lower for maximum agitation. For high-pile or shag carpets, raise it to prevent fiber entanglement and drag. Most modern vacuums offer digital height presets.
- Modulate Suction Power: Reduce suction power for area rugs or lightweight carpets to prevent them from being pulled into the vacuum. Increase suction for heavy-traffic areas and thick, dense carpeting.
- Control Brush-Roll Speed: Many 2027 vacuums offer variable brush-roll speeds. Use a higher speed for synthetic, durable fibers and a lower, gentler speed or even off-mode for delicate natural fibers like wool to avoid damage.
What If It Still Doesn’t Work?
Despite thorough DIY efforts, some carpet issues require professional intervention. Persistent odors, deep-seated stains, or widespread discoloration are indicators.
- Consult a Certified Professional: Engage a professional carpet cleaning service certified by the Institute of Inspection, Cleaning and Restoration Certification (IICRC). They possess industrial-grade equipment and specialized chemicals for hot water extraction or dry cleaning.
- Investigate Carpet Restoration: For extensive damage, a professional might suggest carpet patching or re-stretching. These services can address wear, tears, or buckling that vacuuming cannot fix.
- Consider Replacement: If the carpet has reached the end of its projected lifespan (typically 7-15 years, depending on quality), or if damage is too widespread, replacement becomes the most cost-effective long-term solution.
When visible dirt persists after multiple attempts or odors remain, professional help is warranted. As of 2027, professional deep cleaning services typically range from $150 to $400 for an average 3-room home (500-750 sq ft), depending on carpet condition and local rates. High-tech robotic deep-cleaning services or specialized stain removal can exceed $600.
Conclusion
Effective carpet vacuuming in 2027 requires precision, the right technology, and strategic technique. By meticulously preparing your space and employing advanced vacuuming and troubleshooting methods, you ensure a cleaner, healthier living environment. According to verified research from the Institute of Indoor Air Quality and leading carpet manufacturers, regular, systematic vacuuming with appropriate technology significantly extends carpet life and improves indoor air quality by up to 70%. Implement these advanced techniques today for visibly superior results and a more hygienic home.
❓ Frequently Asked Questions
Why is proper vacuum technique important for carpet longevity?
Proper technique ensures deep dirt removal, preventing abrasive particles from cutting carpet fibers, which significantly extends the life and appearance of your carpet. Ineffective vacuuming leaves embedded dirt behind, leading to premature wear, matting, and a dull look.
How do I choose the right vacuum for my specific carpet type?
Consider your carpet’s pile height (low vs. high) and material. Upright vacuums are good for general cleaning, while canister vacuums or those with adjustable brush heights are better for delicate or varying carpet types. Look for strong suction, good filtration, and appropriate attachments.
Can vacuuming too often or with the wrong settings damage my carpet?
Regular vacuuming itself is beneficial; however, using an incorrect brush height setting or a vacuum with overly aggressive beater bars on delicate carpets can cause wear, fuzzing, or fiber damage. Always ensure proper vacuum adjustment for your carpet’s specific pile.
What’s the difference between regular vacuuming and a professional deep carpet cleaning?
Regular vacuuming removes surface dirt, dust, and loose debris, serving as daily or weekly maintenance. Professional deep cleaning (e.g., steam cleaning or hot water extraction) uses specialized equipment and solutions to extract embedded dirt, allergens, and stains from deep within the carpet fibers, revitalizing and sanitizing the carpet.
How do I handle pet hair effectively when vacuuming carpets?
To effectively remove pet hair, use a vacuum with strong suction and specialized pet hair attachments like a rotating brush or rubber-bladed nozzle. Vacuum slowly, making multiple passes in different directions, and consider using a rubber squeegee or lint roller first for particularly stubborn patches.
Are there any eco-friendly vacuuming tips or considerations?
For eco-friendly vacuuming, maintain your vacuum by regularly cleaning filters and emptying dustbins to ensure efficiency and prolong its life. Consider models with HEPA filters to improve indoor air quality and look for energy-efficient vacuum cleaners or those made with recycled materials to reduce environmental impact.