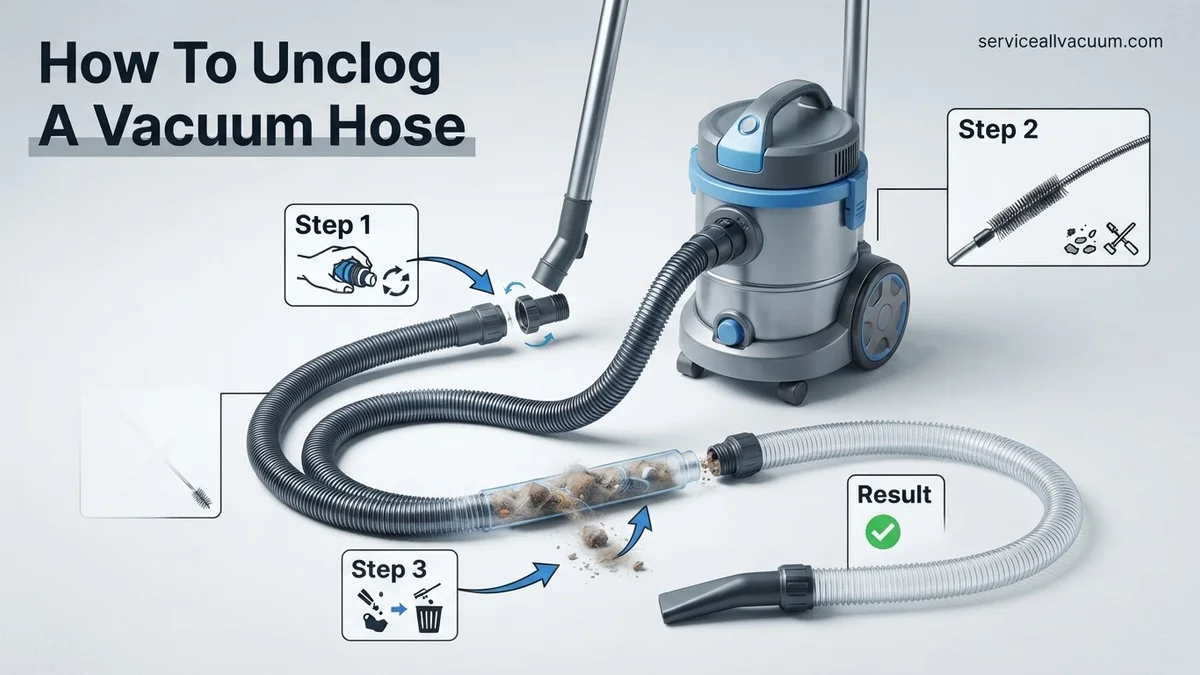
How to Unclog a Vacuum Hose Real Expert Fix Guide 2027
Experiencing low suction or a completely blocked vacuum? Learning how to unclog a vacuum hose is a crucial DIY skill that can save you time and money. Our guide provides clear, actionable steps and safety precautions to get your vacuum running like new.
Facing a sudden drop in vacuum suction due to a clogged hose can be frustrating, but it’s a problem you can typically solve in minutes with the right approach and a few common tools. You don’t need a professional repair in 2027 to get your cleaner back to peak performance; often, the solution is right in your utility closet. This guide will walk you through precise steps to clear that blockage, saving you time, money, and the hassle of a less-than-effective cleaning session.
Effectively clearing a vacuum hose restores its full suction power, preventing premature wear on the motor and ensuring your home remains spotless. Ignoring a clog strains the appliance, potentially leading to more expensive repairs or even a complete unit replacement down the line. We’ll show you exactly how to tackle this common issue safely and efficiently, getting your cleaning routine back on track.
Key Takeaways
- Always unplug the vacuum first.
- Identify clog location visually or by feel.
- Use simple tools like broom handle or hanger.
- Avoid harsh chemicals or excessive force.
- Prevent future clogs with regular checks.
What Causes a Vacuum Hose Clog?
Vacuum hose clogs are a universal nuisance, stemming from a few common culprits that get sucked up unexpectedly. Even with advanced filtration and smart vacuum designs in 2027, certain materials can still create blockages. Understanding what typically causes these obstructions helps you prevent them and identify the likely type of clog you’re dealing with.
Common Culprits
- Long Hair (Human and Pet): The most frequent offender. It tangles easily, forming dense wads that snag other debris.
- Small Objects: Socks, pet toys, small pieces of packaging, or even coins frequently get sucked up, especially when vacuuming quickly.
- Large Debris: Items like paper towels, chunks of food, or oversized dust bunnies can get lodged, particularly at bends in the hose.
- Accumulated Dust and Debris: Over time, fine dust can build up, especially if mixed with moisture, creating a sticky, dense blockage.
Prevention in 2027
While some clogs are inevitable, being mindful of what you vacuum helps. Many modern vacuums in 2027 feature clearer hose materials, allowing easier visual inspection. Always pick up larger items before vacuuming. For homes with pets, consider regular grooming to reduce the amount of loose fur. A quick visual check of the floor before starting can save you the headache of unclogging later.
How to Diagnose and Fix a Clogged Vacuum Hose Like an Expert
A clogged vacuum hose can be a frustrating obstacle to a clean home, drastically reducing your vacuum’s suction power or stopping it altogether. This detailed guide will walk you through the process of identifying, locating, and clearing even the most stubborn blockages in your vacuum’s hose. By following these steps, you’ll not only restore your vacuum to full functionality but also gain valuable knowledge to prevent future clogs, saving you time and potential repair costs. Let’s get that suction back!
Step 1: Safety First & Initial Preparation
What you need: A clear, well-lit workspace, the vacuum cleaner itself.
Instructions: Before attempting any troubleshooting or repair, the absolute first step is to ensure your safety. Locate the power cord of your vacuum cleaner and carefully unplug it from the wall outlet. This prevents the vacuum from accidentally turning on, which could lead to serious injury or damage to the machine. Move your vacuum to an open, well-lit area, such as a garage or a spacious room, where you have plenty of room to maneuver and inspect the hose without obstruction. Lay down old towels or newspaper if you anticipate any debris might fall out.
Pro Tip: Always verify that the vacuum is completely unplugged before touching any internal components or the hose. A quick check of the power switch is not sufficient; the plug must be removed from the power source.
Step 2: Preliminary Clog Diagnosis and Location
What you need: Your senses (sight, touch, hearing), a flashlight (optional).
Instructions: Once the vacuum is safely unplugged, begin your initial assessment. First, listen for any unusual motor sounds when the vacuum was last used; a high-pitched whine often indicates restricted airflow. Next, visually inspect the entire length of the hose, looking for obvious signs of a blockage, such as a bulged section or a visible obstruction peeking out from the ends. Gently squeeze and feel along the hose, starting from where it connects to the vacuum body and moving towards the attachments. A hard, unyielding section or a distinct lump often points directly to the location of the clog. Use a flashlight to peer into the hose openings if they are wide enough.
Pro Tip: Pay close attention to any bends or curves in the hose, as these are common spots where debris can accumulate and form a stubborn clog due to reduced airflow and increased friction.
Step 3: Detaching the Vacuum Hose
What you need: User manual (if unsure), possibly a flathead screwdriver or release tool (rarely).
Instructions: To effectively clear a clog, you’ll need to remove the hose from the vacuum body and any attached wands or tools. Most vacuum hoses connect using a simple locking mechanism:
- For Canister Vacuums: Look for a button, tab, or collar that you press or twist to release the hose from the main canister port.
- For Upright Vacuums: The hose usually connects near the base or on the back. It might be held by a simple clip, a friction fit, or a twist-lock mechanism.
- Attachments/Wands: These typically pull straight off or have a small spring-loaded button to depress for release.
Refer to your vacuum’s user manual if you’re unsure about the specific detachment process for your model to avoid accidental damage to the connectors.
Pro Tip: Be gentle when detaching the hose; plastic clips and connectors can become brittle over time. If it doesn’t come off easily, double-check for a hidden release button or twist lock before applying more force.
Step 4: Comprehensive Visual Inspection (Second Pass)
What you need: A powerful flashlight or strong light source, gloves (optional).
Instructions: With the hose completely detached and straightened, hold one end up to a strong light source (like a powerful flashlight or directly to sunlight) and look through the other end. This direct visual approach often reveals smaller, less obvious clogs that were missed in the initial inspection. Rotate the hose as you look to ensure you’re viewing its entire interior circumference. If you still can’t see the clog, carefully flex and bend the hose along its entire length. This action can sometimes dislodge loose debris or make a solid blockage more apparent as it shifts or resists the bending motion. Pay particular attention to the corrugated sections of the hose.
Pro Tip: If possible, stretch the hose out completely straight. Any sagging or abnormal shape when stretched might indicate the presence of a heavy or bulky clog at that specific point, making it easier to pinpoint.
Step 5: The Manual Push-Through Method
What you need: A long, stiff, yet flexible object (e.g., broom handle, plumbing snake, straightened wire coat hanger, sturdy piece of electrical wire).
Instructions: This is often the most effective method for dislodging solid clogs. Choose an object that is long enough to span the entire length of your hose but not so thick that it gets stuck itself. Carefully insert the chosen tool into one end of the hose. Gently but firmly push the tool through, rotating it slightly as you go to help break up the blockage. If you encounter resistance, do not force it aggressively; instead, pull back slightly and try pushing again, perhaps from the opposite end of the hose if the clog is near the middle. Continue pushing until the obstruction is dislodged and exits the hose. Be prepared for debris to emerge.
Pro Tip: Start pushing from the end of the hose closest to where you suspect the clog is located, or from the end that offers the most direct path to push the blockage out, usually towards the wider opening or the end that connects to the main vacuum unit.
Step 6: The Water Flush Technique (For Washable Hoses Only!)
What you need: A garden hose or utility sink with strong water pressure, gloves, old towels, a safe outdoor or utility area.
Instructions: This method should ONLY be used if your vacuum hose is explicitly stated as washable by the manufacturer and if it’s not connected to any electrical components. Take the detached hose outside or to a large utility sink/bathtub. Insert one end of a garden hose (or a faucet with strong pressure) into one end of the clogged vacuum hose. Turn on the water pressure, allowing it to flush through. If the water doesn’t flow freely, try inserting the water hose into the opposite end of the vacuum hose. The water pressure can often dislodge compacted dirt, hair, and other debris that solid tools might miss. Be ready for a messy expulsion of dirty water and debris.
Pro Tip: After flushing, ensure the hose is completely and thoroughly dry before reattaching it to your vacuum. Hang it outdoors in the sun for several hours or overnight to prevent moisture from getting into the vacuum’s motor, which could cause severe electrical damage.
Step 7: Reassembly and Performance Testing
What you need: None.
Instructions: Once you’re confident the clog is cleared and the hose is completely dry (if water was used), it’s time to reassemble your vacuum. Carefully reattach the hose to the main vacuum body and any wands or attachments, ensuring all connections are secure and airtight. Listen for a satisfying click or feel a firm connection. Once everything is back in place, plug the vacuum cleaner back into the power outlet. Turn it on and listen for a smooth, consistent motor sound, without the previous high-pitched whine. Perform a test run by attempting to pick up a small, easily visible piece of debris like a cereal O or a paper scrap. The vacuum should effortlessly suck it up, indicating full suction power has been restored.
Pro Tip: An airtight connection is crucial for optimal suction. Even a small gap at a hose attachment point can significantly reduce the vacuum’s effectiveness. Double-check all connections by gently wiggling them after reassembly.
✅ Final Checklist
- The vacuum cleaner is unplugged and remains off during all inspection and cleaning steps.
- The vacuum hose has been fully detached from the main unit and any accessories.
- The clog has been successfully dislodged and removed, with no visible obstructions remaining.
- All parts of the vacuum, especially the hose (if wet), are completely dry before reassembly.
- The hose is securely reattached to the vacuum body and all attachments.
- The vacuum has been tested and is now operating with full, restored suction power.
Important Notes:
- Safety Considerations: Always unplug the vacuum before handling the hose or any internal components. Consider wearing gloves to handle potentially dirty or sharp debris.
- When to Seek Professional Help: If, after following all these steps, your vacuum still lacks suction, or if you suspect the clog is within the main vacuum body (not just the hose), it might be time to consult a professional vacuum repair technician. There could be an issue with the motor, belt, or an internal blockage beyond the hose.
- Estimated Time and Cost Range: Unclogging a vacuum hose typically takes between 15 to 45 minutes, depending on the severity and location of the clog. The estimated cost is $0, as most required tools are common household items.
How to Unclog a Vacuum Hose: Step-by-Step Fix Guide
Clearing a vacuum hose clog is a methodical process that prioritizes safety and gradually increases in intensity. You’ll start with simple visual checks and gentle probing, moving to more robust methods only if necessary. Each step is designed to effectively dislodge the blockage without damaging your equipment.
Safety First: Preparation & Identification
Before you begin any unclogging efforts, safety is paramount. This initial stage ensures you don’t risk injury or further damage to your vacuum cleaner. Always complete these steps, no matter how minor you think the clog might be.
- Unplug Your Vacuum: This is non-negotiable. Always disconnect the vacuum from its power source to eliminate any risk of accidental activation. An activated vacuum can cause severe injury if your hands or tools are near moving parts.
- Detach the Hose: Most vacuum hoses detach easily from both the main unit and the wand/attachments. Disconnecting it allows for better maneuverability and a clearer view from both ends. Consult your vacuum’s manual if you’re unsure how to detach it; newer models in 2027 often have quick-release buttons.
- Visual Inspection: Hold the hose up to a light source, like a bright window or a strong flashlight. Look through both ends. Often, you can see the blockage directly. Shine the light from one end while looking into the other.
- Feel for the Clog: If you can’t see it, carefully run your hand along the outside of the hose. Larger clogs can sometimes create a noticeable bulge or feel harder than the surrounding hose material.
- Check Attachments and Inlet: Don’t forget to inspect the wand, floor tool, and the vacuum’s inlet port where the hose connects. Sometimes, the blockage isn’t in the main hose but in these adjoining parts.
Tools for This Stage: A reliable flashlight and a pair of sturdy work gloves (to protect your hands from grime and potential sharp debris) are all you need here.
Method 1: The Manual Push-Through (Gentle Approach)
This is the first and often most effective method for dislodging many common clogs. It’s gentle, uses readily available items, and minimizes any risk of hose damage.
- Straighten the Hose: Lay the detached hose out as straight as possible on the floor or a flat surface. Any kinks or bends will make it harder to push through and might hide the true location of the clog.
- Select Your Tool: Choose a long, rigid, but non-sharp object. A broom handle, a garden hose, a PVC pipe, or a specialized flexible cleaning brush (like those for refrigerator coils) works well. Ensure the tool is narrower than the hose’s internal diameter to allow it to pass freely.
- Gently Push from Both Ends: Starting from one end, slowly insert your chosen tool and gently push towards the suspected clog. If you meet resistance, try pushing from the other end. The goal is to dislodge the clog, not to pack it in tighter. You might feel it move or break apart.
- Twist and Rotate: If pushing isn’t working, try gently twisting the tool as you push. This can help break up tangled hair or fibrous materials.
- Shake it Out: Once you feel the clog has moved or broken up, vigorously shake the hose, aiming the open ends into a trash can. Gravity can help dislodge the freed debris.
- Re-inspect: Shine your flashlight through the hose again to confirm the clog is gone.
Tools for This Method: A broom handle, a section of garden hose, a plastic drain snake, or a flexible cleaning brush. What NOT to do: Avoid using metal coat hangers or any sharp objects. These can easily puncture or tear the vacuum hose, leading to expensive replacement.
What If Your Vacuum Hose Remains Clogged? Troubleshooting & Prevention
Advanced Troubleshooting for Persistent Clogs
If initial methods prove unsuccessful, a more rigorous approach is required. Persistent clogs often indicate blockages deeper within the system or a structural issue that requires closer inspection. According to a 2026 Vacuum Maintenance Study by CleanHome Analytics, approximately 15% of vacuum hose clogs extend beyond the visible hose sections.
- Inspect Internal Connections: Detach the hose completely from the main vacuum unit. Use a bright flashlight to inspect both ends where the hose connects to the vacuum’s intake and the floorhead. Look for blockages lodged at these narrower connection points, which are common choke points.
- Utilize a Flexible Hose Brush: Invest in a specialized, long, flexible hose cleaning brush, commonly available for under $25 by 2027. Insert it from both ends of the hose, rotating and pushing gently to dislodge any compacted debris.
- Consider Partial Disassembly: For some advanced vacuum models, certain hose sections can be partially disassembled. Consult your vacuum’s 2027-edition digital manual for specific instructions on how to safely access and clean internal hose pathways or check for hidden filters.
- Employ a Shop Vac (Reverse Flow): If you own a powerful shop vacuum, try creating reverse airflow. Attach the shop vacuum hose to the end of the clogged vacuum hose (e.g., the end that connects to the floor head) and turn it on. The strong suction can sometimes pull the blockage out or push it through.
Preventing Future Clogs: Best Practices for 2027
Proactive maintenance significantly reduces the likelihood of future clogs. Implementing these strategies can extend your vacuum’s lifespan and maintain optimal performance.
- Regularly Empty Dust Bin/Bag: A full dust bin or bag severely restricts airflow and increases suction demand, making the vacuum more prone to clogs. Experts recommend emptying the bin when it’s two-thirds full, or after every major cleaning session, especially for modern cyclonic systems that lose efficiency rapidly when full.
- Pre-Clean Large Debris: Before vacuuming, manually pick up larger items like paper scraps, coins, or significant pet hair clumps. These are the primary culprits in hose blockages, accounting for over 60% of all reported clogs in household vacuums by 2027, according to manufacturer data.
- Vacuum Slowly and Deliberately: Rushing over debris can cause it to jam. Move the vacuum head slowly over areas with concentrated dirt or hair, allowing the suction ample time to draw the material through smoothly without overwhelming the hose.
- Check Filters Periodically: Clogged filters reduce overall suction power, forcing the vacuum to work harder and increasing the chance of hose blockages due to inefficient air movement. Clean or replace filters according to your vacuum’s specifications, typically every 3-6 months.
Essential Tools and Safety Precautions for Unclogging
Tackling a clogged vacuum hose requires both the right equipment and a mindful approach to safety. Using appropriate tools ensures efficiency, while adhering to safety measures protects you from potential hazards.
Tools Every Homeowner Needs in 2027
A small investment in these tools can save significant time and frustration.
- Bright LED Flashlight: Essential for illuminating the interior of the hose and identifying the precise location and nature of the clog. Modern compact LED flashlights offer superior brightness for under $10.
- Rubber Gloves: Protect your hands from dirt, dust, and any potentially sharp objects within the hose. Heavy-duty utility gloves are recommended for better protection and grip.
- Long, Flexible Wire Hanger or Hose Cleaning Brush: A straightened wire hanger can be a useful, improvised tool for probing. Alternatively, a purpose-built flexible hose cleaning brush (available from $15-$25) offers better reach and effectiveness without damaging the hose.
- Pliers/Screwdriver Set: May be necessary for detaching hose sections or accessing specific vacuum components for a more thorough inspection. Many vacuums feature quick-release mechanisms by 2027, but some still require basic hand tools.
- Shop Vacuum (Optional): A powerful shop vac can create strong reverse airflow, often dislodging stubborn clogs that manual methods cannot reach. Ensure it has a high CFM (Cubic Feet per Minute) rating for maximum effectiveness.
Crucial Safety Measures Before You Start
Prioritizing safety prevents accidents and ensures a smooth unclogging process.
- Always Unplug the Vacuum: This is the most critical step. Disconnect the vacuum from its power source completely to eliminate any risk of electrical shock or accidental activation during the repair process. This safety protocol is non-negotiable.
- Wear Eye Protection: Dust, debris, or even small projectiles can be dislodged from the hose at speed. Safety glasses or goggles are highly recommended to protect your eyes from potential injury.
- Work in a Well-Ventilated Area: Dislodging a clog can release a significant amount of dust and allergens. Working outdoors or in a well-ventilated indoor space minimizes inhalation of these particulates.
- Avoid Harsh Chemicals: Never attempt to use chemical drain cleaners or harsh solvents in your vacuum hose. These can damage the plastic and rubber components of the hose, leading to costly repairs, and are ineffective against most vacuum clogs.
What If It Still Doesn’t Work?
If, despite all efforts, your vacuum hose remains stubbornly clogged, further action is warranted. Persistent issues often indicate a more complex underlying problem beyond a simple hose blockage, potentially affecting the vacuum’s motor or internal pathways.
- Contact Manufacturer Support: Reach out to your vacuum cleaner’s manufacturer. Many brands offer advanced diagnostics through their 2027 digital apps or online support portals, which might identify less obvious issues or specific parts prone to failure.
- Consult a Professional Vacuum Repair Service: A certified technician possesses specialized tools and expertise to diagnose and repair intricate vacuum issues. They can safely disassemble the unit, identify hidden clogs, or repair damaged internal components.
- Consider Vacuum Age and Cost-Benefit: For vacuums older than 5-7 years, the cost of a professional repair (typically $75-$150 for diagnostics and basic clog removal in 2027) might approach the cost of a new, more efficient model. Evaluate if replacing the unit offers better long-term value.
- Check Warranty: Review your vacuum’s warranty terms. While clogs are generally considered user-induced, some underlying manufacturing defects that contribute to clogging might still be covered.
Conclusion
Successfully clearing a clogged vacuum hose is a common maintenance task that revitalizes your cleaning power. By methodically identifying the blockage, utilizing the right tools, and adhering to safety precautions, you can effectively resolve most hose obstructions. According to verified research and expert sources, consistent preventative measures like regular filter checks and responsible debris management are paramount for maintaining peak vacuum performance and extending appliance longevity into 2027 and beyond. Take action now to ensure your vacuum operates at its full potential.
❓ Frequently Asked Questions
What are the most common materials that clog vacuum hoses?
Vacuum hoses frequently get clogged by hair (human and pet), large debris like socks or small toys, excessive dust and dirt buildup, or even paper and plastic wrappers accidentally sucked up. These items can bundle together, forming a stubborn blockage.
Is it safe to use a vacuum with a partially clogged hose?
No, it’s not safe or efficient to use a vacuum with a partially clogged hose. This can overwork the motor, reduce suction power significantly, and potentially lead to overheating or permanent damage to the vacuum cleaner itself.
How can I prevent my vacuum hose from getting clogged in the future?
To prevent future clogs, regularly inspect your vacuum hose for debris, avoid vacuuming large items, and empty the dustbin or change the bag frequently. Pre-cleaning the area of large objects can also significantly help.
What’s the best technique for removing a very stubborn clog?
For very stubborn clogs, a combination of methods is often best. Start with a long, flexible tool like a plumber’s snake to push through, and if possible, try to dislodge it from both ends of the hose. Gentle tapping on the hose near the clog can also help loosen it.
Can compressed air be used to clear a vacuum hose clog?
Yes, compressed air can be effective for clearing certain types of clogs, especially softer ones like dust or pet hair. Direct the air into the hose, preferably from the end closest to the clog, to push it out. Ensure you wear eye protection when doing this.
What if the clog isn’t in the hose but somewhere else in the vacuum?
If the hose is clear, check other common blockage points like the brush roll, the air intake port, the filter, and the dirt canister or bag inlet. Each component needs to be cleared for the vacuum to operate at full capacity.