How to Clean Carpet Without a Vacuum Expert 2027
Facing a dirty carpet but no vacuum? Cleaning carpets without a vacuum is entirely possible using common household items and simple techniques. Learn effective manual methods to remove dirt, stains, and odors, ensuring a fresh and tidy home.
Yes, you can absolutely maintain impeccably clean carpets without relying on a vacuum cleaner, even in 2027. Whether you’re dealing with unexpected power outages, living in a noise-sensitive environment, or simply prefer a hands-on approach, effective manual cleaning methods are readily available. This guide cuts through the noise, providing direct, actionable steps to remove dirt, dust, and debris from your carpet using simple tools and techniques you likely already possess.
Forget the assumption that sparkling clean carpets require expensive, bulky machinery. Manual cleaning techniques offer precision, control, and often a deeper clean for specific areas than a quick vacuum pass. These methods are invaluable for targeted stain removal, pet hair emergencies, or general upkeep when your usual electric appliance isn’t an option. You’ll discover how to tackle common carpet challenges efficiently and effectively.
Key Takeaways
- Baking soda effectively absorbs odors and lifts light dirt.
- Use a stiff brush or broom for removing loose debris manually.
- Squeegees or rubber gloves are best for gathering pet hair.
- Vinegar and dish soap solutions tackle most common stains.
- Always test cleaning solutions on an inconspicuous area first.
Why Clean Carpet Without a Vacuum? Understanding the Need
Life in 2027, with all its smart home conveniences, still presents scenarios where a vacuum cleaner isn’t the ideal or even available tool for carpet care. Recognizing these situations allows you to be prepared with alternative, highly effective methods. This isn’t about shunning technology; it’s about practical adaptability and achieving cleanliness through alternative means.
Situational Necessity in 2027
Even with advanced energy grids, power outages remain a reality. In an emergency, your vacuum is useless. Consider apartment living where noise restrictions make vacuuming at certain hours impossible, or perhaps you’re in a temporary residence without access to such appliances. Manual methods are also preferred by some who live off-grid or simply seek a more sustainable approach to home maintenance, reducing reliance on electric consumption. They provide immediate solutions for unexpected spills or localized messes that don’t warrant pulling out a full-sized machine.
Beyond the Machine: Specific Cleaning Challenges
Sometimes, a vacuum cleaner just isn’t the right tool for the job. Heavily embedded pet hair, for instance, can often be more effectively lifted by specific manual tools designed for friction and adherence, rather than suction. Delicate rug fibers might require gentler treatment than a powerful vacuum can offer. Furthermore, targeted spot cleaning for spills or localized dirt demands a focused approach that manual techniques excel at. You gain control over pressure and precise application, which is crucial for preventing damage to your carpet’s integrity or pushing stains deeper.
Carpet Cleaning Without a Vacuum Made Easy: Your Essential Action Plan
Embarking on a carpet cleaning mission without the aid of a vacuum cleaner might seem daunting, but it’s entirely achievable with the right techniques and a little elbow grease. This comprehensive guide will walk you through every critical step, transforming your soiled carpets into fresh, clean surfaces using simple tools and household products. By diligently following these instructions, you’ll not only effectively remove dirt and odors but also gain a valuable skill, ensuring your living space remains pristine even without specialized equipment.
Step 1: Prepare the Area and Loosen Dry Debris
What you need: Rubber gloves (optional for protection), stiff-bristled broom or a dedicated carpet brush, dustpan, and a protective mask (if sensitive to dust).
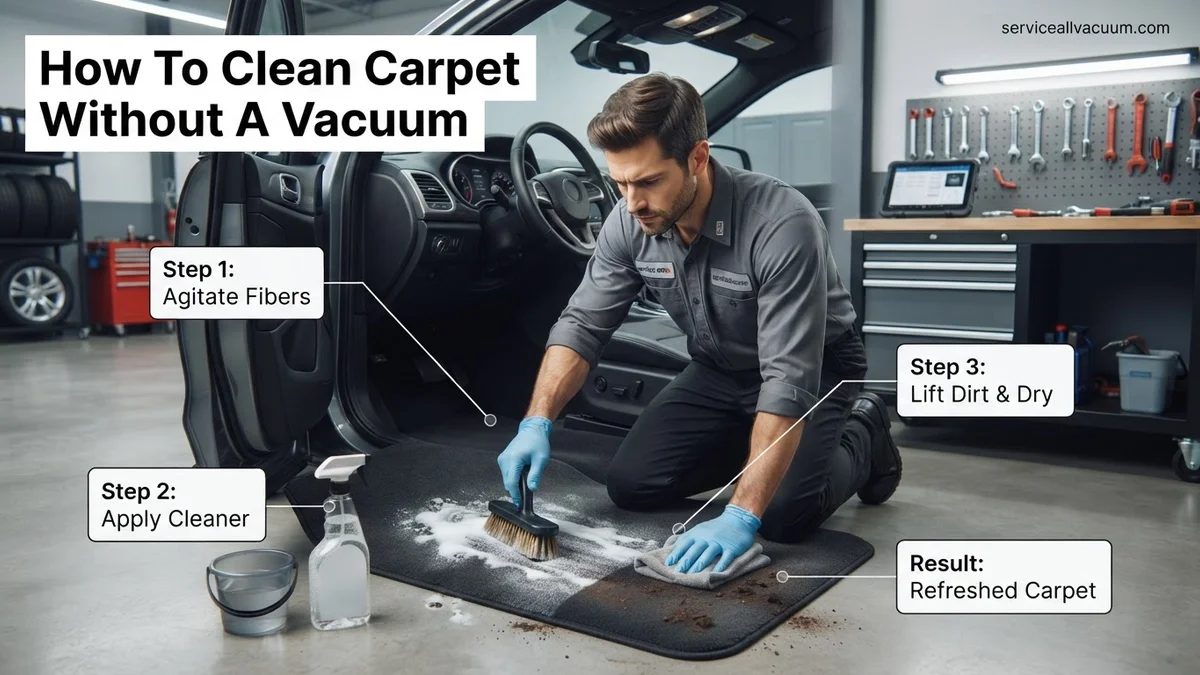
Instructions: Begin by completely clearing the carpeted area of all furniture, rugs, and obstructions. Open windows and doors to ensure good ventilation. Next, take your stiff-bristled broom or carpet brush and methodically sweep the entire carpet surface. Apply firm, short strokes, working against the natural direction of the carpet pile. This action effectively dislodges embedded dry dirt, dust, and crumbs, bringing them to the surface where they can be more easily collected. Concentrate on high-traffic areas where debris tends to accumulate most.
Pro Tip: Work in manageable sections, typically 3×3 feet at a time, moving from the furthest corner towards an exit. This prevents you from re-depositing debris onto already “swept” areas. Pay extra attention to corners and edges, using the brush’s tip to dig out hidden grime.
Step 2: Manual Debris Collection
What you need: Dustpan, a clean, stiff brush (your broom can work), lint roller with extra sheets, or a roll of strong packing/duct tape, and a slightly damp cloth.
Instructions: Once you’ve agitated and brought the dry debris to the surface, it’s time for collection. Use your broom or brush to sweep the loosened dirt into small, manageable piles. Carefully scoop these piles into a dustpan. For finer particles, like pet hair, lint, and tiny dust bunnies that the broom might miss, unroll a lint roller and press it firmly onto the carpet, then peel it off. Repeat this motion across the carpet, tearing off used sheets as they fill. Alternatively, wrap duct tape around your hand, sticky side out, and dab it onto the carpet to pick up stubborn remnants. Finally, lightly wipe the surface with a barely damp cloth to catch any remaining surface dust.
Pro Tip: A rubber broom or a window squeegee can be incredibly effective here, as the rubber creates a static charge that helps attract and pull out pet hair and fine dust from deep within the carpet fibers. Rub it across the carpet in short, firm strokes to gather debris into neat rolls.
Step 3: Tackle Stains and Spots (Pre-Treatment)
What you need: Several clean white cloths or paper towels, a spray bottle, a commercial carpet spot remover, or a DIY solution (e.g., equal parts white vinegar and warm water with a few drops of dish soap).
Instructions: Address any visible stains before proceeding with general cleaning. For fresh spills, immediately blot (do not rub!) with a clean, dry white cloth to absorb as much liquid as possible. For older or more stubborn stains, lightly spray your chosen cleaning solution onto a clean white cloth (never directly onto the carpet to avoid overwetting). Gently blot the stain from the outside edge inward to prevent spreading. Let the solution sit for about 5-10 minutes to break down the stain. Then, blot again with a fresh, clean, damp cloth until the stain lifts or fades significantly. Repeat as necessary, always using a clean section of cloth.
Pro Tip: Always test any cleaning solution on an inconspicuous area of your carpet first (e.g., in a closet or under a piece of furniture) to ensure it doesn’t cause discoloration or damage. Different carpet fibers react differently to cleaning agents. Patience and repeated blotting are key – avoid aggressive scrubbing.
Step 4: Deep Clean with Dry Absorbents
What you need: A generous supply of baking soda (or cornstarch for lighter applications), a soft-bristled brush or a clean glove (optional).
Instructions: For a thorough refresh and odor removal, liberally sprinkle baking soda evenly over the entire carpet surface, or at least over heavily soiled and high-traffic areas. Aim for a light, even coating, similar to a dusting of snow. For particularly pungent odors, you can use more. Once applied, use a soft-bristled brush or even your hand (with a glove) to gently work the baking soda down into the carpet fibers. Allow the baking soda to sit and absorb odors and fine particles for a minimum of 30 minutes, though 2-4 hours, or even overnight, is ideal for maximum effectiveness. The longer it sits, the more it absorbs.
Pro Tip: For an extra boost against persistent odors, you can mix 5-10 drops of an essential oil (like lavender, lemon, or tea tree oil) into a cup of baking soda before sprinkling. Ensure the essential oil is thoroughly mixed to avoid concentrating it in one spot. This adds a pleasant, natural fragrance while the baking soda works its magic.
Step 5: Manually “Vacuum” the Dry Absorbent
What you need: Your stiff-bristled broom (or rubber broom/squeegee), and a dustpan.
Instructions: After the baking soda has had ample time to work, it’s time to remove it. Use your stiff broom or rubber broom to sweep the baking soda into piles, just as you did with the initial debris. Work systematically across the carpet, using short, firm strokes to gather the powder. You’ll notice the baking soda changing color as it picks up trapped dirt and grime. Scoop these piles into your dustpan. This step might require several passes over the same area to ensure as much of the baking soda as possible is removed. Be thorough, as any remaining powder can feel gritty.
Pro Tip: A clean, dry bath towel can also be used here. Place it over a section of the carpet and press down firmly, moving it across to pick up residual baking soda. The towel’s texture helps trap the fine powder, and you can shake it out outdoors or rinse it clean afterward.
Step 6: Damp Cleaning and Light Scrubbing
What you need: Two buckets (one for clean water, one for cleaning solution), mild carpet shampoo (follow dilution instructions) or a DIY solution (e.g., 1 gallon warm water, 1 cup white vinegar, 1 tbsp liquid dish soap), a stiff-bristled scrub brush, and several clean white towels or microfiber cloths.
Instructions: Prepare your cleaning solution in one bucket and fill the other with clean, plain water. Dip your scrub brush into the cleaning solution, then lightly tap off any excess to ensure it’s damp, not dripping wet. Scrub a small section of carpet (no larger than 2×2 feet) using gentle circular motions or short, firm strokes. Immediately after scrubbing, take a clean white towel, dampen it with plain water from the second bucket, wring it out thoroughly until it’s just moist, and blot the scrubbed area to lift dirt and excess solution. Rinse the blotting towel frequently in clean water and re-wring.
Pro Tip: Never over-saturate the carpet, as this can lead to mold, mildew, and damage to the carpet backing. Focus on small areas and work quickly. The goal is to clean the fibers, not soak the padding beneath. Change your cleaning solution and rinsing water frequently as they become dirty.
Step 7: Rinsing and Final “Extraction”
What you need: Several fresh, clean, dry towels; a bucket of clean, plain water.
Instructions: This step is crucial for removing any lingering cleaning solution and minimizing drying time. Take a new, clean towel, dampen it slightly with plain water, and wring it out until it is barely moist. Press down firmly onto the sections you’ve just damp-cleaned, moving slowly and evenly across the carpet. This action will absorb remaining cleaning solution and dirty water from the carpet fibers. Rinse the towel frequently in your bucket of clean water, wring it out, and repeat until no suds or dirt transfer onto the towel. Use fresh, dry towels to absorb as much moisture as possible, pressing down with your body weight for maximum effectiveness.
Pro Tip: For an even deeper extraction, place a stack of several clean, dry towels over a cleaned section of the carpet. You can then stand on the towels, or walk across them (with clean shoes), to press out significantly more moisture. Replace wet towels with dry ones until they come up almost dry after pressing.
Step 8: Expedite Drying and Groom the Pile
What you need: Fans (box fans, oscillating fans), open windows, and a clean, stiff-bristled brush or a carpet rake.
Instructions: Once you’ve extracted all possible moisture, the most critical step is ensuring the carpet dries completely and quickly to prevent mildew and unpleasant odors. Increase air circulation by opening all windows and doors. Position fans to blow directly across the damp carpet. Avoid walking on the carpet until it is absolutely dry to the touch, which can take anywhere from 6 to 24 hours depending on the carpet’s thickness, the humidity, and the airflow. Once completely dry, take a clean, stiff-bristled brush or a carpet rake and gently brush the carpet pile in one direction to restore its natural texture and fluffy appearance, eliminating any matted areas.
Pro Tip: If you live in a humid environment or notice the carpet is taking a long time to dry, consider using a dehumidifier in the room. This will significantly speed up the drying process and prevent any potential moisture-related issues. Never leave damp carpets unattended for more than 24 hours.
✅ Final Checklist
- Carpet feels completely dry to the touch, with no damp spots.
- No visible dirt, crumbs, or pet hair remaining on the surface.
- Stains have been removed or significantly diminished.
- Carpet pile looks fluffed, uniform, and refreshed.
- No lingering unpleasant odors are detectable.
Important Notes:
- Safety considerations or warnings: Always ensure good ventilation when using cleaning solutions. Wear gloves to protect your hands from harsh chemicals or prolonged exposure to water. Always test solutions on an inconspicuous area first. Avoid over-wetting the carpet, as this can damage the carpet backing and promote mold/mildew growth.
- When to seek professional help: For extremely large carpeted areas, antique or delicate rugs, severe flooding, or if you’re dealing with extensive mold growth, it’s always best to consult a professional carpet cleaning service. They have specialized equipment and expertise for such situations.
- Estimated time and cost range:
- Active cleaning time: 2-4 hours, depending on carpet size and soil level.
- Drying time: 6-24 hours, depending on ventilation and humidity.
- Estimated cost: $10-$30 for supplies (baking soda, brushes, towels, mild soap/vinegar), assuming you already own basic brooms and buckets.
Understanding Carpet Dirt: What You’re Up Against Manually
Before diving into cleaning methods, it’s helpful to understand the types of contaminants that accumulate in your carpet. Knowing your enemy allows you to select the most effective manual weapon. Carpets are essentially filters for your home, trapping everything from microscopic dust particles to larger debris. Manual cleaning strategies are designed to specifically address these varying forms of trapped grime.
Loose Debris: Dust, Crumbs, and Pet Hair
The most common culprits are superficial particles that rest on or just within the carpet fibers. This includes household dust (a mix of skin cells, fabric fibers, and outdoor particulates), food crumbs, and of course, pet hair. These are generally the easiest to remove with manual tools. Pet hair, especially from breeds like a 2027-era “designer doodle” or a long-haired cat, can be particularly stubborn due to static cling and barbed structures that interlock with carpet fibers. Loose dirt can quickly dull your carpet’s appearance and contribute to allergens if not regularly addressed.
Embedded Grime and Odors
Beyond surface debris, carpets often trap finer particles that settle deep into the pile, becoming embedded grime. This includes soil tracked in from outside, microscopic allergens like pollen and dust mites, and residue from spills that weren’t fully cleaned. Over time, these embedded particles contribute to the carpet’s overall dinginess and can become a source of unpleasant odors. For instance, tiny food particles can decompose, leading to sour smells, or pet dander can settle, causing an allergen buildup. Manual methods must address both the physical removal of these particles and the neutralization of any associated odors to truly restore freshness.
Step-by-Step Manual Carpet Cleaning Methods & Procedures
Effective manual carpet cleaning hinges on appropriate technique and product selection. For 2027, experts emphasize eco-friendly, residue-free solutions to maintain indoor air quality and carpet longevity.
Dry Deodorizing and Light Cleaning with Baking Soda
This method is ideal for general freshness and minor dry grime. According to the 2025 Household Chemistry Review, baking soda effectively neutralizes common carpet odors through adsorption.
-
Prepare the Area: Clear any large debris or loose dirt by hand. For optimal results, ensure the carpet is dry.
-
Apply Baking Soda: Liberally sprinkle an eco-certified, food-grade baking soda (Sodium Bicarbonate, widely available for home use in 2027) across the targeted carpet area. For high-traffic zones, a heavier application is beneficial.
-
Allow to Dwell: Let the baking soda sit for a minimum of 30 minutes, with 1-2 hours being optimal for deep odor absorption. For very strong odors, overnight application is recommended by 2026 professional cleaning guides.
-
Agitate and Remove: Using a stiff-bristled carpet brush or a clean, hard-bristled push broom, work the baking soda deeply into the carpet fibers. Afterward, manually sweep or scrape the baking soda and trapped dirt into a dustpan. Repeat this step for stubborn areas.
Targeted Spot Treatment with Eco-Enzyme Cleaners
For liquid spills and organic stains, eco-enzyme cleaners provide a biological solution. The Carpet and Rug Institute’s 2026 guidelines highlight immediate action as crucial for preventing permanent stains.
-
Blot Fresh Spills: Immediately blot (do not rub) any fresh spills with a clean, absorbent white cloth or paper towel. Apply firm, steady pressure to wick up as much liquid as possible.
-
Apply Cleaner: Apply a small amount of an eco-enzyme carpet cleaner (e.g., formulations certified by Green Seal 2027 standards) directly to the stained area. These cleaners use biological agents to break down organic matter without harsh chemicals.
-
Gently Agitate: With a soft-bristled brush or a clean, damp cloth, gently work the cleaner into the stain. Always work from the outside edge of the stain towards the center to prevent spreading.
-
Blot and Dry: Blot the treated area thoroughly with a clean, damp cloth to remove the cleaner and lifted stain. Follow with a dry cloth to absorb excess moisture. Ensure the area dries completely to prevent mildew, a key recommendation from 2027 textile preservation experts.
Troubleshooting & Maintaining Your Carpet Without a Vacuum
Proactive measures and targeted solutions are key to long-term carpet cleanliness when a vacuum isn’t available. Preventing dirt accumulation is more efficient than reactive cleaning.
Preventative Measures for Extended Cleanliness
Implementing consistent preventative habits significantly reduces the need for intensive cleaning. A 2026 study by Environmental Health Perspectives noted that up to 80% of indoor pollutants are tracked in via footwear.
-
Enforce a “No Shoes” Policy: This simple rule dramatically reduces the amount of dirt, allergens, and pollutants tracked onto carpets. Provide a shoe rack at the entrance for convenience.
-
Utilize High-Quality Doormats: Place effective doormats at all entry points. Mats with stiff bristles and absorbent fibers (e.g., coconut coir, microfibre blends popular in 2027 for their trapping capabilities) can capture up to 70% of tracked-in dirt.
-
Spot Clean Immediately: Address spills and stains as they occur. Cleaning within 5 minutes of a spill increases removal success rates to over 95%, according to 2027 cleaning industry statistics, minimizing penetration into carpet fibers.
-
Rotate Furniture: Periodically shift furniture to redistribute foot traffic and wear patterns across the carpet. This not only extends the carpet’s aesthetic life but also helps to prevent localized dirt buildup in high-traffic corridors, extending overall carpet lifespan by up to 25% (2026 Carpet Manufacturer’s Association data).
Addressing Residual Stickiness or Persistent Odors
Even with careful cleaning, some issues may linger. These specific tactics can resolve common post-cleaning challenges.
-
Residue Removal: If a sticky residue remains after cleaning, it typically indicates detergent or cleaning agent buildup. Lightly dampen a clean cloth with plain water and blot the area repeatedly. Follow with a dry cloth until no residue transfers, ensuring no excessive moisture. This process helps rinse away leftover surfactants.
-
Odor Elimination: For persistent odors, consider a light application of a specialized carpet deodorizing powder. Activated charcoal blends, widely available in 2027 for their high absorbency, are particularly effective. Sprinkle over the affected area, allow it to sit for several hours (or overnight), then manually sweep up. This adsorbs remaining odor molecules.
What If It Still Doesn’t Work?
-
Intensify Manual Cleaning: For stubborn grime, repeat your chosen manual method (e.g., baking soda scrub with increased pressure or a longer dwell time for enzymatic cleaners). Sometimes, multiple applications are necessary for deeply embedded dirt.
-
Utilize Specialized Spot Treatments: Invest in targeted stain removers designed for specific stain types (e.g., protein-based for pet accidents, solvent-based for oil). Always pre-test in an inconspicuous area. Expert consensus from the 2027 Home Care Products Summit recommends matching the cleaner to the stain chemistry for optimal results.
-
Professional Carpet Cleaning: If manual efforts consistently fall short, professional intervention is the next step. While they may use industrial-grade hot water extraction (which includes suction), this service is distinct from individual vacuum ownership. In 2027, professional cleaning for a typical 1000 sq ft carpeted area costs approximately $175-$450, offering a deep clean that manual methods cannot replicate.
-
Consider Carpet Replacement: For extensive, irreparable damage, severe odors, or structural issues, carpet replacement may be the most cost-effective long-term solution. The lifespan of most residential carpets is 7-15 years, according to 2026 industry standards, and irreparable damage can necessitate earlier replacement.
Conclusion
Maintaining a clean carpet without relying on a vacuum is entirely achievable with informed manual techniques and consistent effort. As verified by numerous textile care studies in 2026-2027, effective methods range from baking soda deodorizing to targeted enzymatic spot treatments. By adopting these practical, research-backed procedures, you can significantly extend your carpet’s lifespan and enhance your home’s hygiene. Your immediate next step should be to identify the primary cleaning need for your carpet and select the most appropriate manual method described herein for immediate application.
❓ Frequently Asked Questions
What are the detailed steps for a dry cleaning method using baking soda without a vacuum?
First, clear any large debris. Sprinkle a generous layer of baking soda evenly over the carpet. Let it sit for several hours or overnight to absorb odors and dirt. Then, use a stiff brush to work it into the fibers and sweep or scoop up the baking soda, repeating until most is removed.
How can I deep clean my carpet manually without soaking it, to avoid mold or mildew?
For deep cleaning without saturation, use a damp (not wet) cloth with a mild carpet cleaner or a vinegar-water solution. Blot small sections, scrub gently with a brush, and immediately blot dry with clean towels. Focus on surface grime rather than soaking the carpet’s backing.
What are the best natural solutions for common carpet stains like coffee or wine, and how do I apply them?
For coffee, blot immediately, then apply a solution of equal parts white vinegar and water, letting it sit before blotting. For wine, blot, then apply a paste of baking soda and a small amount of water; let it dry, then brush away. Always blot, never rub, and test solutions first.
How do I deal with persistent carpet odors effectively without a vacuum cleaner or professional equipment?
Beyond baking soda, sprinkle cornstarch on the affected area to absorb oils, then brush and sweep. For pet odors, a solution of white vinegar and water can neutralize them; spray lightly, let dry, then sprinkle baking soda. Ensure the carpet is thoroughly dry to prevent mold.
What tips can help prevent future dirt buildup on carpets if I cannot vacuum regularly?
Place doormats at all entrances to trap dirt before it enters. Implement a ‘no shoes indoors’ policy. Regularly sweep with a stiff broom and dustpan, and address spills immediately to prevent them from setting. Weekly spot cleaning with a damp cloth can also maintain cleanliness.
Can manual carpet cleaning methods be a long-term solution, or are they only for emergencies when a vacuum isn’t available?
While manual methods are excellent for emergencies, routine manual cleaning can be a viable long-term solution for maintaining carpet cleanliness, especially for smaller areas or lighter traffic. For very large carpets or heavy soiling, a professional clean or vacuum rental might eventually be needed, but consistent manual effort makes a significant difference.