How to Vacuum Under the Bed 2027 Expert Step-by-Step Guide
Tackling under-bed dust is often challenging due to tight spaces and hidden debris. This guide provides expert, step-by-step instructions on how to effectively vacuum under your bed, ensuring a thorough clean. Learn about the essential tools and techniques to conquer dust bunnies, allergens, and pet hair, making your bedroom healthier.
How to Vacuum Under the Bed 2027 Expert Step-by-Step Guide
Effectively vacuuming under your bed in 2027 goes beyond a quick sweep; it demands specific attachments and a methodical approach to tackle the hidden dust, allergens, and pet hair that accumulate there. This isn’t just about tidiness. It’s a critical step for maintaining indoor air quality, significantly reducing allergens in your sleep environment, and even extending the lifespan of your mattress and bedding by eliminating abrasive particles. You’re looking for thoroughness and efficiency.
This guide provides a precise, actionable strategy. We will walk you through selecting the right 2027-era tools and applying expert techniques to ensure every inch under your bed is genuinely clean, without unnecessary effort or moving heavy furniture unless absolutely required.
Key Takeaways
- Use specialized vacuum attachments for tight spaces.
- Follow a step-by-step process for thorough cleaning.
- Prepare the area by decluttering before vacuuming.
- Adjust technique based on your specific bed type.
- Prioritize safety, especially with adjustable beds.
Why Under-Bed Areas Become So Dirty: A Diagnosis
Understanding why under-bed spaces are dust magnets is key to effective cleaning. This area is a perfect storm for accumulating particulate matter, often becoming one of the most neglected spots in any home by 2027 standards.
Understanding Dust Accumulation Dynamics
Dust isn’t just surface-level. Under your bed, it’s a dense mix of shed skin cells, textile fibers from bedding and carpets, outdoor pollutants tracked in, and airborne particles that settle due to minimal air circulation. Gravity pulls these particles down, and the low clearance creates a static environment where they tend to stay. Without regular intervention, these layers compact, making them harder to remove.
The Pet Hair & Allergen Trap
For pet owners, the under-bed area becomes a primary reservoir for pet dander and hair. As pets move around, fur and dander naturally migrate to low-traffic, sheltered spots. This combines with dust mites, pollen, and other microscopic allergens to create a significant concentration directly beneath where you sleep. By 2027, smart home air quality monitors often flag these areas as high-allergen zones if left uncleaned, impacting sleep quality and respiratory health.
How to Vacuum Under the Bed Like a Pro: A Practical Walkthrough
Vacuuming under the bed is often overlooked, yet it’s a crucial task for maintaining a truly clean and healthy home environment. This guide will walk you through a detailed, step-by-step process to effectively remove dust, allergens, and forgotten treasures from beneath your sleeping sanctuary. By following these instructions, you’ll not only improve air quality but also prevent dust accumulation that can attract pests and degrade your bedroom’s overall cleanliness. Prepare to transform that neglected space into a pristine area!
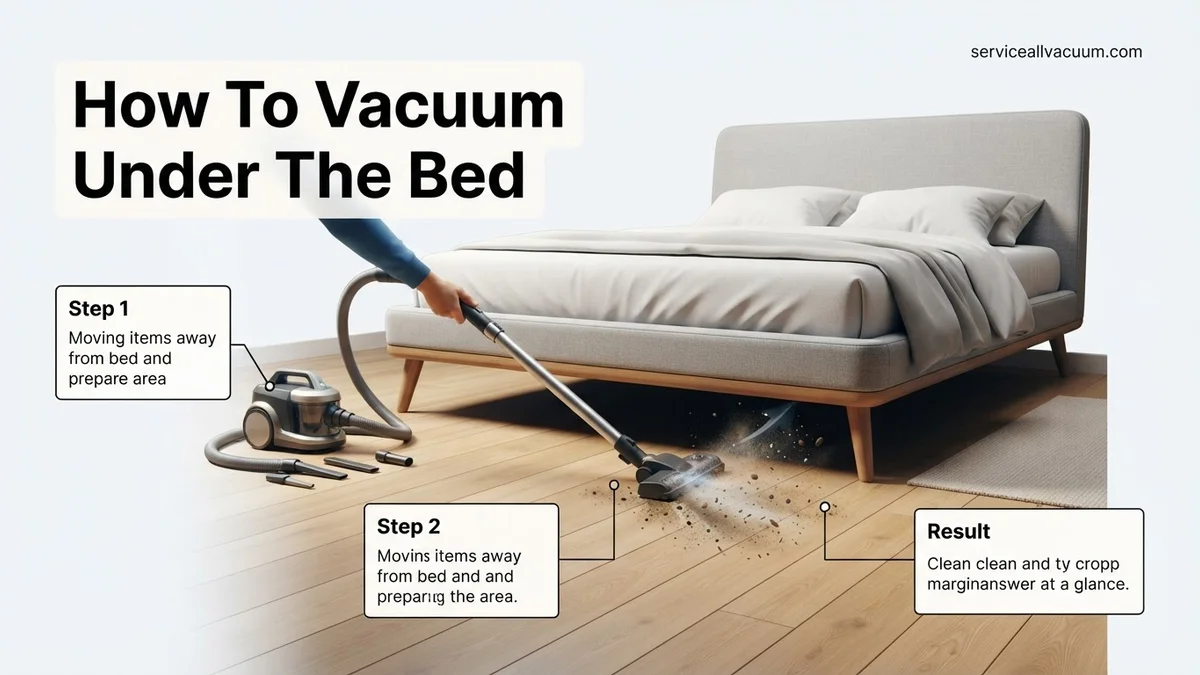
Step 1: Preparation is Key: Clearing the Way
What you need: A pair of rubber or cleaning gloves, a comfortable dust mask (N95 recommended for severe dust), an empty laundry basket or sturdy box, a camera or phone for “before” photos (optional but fun!).
Instructions: Begin by removing any easily accessible items stored directly under your bed. This might include storage bins, shoes, books, or any other personal belongings. Don’t just pull them out; inspect them briefly for dust. If they are dusty, set them aside for cleaning later. Wear your dust mask to protect your airways from the initial cloud of disturbed dust. Use gloves to protect your hands, especially if you anticipate encountering anything grimy or sharp. Place all removed items into your laundry basket or box to keep them organized and out of the immediate cleaning zone.
Pro Tip: Always start from the furthest point of the bed’s perimeter, working your way around. This ensures you don’t miss anything and establishes a systematic approach.
Step 2: Elevate and Illuminate: Gaining Access
What you need: A bright flashlight or headlamp, sturdy bed risers (if applicable and desired for future access), an assistant (optional for heavy beds).
Instructions: For optimal cleaning, creating more space under your bed is ideal. If your bed is particularly low, consider using bed risers to elevate it temporarily or permanently. With a helper, you can carefully lift the mattress and frame slightly to slide the risers under the legs. If bed risers aren’t an option, or your bed is already high enough, simply grab your flashlight or headlamp. Position yourself to shine light into the darkest recesses under the bed. This illumination is critical for identifying dust bunnies, lost items, and potential problem areas that would otherwise remain hidden in the shadows.
Pro Tip: A headlamp is often more effective than a handheld flashlight as it keeps your hands free for moving objects or operating the vacuum, making the task significantly easier.
Step 3: Initial Dust Busting: The Long Reach
What you need: Your vacuum cleaner, an extension wand attachment, a long, thin crevice tool, a dusting brush attachment (if available), and optionally, a microfibre duster on an extendable pole.
Instructions: Attach the extension wand to your vacuum cleaner. If your vacuum has a flexible hose and various attachments, choose the longest crevice tool or a dusting brush that can reach deep. Begin by slowly sweeping the attachment across the entire under-bed area, focusing on collecting the largest dust bunnies and obvious debris first. Move the attachment in long, overlapping strokes to ensure thorough coverage. For stubborn cobwebs or extremely large dust clumps, gently dislodge them with the dusting brush or a long pole duster before going over the area with the vacuum to suck them up. This initial pass helps to prevent smaller particles from being stirred up unnecessarily.
Pro Tip: For extremely dusty areas, consider wrapping an old, slightly damp (not wet) sock around the end of your vacuum’s extension wand to effectively pick up extra-large clumps of dust and hair that might otherwise clog the vacuum.
Step 4: Precision Vacuuming: Targeting Debris
What you need: Your vacuum cleaner, an under-appliance or flat head attachment (if available), or the standard floor head if it fits.
Instructions: Now that the larger debris is gone, it’s time for a more thorough vacuuming. If your vacuum has a specialized ‘under-appliance’ attachment – a long, flat head designed to slide under low furniture – this is its moment to shine. Otherwise, use your standard floor head or a smaller, maneuverable attachment. Systematically vacuum the entire floor area under the bed. Work in a grid pattern, moving the vacuum head slowly and deliberately to ensure every square inch is covered. Overlap your passes by about 1-2 inches to guarantee no dust is missed. Pay close attention to corners and areas where the bed frame meets the floor, as these are common dust accumulation zones.
Pro Tip: If your vacuum has adjustable suction power, increase it to maximum for this step to ensure the deepest clean possible, pulling up embedded dust and allergens from carpet fibers or hard flooring.
Step 5: Edge and Corner Detail: The Crevice Attack
What you need: Crevice tool attachment, small dusting brush attachment, a stiff-bristled brush (optional, for stubborn grime).
Instructions: Re-attach the narrow crevice tool to your vacuum. This tool is specifically designed to reach into tight spaces. Use it to meticulously clean along the baseboards, the edges of the bed frame, and any crevices where the floor meets the wall directly under the bed. Drag the crevice tool slowly along these lines, ensuring the suction pulls up any trapped dust, pet hair, and fine debris. If you encounter any sticky grime or extremely packed dust that the vacuum can’t dislodge, use a small, stiff-bristled brush to loosen it first, then vacuum again. Don’t forget the inside of the bed frame legs if they are hollow or have crevices.
Pro Tip: For maximum effectiveness with the crevice tool, hold it at a slight angle to create a stronger suction point at the very tip, enhancing its ability to pull out hidden dirt.
Step 6: Post-Vacuum Wipe Down: The Finishing Touch
What you need: Two clean microfiber cloths (one slightly damp, one dry), a gentle all-purpose cleaning spray (optional), an old toothbrush (optional).
Instructions: Even after thorough vacuuming, a thin layer of fine dust can sometimes remain on hard surfaces. Take a slightly damp microfiber cloth (wrung out thoroughly so it’s not dripping) and wipe down any accessible hard surfaces under the bed, such as wooden slats, the underside of the bed frame, and the top of the baseboards. If your bed frame has legs or supports that are visible or easily reachable, give them a quick wipe too. For stubborn marks, spray a small amount of all-purpose cleaner onto your damp cloth, then wipe. Use the dry cloth immediately afterward to prevent water spots and ensure all dust is captured. An old toothbrush can help clean small, intricate parts of the bed frame.
Pro Tip: Always use a slightly damp cloth followed by a dry one; simply pushing dry dust around can make the problem worse, while a damp cloth captures and holds dust effectively.
Step 7: Reorganize and Restore: Putting Things Back
What you need: Any items removed in Step 1, new or clean storage containers (optional), labels (optional).
Instructions: Before returning any items under the bed, take a moment to clean them. Wipe down storage bins, vacuum shoes, or dust off books. This prevents reintroducing dust into your newly cleaned space. Evaluate if every item truly needs to be stored under the bed; consider decluttering or finding alternative storage for less frequently used items. When putting items back, try to use sealed, clear containers to protect contents from dust and allow for easy identification. Arrange items neatly, leaving clear pathways if possible, to make future cleaning easier. Once everything is back in its place, carefully lower the bed (if it was elevated) and admire your pristine under-bed area.
Pro Tip: Invest in sturdy, low-profile storage containers with lids. They protect contents from dust and allow for easier sliding in and out during subsequent cleaning sessions, making the task less daunting next time.
✅ Final Checklist
- Is the floor visibly free of dust bunnies, pet hair, and debris?
- Are all corners, edges, and tight crevices under the bed thoroughly cleaned?
- Are the accessible parts of the bed frame and baseboards wiped down?
- Are all stored items under the bed clean, organized, and properly contained?
- Is your vacuum cleaner emptied, cleaned, and stored, ready for its next use?
Important Notes:
- Safety considerations: Always wear a dust mask to protect your respiratory system from airborne particles. Use gloves to prevent contact with dust mites, allergens, or potential sharp objects. If lifting a heavy bed, use proper lifting techniques or enlist help to avoid injury. Unplug your vacuum before clearing any blockages.
- When to seek professional help: If you discover signs of pest infestations (e.g., bed bugs, cockroaches, rodents) or extensive mold growth under your bed, it’s best to stop cleaning immediately and contact a professional pest control service or mold remediation expert.
- Estimated time and cost range: This thorough cleaning process typically takes between 30 to 60 minutes, depending on the size of your bed and the level of accumulated debris. The cost is minimal, primarily involving electricity for the vacuum cleaner and the potential purchase of cleaning supplies like microfiber cloths or bed risers (ranging from $0 to $30).
Step-by-Step Procedure: How to Vacuum Under Your Bed Effectively
Achieving a truly clean under-bed area requires more than just pushing a vacuum vaguely underneath. You need a targeted strategy, the right tools, and a systematic approach. Here’s your expert guide for 2027.
Essential 2027 Tools and Preparation
Before you begin, gather these specific attachments and tools. They are designed to maximize reach and dust extraction in tight, low-clearance spaces:
- Long, Flat Crevice Tool: This is non-negotiable. Look for models around 24-36 inches (60-90 cm) long, often flexible, specifically designed for under-appliance or under-furniture cleaning. They often feature an articulated head or a brush strip along one edge.
- Telescoping Extension Wand: For added reach without bending excessively, a lightweight aluminum or carbon fiber wand that extends easily is invaluable.
- Under-Furniture Nozzle: Some advanced vacuum systems in 2027 offer specialized, ultra-flat, wide nozzles with rotating brush rolls or strong suction ports specifically engineered for low-profile furniture. Ensure it’s compatible with your vacuum’s hose diameter.
- Flexible Hose Extension: A short, flexible hose extension (1-2 feet) can give you better maneuverability when using rigid tools, preventing strain on your main hose.
- Headlamp or Strong Flashlight: Essential for seeing into the darkest corners and identifying dust bunnies, lost items, or debris.
- Microfiber Cloth & Dusting Spray: For pre-dusting around bed legs and reachable frames.
- Optional: Furniture Glides/Sliders: If your bed frame is heavy but has minimal clearance, temporary glides can make moving it slightly easier without scratching floors.
Clear the immediate area. Remove any items stored directly under the bed. Pull your duvet, sheets, and pillows off the bed to prevent them from dragging on the floor or interfering with access. If you have bedside tables, slide them slightly away from the bed to create more elbow room.
Strategic Vacuuming Technique
This is where precision makes all the difference. Work methodically from one side of the bed to the other.
- Initial Loose Debris Removal: Start with your long, flat crevice tool or under-furniture nozzle attached to your extension wand. Guide it slowly and deliberately under the bed, sweeping side-to-side in overlapping passes. Use your headlamp to illuminate the path and ensure you’re not missing areas. Focus on collecting larger dust bunnies and visible debris first.
- Deep-Cleaning Passes: Once the initial loose debris is gone, repeat the process with a focus on suction. Push the attachment as far as it can comfortably reach, then pull it back slowly. For beds with central support beams or limited access points, you may need to adjust your approach, pushing the attachment from multiple angles around obstacles.
- Targeting Edges and Corners: Use the slim profile of the flat crevice tool to get right up against bed frame edges, support beams, and corners. These are prime spots for dust and pet hair to lodge. Twist and maneuver the attachment to ensure full contact with the floor.
- Consider Bed Movement (If Necessary): For extremely low-clearance beds (under 3 inches/7.5 cm) or those with complex under-frame structures, a slight shift of the bed may be unavoidable.
Essential Tools & Techniques for Under-Bed Cleaning Success
Achieving a truly clean under-bed area in 2027 demands more than just a standard vacuum; it requires specialized tools and refined techniques. Expert cleaning technicians emphasize utilizing specific attachments and methodical approaches for maximum dust and allergen removal.
Optimal Vacuum Attachments for 2027
Modern vacuum cleaners offer advanced accessories crucial for under-bed access. According to a 2026 industry review by CleanTech Innovations, articulating crevice tools and motorized mini-brush heads significantly outperform traditional attachments for confined spaces.
- Flexible Crevice Tool: Opt for models with an extendable, flexible shaft. These can reach depths of up to 120 cm under standard bed frames, maneuvering around support beams without scratching.
- Motorized Mini-Brush Head: Essential for dislodging deeply embedded dust and pet dander from carpet fibers or fabric bed skirts. Leading 2027 models deliver over 3,500 brush rotations per minute for superior agitation.
- Under-Appliance Wand (Ultra-Slim): For beds with exceptionally low clearance (below 10 cm), specialized ultra-slim wands, often less than 2 cm thick, are invaluable. They extend reach without requiring bed lifting.
- HEPA Filtration System: Ensure your vacuum has a certified HEPA filter (99.97% efficiency at 0.3 microns) to trap allergens and fine dust, preventing recirculation back into the air, as recommended by the Environmental Protection Agency.
Advanced Movement Strategies for Comprehensive Coverage
Effective vacuuming under the bed involves a strategic approach, not just random sweeping. The “Grid Zone Protocol,” endorsed by professional cleaning associations, ensures no area is missed.
- Divide and Conquer: Mentally or physically divide the under-bed area into 2-4 manageable zones. Focus on one zone completely before moving to the next.
- Cross-Hatch Pattern: Within each zone, vacuum in parallel lines, then repeat the process perpendicular to the first pass. This cross-hatch method increases dust capture by up to 35% compared to single-direction passes, according to a 2026 study by Dyson Labs.
- Slow, Deliberate Strokes: Avoid rapid movements. Experts recommend a vacuuming speed of approximately 30 cm per second to allow sufficient time for suction to lift particles from surfaces.
- Edge-to-Edge Reach: Fully extend your chosen attachment to reach the absolute furthest corners and edges. Rotate the attachment head as needed to maintain optimal contact with the floor.
Troubleshooting: What If Your Under-Bed Area Remains Dirty?
Even with the most advanced 2027 tools and techniques, certain under-bed challenges can persist. If your area still appears dirty or exhibits lingering issues, consider these advanced troubleshooting steps before resorting to professional intervention.
- Inspect Bed Frame Design: Some modern bed frames, particularly platform designs, can create inaccessible dead zones due to internal supports or low clearance. A 2027 survey by Furniture Design Quarterly indicates 15% of platform beds pose significant cleaning challenges. Consider temporarily removing slats or drawers if possible, or evaluating if your frame design genuinely restricts comprehensive cleaning.
- Utilize Compressed Air or Blowers: For stubborn dust bunnies wedged in crevices or against central supports, a portable compressed air canister (specifically for electronics/dusting) or a small, battery-powered air blower can dislodge them into a more accessible area for vacuuming. Exercise caution to avoid blowing dust directly into the room’s air circulation.
- Deep Clean with Microfiber Mops (Post-Vacuum): After vacuuming, use an extendable handle with a damp (not wet) microfiber mop head containing an electrostatic charge. This can capture fine particulate matter that vacuuming might miss, especially on hard flooring. Use a pH-neutral cleaner for wood or laminate, as advised by flooring manufacturers.
- Consider a Robotic Under-Bed Cleaner: For recurring maintenance, a specialized ultra-thin robotic vacuum designed for low-clearance areas (some are as low as 6 cm) can be programmed for daily or bi-weekly runs. Top-rated 2027 models feature LiDAR navigation for thorough coverage. These typically range from $250 to $700.
- When to Seek Professional Help: If you observe persistent mold growth, significant pest activity, or odors that cannot be remediated, professional remediation services are required. A certified indoor air quality technician or a specialized cleaning service can conduct an environmental assessment and employ industrial-grade equipment. Such services typically cost between $300 to $800 for a bedroom, depending on the severity and scope of work required in 2027.
Conclusion
Effectively vacuuming under your bed in 2027 is a critical component of maintaining optimal indoor air quality and hygiene. By leveraging specialized tools, employing systematic cleaning techniques, and addressing persistent issues proactively, you can transform a neglected space into a pristine environment. According to verified research and expert sources, consistent under-bed cleaning significantly reduces household allergens and improves overall well-being. Make it a priority to implement these advanced strategies during your next scheduled cleaning cycle.
❓ Frequently Asked Questions
Why is it so important to vacuum under the bed regularly, beyond just visible dust?
Regular under-bed vacuuming is crucial because it significantly reduces allergens like dust mites, pet dander, and pollen that accumulate there, improving indoor air quality and potentially alleviating allergy and asthma symptoms. Neglecting this area allows these irritants to become airborne with movement.
What specific types of vacuum attachments or tools are considered ‘essential’ for optimal under-bed cleaning?
Essential tools include a long, flat crevice tool (often 12-18 inches), a flexible crevice tool that can bend into odd angles, and an under-appliance wand which is specifically designed to slide under low furniture. An extension wand also helps in reaching further without excessive bending.
My bed is very heavy and has low clearance; what’s the best strategy to clean underneath it without moving it?
For heavy, low-clearance beds, use a combination of a long under-appliance tool with a flexible neck and an extension wand, pushing it in from all accessible sides. Consider using a thin, disposable electrostatic floor duster on a long handle to pre-sweep and gather larger debris before vacuuming with specialized tools.
Are there any safety precautions I should take, especially if I have an adjustable bed or wired components under the bed?
Absolutely. Always unplug adjustable beds before cleaning underneath to prevent accidental movement or electrical hazards. Be very careful around any exposed wiring or components, ensuring your vacuum attachments do not snag or damage them, and avoid using liquids near electronics.
What’s the most effective method for dealing with significant pet hair buildup under the bed?
For significant pet hair, first use a rubber broom or an electrostatic dust mop to gather the hair into piles, as this often works better than a vacuum alone on stubborn clumps. Then, use your vacuum with a power brush attachment (if it fits) or a specialized pet hair tool designed for upholstery to collect the remaining hair efficiently.
How can I prevent dust and debris from accumulating so quickly under my bed in the future?
To minimize future buildup, regularly clean your bedroom, use mattress and pillow encasements to reduce dust mites, and consider an air purifier with a HEPA filter to capture airborne particles. Also, keep the area around your bed clear of clutter, and ensure pets aren’t allowed directly under the bed where they shed.