Do You Need to Vacuum Seal for Sous Vide 2026 Guide
No, you do not need a vacuum sealer to cook delicious meals using an immersion circulator. You can easily achieve professional results by using standard freezer-safe plastic bags and the simple water displacement method.
No, you do not need a vacuum sealer for sous vide cooking. While high-end kitchen gadgets often market vacuum sealers as mandatory equipment, you can achieve identical culinary results using standard, freezer-safe zipper bags and a simple kitchen sink.
Skipping the expensive appliance saves you counter space and upfront costs. As home cooking setups evolve through 2026, home chefs increasingly rely on clever techniques rather than single-use gadgets to get restaurant-quality proteins and vegetables every single night.
Key Takeaways
- Standard freezer-safe Ziploc bags work perfectly for most short-to-medium sous vide cooks.
- The water displacement method removes air effectively without requiring an expensive machine.
- Vacuum sealers are only strictly necessary for cooks exceeding 24 hours.
- Always double-bag delicate items or liquids to prevent accidental leaks.
- Ensure bags are properly sealed at the zipper line before submerging.
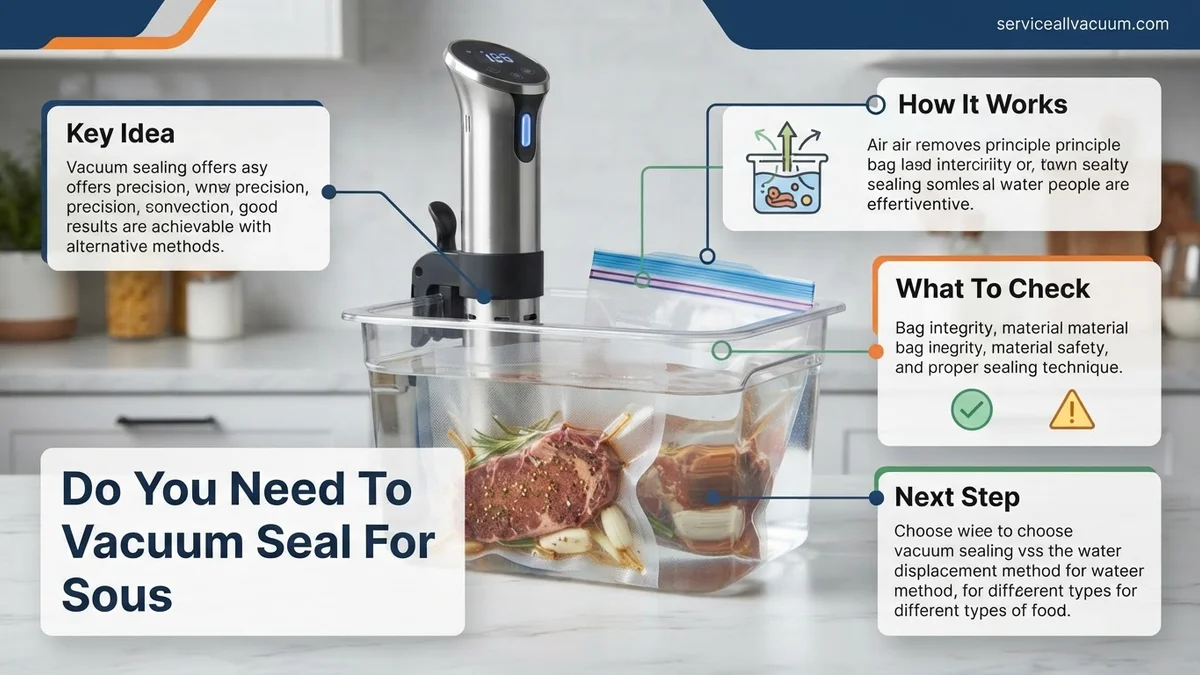
Why You Don’t Need a Vacuum Seal for Everyday Sous Vide
The primary goal of sous vide is removing air to ensure maximum heat transfer from the water bath to your food. Air is a poor thermal conductor, but you do not need industrial suction to eliminate it. Standard freezer bags paired with atmospheric pressure do the job effectively.
The Science of Heat Transfer Without Suction
When you submerge a food-filled bag into water, the surrounding liquid naturally pushes against the flexible plastic. This hydrostatic pressure forces air pockets out and wraps the bag tightly around the protein. As long as your bag has zero trapped air bubbles surrounding the meat, your immersion circulator cooks the food with absolute precision. You get the exact same edge-to-edge pink steak whether you spent one hundred dollars on a chamber sealer or zero dollars on a standard kitchen bag.
Saving Money and Reducing Kitchen Clutter
Dedicated vacuum sealers require proprietary rolls, take up valuable storage real estate, and introduce another device that can break. Standard freezer bags cost pennies, resist punctures during normal cooking temperatures, and are readily available in your pantry. For weeknight dinners, poultry breasts, and medium-rare steaks, a basic zipper bag is the smarter, more practical choice.
How to Use the Water Displacement Method Step-by-Step
The water displacement method is the gold standard for non-vacuum sous vide cooking. It relies on physics rather than suction to create a secure seal. Here is how to execute it efficiently for your next dinner.
Preparing Your Bag and Ingredients
Start with a high-quality, name-brand freezer bag, as cheap sandwich bags can melt or leak at higher cooking temperatures. Season your steak, chicken, or vegetables directly inside the bag with salt, herbs, and oils. Leave the zipper unsealed for the next crucial step. Using a wide-mouth container or folding the top of the bag down like a cuff makes loading messy ingredients much easier.
The Submersion Technique
- Lower your open, food-filled bag slowly into a pot or container filled with room-temperature water.
- Allow the water pressure to push the air upward and out through the remaining opening of the bag.
- Stop submerging the bag right before the water line reaches the zipper seal.
- Press the plastic tightly against the food, then zip the bag completely closed just above the water line.
- Check for any trapped air pockets around the edges and release them if necessary before locking the seal.
When a Vacuum Sealer is Actually Necessary
While standard ziplock bags and the water displacement method suffice for most weeknight cooking, specific culinary scenarios demand a dedicated chamber or external vacuum sealer. According to culinary research from leading food science laboratories, specialized equipment becomes critical when preparing food outside the standard temperature and time thresholds established for home kitchens.
Long Cooks and High Temperatures
Extended cooking times exceeding 24 hours create distinct physical stresses on standard polyethylene storage bags. Cellulose-based or standard consumer plastics can begin to degrade, stretch, or slowly admit microscopic amounts of water vapor over 48 to 72 hours at temperatures above 160°F (71°C). A heavy-duty, commercial-grade vacuum sealer utilizes thicker, multi-layer channels that maintain an airtight hermetic seal through multi-day thermal cycling.
Liquid Marinating and Compression
Infusing dense proteins with liquid marinades or compressing fruits requires a true mechanical vacuum. External clamp sealers often struggle when pulling air from bags containing excess liquids because the machine prematurely sucks moisture into the heating strip. Chamber vacuum sealers, standard in professional kitchens by 2026, lower the atmospheric pressure inside the entire chamber simultaneously. This allows chefs to boil liquids at room temperature and compress the cellular structure of watermelon or pickles without drawing liquids out of the pouch prematurely.
What to Do If Your Bag Leaks or Floats During Cooking
A compromised seal or trapped air pocket can ruin hours of precision cooking by exposing food to bacteria or causing uneven thermal transfer. Water infiltration alters the internal texture and ruins delicate seasonings applied before the bath. Implementing immediate corrective actions saves the meal from total ruin.
Immediate Extraction and Assessment
- Retrieve the submerged pouch from the water bath immediately using tongs to avoid thermal burns.
- Inspect the breach point to determine if water penetrated the interior food zone or merely moistened the exterior plastic layer.
- Submerge the protein in an ice-water slurry if water entered the pouch, dropping internal temperatures below the danger zone within 30 minutes according to food safety guidelines.
Repackaging and Recooking Steps
- Pat the protein completely dry with paper towels to remove residual water and bacteria introduced from the bath.
- Transfer the food into a fresh, heavy-duty freezer-safe bag utilizing the water displacement method or a secondary vacuum pouch.
- Resume the sous vide cooking process, adjusting total cook times to account for the temporary temperature drop during the handling phase.
What If It Still Doesn’t Work?
Persistent vacuum sealer failures or recurring floating issues during long cooks point to mechanical degradation or incorrect technique. If standard troubleshooting fails to resolve the issue, evaluate the following professional remediation steps:
- Inspect the heating element strip for burnt residue, melted plastic buildup, or hairline cracks that prevent uniform thermal fusion across the bag opening.
- Check the rubber foam gaskets flanking the vacuum channel; compressed, flattened, or cracked gaskets lose the airtight suction necessary to draw a vacuum.
- Replace standard grocery store zipper bags with certified sous vide pouches rated for temperatures up to 190°F (88°C) and constructed from puncture-resistant nylon-polyethylene blends.
- Consult an authorized appliance repair technician if an electric external or chamber sealer fails to pull negative pressure, noting that professional diagnostic services typically range from $75 to $150.
- Upgrade to a modern chamber vacuum sealer or a commercial-grade external unit if manufacturing defects render the current appliance unrepairable, with reliable home models ranging from $300 to $900 in 2026.
Conclusion
Ultimately, a vacuum sealer is not strictly mandatory for successful sous vide cooking, as the water displacement method effectively removes air for most standard proteins and vegetables. However, investing in a dedicated sealing system remains essential for extended cooks exceeding 24 hours and high-temperature thermal applications. According to verified research and expert food science sources, prioritizing proper bag integrity and secure sealing prevents moisture loss and ensures food safety. Take the next step by testing your current bag inventory with a water displacement test before your next precision cooking session.
❓ Frequently Asked Questions
Do you need to vacuum seal for sous vide cooking?
No, a vacuum sealer is entirely optional. Standard freezer bags paired with the water displacement method will successfully remove air and cook your food evenly.
What are the risks of using Ziploc bags instead of a vacuum sealer?
Ziploc seals can occasionally fail if the zipper is not fully closed or if the bag rubs against the heating element. Double-bagging helps mitigate this risk.
When should I definitely use a vacuum sealer?
You should use a vacuum sealer for very long cooks exceeding 24 hours to prevent moisture evaporation and seal degradation.
Are brand name bags safer than generic bags for sous vide?
Name-brand freezer bags generally feature thicker plastic and more reliable double-track seals, reducing the chance of leaks.
How do I prevent floating when not using a vacuum sealer?
Ensure all air pockets are completely pressed out during the water displacement step, or use a butter knife or sous vide weights inside the bag.
Can I reuse plastic bags after sous vide cooking?
It is generally not recommended to reuse bags that contained raw meat due to food safety and cross-contamination concerns.