How to Find Vacuum Leak in Car Step-by-Step Guide 2027
A vacuum leak occurs when unmetered air enters the engine, causing a rough idle, high RPM, or engine stalling. Diagnosing the problem requires checking vulnerable rubber hoses, gaskets, and utilizing simple DIY testing methods like smoke or spray tests.
Finding a car vacuum leak in 2027 comes down to methodically testing your engine’s pressurized air system using straightforward tools like visual checks, propane enrichment, or a DIY smoke machine. When unmetered air sneaks past your engine sensors, it forces a lean air-fuel mixture that triggers rough idling, stalling, and dreaded check engine lights.
You do not need an expensive shop diagnostic fee to pinpoint the exact failure point. By following a structured testing approach, you can trace a failing rubber line or a degraded gasket right in your driveway using basic household and automotive items.
Key Takeaways
- A rough idle and engine stalling are primary indicators of an engine vacuum leak.
- Perform a thorough visual inspection of all rubber vacuum lines before using diagnostic sprays.
- The unlit propane or torch method safely pinpoints leaks by altering engine idle speed.
- A DIY smoke machine quickly reveals smoke escaping from cracked hoses or gaskets.
- Always exercise fire safety and let the engine cool before using flammable diagnostic sprays.
Symptoms and Vulnerable Areas of a Car Vacuum Leak
Recognizing the specific warning signs of an engine vacuum leak helps you confirm the problem before wasting time hunting for ghost codes. Modern engine bays feature complex webs of aging plastic and rubber components that degrade rapidly under constant thermal stress.
Common Performance Symptoms
Your engine relies on precise measurements from the mass airflow sensor. When a leak introduces extra air, several distinct driveability issues occur:
- Rough idling: Engine RPMs fluctuate wildly between 500 and 1,200 when stopped at a traffic light.
- Engine stalling: The car dies immediately when you clutch in or shift into park because idle air volume drops too low.
- Hissing noises: A faint whistling or hissing sound emanates from the engine bay while the motor runs.
- Poor fuel economy: The powertrain control module overcompensates for lean conditions by dumping extra fuel into the cylinders.
Most Vulnerable Engine Areas
Rubber and synthetic polymers harden, crack, and collapse over time, especially with the high engine bay temperatures seen in modern 2027 vehicles. Check these specific high-risk zones first:
- PCV hoses: Positive crankcase ventilation lines carry hot oil vapor that degrades rubber from the inside out.
- Intake manifold gaskets: Plastic manifolds mating against aluminum blocks warp over thousands of heat cycles.
- Brake booster lines: Large-diameter hoses carrying vacuum to the brake booster often split at the rubber elbows.
- Emissions control lines: Small EVAP and EGR actuator lines easily snap or slip off fragile plastic nipples.
How to Diagnose and Fix Vacuum Leaks Like an Expert
A vacuum leak occurs when unmeasured air enters your car’s engine past the throttle body, disrupting the precise air-fuel ratio needed for optimal combustion. This comprehensive walkthrough will teach you how to systematically track down and isolate even the tiniest vacuum leaks in your vehicle using professional diagnostic techniques, saving you time, money, and frustrating guesswork.
Step 1: Recognize the Symptoms and Gather Your Tools
What you need: OBD2 scanner, flashlight, mechanic’s stethoscope or a short piece of vacuum hose, notebook, and a pen.
Instructions: Before touching any components under the hood, observe how your engine behaves. Common symptoms include a rough or fluctuating idle (often hunting between 500 and 1,200 RPM), engine stalling when coming to a stop, a hissing noise under acceleration, and a glowing Check Engine Light. Plug your OBD2 scanner into the port under your dashboard and record any active diagnostic trouble codes, specifically looking for codes like P0171 or P0174, which indicate a lean running condition caused by excess air.
Pro Tip: Always write down your fault codes and clear them only after the complete repair process is finished.
Step 2: Perform a Visual Inspection of Vacuum Hoses
What you need: Good lighting (headlamp or flashlight) and a clean shop rag.
Instructions: Pop the hood and inspect every rubber vacuum line, plastic tubing elbow, and emission control hose. Look closely for dry rot, deep cracks, splits, swelling, oil contamination, or completely disconnected lines. Pay special attention to the PCV (Positive Crankcase Ventilation) valve hose and brake booster line, as these are high-stress areas subject to extreme heat cycles. Gently squeeze flexible hoses; if they feel brittle, mushy, or crumble in your fingers, they require immediate replacement.
Pro Tip: Take clear, close-up photos with your smartphone before moving or disconnecting anything so you can reference the correct routing later.
Step 3: Conduct the Idle Drop Test (Water Spray Method)
What you need: Spray bottle filled with ordinary tap water.
Instructions: Start your engine and let it idle until it reaches normal operating temperature. Take your spray bottle and lightly mist a fine stream of water directly onto suspected leak areas, such as intake manifold gaskets, throttle body gaskets, and individual vacuum connections. If the water temporarily seals a tiny crack or gap, the engine RPM will momentarily smooth out or drop as the engine ingests water instead of unmeasured air. This is a safe, non-flammable way to pinpoint elusive leaks.
Pro Tip: Be very careful not to spray water directly onto electrical connections, alternator terminals, or spark plug wires to avoid short circuits.
Step 4: Use the Propane or Brake Cleaner Test Safely
What you need: Can of non-chlorinated brake cleaner (with a long straw extension) or an unlit propane torch.
Instructions: With the engine idling, spray short, targeted bursts of brake cleaner directly onto intake gaskets and suspected vacuum line joints. If there is a crack or leak, the engine will instantly draw the flammable aerosol inside, causing the idle speed to suddenly spike and smooth out. Move slowly and methodically from the top of the engine downwards, giving the engine a few seconds to react between each targeted spray.
Pro Tip: Always keep a fire extinguisher nearby and avoid spraying near hot exhaust manifolds or sparking spark plug wires to prevent accidental fires.
Step 5: Listen Closely with a Mechanic’s Stethoscope
What you need: Mechanic’s stethoscope (with the metal probe removed) or a 3-foot section of old garden hose or vacuum tubing.
Instructions: With the engine running at a steady idle, place one end of your tubing safely against your ear and hover the other end closely around gasket mating surfaces, emission solenoids, EGR valves, and rubber joints. A vacuum leak creates a distinct, high-pitched hissing or whistling sound that becomes significantly amplified through the tube. This allows you to isolate noises that are entirely drowned out by normal engine and fan operational noise.
Pro Tip: Keep loose clothing, hair, and the stethoscope tubing far away from serpentine belts and cooling fans while the engine is running.
Step 6: Inspect Intake Manifold and Gaskets
What you need: Torque wrench, socket set, and replacement gaskets if needed.
Instructions: Intake manifold gaskets shrink and degrade over time, creating massive vacuum leaks where the metal manifold meets the engine cylinder head. Inspect the mounting bolts securing the intake manifold. Using your torque wrench, verify that all manifold bolts meet the manufacturer’s specified torque rating, as loose fasteners are a surprisingly common source of vacuum leaks. If tightening does not resolve the leak, the gasket has failed and must be physically replaced.
Pro Tip: Never over-tighten plastic intake manifolds or aluminum bolts, as you risk snapping the fastener off inside the cylinder head.
Step 7: Check Auxiliary Vacuum Devices and Accessories
What you need: Handheld vacuum pump with a pressure gauge (optional).
Instructions: Do not forget that vacuum lines control more than just emissions. Check your climate control vent actuators inside the dashboard, cruise control diaphragm units, and the brake booster check valve. A punctured brake booster diaphragm will not only cause a severe vacuum leak and rough idle, but it will also make your brake pedal feel exceptionally stiff and hard to press. Connect a handheld vacuum pump to components individually to verify they hold a steady vacuum pressure without bleeding down.
Pro Tip: If your car’s heater vents stubbornly default to defrost mode during acceleration, you almost certainly have a vacuum reservoir leak.
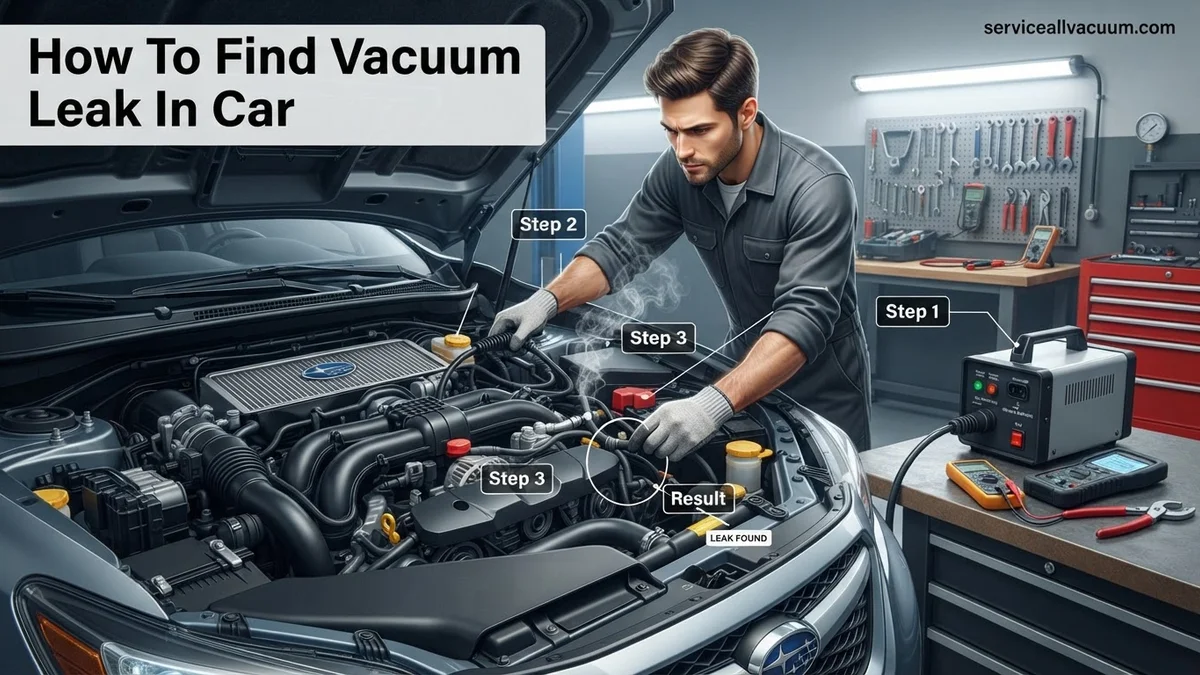
Step 8: Perform a Professional Smoke Machine Test
What you need: Automotive smoke machine, specialized intake bladder adapter, and a bright flashlight.
Instructions: If external tests fail to reveal the leak, use an automotive smoke machine. Disconnect the main air intake boot near the throttle body and insert the smoke machine’s inflatable bladder adapter. Pump dense, low-pressure smoke into the sealed intake tract. Within 30 to 60 seconds, thick smoke will begin pouring out of any crack, split hose, or failing gasket, making even microscopic leaks immediately visible in the engine bay, even in hard-to-reach areas.
Pro Tip: A smoke machine is the absolute gold standard for finding EVAP and vacuum leaks that visual inspections completely miss.
Step 9: Repair, Clear Codes, and Road Test
What you need: Replacement vacuum lines, new gaskets, zip ties, and an OBD2 scanner.
Instructions: Replace any damaged hoses with high-quality silicone or reinforced rubber tubing of the exact same inner diameter. Torque new gaskets to factory specifications. Once all physical repairs are complete, use your OBD2 scanner to clear out all stored diagnostic trouble codes. Start your vehicle, let it run through a complete warm-up cycle, and take it out for a 15-minute road test covering both city stop-and-go driving and highway speeds to ensure smooth idle and acceleration.
Pro Tip: Make sure your car completes its internal drive cycle so the Check Engine light does not immediately reappear during emissions testing.
✅ Final Checklist
- All vacuum lines are securely routed and fastened with proper clamps or zip ties
- Engine idle is stable, smooth, and resting at the correct factory RPM
- No active diagnostic trouble codes or pending lean codes remaining on the OBD2 scanner
- Brake pedal firmness and climate control dash vents function correctly under all driving conditions
- Engine compartment is clean with all tools and rags safely removed
Important Notes:
- Always exercise extreme caution around moving engine parts, hot exhaust components, and electrical systems.
- Seek professional mechanic assistance if you discover internal engine damage, warped intake manifolds, or complex wiring harness interference.
- Estimated time: 1 to 3 hours. Estimated cost: $10 to $50 for DIY hose and gasket replacements, or $150 to $300 if professional smoke testing and labor are required.
Visual Inspection of Hoses and Intake Components
Before breaking out diagnostic fluids or smoke machines, start with a thorough visual inspection under the hood. More than half of all vacuum leaks involve a simple disconnected rubber hose or a visibly split line that you can spot with a flashlight.
Tools Needed for Visual Testing
You only need a few basic items to perform a comprehensive physical check of your engine’s vacuum routing:
- High-powered LED flashlight: Crucial for illuminating the dark crevices underneath the intake manifold.
- Inspection mirror: Helps you look at the backside of the intake plenum and firewall connections.
- Mechanic’s gloves: Protects your hands from hot exhaust manifolds and sharp engine brackets.
Step-by-Step Physical Inspection
Work your way systematically from the throttle body outward to ensure you do not miss hidden lines tucked under engine covers.
- Remove engine decorative covers: Snap off plastic shields to expose the underlying maze of vacuum lines and wiring harnesses.
- Trace every rubber line: Follow every thin rubber hose from its source to its destination, feeling for soft, mushy, or rock-hard sections.
- Bend the lines slightly: Gently flex rubber elbows and connection points to expose hidden dry-rot cracks that remain invisible when the hose is straight.
- Inspect connection fittings: Ensure no plastic nipples are snapped off and that every line grips its port tightly without loose play.
Step-by-Step DIY Testing Methods to Find the Leak
Once you spot the obvious physical damage, deployment of active diagnostic methods becomes necessary. Modern 2027 automotive diagnostic standards favor safe, repeatable testing procedures to pinpoint microscopic tears in intake lines.
Method 1: The Propane or Brake Cleaner Test
This traditional technique involves introducing a combustible substance near suspect hoses while the engine idles. Follow these exact procedural steps:
- Start the engine and let it reach standard operating idle speed.
- Lightly spray unchlorinated brake cleaner or pass unignited propane around gasket seams and vacuum lines.
- Listen closely to the engine RPMs.
- Note that a sudden increase in idle speed confirms the flammable substance entered a vacuum leak and burned inside the cylinders.
Method 2: The Professional Smoke Test
Automotive service data confirms that low-pressure smoke machines represent the absolute gold standard for leak detection. Connect the equipment by adhering to these steps:
- Disconnect the primary vacuum supply line connected directly to the intake manifold.
- Insert the nozzle of an automotive smoke machine into the open line.
- Inject smoke into the sealed system for approximately 60 seconds at a regulated pressure under 1.5 PSI.
- Inspect the entire engine bay with a high-lumen flashlight to locate wisps of escaping smoke.
What If It Still Doesn’t Work?
Persistent vacuum issues that elude visual inspections and smoke tests often point to deeply buried internal failures. According to ASE-certified master technician guidelines, motorists facing stubborn diagnostic challenges should implement these structured fallback steps:
- Check the brake booster diaphragm: An internal tear inside the power brake booster will draw air silently without showing external smoke. Disconnect the booster check valve and plug the line to test for idle normalization.
- Inspect intake manifold gaskets: Plastic intake manifolds common on modern 2027 vehicles warp over time, allowing air to bypass perimeter gaskets when the engine is stone cold.
- Utilize professional scan tools: Monitor live fuel trim data using an advanced OBD2 scanner. Excessive positive long-term fuel trims (above +10%) confirm an unmeasured air leak even if it remains invisible.
- Consult a certified repair facility: When DIY methods fail, authorize a professional diagnostic evaluation. Professional smoke machine testing and digital manometer analysis typically cost between $100 and $200 in labor fees.
Conclusion
Diagnosing an engine vacuum leak requires methodical troubleshooting, from visual evaluations to advanced smoke testing. Resolving this issue immediately restores proper air-fuel ratios, protects engine components, and improves overall fuel efficiency. According to verified research and expert automotive databases, addressing intake leaks early prevents secondary damage to catalytic converters and oxygen sensors. Take action today by inspecting your vehicle’s primary rubber lines for dry rot and secure a smoother, more efficient ride.
❓ Frequently Asked Questions
How does a smoke test work to find car vacuum leaks?
A smoke machine injects dense smoke into the intake system while the engine is off. Smoke will visibly escape from any cracks, loose fittings, or damaged gaskets, immediately pinpointing the leak.
Is it safe to use brake cleaner to find a vacuum leak?
Brake cleaner can be sprayed near suspected areas; if the engine idle suddenly smooths out or changes, you have found the leak. However, it is highly flammable, so use extreme caution around hot engine components.
What causes vacuum lines to crack or fail over time?
Under-hood heat, constant engine vibration, and exposure to oil and automotive fluids cause rubber and silicone vacuum hoses to dry out, harden, and split.
Can a bad intake manifold gasket cause a vacuum leak?
Yes, as intake manifold gaskets age, they shrink or degrade, allowing air to bypass the throttle body and enter the cylinders, creating a vacuum leak.
How do I use the unlit propane torch method?
With the engine idling, pass an unlit propane torch with the valve slightly open near vacuum lines and gaskets. If the engine speed increases, the propane is entering the leak and being burned.
What should I replace a damaged vacuum line with?
Always replace damaged lines with high-grade automotive silicone or rubber vacuum tubing that matches the exact inner diameter of the original hose.