How to Find a Vacuum Leak Step-by-Step Guide 2027
A vacuum leak introduces unmetered air into your engine, causing a rough idle, high RPM, and potential stalling. Learning how to find a vacuum leak using accessible household tools or professional smoke tests can quickly pinpoint the exact source of trouble.
Finding a vacuum leak in your vehicle requires a systematic approach using targeted diagnostic tests, ranging from a simple visual check to using a professional smoke machine. When unmetered air enters your engine past the throttle body, your air-fuel ratio gets thrown off, leading to rough idling, engine stalling, and persistent check engine lights.
Diagnosing this issue quickly saves you from poor fuel economy and potential engine damage. Whether you are working on a modern 2027 vehicle or a classic project car, isolating the source of the leak quickly stops the guesswork and gets your car running smoothly again.
Key Takeaways
- Listen for a distinct hissing sound under the hood while the engine idles.
- Use a spray bottle with water to temporarily suppress vacuum leaks and stabilize idle.
- Inspect all rubber vacuum hoses for dry rot, cracks, and loose connections.
- Exercise extreme caution when using flammable sprays like brake cleaner near hot exhaust components.
- A smoke machine remains the most reliable professional method for finding hidden leaks.
What Causes Vacuum Leaks and Common Symptoms to Look For
Modern engine bays operate under intense heat and vibration, which degrades rubber and plastic components over time. Knowing what fails most often helps you pinpoint the issue before breaking out diagnostic tools.
Common Failure Points
- Rubber Vacuum Hoses: Dry rot, cracking, or softening from oil exposure causes lines to split or collapse.
- Intake Manifold Gaskets: Rubber or paper gaskets shrink and harden, especially in colder weather, letting air slip past the mating surface.
- PCV Valves and Grommets: Positive Crankcase Ventilation valves stick open or their rubber mounting grommets disintegrate.
- EGR Valves and Emission Lines: Carbon buildup or cracked actuation lines frequently break the closed vacuum loop.
Key Symptoms of a Leak
- High or Erratic Idle: Your engine computer tries to compensate for extra air by increasing RPMs.
- Engine Stalling: Coming to a stop drops the idle too low because the air-fuel mixture is too lean.
- P0171 and P0172 Diagnostic Trouble Codes: OBD2 scanners point directly to a lean running condition on bank one or two.
How to Diagnose and Fix Vacuum Leaks Like an Expert
A vacuum leak occurs when unmeasured air sneaks into your engine’s intake system past the throttle body. This throws off the air-fuel ratio, leading to rough idling, engine stalling, poor fuel economy, and that dreaded check engine light. Tracking down the exact source of a vacuum leak can feel like searching for a needle in a haystack, but with a systematic approach and the right techniques, you can pinpoint the issue in no time. This guide will walk you through the entire process from a visual inspection to advanced smoke testing.
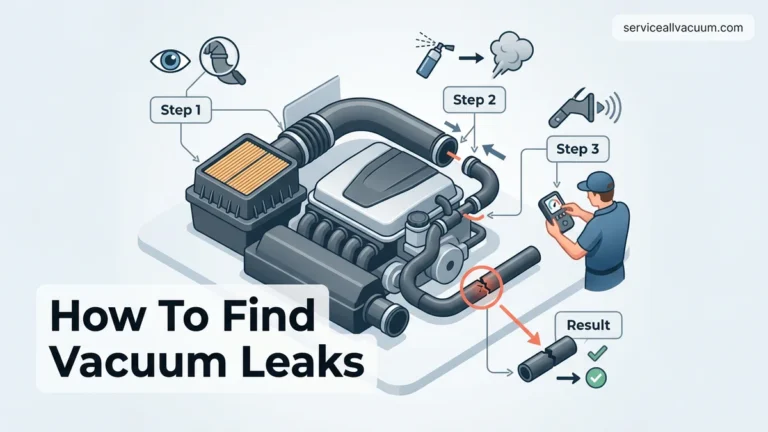
Step 1: Perform a Thorough Visual and Tactile Inspection
What you need: A flashlight, safety glasses, and clean shop rags.
Instructions: Start by opening your hood in a well-lit area and visually scanning every rubber hose, plastic line, and vacuum fitting connected to the intake manifold. Look for dry rot, cracking, splits, or completely disconnected lines. Pay close attention to elbows and areas where hoses rub against metal brackets. Gently squeeze and wiggle each rubber hose with your bare hands. If a hose feels overly brittle, soft, spongy, or leaves black residue on your fingers, it is compromised and likely leaking.
Pro Tip: Don’t overlook the PCV (Positive Crankcase Ventilation) valve grommet and the brake booster vacuum hose, as these are high-failure items on many modern vehicles.
Step 2: Execute the Idle RPM Drop Test
What you need: A can of automotive brake cleaner or unlit propane torch, and an assistant or OBD2 scanner to monitor engine RPM.
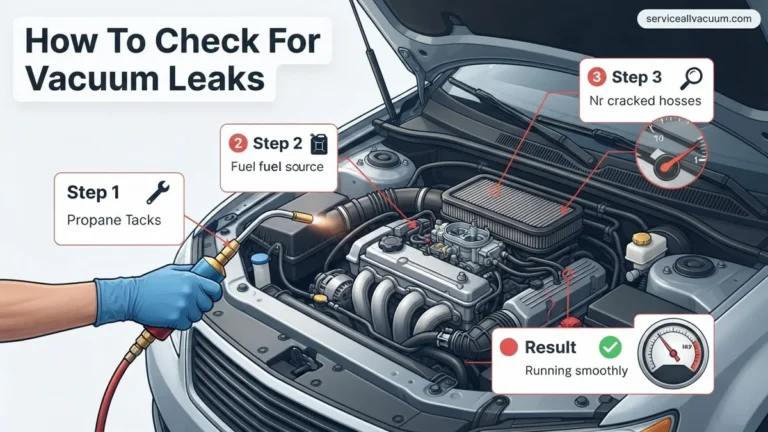
Instructions: Start the engine and let it reach normal operating temperature so it idles steadily. Take your brake cleaner and spray a very light, controlled mist onto suspected vacuum lines, gasket mating surfaces (like the intake manifold and throttle body), and rubber connectors one area at a time. Listen closely to the engine sound and watch your tachometer. If the idle suddenly drops, smooths out, or changes pitch, you have found your leak. The flammable aerosol temporarily seals the gap, enriching the air-fuel mixture and altering the idle speed.
Pro Tip: Use a spray can with a long red straw nozzle to get precisely into tight spaces, and avoid spraying near hot exhaust manifolds to prevent fires.
Step 3: Listen Closely with an Automotive Stethoscope
What you need: An automotive mechanic’s stethoscope (or a simple 3-foot section of rubber garden hose).
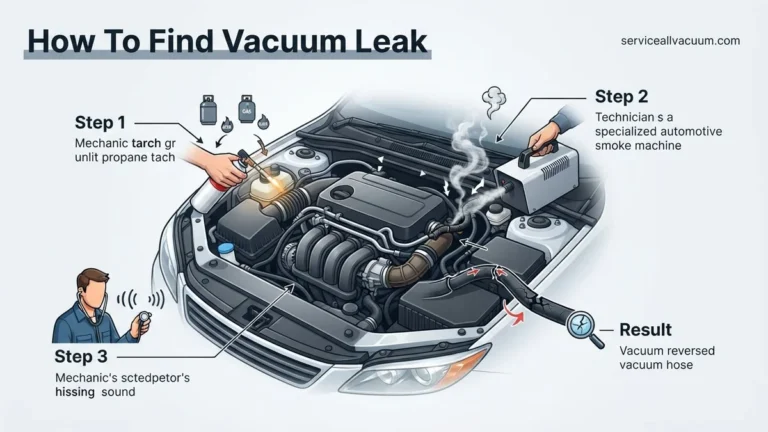
Instructions: With the engine idling, place the probe tip of your stethoscope (or hold one end of the rubber hose to your ear while pointing the other end) near the various vacuum lines, intake gaskets, and emission components. Air rushing through a tiny crack creates a distinct high-pitched whistling, hissing, or sucking sound that is otherwise masked by normal engine noise. Systematically move the probe across every potential leak source until the sound dramatically increases in volume, isolating the exact point of failure.
Pro Tip: Remove the metal probe from the mechanic’s stethoscope and just use the open rubber tube; this often makes it easier to pinpoint high-frequency hissing sounds in cramped engine bays.
Step 4: Conduct a DIY Cigar or Propane Smoke Test
What you need: A dedicated automotive smoke machine or a DIY smoke setup (cigar/heat gun with mineral oil), rubber glove, and zip tie.
Instructions: Disconnect the main air intake duct right before the throttle body. Seal off the intake opening using a rubber glove secured tightly with a zip tie. Feed the nozzle of your smoke machine or the smoke output tube into a smaller vacuum port on the intake manifold. Pump thick, dense smoke into the intake system until it is pressurized slightly. Turn on your flashlight and carefully scan the entire engine bay. Within 30 to 60 seconds, you will see wisps of white smoke escaping directly out of the cracked hose, worn gasket, or loose fitting causing your vacuum leak.
Pro Tip: Never pump more than 1 to 2 PSI of pressure into the intake system, as excessive pressure can damage delicate sensors or push out shaft seals.
Step 5: Utilize a Propane Enrichment Tool
What you need: An unlit propane torch with a flexible hose attachment.
Instructions: Turn on the propane tank valve just slightly so you hear a very faint hiss of gas escaping—do not ignite it! With the engine idling, slowly wave the tip of the propane hose around intake gaskets, injector O-rings, and vacuum connections. When the unburned propane gas is drawn into the engine through a vacuum leak, the engine’s air-fuel mixture will instantly richen, causing the idle speed to rise noticeably. This method leaves no messy residue behind, unlike liquid sprays such as brake cleaner.
Pro Tip: Work methodically from the top of the engine downwards, as propane gas is heavier than air and will naturally drift downward if released carelessly.
Step 6: Replace Faulty Components and Clear Codes
What you need: Replacement vacuum tubing, new gaskets, hose cutters, pliers, and an OBD2 scanner.
Instructions: Now that you have successfully identified the source of the vacuum leak, it is time to perform the repair. Cut new high-temperature silicone or rubber vacuum lines to the exact length of the old ones using sharp shears. Replace brittle plastic connectors and install fresh intake manifold or throttle body gaskets if those were the culprits. Once everything is securely reinstalled and clamped, start the vehicle and verify that the rough idle is gone. Finally, plug in your OBD2 scanner and clear any stored Diagnostic Trouble Codes (like P0171 or P0174).
Pro Tip: Always replace vacuum lines one at a time to avoid getting confused about where individual hoses route across complex emissions routing diagrams.
✅ Final Checklist
- All vacuum hoses are securely attached to their respective fittings and routed correctly
- No hissing or whistling sounds can be heard while the engine is idling
- Engine idle speed is stable and matches manufacturer specifications (typically 650-800 RPM)
- Check Engine Light remains off after a 15-minute test drive
- Fuel trim readings on an OBD2 scanner return to normal parameters (within plus or minus 5 percent)
Important Notes:
- Always wear safety glasses and gloves. Keep flames, sparks, and lit cigars away from open fuel lines and battery terminals.
- If you perform a smoke test or spray flammable liquids, ensure you are working in a well-ventilated outdoor area to avoid breathing in harmful vapors.
- Seek professional mechanic assistance if you suspect internal engine leaks, such as a warped intake manifold or leaking cylinder head gasket, which require specialized tools to repair.
- Estimated time: 30 to 90 minutes. Cost range: $10 to $50 for DIY repairs (hoses/gaskets), or $150 to $300 if professional diagnostic smoke testing is required.
How to Find a Vacuum Leak Using the Visual and Hissing Inspection Method
Before buying or renting special diagnostic equipment, start with the free, low-tech methods. Many vacuum leaks can be found simply by using your eyes and ears.
The Visual Inspection Routine
Pop your hood in a well-lit area and grab a flashlight. Trace every rubber line connected to the intake manifold, throttle body, and accessories like your brake booster. Look closely at sharp bends and connections where hoses slide onto plastic nipples. A split line will often display white or green corrosion, or show visible cracks when you gently flex the rubber.
Listening for the Hiss
Turn off your air conditioning, radio, and any loud shop equipment. Start the engine and let it idle. A vacuum leak creates a distinct hissing or whistling sound as unmetered air rushes through a tiny opening. To isolate the sound, take a length of standard garden hose or rubber vacuum tubing. Hold one end to your ear and move the other end close to suspected leak areas. This acts as a crude automotive stethoscope, allowing you to pinpoint the exact source of the hiss instantly.
Step-by-Step Guide on How to Find a Vacuum Leak with Smoke Tests and Sprays
Modern automotive diagnostics in 2027 rely heavily on precision tools to locate elusive engine air leaks without damaging sensitive components. Professional mechanics and advanced DIYers use two primary methods to pinpoint punctures or failing seals: smoke testing and controlled spray testing.
Using a Professional Automotive Smoke Machine
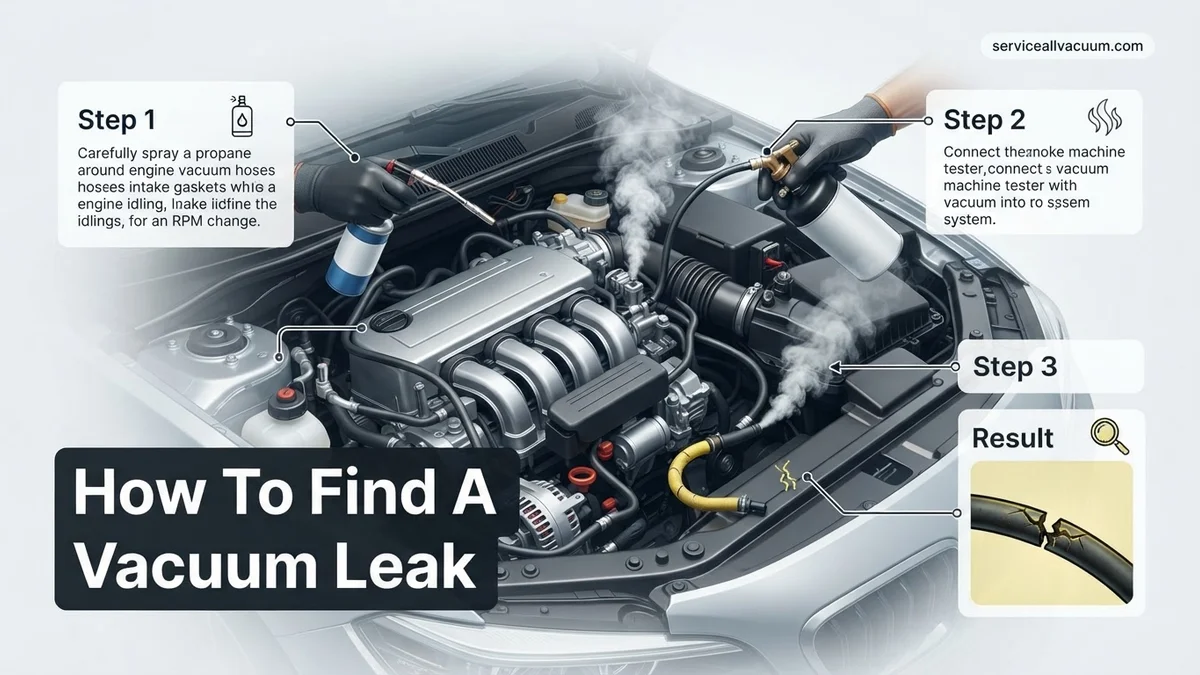
- Disconnect the main air intake duct just after the mass airflow sensor and insert the nozzle of your EVAP or automotive smoke machine into the opening.
- Plug any remaining open ports using tape or a glove to create a sealed system within the intake manifold.
- Activate the smoke machine, which pumps pressurized mineral-oil smoke through the intake pathways at a safe pressure of 1 to 2 PSI.
- Inspect the engine bay with a bright LED flashlight, looking closely for wisps of white smoke escaping from cracked hoses, brittle gaskets, or damaged fittings.
Using the Propane or Brake Cleaner Spray Method
- Start the engine and allow it to reach a stable idle, noting any rough cycling or surging.
- Select a non-chlorinated brake cleaner or an unlit propane torch attached to an extension hose.
- Lightly spray or release gas in short, targeted bursts around suspected areas like vacuum lines, the throttle body gasket, and fuel injector O-rings.
- Listen carefully to the engine RPMs; if the idle suddenly smooths out or increases, you have found your leak, as the engine is burning the combustible aerosol.
What If It Still Doesn’t Work?
If basic diagnostics fail to reveal the issue, the leak may be internal, intermittent, or hidden beneath structural components. Try these advanced fallback steps to resolve stubborn drivability problems:
- Perform a cylinder compression test or a cylinder leak-down test to check for internal vacuum issues caused by a burnt valve or blown head gasket.
- Inspect the brake booster diaphragm by pinching off its vacuum supply line; a failing booster internal seal will draw unmeasured air directly into the system.
- Utilize an advanced OBD2 diagnostic scanner to monitor live short-term and long-term fuel trim data, confirming whether the engine is consistently running lean across all cylinders.
- Consult a certified professional technician if the fault persists despite replacing all external rubber hoses and gaskets. Professional diagnostic labor typically ranges from $150 to $250 per hour, while total repair costs vary by vehicle make and model.
Conclusion
Unaddressed engine air leaks compromise fuel economy, trigger persistent check engine lights, and cause rough idling that degrades overall vehicle performance. Resolving these issues early prevents long-term damage to internal combustion components and restores optimal engine efficiency. According to verified research and automotive service data from leading industry experts, routine inspection of rubber vacuum lines every 30,000 miles significantly reduces unexpected mechanical failures. Next actionable step: Inspect your vehicle’s primary intake lines today using a high-intensity flashlight or schedule a professional smoke test to catch microscopic cracks before they worsen.
❓ Frequently Asked Questions
How do I know if my rough idle is caused by a vacuum leak?
A rough idle caused by a vacuum leak often smooths out slightly as the engine warms up or when extra fuel is introduced. You can confirm this by checking for stored lean codes (like P0171 or P0174) using an OBD2 scanner.
Is it safe to use propane or brake cleaner around a running engine?
Using flammable sprays carries a real risk of fire if it contacts hot exhaust manifolds or spark. Always keep a fire extinguisher nearby and apply sprays in short, controlled bursts.
What are the most common failure points for vacuum leaks?
The most frequent culprits include aged or cracked rubber vacuum lines, deteriorated intake manifold gaskets, leaking PCV valves, and cracked PCV hoses.
Can a vacuum leak trigger a check engine light?
Yes, unmetered air throws off the air-fuel ratio monitored by the oxygen sensors, which frequently triggers lean fault codes and illuminates the check engine light.
How does a mechanic test for vacuum leaks?
Professionals typically rely on electronic smoke machines to pressurize the intake tract, allowing them to spot escaping smoke instantly without risking engine damage from flammable sprays.
What should I do after I find the vacuum leak?
Replace any damaged rubber lines with correct-diameter automotive hose, torque loose intake bolts to specification, or replace degraded gaskets to restore proper engine sealing.