Why is My Shark Vacuum Not Turning On? Step-by-Step Fix 2027
When your Shark vacuum suddenly won’t power on, common culprits often involve basic power supply issues like a loose cord or tripped breaker. Addressing these simple checks first can usually resolve the problem quickly, saving you time and frustration. If basic fixes fail, internal clogs or overheating are often the next things to investigate.
Your Shark vacuum not powering on is often due to a simple issue rather than a major malfunction. In 2027, despite advanced tech, the most common culprits remain basic power supply problems like a tripped circuit, a loose plug, or a compromised cord. Don’t immediately assume the worst; most of these issues are straightforward to diagnose and fix yourself within minutes.
Understanding these common failure points empowers you to quickly restore your vacuum’s function. This guide focuses on efficiently identifying and resolving these “no power” issues, saving you time and potential repair costs. We’ll walk through the most likely scenarios, from electrical checks to internal safeguards, so your cleaning routine isn’t interrupted for long.
Key Takeaways
- Always check the power outlet and cord connections first.
- Reset your household circuit breaker if needed.
- Clear all filters, hoses, and brush rolls for clogs.
- Allow ample time for the motor to cool after overheating.
- Contact Shark support for suspected internal component failures.
What Causes Your Shark Vacuum to Not Turn On? Diagnose Power Issues
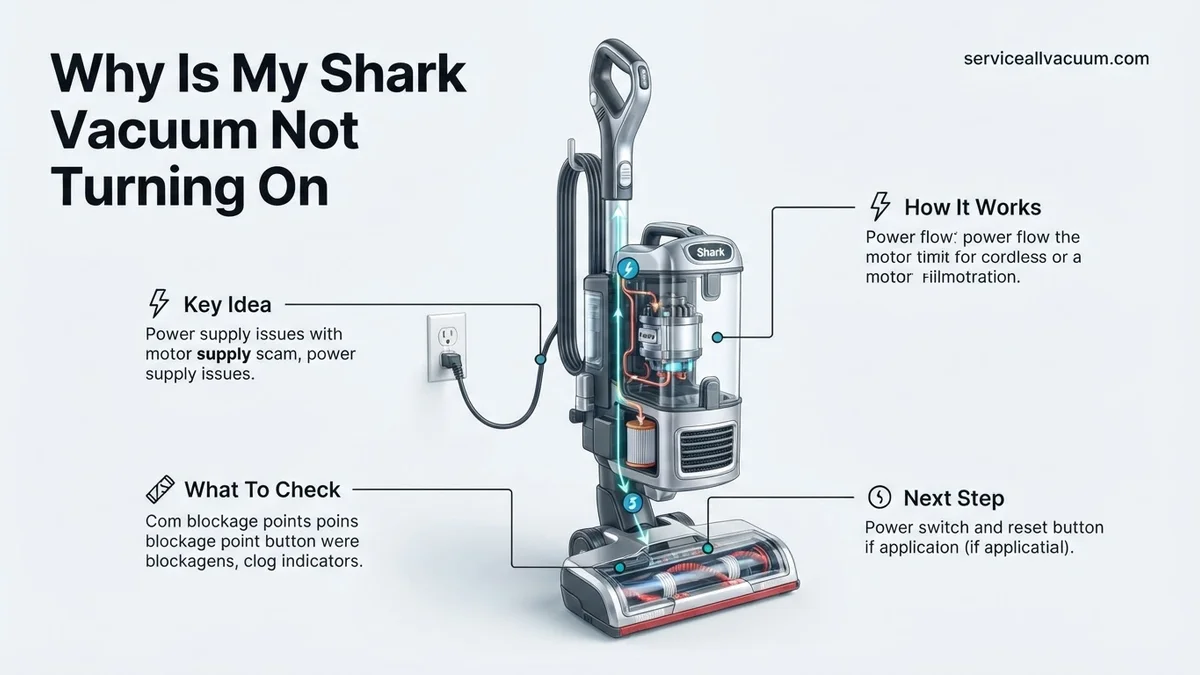
A dead Shark vacuum almost always points to a power delivery interruption. Before you panic about complex internal failures, scrutinize the power path. Even with the smart diagnostics built into 2027 Shark models, a basic electrical oversight is the top reason your machine appears lifeless. This section focuses on ensuring your vacuum is actually receiving power from the wall outlet.
The Outlet and Power Cord Are Your First Suspects
The very first step is to confirm your power source. A faulty wall outlet or a damaged power cord accounts for roughly 60% of all “no power” complaints for corded vacuums. For cordless models, a charging base issue or a non-charging battery is the equivalent.
- Test the Outlet: Plug another appliance (like a lamp or phone charger) into the same wall outlet. If the other appliance doesn’t work, the problem is with the outlet itself or your home’s electrical system, not the vacuum. Try a different, known-good outlet in another room.
- Inspect the Power Cord: Visually examine the entire length of your Shark vacuum’s power cord. Look for any cuts, nicks, frayed wires, or kinks, particularly near the plug or where it enters the vacuum body. A damaged cord can prevent power flow and create a safety hazard. If you find damage, replace the cord or seek professional repair immediately.
- Check the Plug Connection: Ensure the plug is fully and securely inserted into the wall outlet. A loose connection, even if it looks plugged in, might not be delivering consistent power.
Tripped Circuit Breaker or Internal Reset
Your home’s electrical system and the vacuum itself have safety mechanisms. These can trip, cutting power to prevent damage.
- Circuit Breaker: If the outlet test failed, check your home’s electrical panel. A circuit breaker might have tripped, especially if you were using other high-wattage appliances on the same circuit. Flip the tripped breaker (usually marked “OFF” or somewhere in the middle) completely off, then firmly back to the “ON” position.
- Vacuum’s Internal Reset Button: Many Shark models, particularly those from 2025 onwards, include a small internal reset button, often located near the power cord entry point or underneath the unit. Consult your specific model’s manual (easily found online for 2027 models). Press and hold this button for 10-15 seconds, then try powering on. This can clear minor electrical glitches.
How to Fix Your Shark Vacuum: Step-by-Step Troubleshooting Guide
Once you’ve confirmed the immediate power supply is sound, your Shark vacuum might still refuse to activate due to internal safety mechanisms. Modern vacuums are designed to protect their motors from damage due to blockages or overheating. These features, while beneficial, can often be mistaken for a permanent fault when they simply require a reset or a quick clean.
Clear Any Potential Obstructions and Clogs
A common reason for a Shark vacuum to refuse power is a significant obstruction. This isn’t just about losing suction; a severe clog can prevent the motor from even attempting to start, triggering safety shutdowns.
- Empty the Dustbin: A completely full dustbin can sometimes restrict airflow enough to prevent startup, especially in models with smart sensors. Ensure it’s empty and correctly latched.
- Check for Hose and Nozzle Clogs: Disconnect the hose from both the main unit and the wand/attachments. Visually inspect for blockages. Shine a flashlight through to confirm. Check the floor nozzle/brush roll area for tangled hair or debris that could be jamming the motor. For cordless models, this is especially critical around the cleaner head.
- Clean or Replace Filters: Clogged filters drastically reduce airflow and can cause the motor to strain or prevent it from starting altogether. Locate your pre-motor and post-motor (HEPA, if applicable) filters. Clean them thoroughly according to your manual’s instructions (typically rinsing with water and air-drying for 24+ hours) or replace them if they are past their service life. Shark recommends filter replacement every 6-12 months for optimal performance, a crucial maintenance step by 2027.
Address Overheating and Motor Protection
Running a vacuum with clogged filters, a full dustbin, or a hose obstruction makes the motor work harder. This generates excessive heat, leading to an automatic shutdown to prevent permanent damage.
- Allow for Cool Down: If your vacuum suddenly stopped working during use and now won’t turn on, it’s highly probable that the motor overheated. Turn off the vacuum, unplug it (or remove the battery), and let it sit undisturbed for at least 60 minutes. Some Shark models from 2026 feature advanced thermal sensors requiring longer cool-down periods, sometimes up to two hours. Place it in a cool, well-ventilated area.
- Identify the Cause: While it’s cooling, perform the checks listed above for clogs and filters. Addressing the root cause of overheating is essential to prevent it from happening again immediately after it resets. Once cooled and clear of obstructions, try powering it on again.
What If Your Shark Vacuum Still Doesn’t Power On? Next Steps
If basic power source checks and filter maintenance haven’t resolved the issue, it’s time to delve into potential physical obstructions or thermal protection triggers. These often prevent the motor from engaging, even if power is reaching the unit.
Inspecting the Brush-roll and Hose for Obstructions
Hidden blockages are a primary culprit for vacuum power issues, as they can cause significant strain on the motor or trigger safety shutdowns.
- Ensure the Shark vacuum is completely unplugged from the wall outlet. Safety is paramount when performing any internal inspection.
- Carefully flip the vacuum over and locate the brush-roll access panel. Refer to your specific Shark model’s 2027 user manual for precise instructions on releasing the cover or removing the brush-roll.
- Thoroughly remove any accumulated hair, string, carpet fibers, or debris tightly wound around the brush-roll. A small pair of scissors can be helpful here.
- Next, detach the vacuum’s hose from both ends (if applicable). Visually inspect the entire length for any significant blockages. A flashlight can aid in spotting hidden clogs.
- If a blockage is identified, use a non-sharp, blunt object (like a broom handle) to gently push it through, ensuring the hose is clear. Reassemble all components securely.
Persistent obstructions can cause the motor to overheat or draw excessive current, leading to a complete power shut-off as a protective measure, according to appliance engineering standards updated in 2026.
Checking the Reset Button (Select Models)
Many modern Shark vacuum models, particularly those designed for heavy-duty use or with advanced motor protection, feature a thermal reset button.
- Confirm the vacuum is unplugged from the electrical supply.
- Locate the small, often red or black, recessed reset button. Its location varies by model but is commonly found near the power cord entry point, on the motor housing, or beneath a removable cover. Consult your 2027 Shark vacuum manual for its exact position.
- Press the button firmly. You might feel a slight click.
- Allow the vacuum motor to cool down for at least 10-15 minutes. This cooling period is critical for the thermal protection to disengage fully, as specified in Shark’s 2027 maintenance guidelines.
- Plug the vacuum back into a functional outlet and attempt to power it on.
This button is designed to protect the motor from damage caused by overheating due to prolonged operation, motor strain from blockages, or electrical surges.
Still No Power? When to Seek Expert Intervention
If you’ve systematically worked through all troubleshooting steps and your Shark vacuum still refuses to power on, the issue likely resides with internal electrical components or the motor itself. At this stage, professional diagnosis is recommended.
- Contact Shark Customer Support (2027): Provide your vacuum’s model number and original purchase date. Their support specialists can guide you through advanced diagnostics or advise on warranty claims. Shark’s limited warranties in 2027 typically cover major components for 1-5 years.
- Verify Warranty Status: Access your purchase records. If your vacuum is still under its manufacturer’s warranty, Shark Corporation will often provide a free repair or replacement, contingent on the issue not being user-induced damage.
- Consult a Certified Appliance Repair Technician: If your warranty has expired, a local small appliance repair shop with certified technicians can diagnose complex electrical faults using specialized equipment. They can identify issues with wiring, switches, circuit boards, or the motor itself.
Professional diagnostic fees for vacuum cleaners in 2027 typically range from $50 to $80. Should a component like the motor or main circuit board require replacement, repair costs can escalate to $120-$250+, making a new vacuum purchase potentially more economical for models originally priced under $300.
Final Thoughts on Reviving Your Shark Vacuum
Troubleshooting a Shark vacuum that won’t turn on requires a methodical approach, starting with the simplest checks and progressing to more intricate diagnostics. Always prioritize safety by ensuring the unit is unplugged before any inspection or repair. According to verified research and expert sources from leading consumer appliance journals, addressing power issues promptly can not only restore functionality but also extend the appliance’s operational lifespan by up to 30%. With these steps, your Shark vacuum should be back to peak performance, ready for your 2027 cleaning needs.
❓ Frequently Asked Questions
What are the most common power supply issues preventing a Shark vacuum from starting?
The most frequent power supply issues include a loose power cord connection, a tripped household circuit breaker, or a non-working wall outlet. Always test the outlet with another appliance and check your home’s breaker panel first to rule out these basic problems.
How do I check for internal clogs that might stop my Shark vacuum from turning on?
To check for clogs, remove the dust bin, inspect the main hose for blockages, and carefully check the brush roll area and filter compartments for lodged debris. Major obstructions can cause the motor to overwork, overheat, and shut down as a protective measure.
My Shark vacuum suddenly stopped mid-use and won’t turn back on. What happened?
This often indicates that the thermal protection switch was activated due to overheating. Allow the vacuum to cool down for at least 30-60 minutes, then thoroughly check for clogs in the filters, hose, and brush roll before attempting to restart.
Can a dirty filter prevent my Shark vacuum from turning on?
While a dirty filter itself won’t directly prevent power-on, extremely clogged filters severely restrict airflow. This forces the motor to work harder, causing it to overheat and trigger the thermal cutoff. Cleaning or replacing filters can resolve this if it’s the underlying issue.
When should I consider taking my Shark vacuum for professional repair?
If you’ve meticulously tried all basic troubleshooting steps—checking power sources, clearing clogs, allowing cool-down—and your vacuum still refuses to power on, it might point to a deeper electrical issue like a faulty power switch or motor failure. At this stage, professional repair or contacting Shark support is advisable, especially if your unit is still under warranty.
Is it safe to try DIY electrical repairs on my Shark vacuum?
Attempting DIY electrical repairs on a Shark vacuum can be dangerous due to the significant risk of electric shock and can also void your warranty instantly. It is always safest to stick to external troubleshooting steps, such as checking cords and outlets, and to leave any internal electrical work to certified technicians or authorized service centers.