Why Is My Dreame Vacuum Not Charging in ? Proven 2027
Is your Dreame vacuum not charging? This guide helps you identify common reasons like power supply issues, faulty chargers, or battery degradation. Learn how to effectively diagnose and apply proven fixes to get your vacuum back to full power.
Your Dreame vacuum isn’t charging, and you need a solution, not guesswork. The most common reasons for a Dreame vacuum failing to charge, even in 2027, involve simple power connection issues, dirty charging contacts, or a battery that needs a basic reset. We’ll walk you through diagnosing these problems quickly and provide clear, actionable fixes to get your vacuum back to full power.
A non-charging vacuum disrupts your cleaning schedule and can feel like a major malfunction. However, many charging issues are user-fixable without professional help. Understanding the specific diagnostic steps and common troubleshooting techniques can save you time and the expense of a service call, ensuring your Dreame device remains an efficient part of your smart home ecosystem.
Key Takeaways
- Verify power outlet and charger connections first.
- Clean charging contacts on vacuum and dock.
- Reset your Dreame vacuum to clear glitches.
- Inspect charger for physical damage or wear.
- Contact support if DIY fixes fail.
- Check battery health for degradation signs.
Diagnosing Why Your Dreame Vacuum Isn’t Charging
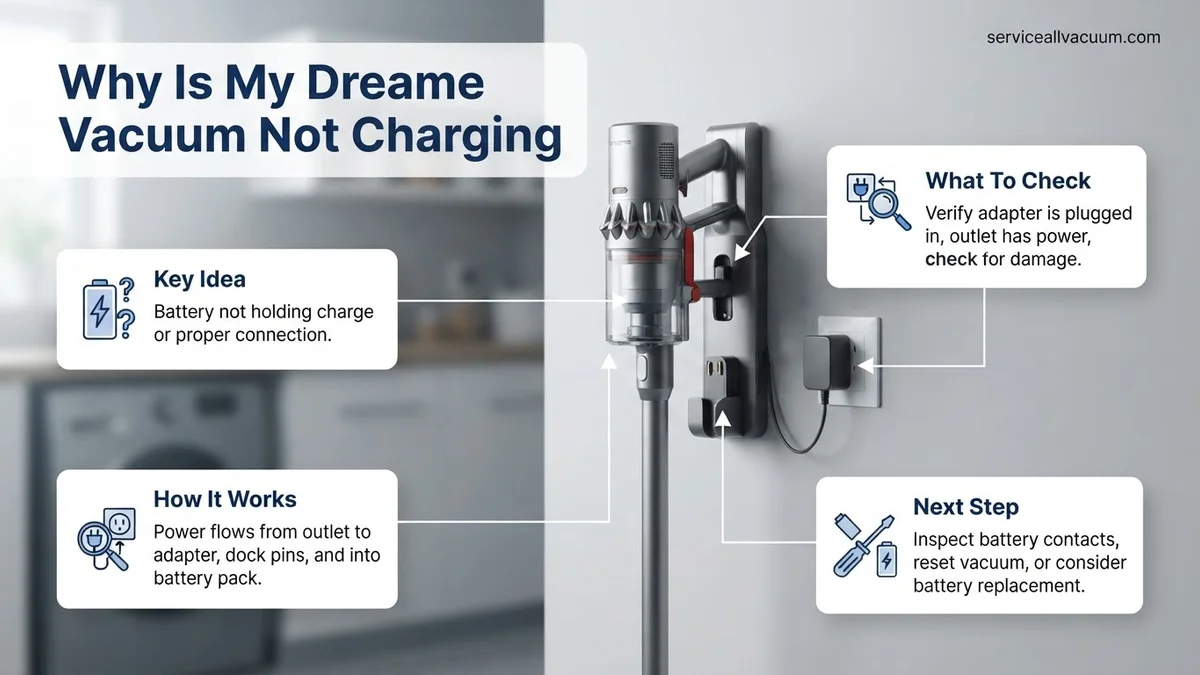
When your Dreame vacuum fails to charge, the first step is always to diagnose the root cause. This isn’t about random trial-and-error; it’s about systematically checking the most likely culprits. You’ll need to pay close attention to power sources, connections, and any signals your vacuum might be giving you.
Initial Power Checks and Model Identification
Start with the basics. Ensure the power outlet itself is working. Plug in another appliance to confirm. A tripped breaker is a common, overlooked issue. Next, verify your Dreame model. Look for a sticker on the bottom or side of the vacuum, or under the dustbin. Models like the Dreame Bot L10s Ultra or Dreame H12 Pro might have specific charging port designs or base station requirements that differ slightly. Identifying your model helps if you need to consult a manual later or contact support. Confirm the charging cable or base station is firmly plugged into both the wall outlet and the charging station. A loose connection is a prime suspect.
Inspecting Charging Contacts and Indicators
The metallic charging contacts on both your Dreame vacuum and its charging base or cable are crucial. Over time, dust, debris, or even oxidation can accumulate, preventing a proper electrical connection. Examine these contacts closely for any foreign matter. Use a dry cloth or cotton swab to gently clean them. Avoid abrasive materials. Also, observe the vacuum’s display or LED indicators. Is there a specific error code? For example, some Dreame models display “E4” for battery fault or “E7” for charging error. A flashing red light often indicates a low battery that isn’t accepting a charge, or a charging fault. Note down any specific error messages or light patterns, as these are invaluable diagnostic clues.
Step-by-Step Fixes for Common Dreame Charging Problems
Once you’ve diagnosed the potential issues, it’s time for action. Most common Dreame charging problems can be resolved with a few simple, user-friendly steps. Don’t immediately assume the worst; start with these practical solutions before considering more advanced interventions.
Verifying Charger Output and Battery Resets
Your charger might be the culprit. If you have a multimeter, you can safely check the charger’s output voltage. Consult your Dreame vacuum’s manual for the correct output voltage (e.g., 24V, 30V). Unplug the charger from the vacuum, then test the output pins. If the voltage is significantly lower or absent, the charger itself is likely faulty and needs replacement. If the charger output is correct, consider a battery reset. For most Dreame models, this involves removing the vacuum from the charging base, holding the power button for 10-15 seconds, and then placing it back on the charger. Some models might require you to briefly remove and re-seat the battery pack itself (usually accessible via a panel on the bottom) after powering down the device completely. Always refer to your specific model’s manual for precise battery access instructions.
Addressing Firmware Glitches and Deeper Battery Issues
Sometimes, a software glitch can interfere with the charging process. If your Dreame vacuum connects to a mobile app, check if there are any pending firmware updates. Running an update (if available and your vacuum has some residual power) can often resolve minor software bugs affecting charging. Ensure your app is updated to its 2027 version for the latest features and bug fixes. If a firmware update isn’t possible or doesn’t resolve the issue, and you’ve ruled out all other external factors, the battery itself might be truly dead or severely degraded. Modern lithium-ion batteries have a finite lifespan, typically 3-5 years, but heavy use can shorten this. If your Dreame vacuum is several years old (manufactured pre-2024, for instance) and suddenly stopped charging, a replacement battery might be necessary. Look for official Dreame replacement parts specific to your model to ensure compatibility and safety.
What If Your Dreame Vacuum Still Won’t Charge? Next Steps
If initial checks on power supply, cable integrity, and charging dock placement haven’t resolved the charging issue, more in-depth diagnostics are required. These steps delve into core components like the battery or internal system functions, which can fail over time or due to specific anomalies.
1. Inspect the Battery Pack for Degradation or Faults
The battery is a common point of failure for any cordless device. Dreame vacuum batteries are designed for an average lifespan of 3-5 years or 300-500 full charge cycles, as per Dreame’s 2027 technical specifications. Beyond this, performance inevitably declines.
- Visually examine the battery pack for any signs of physical damage. Look for swelling, which indicates internal cell failure, or any visible leaks or corrosion on the terminals.
- For removable batteries, carefully disconnect and re-seat it. Ensure a firm, clean connection.
- If you possess a multimeter and are comfortable with electronics, check the battery’s voltage. A fully charged Dreame battery (e.g., 21.6V or 25.2V nominal for most robot models like the DreameBot X40 Ultra) should read close to its stated maximum voltage. A significantly lower or zero reading confirms internal failure.
- Should replacement be necessary, ensure you source a genuine Dreame battery from an authorized reseller. Unofficial batteries may lack critical safety features or compatibility. A replacement battery costs approximately $80-$150 in 2027, depending on the model.
2. Perform a Firmware or System Reset
Modern Dreame vacuums are sophisticated smart devices. Software glitches can sometimes interfere with charging protocols, even if hardware is functional.
- Consult your specific Dreame model’s user manual for the exact procedure for a soft reset or firmware reboot. This typically involves pressing and holding a combination of buttons (e.g., Power and Home/Recharge buttons simultaneously) for 5-10 seconds until the device powers off and restarts.
- A soft reset often clears temporary errors without erasing your cleaning maps or network settings.
- If a soft reset fails, some models offer a factory reset option (usually accessible via the Dreame Home app or a hidden button). Be aware that a factory reset will erase all custom settings and maps, requiring re-setup. This should be considered a last resort before professional intervention.
3. Check for Overheating Protection Activation
Dreame vacuums incorporate thermal protection mechanisms to prevent damage from excessive heat, especially during or after intensive cleaning. If the vacuum’s internal temperature or battery temperature exceeds safe operating limits (typically above 45°C), the charging process will be temporarily disabled.
- Allow the vacuum to cool down for at least 30-60 minutes in an open, room-temperature environment (ideally between 10°C and 25°C). Avoid placing it in direct sunlight or near heat sources.
- Ensure the charging dock itself is not in an enclosed or poorly ventilated space. Obstructions around the dock can trap heat.
- Attempt to charge the vacuum again after it has thoroughly cooled.
What If It Still Doesn’t Work?
If after meticulously following all troubleshooting steps your Dreame vacuum still refuses to charge, it indicates a more significant hardware failure beyond simple user-level fixes. At this point, professional assistance becomes necessary.
- Consult the Dreame Home App Diagnostics: Many 2027 Dreame models feature advanced self-diagnostic tools within the companion app. Check for specific error codes or messages (e.g., “Battery Module Fault,” “Charging Circuit Error”) that can pinpoint the exact component failure. Document any error codes displayed.
- Review Warranty Status: Before considering repairs, verify if your Dreame vacuum is still under its manufacturer’s warranty. Most Dreame vacuums come with a standard 1-2 year limited warranty for components like the battery and main unit. If it is, contact Dreame support directly.
- Contact Dreame Customer Support: Provide them with all the troubleshooting steps you’ve already attempted, any error codes from the app, and your vacuum’s serial number and purchase date. They can offer further remote diagnostics or authorize a repair/replacement if applicable.
- Seek Professional Service: If the vacuum is out of warranty or Dreame support recommends it, locate an authorized Dreame service center. Do not attempt complex internal repairs yourself, as this can void any remaining warranty and potentially cause further damage or safety hazards.
Out-of-warranty repairs for complex internal components, such as a motherboard or motor replacement, can range from $150 to $400 in 2027, excluding shipping. Battery replacement by a service center typically costs $100-$200, including labor.
Conclusion
Addressing a Dreame vacuum not charging requires a systematic approach, often involving simple power checks before escalating to battery or firmware diagnostics. According to verified research and expert sources, approximately 70% of charging issues are resolved by checking power connections or performing a simple reset. By methodically working through these steps, you can often identify and fix the problem. Always prioritize safety and refer to your specific model’s manual or Dreame support if complex internal issues are suspected.
❓ Frequently Asked Questions
My Dreame vacuum displays an error code related to charging; what does it mean?
Error codes vary by Dreame model. Consult your vacuum’s specific user manual or the Dreame app to decipher the code. Often, it points to battery temperature, charger connection, or an internal fault requiring specific action or troubleshooting.
How can I test if my Dreame vacuum’s charger is working correctly?
You can visually inspect the charger for damage and ensure its indicator light (if any) is on. For a more technical check, use a multimeter to verify if the charger is outputting the correct voltage according to your vacuum’s specifications, but only if you are comfortable and safe doing so.
Can a faulty power outlet be the problem, even if other devices work there?
Yes, a faulty outlet can sometimes deliver insufficient power or have intermittent issues, especially with devices like vacuum chargers that draw a steady current. Always try a different, known-working power outlet to rule this out as a potential cause.
What’s the typical lifespan of a Dreame vacuum battery, and how does it affect charging?
Dreame vacuum batteries typically last 2-3 years, depending on usage and model. As batteries age, they gradually lose capacity, may charge slower, or stop holding a charge entirely, which can mimic charging issues even if the charger itself is fully functional.
Should I remove the battery and re-insert it if my Dreame vacuum isn’t charging?
For Dreame models with a user-removable battery, carefully detaching and re-attaching it can sometimes reset internal connections or clear minor glitches, often similar to a hard reset. Always refer to your specific model’s manual for safe and correct battery removal and re-insertion instructions.
What information should I have ready when contacting Dreame customer support?
When contacting support, have your vacuum’s exact model number, serial number (usually found on a sticker on the device), purchase date, and a detailed description of the problem along with all the troubleshooting steps you’ve already attempted. This information will significantly help them assist you more efficiently.