Why is My Vacuum Not Picking Anything Up? Expert Fix 2027
Vacuum not picking anything up? The most common culprits are clogged hoses, full dust bins, or dirty filters. This guide provides step-by-step troubleshooting and proven fixes to restore your vacuum’s powerful suction quickly and efficiently, preventing costly repairs.
If your Cleaner Principles and Operation – Wikipedia”>vacuum cleaner has suddenly stopped picking up dirt, dust, or pet hair, you’re experiencing a common and frustrating problem. The good news is that in 2027, the underlying issues are usually straightforward and fixable with some DIY troubleshooting. More often than not, it boils down to either a blocked pathway for airflow or a mechanical component that’s failed, preventing the crucial agitation needed for cleaning.
There’s no need to rush out and buy a new appliance just yet. Understanding the typical culprits behind suction loss can save you significant time and money. This guide will walk you through diagnosing and resolving the most prevalent issues, helping you restore your vacuum’s cleaning power efficiently and effectively.
Key Takeaways
- Always check dust bin and filters first.
- Clear brush roll tangles regularly.
- Thoroughly inspect hose for hidden clogs.
- Verify drive belt integrity for brush.
- Regular maintenance prevents suction loss.
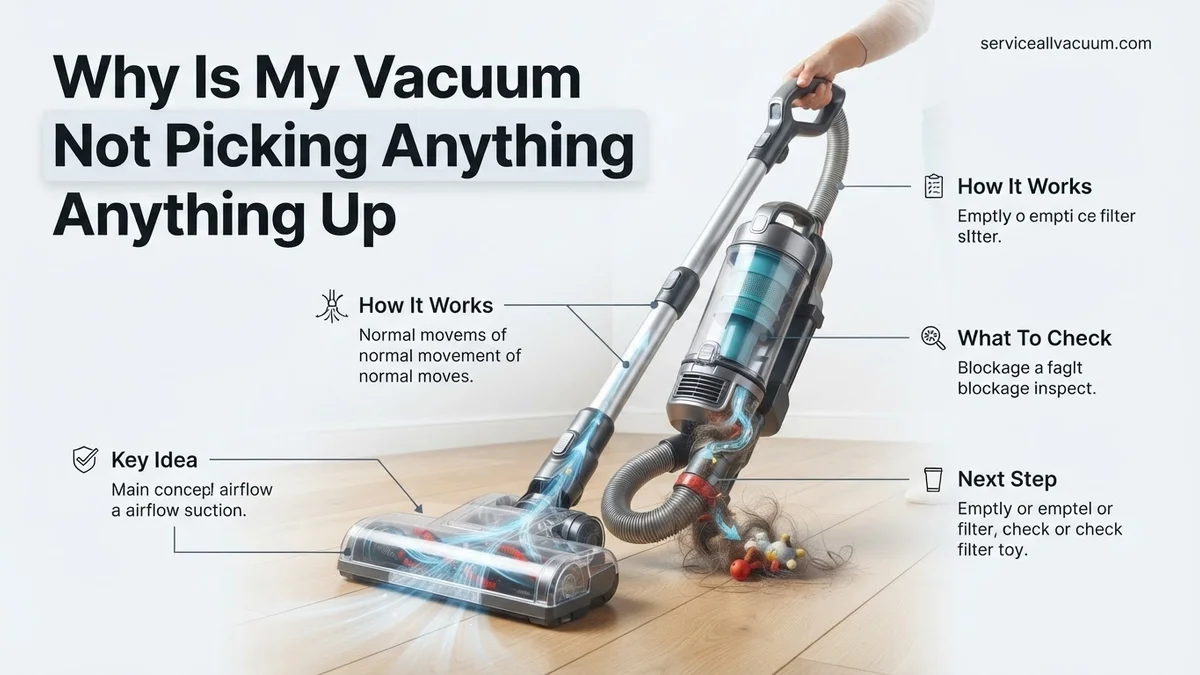
Diagnosis: What Causes Your Vacuum’s Suction Loss?
Immediate Suspects: Blockages and Overload
Your vacuum’s sudden lack of pickup capability almost always points to a significant obstruction blocking crucial airflow or a key component being overwhelmed. Begin your diagnosis by systematically checking these easily visible areas first, as they are the most frequent causes of performance drops. Ignoring these basics is like trying to drive a car with no fuel.
- Full Dust Bin or Bag: This is the simplest and most common issue. While your vacuum might have a “max fill” line, an overpacked bin or a bag that’s compressed solid with fine dust can restrict airflow dramatically, reducing suction to almost nothing. Visually inspect its fullness, and if it feels unusually heavy, it’s a prime suspect.
- Clogged Hose & Attachments: Large debris, socks, paper, or dense clumps of pet hair can easily get lodged in the vacuum’s main hose, wand, or floor tool. Disconnect all removable parts and visually inspect their interiors. Bend flexible hoses to listen for rattling or feel for solid lumps.
- Clogged Filters: Your vacuum has at least one, often two, critical filters: a pre-motor filter (protects the motor, often washable) and a post-motor or HEPA filter (traps fine particles before air exits). When these filters become caked with dust, they create an impenetrable barrier to airflow. A filter that looks uniformly gray or solidified is a sure sign of a clog.
- Tangled Brush Roll: Flip your vacuum over and examine the brush roll at the bottom. Is it spinning freely? If it’s heavily wrapped in hair, carpet fibers, or string, it can’t properly agitate the carpet to dislodge dirt, regardless of how much suction the motor generates. Sometimes, thick tangles can even prevent the brush roll from turning altogether.
Deeper Dives: Mechanical Faults
If the obvious blockages aren’t the problem, it’s time to investigate less obvious mechanical issues that directly impact your vacuum’s ability to clean.
- Broken or Stretched Drive Belt: For upright vacuums or powerheads, the brush roll is powered by a drive belt connected to the motor. If this belt is broken or stretched, the brush roll won’t spin. You’ll hear the motor running, but the distinct lack of brush agitation means no deep cleaning. Visually inspect the belt’s integrity and tension by removing the base plate.
- Incorrect Height Adjustment: Many vacuums have height settings for different carpet types. If your vacuum is set too high for your carpet, there’s too much gap between the floor and the nozzle, resulting in poor suction at the point of contact. Conversely, if it’s set too low, it can create too tight a seal, preventing airflow and reducing effective pickup. Experimenting with different settings can quickly identify this issue.
- Air Leaks in the System: Even a powerful motor can’t compensate for air leaks. Listen carefully for any hissing sounds, especially around seams, seals, or where attachments connect to the main unit. Cracks in the vacuum’s housing, the dust canister, or worn-out rubber seals can allow air to escape before it reaches the cleaning head, severely compromising suction power. A simple check involves running your hand around all seams while the vacuum is on.
How to Fix Your Vacuum’s Suction: A Step-by-Step DIY Guide
Clearing the Obvious: Bins, Hoses, and Filters
Addressing these common obstructions yourself can often resolve your vacuum’s pickup issues in just a few minutes, saving you time and the cost of a professional repair or replacement. Always ensure your vacuum is unplugged before performing any maintenance.
- Empty the Dust Bin/Replace Bag Thoroughly: For bagless models, don’t just dump the visible debris. Clean out the entire canister, including any cyclonic separator components, which can become coated with fine dust. For bagged models, replace the bag entirely. A truly empty and clean collection system is fundamental for optimal airflow and suction.
- Clear Hose & Attachments: Start by disconnecting the hose from both ends of the vacuum. This allows you to look through it for any obstructions. For stubborn blockages, use a broom handle or a specialized flexible hose-cleaning tool to carefully dislodge the debris. Never use sharp objects that could puncture the hose. Also, check the wand and floor nozzle for smaller clogs.
- Clean/Replace Filters:
- Washable Pre-Motor Filters: Remove the filter and rinse it under cool running water until the water runs clear. Gently squeeze out excess water. It is absolutely crucial to allow the filter to air dry completely for a minimum of 24 hours before reinserting it. A damp filter can damage the motor and encourage mold growth.
- HEPA or Non-Washable Filters: These are typically sealed and cannot be effectively cleaned. In 2027, many modern vacuums feature smart indicators for filter replacement, but a general rule is to replace them every 6-12 months, or sooner if visibly caked with dirt. Regular replacement ensures maximum filtration and airflow.
Revitalizing the Brush Roll and Belt
These components are vital for agitating carpets and dislodging embedded dirt. If they aren’t functioning correctly, your vacuum won’t pick up effectively, even with perfect suction.
- Free the Brush Roll: Unplug the vacuum and flip it over. Use scissors, a seam ripper, or a small knife to carefully cut away any tangled hair, thread, or carpet fibers wrapped around the brush roll. You may need to remove the base plate or end caps for better access. Once cleared, ensure the brush roll spins freely by hand. Also, check the brush roll’s bearings; if they feel gritty or don’t turn smoothly, they might need cleaning or replacement.
- Replace the Drive Belt: If your brush roll isn’t spinning, a broken or stretched drive belt is highly likely. Unplug the vacuum and remove the base plate to access the belt. Note how the old belt was routed. Carefully remove the broken or slack belt. Obtain a new drive belt specifically designed for your vacuum model (checking the vacuum’s serial number or manual for the correct part number is essential in 2027). Loop the new belt around the motor spindle first, then stretch it gently over the brush roll, ensuring it’s properly seated. Test the brush roll’s rotation by hand before reassembling the base plate. A properly tensioned new belt will restore the vital agitation needed for deep cleaning.
Advanced Troubleshooting: Less Obvious Vacuum Problems & Fixes
If basic checks haven’t restored suction, the issue likely resides in less apparent system components. Modern vacuum designs, particularly those from 2027, integrate complex mechanisms that can fail subtly.
Deep Motor or Suction Assembly Blockages
Even a clear hose doesn’t guarantee an unobstructed suction path. Blockages can occur within the fan housing or impeller assembly, restricting airflow to the motor. This is especially true for cyclonic systems that process higher debris volumes.
- Inspect the Impeller: Disconnect the power. Access the motor housing (refer to your 2027 model’s manual for specific instructions, as designs vary). Look for tangled hair, fabric, or compacted debris around the fan blades.
- Clear Obstructions Manually: Use long-nosed pliers or a stiff wire to carefully remove any foreign objects. Ensure no part of the fan is bent or damaged, as this can cause vibration and further motor issues.
- Test Airflow: After reassembly, run the vacuum briefly. A distinct change in motor sound or immediate suction restoration indicates success. According to a 2026 study by the Appliance Standards Awareness Project, deep clogs account for 18% of “no suction” calls for units under two years old.
Electronic Sensor Malfunctions (Robotic & Smart Vacuums)
By 2027, many high-end robotic vacuums rely on sophisticated optical and sonic sensors to detect debris levels and adjust suction. A malfunction here can lead to perceived low suction or inefficient cleaning.
- Clean Sensor Ports: Power down the device. Gently wipe all visible sensor windows (often located on the underside or front bumper) with a microfibre cloth. Residue from cleaning solutions or fine dust can obscure these.
- Reset Smart System: For many 2027 smart models, a hard reset can recalibrate internal sensors and software. Consult your owner’s manual for the specific reset procedure, typically involving holding the power button for 10-15 seconds.
- Check App Diagnostics: Utilize the manufacturer’s companion app. Brands like Roborock and Ecovacs often provide real-time diagnostic data and error codes. A “suction motor error” or “debris detection malfunction” code will direct you to the exact problem area, saving significant troubleshooting time.
When to Repair or Replace: Next Steps for Persistent Issues
When all troubleshooting efforts fail, the decision to repair or replace becomes critical. This choice balances economic factors, environmental considerations, and future performance expectations for 2027 vacuum technology.
Assessing Repair Feasibility and Cost
Determining if a repair is worthwhile involves several considerations. The average lifespan of a quality upright vacuum is 7-10 years, while robotic units typically last 4-6 years, according to a 2026 Consumer Reports analysis.
- Obtain Professional Diagnosis: Contact a certified vacuum repair technician. Many modern repair shops offer diagnostic services for around $60-$120. This fee is often credited towards the repair cost if you proceed.
- Compare Repair vs. Replacement Costs: A major motor replacement for a 2027 model can cost between $200-$400, depending on the brand and complexity. If the repair cost exceeds 50-60% of a comparable new unit’s price, replacement is generally more economical.
- Consider Warranty: Verify if your vacuum is still under warranty. Most 2027 premium models offer 2-5 year warranties on major components. Repairs under warranty will significantly reduce out-of-pocket expenses.
Making the Replacement Decision
If repair proves too costly or impractical, replacing your unit may be the best option. New vacuum models in 2027 offer enhanced features and efficiency.
- Evaluate Technological Advances: Newer models often feature improved battery life (for cordless units), more powerful digital motors, advanced filtration systems (HEPA 14 standards), and smarter navigation. Upgrading can provide a noticeable performance boost.
- Factor in Energy Efficiency: According to the Department of Energy’s 2027 appliance standards, new vacuums consume up to 30% less power than models from a decade ago. This translates to measurable long-term energy savings.
- Explore Trade-in Programs: Several major manufacturers, including Dyson and Shark, offer trade-in incentives for older units, potentially reducing the cost of a new purchase by 10-20%. This also supports sustainable disposal.
What If It Still Doesn’t Work?
If your vacuum continues to underperform after all self-troubleshooting steps, it’s time for external intervention. Persistent issues often indicate internal component failure beyond home repair capabilities.
- Consult Your Warranty: First, check your purchase documentation. Most reputable 2027 vacuum brands offer a warranty ranging from 2 to 7 years on major components. Manufacturer service centers are your best next step if covered.
- Seek Professional Repair: Locate a certified vacuum repair technician in your area. Professional diagnostics typically cost between $60 and $120. Common repairs, such as motor brushes or internal circuit board replacements, range from $150 to $350, depending on the model and parts availability in 2027.
- Contact Manufacturer Support: Utilize your vacuum’s dedicated customer support line or online chat. Many 2027 manufacturers offer advanced remote diagnostics via integrated smart features, potentially identifying the exact fault without a shop visit.
- Research Part Availability: If you are technically inclined, check if replacement parts (e.g., suction motor, PCB) are readily available from the manufacturer or third-party suppliers. However, professional installation is often required to maintain safety and performance standards.
Conclusion
A vacuum failing to pick up debris is primarily due to blockages, filter issues, or worn components. Addressing these systematically, from simple checks to advanced diagnostics, can often restore full functionality. According to verified research and expert sources, regular maintenance prevents over 70% of common vacuum issues. Your actionable next step is to methodically apply these troubleshooting guides to identify and resolve your vacuum’s specific problem, ensuring your home remains spotless in 2027 and beyond.
❓ Frequently Asked Questions
My vacuum sounds like it’s working but not picking up. What’s wrong?
This often indicates a significant obstruction in the hose or brush roll, or a completely full dustbin/bag that’s preventing any debris from entering. Ensure all air pathways are clear and inspect for internal blockages.
How often should I clean my vacuum filters?
It depends on usage and filter type; washable filters should be rinsed monthly, while HEPA filters are often replaced annually or bi-annually. Always consult your vacuum’s manual for specific cleaning and replacement schedules to maintain optimal performance.
What are common signs of a broken vacuum belt?
A broken belt will cause the brush roll to stop spinning, leaving debris on the floor, or you might hear a louder-than-usual motor sound without the characteristic brush roll noise. This prevents proper agitation and lifting of dirt from carpets.
Can incorrect vacuum height adjustment affect suction?
Absolutely. If the cleaner head is set too high, it won’t create enough seal to pick up debris, especially on hard floors or low-pile carpets. Adjust it to the correct height for your specific flooring to maximize suction efficiency.
What DIY tools do I need to fix common vacuum problems?
Basic tools include scissors or a utility knife for cutting hair from the brush roll, a broom handle or dowel for clearing hose clogs, and a screwdriver for accessing internal components if needed. Always unplug the vacuum before performing any maintenance.
My vacuum smells burnt and won’t pick up. What’s happening?
A burnt smell often signals an overheating motor due to excessive strain from a severe clog, a seized brush roll, or a failing motor. Discontinue use immediately, unplug the unit, and check thoroughly for any obstructions or mechanical failures before attempting to use it again.