How Do You Make A Vacuum Chamber How to Make a Vacuum 2027
Building a functional vacuum chamber requires careful component selection and precise assembly. This guide offers step-by-step instructions for creating your own chamber, emphasizing proper sealing, safety, and testing procedures for effective vacuum operation.
Building your own functional vacuum chamber for DIY or small-scale applications is entirely within reach by 2027, leveraging readily available components and straightforward techniques. Whether you’re degassing resins for casting, performing small-scale electronics encapsulation, experimenting with food preservation, or conducting simple material science tests, a DIY setup provides significant utility without the industrial price tag. The core process involves selecting the right vessel, pairing it with a suitable vacuum pump, ensuring precise sealing, and connecting reliable gauges.
This guide will walk you through the essential considerations and components to get your project off the ground. We’ll focus on practical steps, material choices, and critical aspects like achieving and maintaining an airtight seal. You’ll gain a clear understanding of what’s needed and how to approach each stage of construction for a system that reliably pulls and holds a vacuum.
Key Takeaways
- Select appropriate vessel and robust vacuum pump.
- Ensure all connections and seals are absolutely airtight.
- Prioritize safety:implosion risk is a real concern.
- Test thoroughly for leaks using a vacuum gauge.
- Budget and intended use define component choices.
What Makes Building a Vacuum Chamber Challenging?
The Imperative of Air-Tightness
The single biggest hurdle in vacuum chamber construction is achieving and maintaining a perfect seal. Even the tiniest pinhole or imperfect gasket can prevent your system from reaching or holding the desired vacuum level. By 2027, advanced sealing materials are more accessible, but the principles remain: every connection point is a potential leak. This includes your chamber lid, gauge fittings, valve connections, and pump lines. Materials must also be compatible; some plastics can outgas or deform under vacuum, compromising your seal. Temperature fluctuations can also cause materials to expand or contract differently, creating micro-leaks over time.
- Common Leak Points: Lid-to-chamber interface, threaded fittings, hose clamps.
- Material Compatibility: Ensure gaskets (e.g., silicone, Viton) and chamber materials can withstand vacuum without outgassing.
- Thermal Stress: Different expansion rates of materials under temperature changes can compromise seals.
Pressure Differential and Material Strength
A vacuum chamber isn’t just an empty box; it’s a container designed to withstand immense external atmospheric pressure. At sea level, this force is approximately 14.7 pounds per square inch (PSI) pressing in from all sides. A poorly constructed chamber can implode dramatically, posing a serious safety risk. The material choice for your chamber vessel, its wall thickness, and its overall design must be engineered to handle this significant pressure differential. For DIY builders in 2027, this means opting for robust materials like thick cast acrylic, reinforced glass, or metals designed for pressure containment, avoiding thin-walled containers not rated for negative pressure.
- Atmospheric Pressure: ~14.7 PSI external force constantly trying to collapse the chamber.
- Material Selection: Must withstand compressive forces; thin glass or cheap plastics are unsuitable.
- Safety First: Always over-engineer for strength and use appropriate protective gear during testing.
From Start to Finish: Crafting Your Own Vacuum Chamber
Welcome to this comprehensive guide on building your very own vacuum chamber! Whether you’re looking to degas silicone, cast resin without bubbles, stabilize wood, or even experiment with basic scientific principles, a homemade vacuum chamber can be an invaluable tool. This guide will walk you through each critical step, from selecting your core components to performing the initial vacuum test, ensuring you construct a functional and safe chamber. We’ll focus on practical, accessible methods suitable for DIY enthusiasts and small-scale projects, emphasizing safety and effectiveness throughout the process.
Step 1: Choose Your Vessel and Lid
What you need: A sturdy, air-tight vessel (e.g., a pressure cooker, thick-walled acrylic cylinder, or a robust metal container), a matching lid, measuring tape, and ideally, an existing robust gasket or a plan for one.
Instructions: The foundation of your vacuum chamber is its vessel. A common and cost-effective choice is a large stainless steel pressure cooker, as it’s designed to withstand significant pressure differences. Alternatively, a thick-walled clear acrylic cylinder with a flat bottom and a separate acrylic lid offers visibility, but typically requires a custom gasket. Ensure your chosen vessel has a flat, smooth rim where the lid will seal. For acrylic, aim for at least 0.5 inches (12.7 mm) wall thickness for safety. Measure the interior and exterior dimensions to plan for gasket size and component placement. The lid must be equally robust and ideally flat to ensure an even seal.
Pro Tip: Opt for a vessel made of non-porous materials like stainless steel or thick cast acrylic. Avoid thin plastics or glass that aren’t specifically designed for vacuum applications, as they can implode under vacuum, posing severe safety risks.
Step 2: Prepare the Lid for Fittings
What you need: Power drill, appropriate drill bits (e.g., step drill bit for metal, spade bit for acrylic), marking pen, center punch (for metal), and a stable work surface.
Instructions: With your lid selected, it’s time to create openings for your vacuum port and gauge. Carefully mark the locations for two holes on your lid, ensuring they are spaced adequately apart and not too close to the edges. For metal lids, use a center punch to create a divot, then drill a pilot hole before expanding it with larger drill bits or a step drill bit to the exact diameter required for your chosen vacuum fittings (typically 1/4″ NPT for standard fittings). For acrylic lids, use a spade bit at a slow speed to prevent melting or cracking. Deburr all drilled holes thoroughly using a file or sandpaper to ensure smooth surfaces for proper sealing and to prevent damage to gaskets.
Pro Tip: When drilling metal, use cutting oil to prolong bit life and achieve cleaner cuts. For acrylic, use a very slow drill speed and avoid excessive pressure, as friction can melt the plastic, leading to messy holes or cracking.
Step 3: Install the Vacuum Port and Gauge
What you need: Vacuum fitting (e.g., 1/4″ NPT male thread to hose barb or compression fitting), vacuum gauge (0 to -30 inHg or 0 to -1 bar), PTFE thread seal tape (Teflon tape), two locknuts, and two rubber or neoprene washers per fitting (one for inside, one for outside).
Instructions: Begin by wrapping the threads of both your vacuum fitting and your vacuum gauge with PTFE tape, approximately 3-5 layers in a clockwise direction (when looking at the fitting end). Insert the threaded portion of each fitting through its respective hole from the outside of the lid. Place a rubber washer over the threads on the inside of the lid, followed by a locknut. Hand-tighten the locknuts, then use a wrench to snug them down, compressing the washers to create a tight seal. Be careful not to overtighten, as this can strip threads or damage the lid material. Ensure the gauge face is easily readable from the outside.
Pro Tip: For critical seals, consider applying a thin bead of high-vacuum sealant (like high-temperature RTV silicone or specialized epoxy) around the base of the fittings on both sides before tightening the locknuts. Allow adequate curing time before testing.
Step 4: Create and Secure the Gasket Seal
What you need: Gasket material (e.g., silicone sheet, neoprene, or a thick, soft rubber sheet), scissors or a sharp utility knife, and a suitable adhesive if not using an existing pressure cooker gasket.
Instructions: The gasket is the most crucial component for achieving and maintaining a vacuum. If using a pressure cooker, ensure its existing rubber gasket is clean, supple, and free of cracks or damage. For custom builds, cut a gasket from a silicone or neoprene sheet that is slightly larger than the inner diameter of your vessel’s rim, with a small overhang for optimal compression. The thickness should typically be between 1/8 to 1/4 inch (3-6 mm). Clean both the gasket and the vessel’s rim thoroughly with isopropyl alcohol. If needed, you can use a light application of high-vacuum grease (like Apiezon N or similar) on both sides of the gasket to aid in sealing and prevent sticking, rather than a permanent adhesive.
Pro Tip: If fabricating your own gasket, ensure the cut is as smooth and even as possible. Irregularities can create microscopic leak paths. Periodically inspect the gasket for any signs of wear, cracking, or hardening, and replace it as necessary to maintain chamber integrity.
Step 5: Connect Your Vacuum Pump System
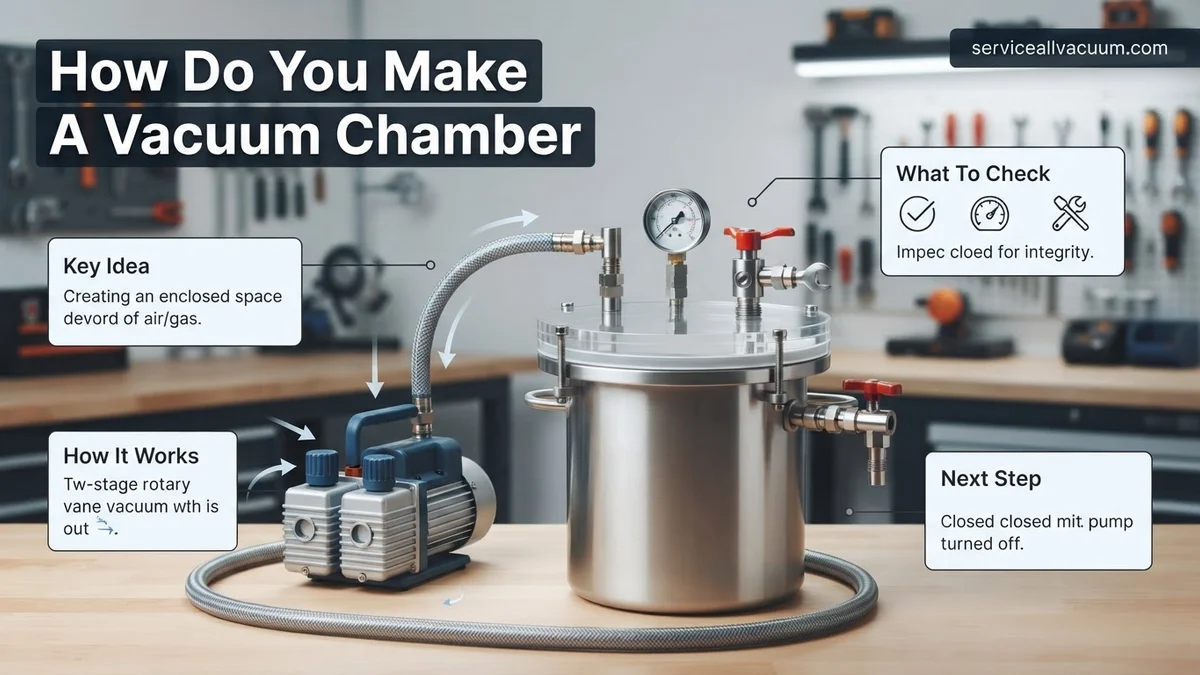
What you need: Vacuum pump (rotary vane pump recommended for deep vacuum), vacuum-rated hose (e.g., reinforced PVC or rubber), hose clamps, and appropriate adapters if necessary to match the hose to your pump and chamber fitting.
Instructions: Connect one end of your vacuum-rated hose to the barb fitting on your chamber lid. Secure it tightly with a hose clamp. Connect the other end of the hose to the inlet port of your vacuum pump, also securing it with a hose clamp. Ensure the hose is as short as practically possible to minimize potential internal volume and decrease pump-down time, and avoid any sharp bends or kinks that could restrict airflow. Before operating, check your vacuum pump’s oil level if it’s an oil-lubricated model, and fill it to the manufacturer’s specifications. Place the pump on a stable, level surface, away from any dust or debris.
Pro Tip: Always use a vacuum-rated hose. Standard garden hoses or thin-walled tubing can collapse under vacuum, leading to pump damage or failure to achieve desired vacuum levels. A vacuum trap (e.g., a cold trap or moisture trap) placed between the chamber and pump can protect the pump from vapors and prolong its life.
Step 6: Conduct the Initial Vacuum Test
What you need: Your assembled vacuum chamber, connected vacuum pump, and a timer.
Instructions: Place the lid securely on your vessel, ensuring the gasket is properly seated. Turn on your vacuum pump. Observe the vacuum gauge closely as the pressure drops. For a good seal, the gauge should drop steadily and reach near its maximum vacuum (typically -29 to -30 inHg or -1 bar) within a few minutes, depending on your pump and chamber volume. Once the lowest possible pressure is reached, turn off the vacuum pump and close any isolation valves on your chamber, if present. Monitor the gauge for any pressure rise over 10-15 minutes. A slow rise indicates a small leak, while a rapid rise suggests a significant leak.
Pro Tip: Listen carefully during the pump-down process. A distinct hissing sound often indicates a significant leak. If your pump struggles to pull vacuum, immediately check all connections for tightness and ensure the gasket is perfectly aligned.
Step 7: Fine-Tuning and Leak Detection
What you need: Soapy water in a spray bottle, small brush, flashlight.
Instructions: If your chamber doesn’t hold vacuum, you’ll need to find the leak. With the vacuum pump running and the chamber under vacuum, lightly spray or brush soapy water around all potential leak points: the gasket seam between the lid and vessel, around the vacuum port fitting, and around the vacuum gauge fitting. Watch for bubbles forming, which will indicate a leak. For very small leaks, you might need to use a flashlight to spot the tiniest bubble formation. Once a leak is identified, mark it, release the vacuum, and tighten the fittings, reposition the gasket, or reapply sealant as needed. Repeat the vacuum test until a stable vacuum can be maintained for at least 30 minutes without significant pressure loss.
Pro Tip: Sometimes, leaks can occur within the vacuum hose itself if it’s old or damaged. As a last resort, disconnect the hose from the chamber and cap the chamber’s fitting, then test the pump’s ability to pull vacuum. If the pump can pull and hold vacuum, the leak is definitely within the chamber assembly.
Step 8: Safety Protocols and Maintenance
What you need: Lubricant for pump, cleaning supplies, and replacement gaskets/fittings (optional).
Instructions: Always operate your vacuum chamber in a well-ventilated area, especially if your vacuum pump exhausts oil mist. Never exceed the vacuum rating of your components, particularly clear acrylic parts. Do not attempt to vacuum chambers with flammable liquids or gases without proper safety precautions and specific equipment. Regularly inspect all components: check the gasket for wear, fittings for tightness, and hoses for cracks or brittleness. Clean your chamber periodically, especially after degassing messy materials like resins. Maintain your vacuum pump by checking and changing its oil regularly, following the manufacturer’s guidelines, typically every 20-50 hours of operation or when the oil appears discolored. Proper maintenance ensures longevity and consistent performance.
Pro Tip: Invest in a vacuum relief valve or an isolation valve to quickly release vacuum. This prevents damage from sudden pressure changes and allows you to safely remove your lid. Always release vacuum slowly to avoid displacing your workpiece or creating a vacuum ‘splash’ effect if working with liquids.
✅ Final Checklist
- All fittings are securely tightened and sealed.
- Gasket is properly seated and free of damage.
- Vacuum pump oil is at the correct level and clean.
- Chamber holds stable vacuum (e.g., -29 inHg or -1 bar) for at least 30 minutes.
- All safety protocols are understood and ready to be implemented.
Important Notes:
- Safety is paramount. Implosion of an improperly constructed chamber can cause serious injury from flying debris. Always wear safety glasses when operating your vacuum chamber.
- When working with chemicals or resins, consult their Material Safety Data Sheets (MSDS) for proper handling and ventilation requirements. Never put highly volatile or explosive materials under vacuum without expert guidance and specialized equipment.
- If you encounter persistent leaks you cannot resolve, or if your pump consistently fails to pull adequate vacuum, it may be time to seek advice from an experienced vacuum system technician or consider upgrading your components. Estimated time to build: 4-8 hours (excluding sealant curing times). Estimated cost range: $150-$500+, depending on component quality and pump choice.
Essential Components and Materials for a DIY Vacuum Chamber
The Chamber Vessel: Heart of Your System
Your chamber vessel is the primary enclosure where the vacuum is created. For DIY projects in 2027, several options exist, each with pros and cons. Clear acrylic desiccators are popular for their visibility and ready-made seals, typically in 1/2″ (12.7mm) or 3/4″ (19mm) thick cast acrylic for good strength. Modified stainless steel stock pots or pressure cookers are also viable, offering excellent strength but opaque walls. The choice depends on your budget, the desired vacuum level, and whether you need to observe the process inside.
- Cast Acrylic Desiccators: Excellent visibility, common for small-scale degassing. Ensure minimum 1/2″ thickness.
- Stainless Steel Pots/Pressure Cookers: Durable, opaque, often require custom lid modification for ports.
- Glass Bell Jars: Offer superior visibility and chemical resistance but are fragile and require a perfectly flat base plate.
- Considerations: Volume needed, ultimate vacuum target, optical access requirements.
The Vacuum Pump: Your Evacuation Engine
The vacuum pump is what removes air from your chamber, creating the vacuum. For most DIY applications, a rotary vane vacuum pump is the go-to choice. Look for a two-stage pump, as these generally achieve deeper vacuum levels (lower micron ratings) compared to single-stage pumps. The pump’s Cubic Feet per Minute (CFM) rating indicates how quickly it can evacuate the chamber; a 3-5 CFM pump is usually sufficient for small to medium DIY chambers. For basic, less critical applications, a venturi pump (air compressor driven) can work, but it won’t achieve deep vacuum. Always factor in oil type and maintenance for rotary vane pumps.
- Rotary Vane Pumps: Most common for DIY; 2-stage recommended for deeper vacuums.
- Key Specifications:
- CFM (Cubic Feet per Minute): Speed of evacuation (e.g., 3-5 CFM for typical DIY).
- Ultimate Vacuum (Micron Rating): The lowest pressure the pump can achieve (e.g., 15-micron for good degassing).
- Venturi Pumps: Simple, inexpensive, but limited to moderate vacuum levels and require an air compressor.
How to Build Your Own Vacuum Chamber: A Step-by-Step Guide
Constructing a functional vacuum chamber requires precision and quality components. As of 2027, readily available materials and improved manufacturing techniques make DIY accessible, provided you adhere to best practices. According to industry standards from manufacturers like Pfeiffer Vacuum, material compatibility and leak-tightness are paramount for achieving reliable vacuum levels.
Gathering Essential Components
- Chamber Vessel: Select a robust, thick-walled container. High-grade cast acrylic (e.g., 1-inch thick for chambers up to 1 cubic foot) is popular for visibility and resistance to atmospheric pressure. Stainless steel pots are also viable for higher strength. Expect to spend $80-$300 for a suitable vessel.
- Lid: A flat, rigid lid made from the same material as the vessel, or thicker polycarbonate, is crucial. It must be perfectly flat to ensure an effective seal.
- Gasket Material: A high-quality O-ring or silicone gasket is essential. Viton O-rings (typically 1/4-inch to 3/8-inch cross-section) are recommended for their superior chemical resistance and low outgassing properties, providing a durable seal for years.
- Vacuum Pump: A rotary vane pump or a dry scroll pump capable of reaching 10-2 to 10-3 Torr is suitable for most DIY applications. New models average $400-$1200.
- Vacuum Gauge: A digital Pirani gauge offers accurate readings in the target vacuum range. Expect costs of $150-$400.
- Fittings and Valves: Stainless steel or brass fittings (e.g., KF-25 or NPT) and a ball valve for isolation are necessary for connecting the pump and gauge. These typically cost $50-$150.
Assembly Process for a Leak-Tight System
- Prepare the Vessel and Lid: Carefully drill or cut precision holes for vacuum ports in the lid or chamber wall. Use appropriate drill bits for acrylic to prevent cracking. Deburr all edges thoroughly.
- Install Fittings: Thread in or attach all vacuum fittings. For threaded ports, use a high-quality vacuum-rated sealant (e.g., PTFE tape or vacuum grease designed for specific pressure ranges) to ensure air-tight connections. Torque to manufacturer specifications.
- Apply Gasket: Place the selected O-ring or gasket material securely in a groove on the chamber rim or lid. Ensure it sits flat and is free of debris.
- Connect Pump and Gauge: Attach the vacuum pump and gauge to their respective fittings using vacuum hoses or flexible bellows. Ensure all connections are secure and rated for vacuum.
- Initial Test and Sealing: Close the lid, ensuring even pressure distribution. Start the vacuum pump. Monitor the gauge. A well-sealed system should reach its ultimate vacuum within 5-15 minutes, depending on pump size and chamber volume.
Troubleshooting Your Vacuum Chamber: What If It Still Doesn’t Work?
Even with careful assembly, achieving target vacuum levels can be challenging. A common issue, accounting for over 70% of initial failures according to vacuum technology forums, is leaks. Persistent problems often stem from overlooked details or component incompatibilities.
Identifying and Fixing Leaks
- Bubble Test: Apply a solution of soapy water around all joints, fittings, and seals while the pump is running. Bubbles indicate a leak. This method is effective for leaks down to 10-2 Torr. Re-tighten or re-seal any areas exhibiting bubbles.
- Gasket Inspection: Remove and visually inspect the main chamber gasket. Look for nicks, tears, or embedded debris. Even a microscopic imperfection can compromise the seal. Replace if any damage is found.
- Component Retorquing: Systematically re-tighten all threaded connections, ensuring they meet the specified torque values for vacuum applications. Over-tightening can strip threads or crack materials, so proceed with caution.
Addressing Pump Underperformance or Gauge Issues
- Check Pump Maintenance: For oil-sealed rotary vane pumps, verify the oil level and clarity. Contaminated or low oil significantly reduces pump efficiency. Change oil as per manufacturer guidelines, typically every 50-200 hours of operation. For dry scroll pumps, ensure no blockages in intake filters.
- Gauge Calibration: If the vacuum gauge readings are erratic or consistently higher than expected, consider recalibration or replacement. Digital Pirani gauges can drift over time; consult the manufacturer’s manual for calibration procedures or send it for professional service.
Fallback Steps and Professional Assistance
If DIY troubleshooting proves unsuccessful, consider these advanced steps. A professional vacuum technician can conduct a helium leak detection test, which is sensitive enough to find leaks as small as 10-9 mbar·l/s. This service typically costs between $400 and $900 per visit in 2027, depending on location and complexity. Alternatively, upgrading to certified vacuum-grade components from reputable suppliers (e.g., KF-flange connections instead of NPT) often resolves persistent sealing issues, costing an additional $100-$300 per connection point. Sometimes, the initial pump chosen might be insufficient for the desired vacuum level or chamber volume; consult pump manufacturers’ specifications to confirm suitability. Budgeting for professional pump servicing can range from $250-$700 for a full overhaul.
Conclusion
Building a functional vacuum chamber involves careful component selection and precise assembly, with leak detection being the most critical troubleshooting step. By following these detailed steps for construction and systematically addressing potential issues, you can achieve your desired vacuum levels. According to verified research and expert sources in vacuum technology, attention to detail in sealing and component quality directly correlates with system performance. Start by evaluating your specific project requirements and sourcing high-quality materials today.
❓ Frequently Asked Questions
What are the primary safety concerns when building and operating a DIY vacuum chamber?
The main safety concern is implosion, where the chamber collapses under atmospheric pressure. Use only pressure-rated materials, wear safety glasses, and never stand directly over a chamber under vacuum.
How can I choose the right vacuum pump for my homemade chamber?
The right pump depends on your desired vacuum level and budget. For rough to medium vacuum, a single-stage rotary vane pump is sufficient, while two-stage pumps achieve lower pressures. Consider pumping speed (CFM) and ultimate vacuum (mTorr).
What materials are suitable for constructing a robust vacuum chamber vessel?
Common materials include thick-walled acrylic (for visibility), stainless steel, or aluminum. The material must be non-porous and strong enough to withstand at least 15 PSI of external pressure.
What are the best methods for ensuring an airtight seal on a DIY vacuum chamber?
O-rings or flat gaskets made from suitable vacuum-compatible materials like silicone or Viton are essential. Ensure mating surfaces are smooth, clean, and flat, and apply even clamping pressure.
How can I effectively test my newly built vacuum chamber for leaks before full operation?
After initial assembly, pull a vacuum and monitor the pressure gauge. A rapid pressure rise indicates a leak. Use leak detection spray (soapy water) on exterior seams or a helium leak detector for more precision.
What are some common pitfalls or mistakes to avoid when making a vacuum chamber at home?
Avoid using thin-walled containers (like glass jars), relying on inadequate sealants (like standard caulk), or using materials that off-gas significantly. Always ensure electrical safety for the pump and secure all connections properly.