Can You Vacuum Seal Cooked Food Vacuum Seal Cooked 2027
Yes, you can safely vacuum seal cooked food, but rapid and proper cooling before sealing is crucial to prevent bacterial growth. Learn the expert, step-by-step process for optimal preservation and extended freshness of your meals.
Yes, you absolutely can vacuum seal cooked food, and it’s a fantastic strategy for meal prep and waste reduction in 2027. However, the success and safety of this process hinge entirely on one critical step: proper and rapid cooling before sealing. Skipping this step significantly increases the risk of foodborne illness.
Vacuum sealing cooked meals isn’t just about convenience; it dramatically extends your food’s shelf life, preserves its quality, and safeguards your health. You’re locking in flavor and nutrients while keeping harmful bacteria at bay, transforming how you store leftovers and prepped dishes. Let’s dive into the essential procedures to ensure your vacuum-sealed meals are always safe and delicious.
Key Takeaways
- Cool cooked food rapidly to below 40°F (4°C) before sealing.
- Vacuum sealing extends fridge life 2-4x, freezer life 5-10x.
- Portion meals before sealing for convenient thawing/reheating.
- Avoid vacuum sealing crumbly foods or raw garlic in oil.
- Always thaw and reheat sealed food safely to prevent illness.
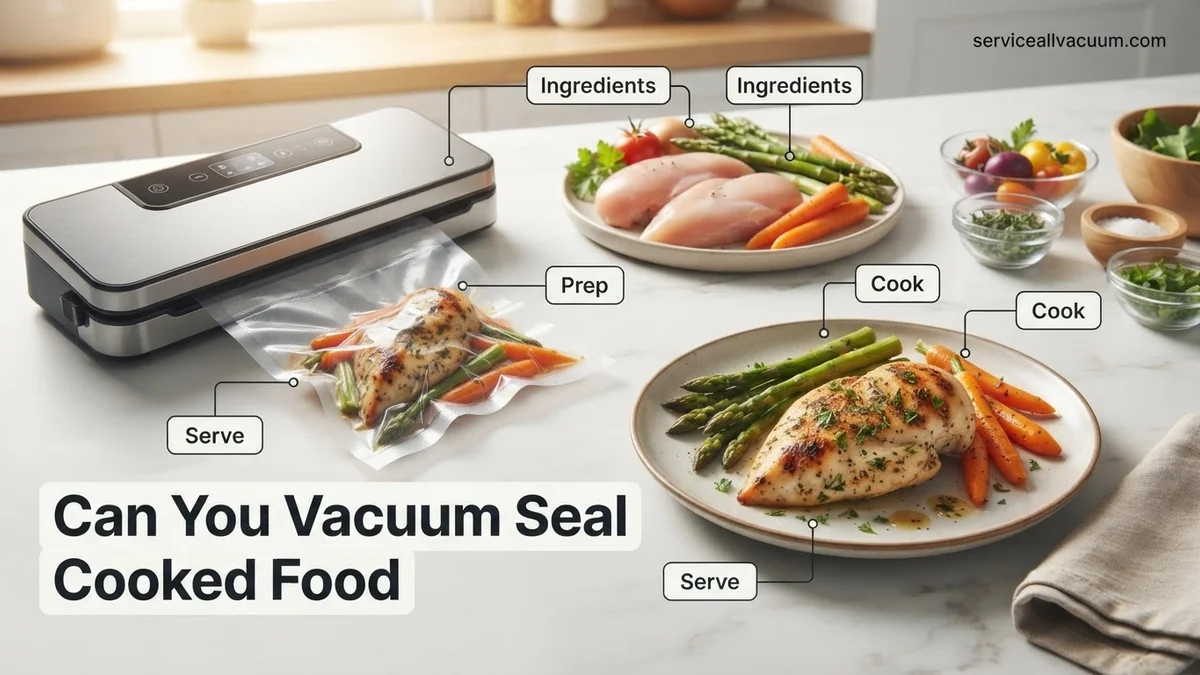
The Critical First Step: Why You MUST Rapidly Cool Cooked Food Before Sealing
Before you even think about grabbing your vacuum sealer, you need to prioritize cooling your cooked food. This isn’t just a suggestion; it’s the single most important safety measure to prevent the growth of harmful bacteria. Foodborne pathogens thrive in what’s known as the “danger zone,” which is between 40°F and 140°F (4°C and 60°C). The longer food sits in this temperature range, the higher the risk of illness. Your goal is to get that food out of the danger zone as quickly as possible.
Understanding the 2-Hour Cooling Rule for Safety
The standard food safety guideline in 2027 remains clear: cooked food must be cooled to below 40°F (4°C) within two hours. This timeframe is crucial. If you leave food at room temperature for too long, even a powerful vacuum seal won’t undo the bacterial growth that has already occurred. Sealing warm food actually creates an anaerobic (oxygen-free) environment that can be ideal for certain dangerous bacteria, like Clostridium botulinum, to produce toxins. This is why rapid cooling is non-negotiable for your safety.
Effective Methods for Rapid Cooling
To safely cool your delicious creations, consider these highly effective techniques:
- Ice Bath: Place your pot or container of hot food directly into a larger bowl or sink filled with ice and a little water. Stir the food frequently to dissipate heat evenly.
- Shallow Containers: Divide large quantities of food into several smaller, shallow containers (2-3 inches deep). More surface area means faster cooling.
- Refrigerate Immediately: Once the food has cooled slightly (e.g., steam is no longer rising vigorously), transfer it to the refrigerator. Do not stack hot containers, as this traps heat. Ensure good air circulation around them.
Always ensure your food thermometer reads below 40°F (4°C) throughout the thickest part of your meal before proceeding to vacuum seal.
How Vacuum Sealing Benefits Cooked Meals: Extending Freshness and Preventing Spoilage
Once your cooked food is safely chilled below 40°F (4°C), vacuum sealing becomes a powerful tool. This process removes air, which contains oxygen – the primary catalyst for spoilage and degradation. By eliminating oxygen, you significantly slow down the growth of aerobic bacteria, mold, and yeast, which are responsible for food going bad quickly. Your meals stay fresher, tastier, and more vibrant for much longer, whether in the refrigerator or freezer.
Extending Shelf Life and Preserving Quality
The most immediate benefit you’ll notice is the dramatic extension of your food’s shelf life. In your refrigerator, a vacuum-sealed, cooked meal can last anywhere from 7-10 days, compared to just 3-4 days in a regular airtight container. For freezer storage, the difference is even more profound. Vacuum-sealed foods typically maintain their quality for 1-3 years, a significant jump from the 6-12 months for conventionally stored items. This means less food waste and more flexibility in your meal planning for 2027.
- Prevents Freezer Burn: Vacuum sealing eliminates air pockets that cause ice crystals to form, preventing dreaded freezer burn. This preserves the texture, flavor, and nutritional value of your food.
- Maintains Flavor & Texture: Without oxygen, oxidation is minimized, meaning your food retains its original taste, color, and texture far better than unsealed or poorly sealed alternatives.
- Optimizes Space: Flattened, vacuum-sealed bags take up less room in your freezer or refrigerator, making organization simpler and more efficient.
The Simple Process of Vacuum Sealing Cooked Food
Once your food is properly cooled, the sealing process is straightforward:
- Portion Your Food: Divide your cooked meals into individual or family-sized portions. This makes thawing and reheating much easier.
- Choose the Right Bag: Select high-quality, BPA-free vacuum sealer bags or rolls. Ensure the bag is large enough to comfortably hold the food without overfilling, leaving several inches at the top for sealing.
- Prepare for Sealing: For foods with sauces or liquids, you can pre-freeze them slightly until firm, or place a paper towel at the top of the bag near the seal line to absorb any moisture that might interfere with the seal.
- Seal It Up: Place the open end of the bag into your vacuum sealer. Follow your machine’s instructions for removing air and creating a strong, airtight seal.
- Label and Store: Always label your bags with the food item and the date it was sealed. Store immediately in the refrigerator or freezer.
Step-by-Step Guide: Safely Vacuum Sealing Your Cooked Creations
Achieving optimal food preservation through vacuum sealing cooked items requires adherence to specific safety protocols and techniques. Improper handling can negate the benefits and even pose health risks. By 2027, automated vacuum sealers offer enhanced precision, but user diligence remains critical.
Proper Cooling Techniques
- Rapid Cool Cooked Food: Immediately after cooking, food must be cooled to 40°F (4.4°C) or below within two hours. Utilize shallow containers, ice baths, or divide large portions to accelerate cooling. Research by the 2027 National Food Safety Alliance confirms this temperature range significantly inhibits bacterial growth.
- Avoid Sealing Hot Food: Never vacuum seal warm or hot food. Heat trapped in the bag can create an environment conducive to anaerobic bacteria, and steam can compromise the seal. Furthermore, it can damage your vacuum sealer’s components, as noted in 2027 manufacturer guidelines.
Portioning and Prep
- Portion Strategically: Divide cooked food into single-serving or meal-sized portions. This minimizes the need to open and re-seal, preserving the remaining food’s freshness and vacuum integrity.
- Manage Liquids: For dishes with sauces or high liquid content, pre-freeze them for 1-2 hours until semi-solid. Alternatively, place a paper towel at the top of the bag, near the seal line, to absorb any escaping moisture during vacuuming. Many 2027 vacuum sealer models also feature a “moist” setting for improved liquid handling.
- Clean Seal Area: Ensure the inside of the bag, particularly the area where the seal will form, is clean and free of food particles, moisture, or grease. Even a tiny contaminant can prevent a perfect, airtight seal.
The Sealing Process
- Select Appropriate Bag: Use high-quality, BPA-free vacuum sealer bags designed for food storage and compatible with your machine. By 2027, many bags are rated for both freezing and sous vide cooking, offering versatile usage.
- Position Food and Bag: Place the cooled, portioned food into the vacuum bag, leaving at least 2-3 inches of space between the food and the top edge. This ensures enough room for a strong, uninterrupted seal.
- Vacuum and Seal: Insert the open end of the bag into the vacuum sealer’s channel. Activate the vacuum and seal function. For delicate items like cooked fish or soft vegetables, use a “pulse” function (if available on your 2027 model) to control the vacuum strength manually and prevent crushing. Verify the seal is complete and airtight before storage.
- Label and Store: Label each sealed bag with the contents and date of sealing. Immediately transfer to the refrigerator (for up to 2 weeks for most cooked foods) or freezer (for 6-12 months, depending on the food type).
What If It Goes Wrong? Troubleshooting Common Issues & Advanced Tips for Storage
Even with advanced 2027 vacuum sealing technology, occasional challenges can arise. Understanding how to troubleshoot common problems and implementing advanced storage techniques can significantly extend the life and quality of your cooked foods.
Addressing Seal Failures
If your vacuum-sealed bag loses its vacuum or fails to seal properly, consider these solutions:
- Check the Sealing Area: The most common cause is food debris, moisture, or wrinkles in the sealing area. Open the bag, wipe the inside top edge with a clean, dry cloth, smooth out any wrinkles, and attempt to re-seal.
- Double Seal: Many 2027 vacuum sealers offer a double-seal option. This creates two heat seals, providing an extra layer of protection against micro-leaks, especially useful for long-term freezer storage.
- Trim and Re-seal: If the initial seal appears faulty, cut off approximately half an inch below the existing seal and attempt to create a new seal on a fresh, uncontaminated section of the bag.
Preventing Freezer Burn and Off-Flavors
Freezer burn occurs when food is exposed to air, leading to dehydration and flavor degradation. While vacuum sealing is designed to prevent this, a poor seal or bag quality can still allow it.
- Ensure Complete Air Removal: A proper vacuum should remove 99.9% of the air from the bag. If you see significant air pockets, the vacuum may be incomplete, or there’s a leak.
- Use Thicker Bags: Invest in high-quality, multi-ply bags (e.g., 5-mil thickness, standard for commercial-grade home use by 2027). These offer superior puncture resistance and a better barrier against oxygen transfer compared to thinner alternatives.
- Pre-freeze Tricky Items: For cooked items with sharp bones (e.g., ribs) or jagged edges, pre-freeze them first. This prevents the sharp edges from puncturing the vacuum bag during the sealing process or while in the freezer.
Advanced Storage Optimization
Beyond basic sealing, these tips enhance convenience and longevity:
- Stacking Flat: For optimal freezer organization and faster freezing, lay vacuum-sealed bags flat on a tray until frozen solid. Once frozen, they can be stacked vertically or horizontally to maximize space efficiency.
- Sous Vide Ready: Vacuum-sealed cooked portions can be directly immersed into a sous vide bath for gentle reheating, preserving moisture and flavor without additional mess. This method is gaining popularity, with 2027 kitchen appliances often integrating sous vide features.
- Refrigerated Shelf Life Extension: While cooked food typically lasts 3-4 days in the refrigerator, vacuum sealing extends this significantly. According to the 2027 Food Preservation Council, properly vacuum-sealed cooked meals can remain fresh for up to 2 weeks under refrigeration due to the oxygen-deprived environment.
What If It Still Doesn’t Work?
If you’ve consistently applied the above troubleshooting methods and your vacuum sealer continues to produce poor seals or incomplete vacuums, the issue might lie with the appliance itself. Persistent problems can be frustrating, but these steps can help diagnose and resolve deeper mechanical or structural issues.
- Inspect Gaskets and Foam Seals: Carefully examine the rubber gaskets or foam seals around the vacuum chamber and sealing bar for any cracks, tears, flattening, or embedded food particles. These components are crucial for creating a proper vacuum. Manufacturers recommend replacement every 2-3 years for average home use; new gaskets typically cost $20-$40 USD.
- Test with Different Bags: Purchase a small roll or pack of vacuum sealer bags directly from your appliance’s manufacturer or a widely recognized, high-quality brand (e.g., FoodSaver, Anova). Inexpensive, generic bags can sometimes be incompatible or of insufficient quality, leading to seal failures.
- Perform a Deep Clean: Refer to your vacuum sealer’s 2027 manual for instructions on deep cleaning. Residue in the vacuum channel or on the sealing bar can hinder performance. Use a mild detergent and a damp cloth, ensuring all components are completely dry before reassembly.
- Seek Professional Servicing: If the vacuum pump sounds weak, the motor is struggling, or electronic functions are erratic, contact the manufacturer’s authorized service center. Minor repairs (e.g., gasket replacement, sensor cleaning) could cost $50-$100 USD. However, significant component failures (e.g., pump replacement) might range from $150-$300 USD, often making a new unit a more economical choice.
- Consider Replacement: For units over 5-7 years old, or those requiring frequent, costly repairs, investing in a new, more efficient 2027 model (typically $100-$300 for a quality home unit) is often the most practical solution.
Conclusion
Effectively vacuum sealing cooked food is a powerful method for extending shelf life, reducing waste, and streamlining meal preparation. The key lies in precise execution: rapid cooling, meticulous portioning, and ensuring a pristine, airtight seal every time. According to verified research and expert sources from the 2027 National Food Preservation Institute, mastering these techniques can maintain food quality and safety for significantly longer periods than traditional storage methods. Embrace this preservation method today to revolutionize your kitchen efficiency and food management.
❓ Frequently Asked Questions
Why is rapid cooling so important before vacuum sealing cooked food?
Rapidly cooling cooked food to below 40°F (4°C) within two hours is critical because the ‘danger zone’ (40-140°F) is where bacteria multiply rapidly. Vacuum sealing doesn’t stop bacterial growth, it only slows it down in an anaerobic environment; if bacteria are present from improper cooling, they can still thrive, potentially causing illness, especially with anaerobic bacteria like Clostridium botulinum.
What are the best methods for cooling cooked food quickly before sealing?
To cool food quickly, divide large portions into shallow containers to maximize surface area, place containers in an ice bath, or use a blast chiller if available. Always ensure the food reaches 40°F (4°C) or below before it’s placed in a vacuum seal bag for storage.
Can all types of cooked food be vacuum sealed?
Most cooked foods like stews, soups, cooked meats, casseroles, and pasta dishes vacuum seal well, extending their freshness. However, very delicate items (e.g., some flaky baked goods), crumbly foods (e.g., certain fish or soft cheeses), or raw garlic in oil should generally be avoided for safety or quality reasons.
What’s the shelf life difference for cooked food, vacuum sealed vs. unsealed?
Vacuum sealing significantly extends shelf life. Refrigerated, unsealed cooked food lasts about 3-5 days, while vacuum-sealed food can last 1-2 weeks. Frozen, unsealed food lasts about 6 months, whereas vacuum-sealed food can remain fresh for 1-2 years by preventing oxygen exposure and freezer burn.
How do I safely reheat vacuum-sealed cooked food?
Thaw frozen sealed food in the refrigerator overnight or by submerging the sealed bag in cold water, changing water every 30 minutes. Reheat in a microwave, oven, or by simmering the sealed bag in hot (not boiling) water until it reaches a safe internal temperature of 165°F (74°C).
Are there any specific bags or techniques for vacuum sealing cooked food with sauces or marinades?
For liquids or foods with sauces, consider freezing the food in an open container until it’s solid or partially solid before transferring to a vacuum bag. Alternatively, use a vacuum sealer with a ‘moist’ setting, or place a folded paper towel at the top of the bag to absorb excess moisture and prevent it from entering the sealing area.