How Much Longer Does Vacuum Sealed Food Last? Your 2027
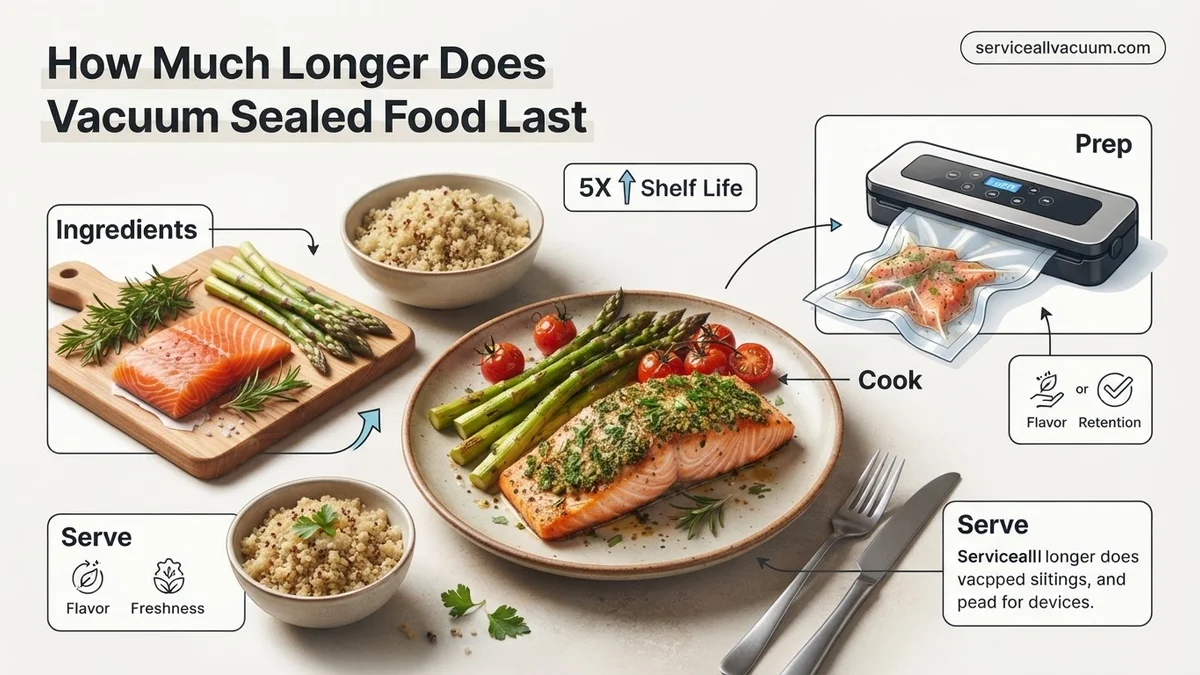
Knowing how much longer vacuum sealed food lasts is crucial for minimizing food waste and maximizing freshness. Vacuum sealing significantly extends shelf life by removing oxygen, often making foods last 3-5 times longer than traditional storage, though proper refrigeration or freezing remains essential for perishables.
You want to know exactly how much longer your food will last when vacuum sealed in 2027? The short answer is significantly longer – often doubling, tripling, or even quadrupling its usable life compared to traditional storage. For most perishables, you’re looking at an extension of 3 to 5 times. This means less food waste, more meal prep efficiency, and substantial savings in your household budget.
Knowing these precise shelf life extensions helps you plan your grocery runs, maximize bulk purchases, and confidently store leftovers for future enjoyment. It transforms how you manage your kitchen inventory, offering unparalleled freshness and convenience in 2027.
Key Takeaways
- Vacuum sealing extends food life 3-5x by removing oxygen.
- Shelf life varies greatly by food type and storage method.
- Refrigerate or freeze perishables even when vacuum sealed.
- Avoid botulism risk:never store low-acid sealed foods at room temp.
- Proper preparation (e.g., blanching) optimizes sealed food quality.
What Causes Food Spoilage & How Vacuum Sealing Fixes It
The Enemy: Oxygen and Moisture
Food spoilage primarily boils down to a few key culprits, and oxygen is at the top of that list. Air exposure leads to oxidation, which degrades fats, causes discoloration, and diminishes flavor. Oxygen also fuels the growth of aerobic bacteria, molds, and yeasts that quickly turn food inedible. For frozen foods, air pockets lead directly to freezer burn, drying out food and ruining its texture and taste. Moisture loss through evaporation is another significant factor in quality degradation.
Vacuum Sealing’s Role in Preservation
Vacuum sealing directly combats these spoilage mechanisms by removing nearly all the air from the food’s packaging. This creates an anaerobic environment. Without oxygen, the growth of most spoilage-causing microorganisms is severely inhibited. Oxidation processes slow to a crawl, preserving flavor, color, and nutritional value. For frozen items, the tight seal prevents moisture from escaping, completely eliminating freezer burn. It’s a simple yet incredibly effective method for extending freshness.
Mastering Food Longevity: Your Vacuum Sealing Action Plan
Vacuum sealing is a powerful tool in the fight against food waste and for extending the freshness of your groceries. But how much longer does vacuum-sealed food truly last? The answer isn’t a simple number; it depends on the food type, storage method, and the quality of your sealing process. This comprehensive guide will walk you through the nuances of vacuum-sealed food shelf life, ensuring you maximize freshness, maintain quality, and most importantly, keep your food safe. By understanding these steps, you’ll transform from a casual sealer to a master of food preservation, saving money and savoring meals longer.
Step 1: Understand the Fundamental Principle of Vacuum Sealing
What you need: A basic understanding of food spoilage mechanisms.
Instructions: Before diving into specific shelf lives, grasp why vacuum sealing works. Food spoilage is primarily caused by oxygen, which promotes the growth of aerobic bacteria, molds, and yeasts, and also causes oxidation leading to changes in color, flavor, and texture. Vacuum sealing removes up to 99% of the air from around your food, significantly slowing down these spoilage processes. It doesn’t eliminate all bacteria, especially anaerobic ones (like those responsible for botulism), so it’s a preservation enhancer, not a standalone solution for all foods at room temperature.
Pro Tip: Vacuum sealing extends shelf life by 3 to 5 times on average when combined with proper refrigeration or freezing. Without cold storage, its benefits for perishable items are minimal and can even create dangerous anaerobic environments for certain bacteria if not handled correctly.
Step 2: Know the Baseline: Original Shelf Life
What you need: Knowledge of standard, unsealed food shelf life for various items.
Instructions: You can only extend what’s already there. Before vacuum sealing, always consider the unsealed shelf life of the food item. For example, fresh raw chicken typically lasts 1-2 days in the refrigerator. Vacuum sealing won’t make it last a month in the fridge. The extension is proportional to the original life. If an item is already near its expiration date or showing signs of spoilage, vacuum sealing it will not reverse the process or make it safe to eat longer. Always start with the freshest possible ingredients.
Pro Tip: A good rule of thumb is to calculate the extended shelf life by multiplying the fresh, unsealed refrigerated life by 2-5, and the fresh, unsealed frozen life by 1-2. Remember, these are estimates, and quality can still degrade over time, even if it’s technically safe.
Step 3: Differentiate Between Refrigerated and Frozen Storage
What you need: A refrigerator and/or a freezer, understanding of temperature’s role in preservation.
Instructions: Vacuum sealing is most effective when combined with cold storage.
Refrigeration: For foods that you plan to use within weeks, vacuum sealing in the refrigerator slows spoilage significantly. For instance, raw meat might go from 1-3 days to 7-10 days. Cooked leftovers from 3-4 days to 10-14 days.
Freezing: This is where vacuum sealing truly shines for long-term preservation. Freezing stops microbial growth, and vacuum sealing prevents freezer burn (oxidization and dehydration) by eliminating air. While unsealed frozen food might last 6-12 months before quality degradation, vacuum-sealed frozen food can maintain peak quality for 2-3 years or even longer in many cases.
Pro Tip: Never rely solely on vacuum sealing for perishable foods stored at room temperature. The anaerobic environment can encourage the growth of dangerous bacteria like Clostridium botulinum if not properly handled (e.g., acidifying, curing, or freezing).
Step 4: Specifics for Meat, Poultry, and Fish
What you need: Fresh cuts of meat, poultry, or fish; a vacuum sealer and appropriate bags.
Instructions: These protein sources are highly perishable.
Raw Meats (Beef, Pork, Lamb): Unsealed, 1-3 days refrigerated. Vacuum sealed, 7-10 days refrigerated. Frozen, unsealed: 6-12 months. Vacuum sealed, frozen: 2-3 years.
Raw Poultry (Chicken, Turkey): Unsealed, 1-2 days refrigerated. Vacuum sealed, 5-7 days refrigerated. Frozen, unsealed: 6-9 months. Vacuum sealed, frozen: 1-2 years.
Raw Fish: Unsealed, 1-2 days refrigerated. Vacuum sealed, 3-5 days refrigerated. Frozen, unsealed: 3-6 months. Vacuum sealed, frozen: 1-2 years.
Cooked Meats/Leftovers: Unsealed, 3-4 days refrigerated. Vacuum sealed, 10-14 days refrigerated. Frozen, unsealed: 2-3 months. Vacuum sealed, frozen: 6-12 months.
Pro Tip: For delicate items like fish or very soft meats, consider pre-freezing them for 1-2 hours until firm before vacuum sealing. This prevents crushing and extracts liquids more efficiently during the sealing process, creating a better seal and preventing bacteria growth in trapped moisture.
Step 5: Guidelines for Fruits and Vegetables
What you need: Various fruits and vegetables; a vacuum sealer; potentially blanching equipment.
Instructions: Not all produce responds equally well.
Vegetables: Most vegetables (broccoli, carrots, peas) require blanching before freezing to deactivate enzymes that cause spoilage. Unblanched, unsealed frozen veggies last 2-3 months; blanched and vacuum-sealed, they can last 1-2 years. For refrigeration, delicate leafy greens don’t always do well with full vacuum (they get crushed); use a pulse function or gentle seal. Harder vegetables (carrots, celery) can last 2-3 weeks in the fridge, up from 3-5 days.
Fruits: Berries, for example, can be gently frozen on a tray before vacuum sealing to prevent crushing. They last 1-2 years frozen, versus 6-12 months unsealed. Soft fruits like bananas or peaches are best pureed before vacuum sealing and freezing. Harder fruits (apples) can be vacuum sealed whole for refrigerated storage (2-4 weeks vs. 1 week).
Pro Tip: For moisture-rich or delicate items like fresh berries or lettuce, use the “pulse” vacuum function on your sealer if available, or partially freeze them first. This prevents crushing while still removing excess air. For items that release gas (like broccoli, cabbage, mushrooms, or garlic), vacuum sealing is best for freezing after blanching; prolonged refrigeration can lead to spoilage or even dangerous anaerobic conditions.
Step 6: Extending Dry Goods and Pantry Staples
What you need: Dry goods (pasta, rice, flour, coffee, nuts, spices); a vacuum sealer and appropriate bags/canisters.
Instructions: Vacuum sealing isn’t just for perishables! It’s excellent for dry goods by protecting against moisture, pantry pests (weevils), and oxidation that causes staleness.
Pasta, Rice, Grains: Unsealed, these last 1-2 years. Vacuum sealed, they can last 3-5 years (or even longer for white rice).
Flour, Sugar: Unsealed, 6-12 months. Vacuum sealed, 1-2 years.
Coffee Beans/Grounds: Unsealed, lose freshness in weeks. Vacuum sealed, they stay fresh for 6-12 months (beans) or 3-6 months (grounds) in the pantry, much longer in the freezer.
Nuts, Seeds: Unsealed, go rancid in 3-6 months. Vacuum sealed, 1-2 years in the pantry or even longer in the freezer.
Herbs and Spices: Unsealed, lose potency in 6-12 months. Vacuum sealed, maintain potency for 1-2 years.
Pro Tip: For powdery items like flour or sugar, place a coffee filter or paper towel over the opening of the bag to prevent fine particles from being sucked into the vacuum sealer, which can damage the machine or compromise the seal.
Step 7: Master Proper Sealing Technique
What you need: A vacuum sealer, compatible bags, clean workstation, scissors.
Instructions: A poor seal negates all benefits.
1. Ensure the bag is clean and dry inside, especially near the sealing area (top 1-2 inches). Moisture or food particles can prevent a proper seal.
2. Leave at least 3 inches of empty space between the food and the bag’s open end to allow for proper vacuuming and sealing. More space is better for bulky or liquid-rich items.
3. Position the open end of the bag correctly within your sealer’s vacuum channel and sealing bar.
4. Monitor the vacuum process. If liquids are being drawn into the sealer, stop, reposition, or pre-freeze the food.
5. Consider a double seal for critical items, especially if freezing for extended periods or if the bag contains liquids. Run the sealing cycle twice on the same spot, just to ensure redundancy.
Pro Tip: For liquid-rich foods (marinades, soups, stews), freeze them solid in an appropriate container (like a freezer-safe bowl) first, then pop out the frozen block and vacuum seal it. This eliminates the risk of liquids interfering with the seal.
Step 8: Implement a Robust Labeling and Tracking System
What you need: Permanent marker, labels or tape.
Instructions: Without proper labeling, vacuum-sealed items become mysterious bags of unknown age. Before sealing, use a permanent marker to clearly write:
1. The contents of the bag (e.g., “Ground Beef,” “Blanched Broccoli,” “Coffee Beans”).
2. The date it was sealed.
3. The estimated expiration date (based on the extended shelf life).
4. For raw meats, consider adding “Raw” to the label.
This prevents confusion, helps you rotate stock (First In, First Out), and ensures you consume food before its quality significantly degrades, even if it’s technically safe.
Pro Tip: Keep a running inventory list (digital or physical) of your vacuum-sealed items, especially for frozen goods. Include item, date sealed, and estimated best-by date. This is invaluable for managing a well-stocked pantry and freezer.
Step 9: Recognize Signs of Spoilage (Even When Sealed)
What you need: Your senses (sight, smell, touch).
Instructions: Vacuum sealing extends life, but doesn’t make food immortal. Always inspect food upon opening.
Visual Cues: Look for mold, discoloration (green, grey, brown on meats), or a slimy texture. If the bag has lost its vacuum (known as “loss of seal”), treat the food as if it were never sealed and check for spoilage signs based on its original shelf life. Any swelling of the bag indicates gas production, a sign of spoilage and potential anaerobic bacterial activity – immediately discard without tasting.
Olfactory Cues: A foul, sour, or unusual odor is the most reliable sign of spoilage, even if appearance seems normal. Don’t taste to confirm; if it smells bad, it is bad.
Texture: Slimy or excessively sticky texture on meats/poultry, or mushy texture on vegetables, are clear indicators to discard.
Pro Tip: If you have any doubt about the freshness or safety of vacuum-sealed food, especially if the seal has broken or the bag is bloated, err on the side of caution and discard it. Your health is not worth the risk.
✅ Final Checklist
- Initial freshness confirmed: Was the food fresh and safe before sealing?
- Proper bag preparation: Was the bag clean, dry, and with enough headspace?
- Effective vacuum and seal: Is the bag tightly vacuumed with no air pockets, and the seal strong and intact?
- Accurate labeling: Is the food type, seal date, and estimated best-by date clearly marked?
- Correct storage temperature: Is the sealed food stored at the appropriate refrigerated or frozen temperature?
- Pre-consumption inspection: Was the food inspected for signs of spoilage (color, odor, texture, intact seal) before being used?
Important Notes:
- Safety First: Botulism Risk: Vacuum sealing low-acid foods (e.g., meats, poultry, fish, most vegetables, garlic, mushrooms) creates an anaerobic (oxygen-free) environment that is ideal for the growth of Clostridium botulinum, the bacterium that causes botulism, a serious and potentially fatal illness. To prevent this, always refrigerate or freeze vacuum-sealed low-acid foods. Never store them at room temperature. For foods like garlic in oil, always use approved recipes that include acidification or ensure it’s refrigerated and consumed within a very short timeframe (e.g., 7 days).
- When in doubt, throw it out: No amount of extended shelf life is worth risking foodborne illness. If a vacuum-sealed bag loses its seal, swells, or if the food looks or smells suspicious upon opening, discard it immediately.
- Initial Investment: The primary cost is the vacuum sealer itself (ranging from $50 for basic models to $300+ for commercial-grade) and compatible bags/rolls. Over time, the savings from reduced food waste typically offset this initial investment. Estimated time for sealing individual items is usually less than 1-2 minutes per bag, with batch processing for food prep taking 30-60 minutes.
Expert Guide: Real Shelf Life Extensions by Food Type and Storage
Critical Factors Beyond the Seal
While vacuum sealing is powerful, its effectiveness still relies on a few key factors in 2027. Always start with fresh, high-quality food. A perfectly sealed package won’t magically revive spoiled ingredients. Ensure your sealing technique is flawless; any tiny leak will compromise the vacuum. Most importantly, remember that vacuum sealing slows spoilage, but for perishable items like meat and dairy, refrigeration or freezing remains absolutely essential for safety and optimal results. It’s not a substitute for proper temperature control.
Your 2027 Shelf Life Chart
Here’s what you can realistically expect for common food types when vacuum sealed compared to traditional storage methods:
- Raw Beef, Pork, Lamb (Refrigerated)
- Traditional: 3-5 days
- Vacuum Sealed: 10-14 days
- Raw Beef, Pork, Lamb (Frozen)
- Traditional: 6-12 months
- Vacuum Sealed: 2-3 years
- Raw Poultry (Refrigerated)
- Traditional: 1-2 days
- Vacuum Sealed: 6-9 days
- Raw Poultry (Frozen)
- Traditional: 9 months
- Vacuum Sealed: 2-3 years
- Raw Fish (Refrigerated)
- Traditional: 1-2 days
- Vacuum Sealed: 5-7 days
- Raw Fish (Frozen)
- Traditional: 6 months
- Vacuum Sealed: 1-2 years
- Hard Cheeses (e.g., Cheddar, Parmesan – Refrigerated)
- Traditional: 1-2 weeks once opened
- Vacuum Sealed: 4-8 months
- Soft Cheeses (e.g., Brie, Feta – Refrigerated)
- Traditional: 5-7 days once opened
- Vacuum Sealed: 2-4 weeks (use caution, some soft cheeses benefit less)
- Cooked Meats/Leftovers (Refrigerated)
- Traditional: 3-4 days
- Vacuum Sealed: 10-14 days
- Cooked Meats/Leftovers (Frozen)
- Traditional: 2-3 months
- Vacuum Sealed: 1-2 years
- Fresh Vegetables (e.g., Broccoli, Carrots – Refrigerated)
- Traditional: 3-7 days
- Vacuum Sealed: 1-2 weeks
- Fresh Fruits (e.g., Berries, Sliced Apples – Refrigerated)
- Traditional: 3-7 days
- Vacuum Sealed: 1-2 weeks (blanch or pretreat some fruits for best results)
- Dry Goods (e.g., Pasta, Rice, Flour – Pantry)
- Traditional: 6-12 months
- Vacuum Sealed: 1-2 years or longer
- Nuts, Coffee Beans (Pantry)
- Traditional: 3-6 months
- Vacuum Sealed: 1-2 years
Best Practices: Maximizing Freshness with Vacuum Sealing
Achieving optimal shelf-life extensions from vacuum sealing depends heavily on proper technique and preparation. Ignoring these steps can negate the benefits of the technology, even with the most advanced 2027 vacuum sealers.
Pre-Sealing Food Preparation
- Pre-chill Foods: Always ensure cooked foods are chilled to 40°F (4°C) or below before sealing. Warm food generates condensation inside the bag, which can compromise the seal and foster bacterial growth.
- Blanch Vegetables: For most vegetables, blanching (briefly boiling then rapidly cooling) is critical. This process deactivates enzymes that cause spoilage, even in an oxygen-deprived environment. USDA guidelines for 2027 continue to recommend blanching for optimal frozen vegetable quality and safety.
Sealing Process and Bag Management
- Select Quality Bags: Utilize BPA-free, multi-ply vacuum seal bags specifically designed for food use. Thicker bags (typically 3-4 mil) provide a superior barrier against oxygen transfer, as confirmed by packaging science studies in 2026.
- Ensure Clean Seal Area: The area where the bag will be sealed must be completely clean and dry. Any food particles, crumbs, or moisture will prevent an airtight, permanent seal, leading to premature spoilage.
- Avoid Overfilling: Leave at least 2-3 inches of empty space between the food item and the intended seal line. This allows the machine to create a strong, uniform seal without food interference.
- Label Thoroughly: Always label sealed packages with the contents and the date of sealing. This practice is essential for proper food rotation and adhering to safe consumption timelines, even for extended-life items.
Critical Safety: Avoiding Risks & Ensuring Quality with Sealed Food
While vacuum sealing dramatically extends shelf life, it introduces specific safety considerations, particularly concerning anaerobic bacteria. Adhering to strict guidelines is paramount to prevent foodborne illnesses.
Maintaining Food Safety Standards
- Refrigeration or Freezing is Mandatory: Vacuum sealing does not eliminate the need for temperature control for perishable foods. The USDA consistently emphasizes that vacuum sealing perishable items without refrigeration or freezing can create an anaerobic (oxygen-free) environment, which is ideal for the growth of dangerous bacteria like Clostridium botulinum.
- Beware of Low-Acid Foods: Never vacuum seal low-acid foods (e.g., garlic in oil, cooked potatoes, mushrooms) and store them at room temperature. This is a high-risk scenario for botulism. Such items must be refrigerated immediately after sealing and consumed within a few days, or frozen for longer storage.
- Inspect Before Consuming: Always conduct a thorough visual inspection and smell test when opening any vacuum-sealed food. Signs of spoilage include off-odors, discoloration, mold, or gas buildup (a puffed-up bag). Discard immediately if any of these signs are present, regardless of the vacuum seal date.
- Proper Thawing Protocols: Thaw vacuum-sealed foods safely in the refrigerator, under cold running water (with the food still sealed), or in the microwave. Thawing at room temperature allows surface bacteria to multiply rapidly before the interior defrosts, increasing health risks.
What If It Still Doesn’t Work?
If your vacuum-sealed food isn’t holding its seal, spoiling prematurely, or your machine isn’t performing as expected, a systematic troubleshooting approach is necessary.
- Inspect Sealing Bar and Gaskets: Examine the machine’s sealing bar for damage or debris, and check the rubber gaskets for cracks, tears, or hardening. These components are crucial for creating a proper vacuum and seal. Replacement kits for common brands typically cost between $15-$40 in 2027.
- Try Different Bags: The quality and thickness of vacuum seal bags vary. Experiment with a different brand or a thicker micron bag (e.g., 4-mil instead of 3-mil). Some machines are more compatible with specific bag textures or materials.
- Clean the Vacuum Channel: Food particles, liquid residue, or debris can accumulate in the machine’s vacuum channel or around the nozzle. This can obstruct airflow and prevent a complete vacuum or seal. Clean thoroughly with a damp cloth and allow it to dry completely.
- Test for Leaks: To isolate the problem, seal an empty bag containing a small amount of water. If the seal holds perfectly and no water escapes under manual pressure, the issue might be related to food preparation or bag placement rather than the machine’s sealing mechanism.
- Seek Professional Servicing: If all troubleshooting steps fail, the vacuum pump, motor, or electronic components may be faulty. For higher-end models, professional appliance repair services can diagnose and fix these issues. Repair costs typically range from $75-$200 in 2027, depending on the complexity, though for many consumer-grade units, purchasing a new device may be more cost-effective if the unit is more than 5 years old.
Conclusion
Vacuum sealing remains a highly effective method for significantly extending food freshness and reducing waste in 2027. Its success, however, is entirely dependent on meticulous preparation, correct sealing techniques, and unwavering adherence to critical food safety guidelines. According to verified research and expert sources like the USDA, integrating these practices ensures both the longevity and safety of your preserved foods. Your actionable next step: evaluate your current vacuum sealing habits against these best practices to fully leverage the benefits of this preservation technology.
❓ Frequently Asked Questions
What are the typical shelf life extensions for vacuum-sealed meats?
Vacuum sealing typically extends the shelf life of raw meats. In the refrigerator, raw beef, pork, and poultry can last 7-10 days sealed versus 1-3 days unsealed. In the freezer, vacuum-sealed meats can last 2-3 years, compared to 6-12 months for traditionally stored frozen meats, largely preventing freezer burn.
How does vacuum sealing affect the storage of vegetables and fruits?
For most vegetables, blanching before vacuum sealing is crucial to stop enzyme action; then they can last 2-3 years in the freezer, much longer than a few months unsealed. Fruits vary; some, like berries, can be frozen sealed, while soft fruits may need pre-freezing to retain texture. Fresh, unblanched vegetables stored sealed in the fridge may last only slightly longer and risk anaerobic spoilage.
Are there any foods that should NOT be vacuum sealed?
Yes, foods with anaerobic bacteria risks like fresh garlic, soft cheeses, raw mushrooms, and some cooked vegetables, especially when stored at room temperature, should not be vacuum sealed. Additionally, cruciferous vegetables (broccoli, cabbage) can release gases, and soft, delicate foods might get crushed unless pre-frozen.
Why is consistent temperature still important for vacuum-sealed foods?
Consistent low temperatures (refrigeration or freezing) are vital because vacuum sealing primarily removes oxygen. It does not eliminate all bacteria or stop enzymatic activity; it only slows their growth. Temperature control inhibits the growth of anaerobic bacteria and other spoilage microorganisms that can still thrive without oxygen.
How can I ensure the best results when vacuum sealing?
For optimal results, ensure food is fresh and properly prepared (e.g., blanched vegetables, cool cooked foods). Use high-quality bags, leave sufficient space at the seal, and keep the sealing area clean and dry. Always store sealed perishables in the refrigerator or freezer at appropriate temperatures.
Does vacuum sealing prevent mold growth?
Vacuum sealing can significantly inhibit the growth of common molds that require oxygen to thrive. However, some molds and yeast can still grow in low-oxygen environments or if the seal is compromised. It’s crucial to inspect sealed food for any signs of spoilage before consumption, regardless of the seal.