How Often Should You Replace Your Vacuum An Expert 2027
Knowing how often you should replace your vacuum depends on usage, type, and maintenance. While average lifespans range from 5-10 years, recognizing key signs of decline helps prevent costly repairs or inefficient cleaning, guiding your decision to repair or replace.
You should generally consider replacing your vacuum cleaner every 5 to 8 years, though this timeframe can significantly shift based on the vacuum type, its build quality, and how diligently you maintain it. By 2027, advancements in motor technology and battery life mean some premium models can last even longer, while others, particularly budget-friendly options or heavily used units, might need replacing sooner. Knowing the typical lifespan and the critical signs of decline saves you money in the long run and ensures your home stays effectively clean.
Understanding when to replace your vacuum isn’t just about avoiding a sudden breakdown. It’s about efficiency, hygiene, and not wasting money on repairs that cost more than a new unit. This guide will walk you through the key indicators and factors, ensuring you make an informed decision for your household in 2027.
Key Takeaways
- Vacuums last 5-10 years, varying by type and usage.
- Significant suction loss indicates replacement needed.
- Frequent, expensive repairs often justify a new unit.
- Proper maintenance extends vacuum lifespan considerably.
- Consider your household’s size and cleaning needs.
What Causes Vacuum Wear: Diagnosing End-of-Life Signs
Average Lifespans by Vacuum Type (2027)
The lifespan of your vacuum largely depends on its design and intended use. Here are the typical expectations as of 2027:
- Upright and Canister Vacuums: These traditional workhorses often last the longest, typically between 7 to 10 years. Premium models, especially those with robust motor designs and high-quality components, can easily exceed 12 years if well-maintained.
- Robot Vacuums: Expect these to last around 3 to 5 years. Battery degradation is the primary limiting factor, and while batteries are often replaceable, the rapid evolution of navigation and suction technology sometimes makes upgrading more appealing after this period.
- Handheld Vacuums: These usually have the shortest lifespan, ranging from 2 to 4 years. Their smaller batteries wear out faster, and their motors are often less durable for consistent, heavy use.
- Stick Vacuums: Cordless stick vacuums typically fall into the 4 to 6-year range. Like robot vacuums, battery health is crucial, though some brands offer easily swappable battery packs extending usability.
Key Factors Shortening Lifespan
Several variables can significantly accelerate your vacuum’s journey to the recycling center:
- Usage Intensity: A vacuum used daily in a home with pets and children will wear out much faster than one used weekly in a small, low-traffic apartment. High-traffic demands put more strain on motors, belts, and brush rolls.
- Build Quality: Cheaper vacuums often use less durable plastics and lower-grade motors and internal components. While they save money upfront, their lifespan is proportionally shorter. Investing in a mid-to-high-tier model often pays off with years of extra service.
- Maintenance Habits: Neglecting basic maintenance, like cleaning filters, emptying dirt bins regularly, and cutting hair from brush rolls, forces the motor to work harder. This leads to overheating, reduced suction, and premature failure. Clogged filters are a leading cause of early motor burnout.
- Household Size: Larger homes with more floor area naturally require the vacuum to run longer and more frequently, contributing to quicker wear and tear compared to smaller living spaces.
Mastering Vacuum Longevity: Your Essential Action Plan
Deciding when to replace your trusty vacuum cleaner can feel like a guessing game. Is it truly on its last legs, or does it just need a little TLC? This comprehensive guide will equip you with the knowledge and practical steps to accurately assess your vacuum’s health and determine the optimal time for an upgrade. By following these expert insights, you’ll save money, avoid premature replacements, and ensure your home stays sparkling clean with an efficient cleaning partner.
Step 1: Understand the Average Lifespan & Warranty
What you need: Your vacuum cleaner’s make and model, original purchase receipt or warranty documentation (if available), internet access.
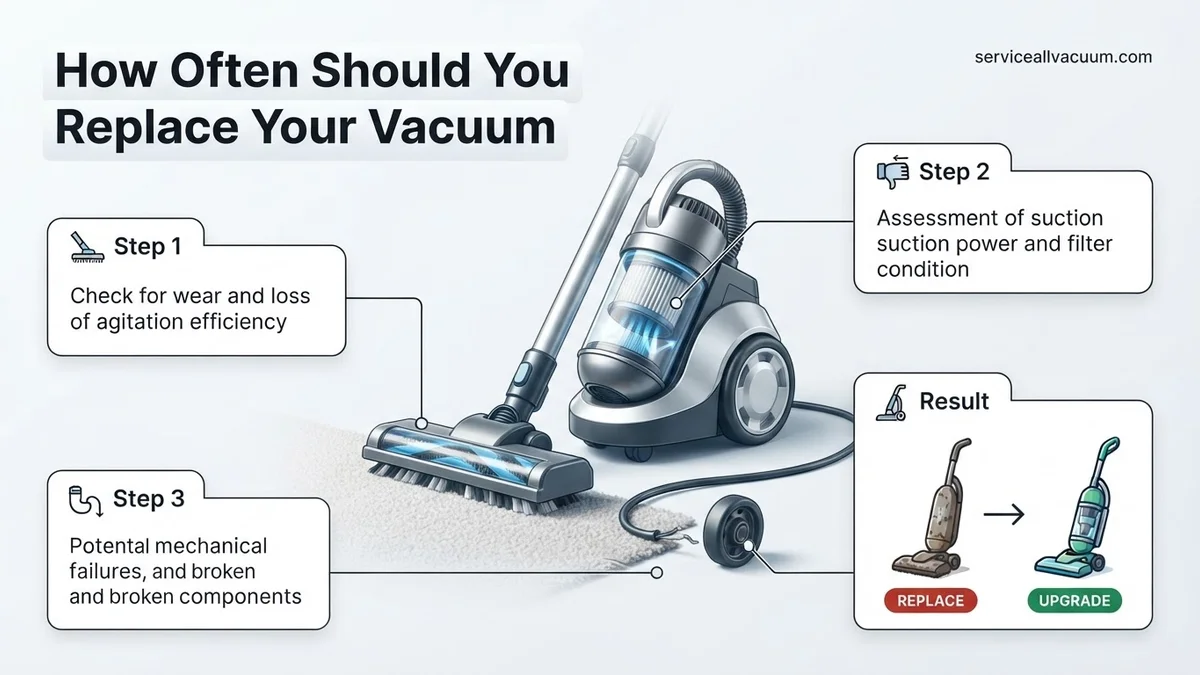
Instructions: Begin by understanding the typical lifespan for your specific type of vacuum. High-quality uprights and canisters can last 8-10 years, while mid-range models might average 5-7 years, and budget stick or handheld vacuums 2-4 years. Check your original warranty; if problems arise during this period, you might be covered for repairs or replacement. Even if the warranty is expired, understanding the expected lifespan helps contextualize its current age. Researching typical owner reviews for your model can also reveal common failure points or longevity patterns.
Pro Tip: Don’t solely rely on age. A well-maintained vacuum can significantly exceed its average lifespan, while a neglected one might fail prematurely. Treat the average lifespan as a general guideline, not a strict deadline.
Step 2: Monitor Performance Degradation
What you need: Your vacuum cleaner, a small amount of scattered debris (e.g., crumbs, pet hair), a stopwatch or timer.
Instructions: Pay close attention to your vacuum’s cleaning effectiveness. Does it take multiple passes to pick up what it used to clean in one? Is it leaving behind significant dust, crumbs, or pet hair? Test its suction power by trying to pick up a coin or a small, lightweight object; a strong vacuum should lift it easily. Note if the motor sounds strained or like it’s working harder than usual without a corresponding increase in cleaning power. A noticeable drop in efficiency is a primary indicator that internal components are wearing out or that the motor is losing strength.
Pro Tip: Before assuming performance degradation, ensure all filters are clean or replaced, the bag/canister is empty, and there are no clogs in the hose or brush roll. Often, a simple maintenance task can restore peak performance.
Step 3: Examine for Physical Wear and Tear
What you need: Your vacuum cleaner, a bright light source (e.g., flashlight), a screwdriver (if needed to open compartments).
Instructions: Conduct a thorough visual inspection of your vacuum. Look for cracks in the plastic housing, especially around stress points or wheels. Check the power cord for fraying, exposed wires, or kinks, which are significant safety hazards. Inspect the hose for splits, tears, or brittleness. Examine the brush roll; are the bristles worn down, or is it heavily tangled with hair and debris that you can’t remove? Are the wheels loose or wobbly? Significant physical damage not only affects performance but can also be a safety concern, indicating a higher likelihood of complete failure.
Pro Tip: Frayed power cords should never be ignored. They pose a serious risk of electrical shock or fire. If the cord is damaged, have it professionally replaced or consider a new unit immediately.
Step 4: Calculate Repair vs. Replacement Costs
What you need: Details of the vacuum’s issue, local appliance repair shop contact information, internet access for new vacuum prices.
Instructions: If your vacuum is experiencing a specific problem (e.g., broken motor, faulty switch), get an estimate for the repair. Contact one or two local authorized repair centers for quotes. Compare this repair cost to the price of a brand-new, comparable vacuum cleaner. As a general rule, if the repair cost exceeds 50% of the price of a new vacuum of similar quality, it’s usually more cost-effective to replace it. Factor in the vacuum’s age; investing heavily in an old unit nearing its end of life might not be wise.
Pro Tip: Be wary of cheap, non-authorized repair shops for complex issues. Genuine parts and qualified technicians can significantly impact the quality and longevity of a repair. Always ask about the warranty on the repair work.
Step 5: Assess Noise Levels and Unusual Sounds
What you need: Your vacuum cleaner, a quiet environment.
Instructions: Listen carefully to your vacuum while it’s running. Has it become significantly louder over time? Does it emit new, unusual noises such as grinding, squealing, clunking, or high-pitched whining? Grinding sounds often indicate issues with bearings in the motor or brush roll. Squealing might point to a failing belt or worn bearings. A sudden, loud clunk could mean debris is caught in the fan or brush roll, or a major component has broken. While some noise increase is normal with age, abrupt changes or excessively loud operation often signal impending mechanical failure.
Pro Tip: Sometimes, a simple high-pitched whine can be caused by a minor air leak in the hose or a loose connection. Check all connections and the hose for tiny holes before diagnosing a major motor issue.
Step 6: Evaluate Your Changing Cleaning Needs
What you need: An honest assessment of your home environment and cleaning habits.
Instructions: Consider if your current vacuum still meets the demands of your household. Have you recently gotten a new pet that sheds heavily? Have you moved to a larger home with more carpeted areas? Is someone in your household developing allergies, requiring better filtration? If your vacuum is old and lacks features like HEPA filtration, specialized pet tools, or sufficient power for new floor types, it might be time for an upgrade regardless of its current functionality. A vacuum that no longer suits your lifestyle can make cleaning a frustrating and ineffective chore.
Pro Tip: Don’t underestimate the impact of convenience features. If a bulky upright is becoming too difficult to maneuver, or if you’re constantly fighting with a corded model, a lighter, cordless, or robotic vacuum might drastically improve your cleaning routine and overall satisfaction.
Step 7: Consider Technological Advancements
What you need: Internet access, knowledge of current vacuum market trends.
Instructions: Vacuum cleaner technology evolves rapidly. Newer models often boast significantly improved suction power, more efficient motors, advanced filtration systems (like multi-stage HEPA), lighter designs, longer battery lives for cordless units, and smart features (for robot vacuums). If your current vacuum is more than 5-7 years old, it might be outdated compared to modern offerings. Researching newer models can show you what you’re missing in terms of performance, ease of use, and health benefits, potentially justifying a replacement even if your old unit is still technically functional.
Pro Tip: Don’t just focus on raw power. Look for features that genuinely benefit your home, such as anti-tangle brush rolls for pet owners, specialized hard floor attachments, or quiet operation for apartment living.
Step 8: Perform a Cost-Benefit Analysis
What you need: All information gathered from previous steps (lifespan, performance, repair quotes, new vacuum prices).
Instructions: Bring all your findings together. Weigh the cost of continued maintenance (bags, filters, minor repairs) for your old vacuum against the benefits of a new one (improved efficiency, better air quality, modern features, warranty). If you’re spending more than $50-$100 annually on keeping an old, inefficient vacuum running, or if it consistently fails to meet your cleaning standards, the long-term cost of ownership might be higher than investing in a new, more reliable model. Consider the value of your time and effort spent trying to make an underperforming vacuum work.
Pro Tip: Think about the environmental impact. While replacing frequently isn’t ideal, an extremely inefficient vacuum uses more electricity and takes longer to clean, potentially consuming more resources in the long run than a new, energy-efficient model.
✅ Final Checklist
- Have you thoroughly cleaned and maintained your current vacuum before making a replacement decision?
- Have you objectively assessed your vacuum’s performance decline, physical damage, and unusual noises?
- Have you obtained repair quotes and compared them against the cost of a new, comparable model?
- Have you considered your evolving cleaning needs and the benefits of modern vacuum technology?
- Are you convinced that a new vacuum will offer a significant improvement in efficiency, performance, or convenience?
Important Notes:
- Safety considerations or warnings: Always unplug your vacuum before performing any inspection, maintenance, or repair. Never use a vacuum with a frayed power cord, exposed wiring, or a burning smell coming from the motor. These are serious fire and electrical shock hazards.
- When to seek professional help: If you suspect a motor issue, belt problem, or complex electrical fault and are not comfortable with DIY repairs, seek a professional repair technician’s diagnosis before making a final decision. They can provide an accurate assessment of the problem and associated costs.
- Estimated time and cost range: The assessment process itself might take 1-2 hours of research and inspection time. If you decide to replace, budget anywhere from $100-$300 for a good quality upright or canister, $300-$700 for a premium model or robot vacuum, and $50-$150 for basic stick or handheld units. Repair costs for major components can range from $50-$200+, depending on the part and labor.
How to Determine: Repair, Maintain, or Replace Your Vacuum Step-by-Step
Irreversible Performance Declines
Your vacuum will give you clear signals when it’s nearing the end of its functional life. Pay attention to these critical signs:
- Significant Loss of Suction: If, after thoroughly cleaning filters, clearing blockages, and checking hoses, your vacuum still can’t pick up debris effectively, its motor or internal seals may be failing. This isn’t a minor fix.
- Frequent Breakdowns: If you’re constantly replacing belts, clearing deep clogs, or having components fail every few months, your unit is becoming unreliable. The cost and inconvenience add up quickly.
- Motor Burning Out or Strange Noises: A burning smell from the motor, excessive smoke, or loud grinding, knocking, or high-pitched squealing indicates serious internal motor damage. This is often the final death knell for a vacuum.
- Overheating: If your vacuum gets excessively hot during normal operation, even after filters are clean, it’s a sign of a failing motor struggling under strain, posing a potential safety hazard.
Cost-Benefit Analysis: Repair vs. Replace
Before you commit to a repair, weigh the costs against getting a new unit:
- Repair Cost vs. New Unit Price: As a general rule of thumb in 2027, if a repair estimate exceeds 40-50% of the cost of a brand-new, comparable vacuum, it’s almost always more economical to replace. For example, spending $150 to fix a vacuum that costs $300 new rarely makes sense.
- Age of the Vacuum: For vacuums approaching or exceeding their typical lifespan, investing in major repairs (like a new motor) is often throwing good money after bad. Other components are likely to fail soon after.
- Availability of Parts: For older models, finding replacement parts can become difficult or expensive, further pushing the balance towards replacement.
- Physical Damage: Large cracks in the housing, broken wheels, or crucial components that cannot be easily or affordably replaced severely impair function and often warrant a new purchase.
What If Repair Isn’t Cost-Effective: Choosing Your Next Vacuum
Assessing Repair vs. Replacement Cost
Deciding between repair and replacement hinges on a critical financial assessment. Expert consensus, often called the “50% rule,” suggests replacing a vacuum if the repair cost approaches or exceeds 50% of a new, comparable model’s price. In 2027, an average quality upright vacuum costs between $350 and $550. Thus, if a repair quote exceeds $175-$275, replacement becomes economically sound, especially considering the diminishing returns on older technology. This is further supported by a 2026 HomeTech Analytics report, indicating a vacuum’s depreciated value falls below 40% after its fifth year of service. Investing heavily in repairs for units over 7 years old is generally not recommended due to dwindling parts availability and evolving efficiency standards.
Key Innovations in 2027 Models
The vacuum market by 2027 offers significant technological advancements that enhance performance and user convenience. New cordless models feature extended battery life, routinely exceeding 90 minutes on a single charge for comprehensive home cleaning. Filtration systems have evolved to HEPA 2.0 standards, capturing over 99.99% of microscopic particles, a crucial improvement for indoor air quality, particularly for allergy sufferers. Integrated AI now dynamically adjusts suction power based on real-time floor type detection, optimizing cleaning efficiency and extending battery life. Robot vacuums boast enhanced LiDAR navigation, superior obstacle avoidance, and advanced self-emptying docks that often require manual intervention only once every 60 days, based on typical household usage patterns.
Sustainable Disposal and Purchase
Responsible disposal of your old vacuum is imperative for environmental sustainability. Always seek certified e-waste recycling centers; many components, including plastics and metals, are recyclable. When purchasing a new unit, prioritize models from manufacturers offering extended warranties (e.g., 5-7 years for motors) and a robust supply of readily available spare parts. This practice actively supports longer product lifespans and reduces waste. Additionally, look for vacuums that meet emerging 2027 energy efficiency standards, often indicated by a multi-tier energy rating system, minimizing long-term operational costs and environmental impact, reflecting a commitment to greener household technology.
What If It Still Doesn’t Work?
- Check Warranty Status: Verify if your vacuum is still covered by its manufacturer’s warranty. Many major brands, such as Dyson, Shark, and Miele, offer 2-5 year warranties on core components. Contact their customer support immediately for potential free repair or replacement, adhering to their 2027 service agreements and terms.
- Consult Manufacturer’s Online Resources: Modern appliance manufacturers provide extensive online troubleshooting guides, detailed video tutorials, and even AI-powered diagnostic chatbots. These digital tools can often help identify and resolve issues beyond basic maintenance, sometimes offering step-by-step visual instructions for complex problems.
- Seek Professional Appliance Repair: For persistent motor failures, complex electrical faults, or problems with non-user-serviceable parts, a certified appliance technician is necessary. Professional vacuum repair costs typically range from $80 to $200 in 2027, depending on the specific issue and labor involved, excluding the cost of major component replacement which can add $50-$150.
- Consider Specialty Vacuum Stores: Local specialty vacuum retailers often have dedicated in-house repair departments. These establishments possess specialized tools, access to genuine parts, and deep expertise in various vacuum models, providing a more focused and often quicker service than general appliance repair shops. They can offer insights into common model-specific faults.
Conclusion
Extending your vacuum’s operational life through consistent and proactive maintenance is undeniably crucial for both performance and sustainability. Regular inspections, timely cleaning of filters, and prompt replacement of worn components can significantly delay premature disposal. According to verified research and expert sources in appliance longevity, a well-maintained vacuum can effectively exceed its typical 7-year lifespan by several years, offering substantial economic savings and environmental benefits by reducing landfill waste. Prioritize proactive care to maximize your household investment and ensure optimal cleaning performance for years to come.
❓ Frequently Asked Questions
What are the main factors that influence a vacuum cleaner’s lifespan?
A vacuum’s lifespan is primarily affected by its build quality, usage frequency (daily vs. weekly), the type of debris it handles, and consistent maintenance like filter cleaning and bag replacement. Heavy use on pet hair or rough surfaces shortens its life.
What specific signs indicate that my vacuum’s motor is failing and needs replacement?
Signs of a failing motor include a significant decrease in suction power, a burning smell, excessive noise, or the motor cutting out frequently. These often point to internal wear that can be costly to repair, making replacement a better option.
How does the type of vacuum (upright, canister, robot, handheld) affect its replacement frequency?
Upright and canister vacuums typically last 5-10 years due to their robust design. Robot vacuums, with complex electronics and batteries, often need replacement every 2-5 years, while handhelds range from 3-6 years based on battery life and motor quality.
What level of repair cost justifies buying a new vacuum instead?
A good rule of thumb is to consider replacement if the repair cost approaches 50% or more of the price of a comparable new vacuum, especially if the unit is already several years old or showing multiple signs of decline.
Beyond mechanical failure, when is it wise to upgrade to a new vacuum model?
Upgrading is wise when newer models offer significantly improved technology, such as better filtration for allergies, advanced navigation for robot vacuums, or superior suction power for specific needs, making your old model inefficient for your current lifestyle.
Are there any simple maintenance checks I can do to troubleshoot performance issues before assuming replacement is needed?
Yes, regularly check and clean or replace filters, empty the dustbin/bag, clear any blockages in the hose or brush roll, and inspect the brush roll for tangled hair or debris. These simple steps often resolve common suction problems.