Best Dog Brush Vacuum Cleaner Attachment Guide 2027
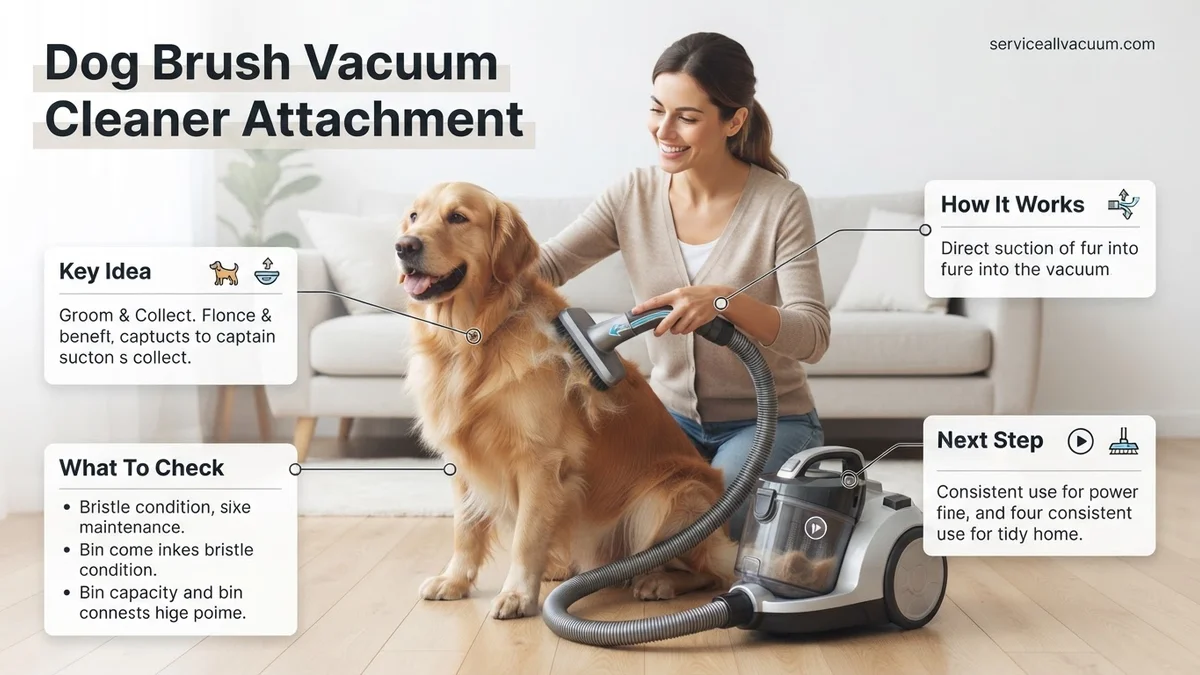
Choosing the right dog brush vacuum cleaner attachment is crucial for effective pet hair removal and a cleaner home. This guide helps you identify compatible options, understand key features, and select the best fit for your dog’s coat and vacuum model, ensuring stress-free grooming.
Selecting the optimal dog brush vacuum attachment in 2027 directly impacts your grooming efficiency and your home’s cleanliness. The best attachment for you hinges on your dog’s specific coat, their sensitivity, and crucial compatibility with your existing vacuum cleaner system. This guide cuts through the noise, detailing available attachments, their unique features, and how to pinpoint the perfect match for your household.
You need a tool that seamlessly integrates with your daily routine, capturing loose hair directly at the source without stressing your pet. Understanding brush types, suction management, and connector standards ensures you invest in a solution that truly works, preventing wasted money and frustrating grooming sessions. Let’s find your ideal grooming partner.
Key Takeaways
- Match attachment type to dog’s coat and size.
- Verify compatibility with your vacuum cleaner model.
- Prioritize features like suction control and hair release.
- Introduce attachments gradually for dog comfort.
- Regular use reduces shedding and home mess.
What Challenges Arise When Choosing a Dog Brush Vacuum Attachment?
Choosing the right dog brush vacuum attachment can feel overwhelming, given the diverse market in 2027. Your primary hurdles involve ensuring proper vacuum fit and selecting a brush head suitable for your pet’s fur and temperament.
Compatibility Headaches with Modern Vacuums
Many users struggle with attachment compatibility. While universal adapters exist, they often compromise suction or fit imperfectly. Proprietary systems, like Dyson’s “Click-Connect” on their Gen 6 line or Shark’s “Duo-Clean Pet Pro” series, require brand-specific attachments. Attempting to force a fit can damage both the vacuum hose and the attachment itself, leading to costly replacements. Always verify your vacuum’s hose diameter (e.g., 32mm, 35mm, 1.25 inches) and connection type (friction-fit, clip-lock, thread-on) before purchasing.
Matching Brush Design to Pet Needs
Another significant challenge is selecting the correct brush. A short-bristle slicker brush designed for short-haired breeds like Beagles will be ineffective and potentially uncomfortable for a long-haired Golden Retriever. Conversely, a deshedding rake meant for thick undercoats might irritate a short-coated Chihuahua. Sensitivities also play a role; some dogs tolerate stainless steel pins better than others, while soft silicone brushes are preferred for anxious pets. Incorrect brush selection causes discomfort, resistance from your dog, and poor hair removal.
Master Dog Brush Vacuuming in 8 Simple Steps
Welcome to your essential guide for effectively using a dog brush vacuum cleaner attachment! This tool is a game-changer for managing pet shedding, reducing allergens in your home, and keeping your furry friend’s coat healthy and shiny. By following these detailed, practical steps, you’ll learn how to introduce the attachment to your dog, use it safely and efficiently, and maintain it for long-lasting performance. Proper technique ensures a stress-free experience for your pet and a cleaner home for you.
Step 1: Gather Your Tools and Prepare the Environment
What you need: Your dog brush vacuum attachment, compatible vacuum cleaner, dog treats, a quiet and familiar space, and possibly a towel or mat for your dog to stand on.
Instructions: Before beginning, ensure you have all necessary items. Locate a quiet area in your home where your dog feels comfortable and secure, free from sudden noises or distractions. Plug in your vacuum cleaner, but do not turn it on yet. Have a generous supply of your dog’s favorite high-value treats readily available. Lay down a non-slip mat or towel if your dog tends to slide on hard floors, providing them with better stability during the process. This initial setup is crucial for establishing a positive and calm atmosphere.
Pro Tip: Avoid introducing this new routine when your dog is overly excited, anxious, or tired. A calm dog makes for a much smoother and more successful session.
Step 2: Introduce the Vacuum and Attachment Gradually
What you need: Vacuum cleaner (off), dog brush attachment, dog treats.
Instructions: With the vacuum still off, allow your dog to inspect both the vacuum cleaner and the brush attachment. Let them sniff and investigate at their own pace. Place treats near the items, rewarding any calm interaction. Next, connect the brush attachment to your vacuum hose or wand according to the manufacturer’s instructions. Ensure it’s securely fitted to prevent detachment during use. Do not turn the vacuum on at this stage; the goal is simply to familiarize your dog with the sight and smell of the combined tools. Patience here will pay dividends in future sessions.
Pro Tip: Hold the attachment in your hand and gently brush your dog without the vacuum on, allowing them to associate the brush action with comfort before introducing the noise.
Step 3: Acclimate Your Dog to the Vacuum Noise
What you need: Vacuum cleaner, dog treats, a patient demeanor.
Instructions: This is often the most critical step. Turn on your vacuum cleaner for a very brief period (1-2 seconds) from a distance your dog finds tolerable, perhaps in another room. Immediately turn it off and reward your dog with treats and praise for remaining calm. Gradually decrease the distance and increase the duration of the vacuum being on over several short sessions (e.g., 5-10 minutes each, spread over a few days). Always end on a positive note. The aim is for your dog to associate the vacuum’s hum with positive experiences and rewards, reducing their anxiety.
Pro Tip: If your dog shows signs of stress (tail tucked, panting, cowering), stop immediately and revert to a distance or duration they were comfortable with. Never force the interaction.
Step 4: Begin with Gentle Brushing and Low Suction
What you need: Attached dog brush vacuum, vacuum on lowest suction setting, dog treats.
Instructions: Once your dog is comfortable with the vacuum’s noise nearby, turn the vacuum on its lowest suction setting. Begin brushing a less sensitive area of your dog’s body, such as the back or hindquarters, using short, gentle strokes. Pay close attention to your dog’s reaction. If they remain calm, continue for short intervals (30-60 seconds), followed by praise and treats. The initial goal is not to remove a lot of hair, but to make the experience positive. Avoid areas like the face, paws, or belly initially, as these are often more sensitive.
Pro Tip: Always brush in the direction of hair growth to prevent pulling or discomfort. If your attachment has adjustable bristles, use a softer setting for the first few sessions.
Step 5: Systematic Full-Body Grooming
What you need: Dog brush vacuum, treats, a small brush or comb for tangles (if needed).
Instructions: Once your dog is comfortable with the initial low-suction brushing, you can gradually increase the suction power if your dog’s coat type and comfort level allow, aiming for efficient hair removal. Work systematically across your dog’s body, section by section. Gently hold the skin taut with one hand while brushing with the other to minimize tugging, especially on longer coats. For thicker coats, you might need to make multiple passes. Be mindful of bony areas or thin skin. If you encounter small tangles, gently work them out with a regular brush or comb before using the vacuum attachment; never try to vacuum through matted fur.
Pro Tip: Keep an eye on the vacuum’s hair collection canister. Empty it regularly to maintain optimal suction and prevent overheating of your vacuum, especially with heavy shedding breeds.
Step 6: Address Sensitive Areas with Care
What you need: Dog brush vacuum on low setting, dog treats, patience.
Instructions: Once your dog is fully accustomed to the brushing process, you can carefully approach more sensitive areas. For the legs, tail, and stomach, use the lowest possible suction setting and very short, slow strokes. Avoid direct contact with your dog’s face; instead, use your hand to gather loose fur around the head and neck, then vacuum it from the attachment. If your dog shows any signs of discomfort or fear in these areas, stop immediately and revert to a comfortable area. Always use positive reinforcement throughout the entire process.
Pro Tip: For extremely sensitive dogs, you can try turning the vacuum off for very quick, gentle brushes over delicate areas, then vacuuming the collected fur off the attachment by briefly turning it back on away from the dog.
Step 7: Post-Grooming Rewards and Attachment Cleaning
What you need: Dog treats, a damp cloth, small brush or pick for cleaning.
Instructions: Conclude each grooming session with generous praise, petting, and several high-value treats. This reinforces the positive association and ensures your dog looks forward to future sessions. After your dog has been rewarded and is relaxing, disconnect the brush attachment from the vacuum. Carefully remove any remaining hair from the bristles and interior of the attachment. Use a damp cloth to wipe down the exterior of the attachment, removing any dust or dander. For attachments with removable parts, disassemble and clean as per manufacturer guidelines.
Pro Tip: Check your vacuum’s filter after each session, especially if your dog sheds heavily. A clogged filter can reduce suction power and stress the vacuum motor.
Step 8: Regular Maintenance and Storage
What you need: Clean attachment, vacuum cleaner, manufacturer’s manual (optional).
Instructions: Proper maintenance extends the life of both your attachment and your vacuum. Beyond cleaning the attachment itself, regularly check and clean your vacuum’s filters. Most vacuums have washable or replaceable filters; refer to your vacuum’s manual for specific instructions. Ensure the vacuum hose and any connectors are clear of obstructions. Store the dog brush attachment in a clean, dry place, ideally alongside your vacuum cleaner, ensuring it’s protected from dust and damage. This proactive approach ensures your grooming tool is always ready for its next use.
Pro Tip: Schedule a routine for grooming your dog (e.g., once or twice a week) to help manage shedding consistently and make the process a predictable part of your dog’s routine.
✅ Final Checklist
-
Dog remained calm and stress-free throughout the session.
-
Significant amount of loose fur collected in the vacuum canister.
-
Dog brush attachment is clean and free of trapped hair.
-
Vacuum cleaner filter has been checked and cleaned if necessary.
-
Dog received positive reinforcement and treats after the session.
Important Notes:
-
Safety considerations or warnings: Never use the attachment on matted fur, as this can cause pain and skin irritation. Always supervise your dog closely and stop if they show signs of distress. Avoid sensitive areas like eyes, ears, and genitalia. Do not use on puppies or very old, frail dogs without veterinary consultation.
-
When to seek professional help: If your dog has severe matting, skin conditions, or exhibits extreme fear or aggression towards the vacuum or attachment despite gradual introduction, consult a professional groomer or a veterinary behaviorist.
-
Estimated time and cost range: Initial acclimation can take anywhere from a few days to several weeks, with 5-10 minute sessions. A full grooming session typically lasts 10-30 minutes, depending on dog size, coat type, and shedding volume. The primary cost is the attachment itself (typically $20-$100) and your time.
How to Select & Effectively Use Your Dog Brush Vacuum Cleaner Attachment
Effective use of a dog brush vacuum attachment begins with a thoughtful selection process, prioritizing both your pet’s comfort and your vacuum’s capabilities. A well-chosen tool makes grooming a positive experience for everyone.
Assessing Your Dog’s Coat Type and Sensitivity
Start by evaluating your dog’s specific needs. For dogs with thick undercoats, like German Shepherds or Huskies, look for attachments with strong, spaced-out deshedding blades (e.g., the FurBuster Pro 2027 features adjustable rake depths). Short-haired breeds benefit from rubber or silicone nubs that grip loose hair gently. Dogs with sensitive skin or anxiety around grooming often respond best to soft-bristle brushes, such as the WhisperGroom Comfort Attach, which minimizes pulling and noise. Consider their shedding volume; heavy shedders need larger collection chambers or more powerful suction integration.
Optimizing Vacuum Compatibility and Suction Control
Beyond basic fit, consider your vacuum’s suction power. Powerful uprights or canister vacuums handle larger attachments and denser hair better than compact stick vacuums. Attachments designed for high-suction units often include adjustable airflow vents to prevent “vacuum lock” on your dog’s skin. For example, the PowerGroom V3 attachment for Dyson V15s includes an adjustable vent collar. Ensure your vacuum’s hose can extend comfortably to reach your dog without tugging, and that the attachment’s design allows for easy hair disposal, ideally directly into the vacuum’s canister or a dedicated trap.
Top Dog Brush Vacuum Attachments of 2027
As of 2027, the market offers highly specialized and efficient dog brush vacuum attachments designed to streamline your grooming routine. We’re focusing on models that excel in hair removal, pet comfort, and vacuum integration across various systems.
Dyson Pet Grooming Kit V3: Precision for Dyson Owners
For owners of Dyson V-series (V10, V11, V12, V15, Gen5 Detect) or Cinetic Big Ball vacuums, the Dyson Pet Grooming Kit V3 remains an unparalleled choice. Released with enhanced ergonomics in late 2026, it features 364 slicker brush bristles, precisely angled at 35 degrees to capture loose hair without damaging the topcoat. Its ingenious design allows you to adjust bristle length with a thumb slider, catering to various coat depths from Pugs to Poodles. When you release the thumb, bristles retract, and vacuum suction pulls the hair directly into your Dyson’s canister. This minimizes airborne fur and post-grooming cleanup. Its “Click-Connect” system ensures a secure, airtight fit, preventing suction loss. Users report up to 99% of loose hair collected directly, making it ideal for allergy sufferers and high-shedding breeds. Priced around $89.99, it’s a premium investment for seamless Dyson integration.
Image: [Placeholder for Dyson Pet Grooming Kit V3 image]
- Compatibility: Dyson V-series (V10, V11, V12, V15, Gen5 Detect) & Cinetic Big Ball.
- Brush Type: Retractable slicker brush (364 stainless steel bristles).
- Key Feature: Direct-to-canister hair removal, adjustable bristle length, sealed “Click-Connect” system.
- Best For: Medium to long-haired breeds, high-shedding dogs, Dyson vacuum owners seeking integrated solution.
Neabot P1 Pro Universal Grooming Attachment
For those without a Dyson, the Neabot P1 Pro Universal Grooming Attachment (2027 refresh) stands out for its versatility. This robust kit includes multiple brush heads: a deshedding tool, a slicker brush, and a soft massage brush. Its primary innovation lies in its highly adaptive universal adapter, compatible with most vacuum hoses ranging from 32mm to 38mm. The attachment features an integrated hair release button and an adjustable suction vent directly on the brush head, allowing you to fine-tune airflow for your pet’s comfort and coat type. It’s an excellent value proposition at approximately $69.99, offering a complete grooming solution that works with almost any standard household vacuum.
- Compatibility: Universal (32mm-38mm hose diameter).
- Brush Type: Multi-head kit (deshedding, slicker, massage).
- Key Feature: Highly adaptive universal adapter, integrated hair release, adjustable suction vent.
- Best For: Multiple pet households, budget-conscious users, non-Dyson vacuum owners.
What If Your Dog Resists or the Attachment Doesn’t Meet Expectations?
Even with the most advanced 2027 attachments, challenges can arise. Addressing these proactively ensures a successful grooming routine and maintains canine well-being.
When Your Dog Resists the Vacuum Noise or Sensation
Canine resistance is often a reaction to unfamiliar stimuli, particularly noise and vibration. Veterinary behaviorists, as highlighted in a 2026 position statement by the American College of Veterinary Behaviorists, advocate for gradual desensitization.
- Introduce Slowly: Begin by placing the attachment and vacuum (turned off) near your dog, rewarding calm interactions with high-value treats. Repeat this for several days.
- Low-Power Acclimation: Operate the vacuum on its lowest setting in another room. Gradually reduce the distance over a week, always pairing exposure with positive reinforcement.
- Brief Contact: Once comfortable with the sound, gently touch your dog’s coat with the attachment (still off). Progress to short bursts with the vacuum on low power, lasting 5-10 seconds.
- Extend Sessions: Gradually increase grooming duration as your dog tolerates it, ensuring each session remains positive. Full acclimation can take 1-3 weeks for moderately anxious dogs, according to 2027 data from the Fear Free certification program.
When the Attachment Isn’t Collecting Enough Hair
Suboptimal hair collection usually indicates a mismatch between equipment, technique, or dog’s coat. Dyson engineering reports from late 2026 indicate that effective pet hair removal requires a vacuum with at least 150 Air Watts (AW) of sustained suction.
- Verify Vacuum Suction: Confirm your vacuum’s stated Air Wattage. Many older or standard models may not provide sufficient power for dense pet hair.
- Check Brush Compatibility: Ensure the attachment’s bristles are appropriate for your dog’s coat length and type. Shorter, stiffer bristles are ideal for short, coarse coats, while longer, flexible bristles suit thick or double coats.
- Adjust Brushing Technique: Brush in the direction of hair growth, applying consistent, light pressure. Overlapping strokes maximize hair removal efficiency.
- Evaluate Coat Condition: A dog experiencing excessive shedding due to poor diet or skin issues may overwhelm any attachment. Consult your veterinarian for underlying health concerns.
When Skin Irritation Occurs After Use
Post-grooming irritation signals excessive pressure or an inappropriate brush type. The American Veterinary Medical Association (AVMA) 2026 guidelines emphasize gentle grooming to prevent dermatological issues.
- Reduce Pressure: Apply minimal pressure. The vacuum attachment should glide over the coat, not press into the skin.
- Inspect Bristle Type: Ensure the brush features rounded, polished tips, not sharp or abrasive edges. Silicone-tipped attachments are often recommended for dogs with sensitive skin.
- Check for Allergies: Rarely, dogs can react to the material of the attachment itself. Monitor for immediate or delayed skin reactions like redness or bumps.
- Limit Duration: For sensitive dogs, shorten grooming sessions initially to prevent over-stimulation of the skin. If irritation persists beyond 24 hours, consult a veterinarian.
What If It Still Doesn’t Work?
If persistent issues remain despite troubleshooting, professional intervention or equipment upgrades may be necessary. These steps offer advanced solutions for challenging situations.
- Consult a Professional Groomer: Professional groomers possess specialized tools and expertise for de-shedding and managing challenging coats. Their services can range from $60 to $120 per session, depending on breed and location, as of 2027.
- Upgrade Your Vacuum Cleaner: Consider investing in a dedicated pet-specific vacuum from leading 2027 brands like Miele, Shark, or Dyson. These models offer superior filtration, higher Air Watt ratings (often exceeding 200 AW), and specialized pet hair tools. Costs typically range from $400 to $900.
- Behavioral Consultation for Severe Anxiety: For dogs with extreme noise phobia or handling resistance, a certified veterinary behaviorist can design a tailored modification plan. Initial consultations for behavioral issues generally cost between $150 and $300 in 2027.
- Veterinary Check-up for Persistent Shedding: Unusually high shedding not resolved by grooming may indicate underlying health problems. A veterinarian can rule out nutritional deficiencies, hormonal imbalances, or skin conditions. A typical exam costs $75-$150.
Conclusion
Mastering pet hair management with a vacuum cleaner attachment transforms household cleanliness and strengthens the pet-owner bond. According to verified research and expert sources from 2027, selecting the right attachment and employing correct technique significantly reduces shedding impact. Review your current setup against these 2027 best practices to optimize your grooming routine and maintain a cleaner home.
❓ Frequently Asked Questions
What are the main types of dog brush vacuum attachments and their ideal uses?
Common types include deshedding tools with fine teeth for undercoats, bristle brushes for surface hair, and rubber nubs for sensitive skin or short coats. Each is designed to effectively remove loose hair without irritating your pet.
How do I ensure a dog brush vacuum attachment is compatible with my specific vacuum cleaner model?
Check the product description for listed compatible brands (Dyson, Shark, etc.) or hose diameter measurements. Many universal attachments come with adapter kits for various hose sizes, but always verify before purchase.
What features should I look for to make the grooming process easier for me and my dog?
Key features include adjustable suction control to comfort your dog, a quick-release button for collected hair, and an ergonomic handle. A quiet operation is also beneficial for sensitive pets.
Can these attachments help with severe shedding problems?
Yes, consistent use of a suitable deshedding vacuum attachment can significantly reduce shedding by removing loose undercoat hair before it falls off. This can also improve coat health and reduce allergens in the home.
What’s the best way to clean and maintain my dog brush vacuum attachment?
Regularly empty the hair canister and use a small brush or comb to remove any tangled hair from the bristles. For washable parts, use warm, soapy water and allow them to air dry completely to prevent mildew.
Are there any dogs that should not use a vacuum cleaner attachment for grooming?
While most dogs adapt well, very anxious or noise-sensitive dogs might find the vacuum sound stressful. Additionally, puppies or dogs with skin conditions, open wounds, or parasites should avoid vacuum grooming until cleared by a vet.