How To Find A Vacuum Leak On An Engine Fix Engine 2027
Finding a vacuum leak on your engine can be frustrating, but crucial for engine health. This guide provides proven, step-by-step methods including visual checks, smoke tests, and spray tests, to accurately diagnose and pinpoint these elusive leaks.
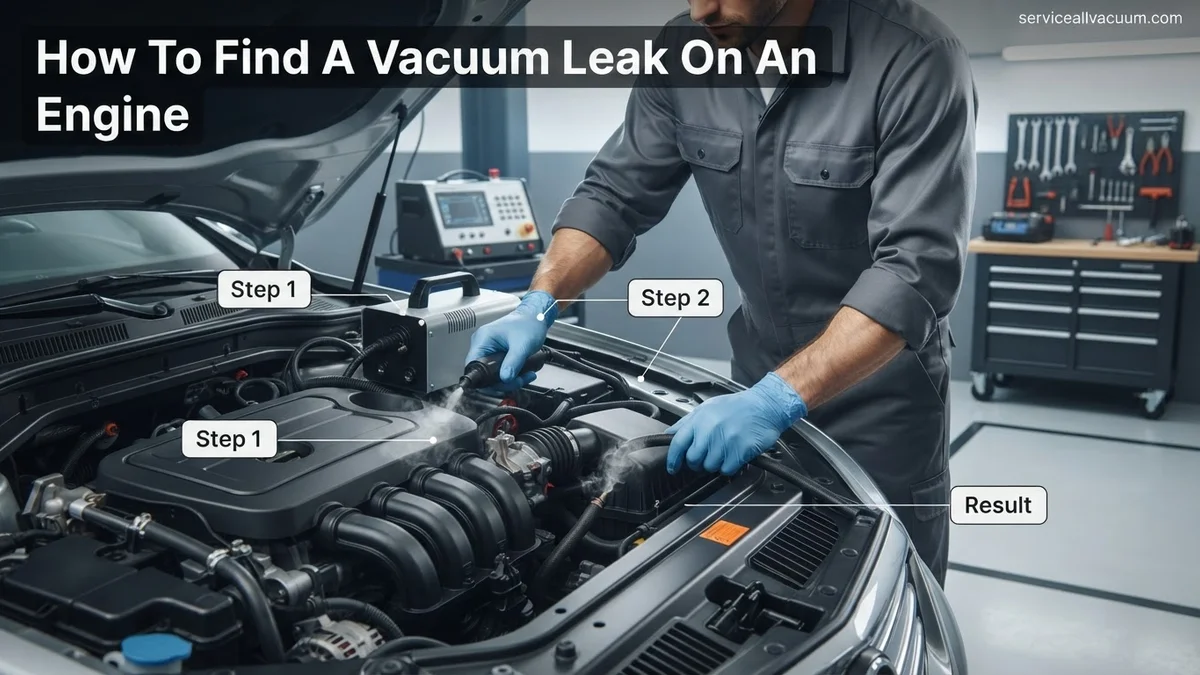
How To Find A Vacuum Leak On An Engine Fix Engine 2027
Locating a vacuum leak is often the critical first step to resolving frustrating engine performance issues like rough idling, sudden power loss, or a persistent Check Engine Light. These leaks introduce unmetered air into your engine, causing the air-fuel mixture to run lean. This imbalance directly impacts your vehicle’s drivability and efficiency, often triggering common codes such as P0171 or P0174.
Key Takeaways
- Perform a thorough visual inspection first.
- Smoke tests are highly effective for diagnosis.
- Spray tests help pinpoint specific leak locations.
- Check common leak points like hoses, gaskets.
- Always prioritize safety when working on engines.
By 2027, modern engine management systems are incredibly precise. Even a small vacuum leak can significantly disrupt their operation, leading to increased emissions, reduced fuel economy, and potential long-term damage to expensive components like catalytic converters. Diagnosing and fixing these leaks yourself can save substantial repair costs and ensure your vehicle continues to perform optimally and meets environmental standards.
How to Diagnose and Fix a Vacuum Leak Like an Expert
Engine vacuum leaks can be a persistent source of frustration, leading to rough idling, poor fuel economy, a lit check engine light, and overall reduced vehicle performance. Identifying and repairing these elusive leaks is crucial for restoring your engine’s health and efficiency. This comprehensive, step-by-step guide will walk you through various proven methods, empowering you to pinpoint vacuum leaks with confidence and precision, just like a seasoned professional.
Step 1: Understand the Enemy: What Are Vacuum Leaks & Their Symptoms?
What you need: A basic understanding of internal combustion engine operation and a calm, patient mindset.
Instructions: Before you start searching, it’s vital to understand what an engine vacuum is (a negative pressure created by the engine’s pistons) and why a leak is problematic. Leaks occur when unmetered air enters the engine after the mass airflow sensor, disrupting the crucial air-fuel ratio. Common symptoms include a rough or high idle, stalling, poor acceleration, a “check engine” light (often with codes like P0171 or P0174 for lean conditions), and an audible hissing sound from the engine bay. Familiarize yourself with these signs to better recognize them during your diagnosis.
Pro Tip: Always start by scanning your car’s On-Board Diagnostics II (OBD-II) system for trouble codes. While P0171/P0174 strongly suggest a vacuum leak, other codes might indicate different issues, helping you narrow down your search immediately.
Step 2: The Initial Reconnaissance: Thorough Visual Inspection
What you need: Good lighting (flashlight or work light), mechanic’s gloves, a small mirror, and possibly a few zip ties or small clamps.
Instructions: With the engine completely off and cool, begin by visually inspecting all accessible vacuum lines, hoses, caps, and connections. These are typically thin rubber or plastic lines connecting various engine components (e.g., PCV valve, brake booster, EGR valve, cruise control). Look for any signs of dry rot, cracks, tears, disconnections, loose clamps, or hoses that appear to have slipped off their fittings. Pay particular attention to the underside of the intake manifold, around the throttle body, and any areas where hoses bend sharply or are exposed to heat.
Pro Tip: Gently wiggle and flex the hoses. Brittle or aged rubber might look fine at rest but will reveal cracks or breaks when subjected to slight movement, indicating a potential failure point.
Step 3: Listen Closely: The Aural Clue
What you need: Good hearing, and optionally, a mechanic’s stethoscope or a long piece of rubber hose.
Instructions: Start the engine and let it reach normal operating temperature. With the engine idling, carefully listen around the intake manifold, vacuum lines, and other vacuum-operated components. A distinct hissing, whistling, or sucking sound, especially one that changes in pitch or volume as you move your head around the engine bay, is a tell-tale sign of a vacuum leak. This method relies on the sound of air being pulled into the engine through an unintended opening. Be patient and systematic, listening to different areas one by one.
Pro Tip: Use a piece of rubber hose (like a section of garden hose or old vacuum line) held to your ear and moved around the engine. This acts like a basic stethoscope, amplifying sounds and helping you pinpoint the exact source of the hiss without getting your head too close to moving parts.
Step 4: The “Controlled Introduction” Method (Propane/Unlit Lighter Fluid)
What you need: An unlit propane torch (small handheld type, NOT a plumber’s torch with a large flame), OR a can of unlit starter fluid/carburetor cleaner with a straw nozzle. CRITICAL: Have a fire extinguisher nearby.
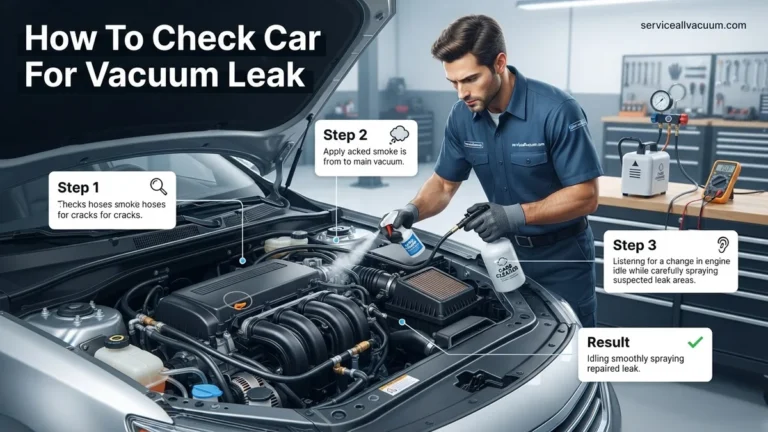
Instructions: With the engine idling, carefully and very slowly direct a small stream of unlit propane (do not ignite it!) or short bursts of starter fluid/carb cleaner around suspected vacuum leak areas. If the engine RPM temporarily increases, smooths out, or changes significantly, you’ve likely found the leak. The engine is effectively sucking in and burning the introduced fuel. Start with the least volatile option (propane). Work methodically around all vacuum lines, manifold gaskets, and the throttle body base. Be extremely cautious around hot exhaust components or electrical connections.
Pro Tip: Use extremely short bursts of spray if using starter fluid/carb cleaner, as too much can flood the engine or cause backfiring. Propane is often preferred as it’s less messy and evaporates cleanly. Always work in a well-ventilated area.
Step 5: The Professional DIYer’s Choice: Smoke Test
What you need: An automotive smoke machine (can be rented or purchased affordably), shop air compressor (if required by your machine), appropriate hose adapters, and a shop rag.
Instructions: This is arguably the most effective and safest DIY method. With the engine off and cool, find a suitable vacuum port or remove an accessible vacuum line to introduce smoke into the engine’s intake system. A common point is the intake boot after the mass airflow sensor and before the throttle body, or a large vacuum line leading to the brake booster. Connect the smoke machine, ensure a good seal, and start introducing smoke. The smoke will follow the path of any vacuum leak, visibly escaping from cracks, holes, or loose connections, making identification straightforward.
Pro Tip: Ensure the engine is off and cool. Block off the throttle body or use an adapter that seals well to prevent smoke from escaping through the throttle plate and making diagnosis difficult. Check for smoke from unexpected places like the exhaust or crankcase breathers as well.
Step 6: The “Water Spray” Alternative (Less Risky for Some Areas)
What you need: A spray bottle filled with plain water, or a very diluted soapy water solution.
Instructions: If you’re hesitant about using flammable substances or a smoke machine isn’t available, the water spray method can sometimes work. With the engine idling, lightly mist water around suspected vacuum leak areas. If the engine RPM momentarily drops, stumbles, or almost stalls, it indicates that the water is being sucked into the intake through the leak, causing a temporary misfire. This is a safer alternative for areas where flammable liquids might pose a greater risk to electrical components or hot exhaust parts.
Pro Tip: Avoid spraying directly onto sensitive electrical connectors, spark plugs, or ignition coils, as this could cause misfires not related to a vacuum leak or even damage. Use a fine mist rather than a stream to avoid saturating components.
Step 7: Target Specific Culprits: Common Leak Points
What you need: Depending on the leak source: replacement vacuum hoses, new PCV valve, intake manifold gaskets, throttle body gasket, brake booster check valve, gasket sealant.
Instructions: Focus your inspection on frequently problematic areas: the PCV (Positive Crankcase Ventilation) valve and its associated hoses, the brake booster vacuum hose and check valve, the intake manifold gaskets (where the manifold bolts to the cylinder head), the throttle body gasket, the EGR (Exhaust Gas Recirculation) valve gasket, and any auxiliary vacuum actuators (e.g., for HVAC systems or cruise control). These components are under constant heat cycles and stress, making them prime candidates for developing leaks. Sometimes, even the oil filler cap or dipstick tube seal can cause a minor vacuum leak.
Pro Tip: Plastic intake manifolds on many modern vehicles are prone to warping or cracking, leading to leaks that are difficult to see. Pay extra attention to the sealing surfaces of these manifolds. If a PCV valve is sticky or its hose is brittle, replace them as a preventative measure.
Step 8: Confirming the Fix: Post-Repair Verification
What you need: Basic hand tools for reassembly, an OBD-II scanner (to clear codes).
Instructions: Once you’ve identified and replaced the faulty vacuum component(s), ensure all connections are secure and clamps are tightened. Clear any stored trouble codes using an OBD-II scanner. Start the engine and let it idle, observing for a stable RPM and the absence of any hissing sounds. If available, perform another quick smoke test to double-check the repair and ensure no new leaks were inadvertently created or missed. Finally, take the vehicle for a test drive, paying attention to engine performance and ensuring the check engine light remains off.
Pro Tip: After clearing codes and driving, allow for several “drive cycles” (engine warm-up, driving, cool-down, restart) to ensure the vehicle’s computer has completed all its self-tests and confirmed the vacuum system integrity. If codes return, re-evaluate your diagnosis.
✅ Final Checklist
- Engine idle is smooth, stable, and within specified RPM range.
- No audible hissing, sucking, or whistling sounds from the engine bay.
- Check Engine Light (CEL) is off, and no pending or stored diagnostic trouble codes (DTCs) related to fuel trim or misfires are present.
- Engine performance (acceleration, fuel economy) has visibly improved and returned to normal levels.
- Brake pedal feel is firm and consistent (if the brake booster hose or check valve was involved).
Important Notes:
- Safety Considerations: Always wear appropriate personal protective equipment (safety glasses, gloves). Ensure the engine is off and cool before physically touching components, especially when performing visual inspections. Be extremely cautious when working around moving engine parts (belts, fans) and hot surfaces (exhaust manifolds). When using flammable liquids or gases, work in a well-ventilated area and always have a fire extinguisher immediately accessible.
- When to Seek Professional Help: If you are uncomfortable performing any of these diagnostic steps, lack the necessary tools (e.g., a smoke machine), or despite diligent efforts, you cannot locate the vacuum leak, it’s always best to consult a certified mechanic. Some leaks can be deeply hidden or require specialized diagnostic equipment and expertise.
- Estimated Time and Cost Range:
- Time: Diagnosis can take anywhere from 1 to 4 hours, depending on the engine’s complexity and the leak’s elusiveness. Repair time varies widely from 15 minutes (for a simple hose replacement) to several hours (for intake manifold gasket replacement).
- Cost: DIY diagnosis can cost $0 (if you have existing tools) to $50-$150 (for a smoke machine rental/purchase). Parts can range from $5 for a vacuum cap or a foot of hose, to $50-$300+ for components like PCV valves, brake booster check valves, or intake manifold gasket sets. Professional diagnosis at a shop typically costs $100-$200, with repair costs varying greatly based on parts and labor involved.
What Are Engine Vacuum Leaks and Why Fix Them?
An engine vacuum leak occurs when outside air bypasses the mass airflow (MAF) sensor and enters the intake system. This “unmetered” air is not accounted for by the engine’s computer (ECU), leading to an incorrect, typically lean, air-fuel ratio. Your ECU will attempt to correct this imbalance by adding more fuel, but its capacity to compensate is limited, resulting in noticeable performance problems.
Recognizing the Symptoms
Identifying a vacuum leak often starts with observing specific changes in your vehicle’s behavior. These are key indicators:
- Rough or High Idle: The engine might rev erratically, surge, or consistently idle at a higher RPM than normal.
- Hesitation or Stalling: Especially noticeable during acceleration or when coming to a stop, the engine may struggle to maintain power or shut off unexpectedly.
- Reduced Fuel Economy: The engine works harder to compensate for the lean condition, leading to increased fuel consumption.
- Check Engine Light (CEL): Frequently illuminated, often accompanied by diagnostic trouble codes (DTCs) like P0171 (System Too Lean, Bank 1) or P0174 (System Too Lean, Bank 2).
- Hissing or Whistling Sounds: You might hear a distinct sound near the engine bay as air is sucked into the leak point.
Why Prompt Repair is Crucial in 2027
Ignoring a vacuum leak means your engine constantly operates with an improper air-fuel mixture. This running-lean condition significantly elevates combustion temperatures, which can severely damage critical components over time. These include oxygen sensors, spark plugs, and especially the expensive catalytic converters. For 2027 vehicles, with their advanced emissions controls and tighter operational tolerances, these issues can quickly lead to accelerated wear, costly repairs, and potential MOT/inspection failures. Addressing a vacuum leak early protects your investment and ensures your vehicle’s long-term reliability.
Common Locations for Engine Vacuum Leaks
Before you begin complex diagnostic tests, knowing the most frequent points of failure will help you narrow down your search. Vacuum leaks typically occur where components connect, or where flexible materials degrade due to heat and age. Start your investigation by systematically checking these prime locations.
Key Areas to Inspect First
Focus your initial search on these high-probability areas for vacuum leaks:
- All Vacuum Lines and Hoses: These are the most common culprits. Look for cracks, dry rot, kinks, loose connections, or hoses that have completely disconnected. Pay extra attention to smaller lines leading to sensors, the PCV system, and emission control components.
- Intake Manifold Gaskets: These seals sit between the intake manifold and the cylinder head. Heat cycles cause them to harden, crack, or shrink over time, creating a leak path for unmetered air. This is a very common source of leaks.
- PCV (Positive Crankcase Ventilation) System: Inspect the PCV valve itself, its hoses, and the grommets that seal it into the valve cover or intake. A clogged or damaged PCV valve or compromised hoses can introduce significant leaks.
- Brake Booster Line and Booster: The large hose connecting your intake manifold to the brake booster is under constant vacuum. It can crack or loosen. The brake booster’s internal diaphragm can also fail, causing a large leak and impacting braking performance.
- EGR (Exhaust Gas Recirculation) Valve Gasket: Although part of the emissions system, a leaking EGR valve or its gasket can also contribute to vacuum issues by allowing exhaust gases or unmetered air into the intake system.
- Throttle Body Gasket: The gasket sealing the throttle body to the intake manifold can degrade, allowing air to bypass the throttle plate and MAF sensor.
Even with more durable materials in 2027 vehicles, consistent engine heat and environmental factors still cause degradation. Always begin your inspection with the easiest and most accessible components, as these often reveal the problem.
DIY Methods to Pinpoint Leaks
Once you understand the symptoms and common locations, it’s time to get hands-on with diagnostic methods. Always prioritize safety. Ensure your engine is cool, the parking brake is engaged, and you are working in a well-ventilated area.
Method 1: The Thorough Visual Inspection
This is your first, safest, and often most effective step. You need a bright flashlight and patience to systematically examine the engine bay.
Tools Needed:
- Bright flashlight or work light
- Small mirror (optional, for hard-to-see areas)
- Gloves (optional, for clean hands)
Step-by-Step Guide:
- Engine Off, Cool: Ensure the engine is completely off and cool to the touch. This prevents burns and allows for safer handling of components.
- Remove Engine Cover: If your vehicle has a plastic engine cover, carefully remove it to expose the manifold and vacuum lines.
- Follow Every Line: Start from a main vacuum source (like the intake manifold) and visually trace every single vacuum hose. Look for:
- Cracks, splits, or dry rot, especially at bends or connection points.
- Loose connections where hoses meet fittings, valves, or sensors.
- Disconnected hoses that are simply dangling.
- Kinks or collapses in soft lines.
- Inspect Gasket Areas: Shine your light around the edges of the intake manifold where it meets the cylinder head. Look for any visible signs of gasket deterioration or oil residue that could indicate a leak. Check the throttle body gasket and PCV valve grommets similarly.
- Check PCV System: Inspect the PCV valve and its associated hoses for damage. Often, the PCV valve itself can fail or its grommet can harden and leak.
- Brake Booster Line: Pay close attention to the large hose running from your intake manifold to the brake booster. Flex it gently to see if any cracks open up. Inspect where it connects at both ends.
- Wiggle Test (Engine Off): Gently wiggle vacuum lines and connections. Sometimes, a weak connection will become evident with a slight movement.
Safety Warning:
This method is inherently safe as the engine is off. Always ensure the vehicle is stable and well-lit to prevent injury.
A thorough visual inspection often uncovers obvious leaks, saving you time and preventing the need for more complex diagnostic methods. It’s surprising how many issues are solved simply by finding a disconnected or cracked hose.
How to Find a Vacuum Leak: Proven Step-by-Step Diagnostic Methods
Pinpointing a vacuum leak requires a systematic approach. While the initial symptoms might be clear, the exact source often demands focused investigation. By 2027, several diagnostic tools have become more accessible and refined, offering enhanced accuracy.
Visual Inspection and Digital Assist
- Visually inspect all accessible vacuum lines, hoses, and connections. By 2027, many older vehicles will exhibit rubber and plastic components that have become brittle or cracked due to prolonged heat exposure and material degradation. Pay close attention to T-junctions, elbows, and connections to the brake booster, PCV valve, and various sensors.
- Utilize a portable digital borescope or endoscope, which are widely available and affordable by 2027. These tools allow for inspection of hard-to-reach areas, such as the underside of the intake manifold, behind accessories, and within complex emission control plumbing. Look for any visible gaps, tears, or disconnected hoses that might be otherwise hidden.
The Smoke Machine Method: The Gold Standard
According to automotive diagnostic experts at Bosch Mobility, the smoke machine remains the most reliable method for locating vacuum leaks due to its precision and non-invasive nature. Modern smoke machines utilize inert, non-toxic smoke, making them safe for engine components.
- Ensure the engine is completely cool and off. Locate a main vacuum line, typically one connected to the brake booster or the EVAP (Evaporative Emission Control System) purge valve, and disconnect it.
- Connect your diagnostic smoke machine to the disconnected vacuum line. Ensure a tight seal to prevent smoke escape during the test.
- Introduce the smoke into the system at a low, controlled pressure. Observe all engine bay components for any wisps of smoke escaping.
- Common areas where smoke will egress include worn intake manifold gaskets, cracked vacuum lines, faulty PCV valves, leaking brake boosters, and deteriorating O-rings around injectors or sensors. The visible smoke precisely identifies the leak’s location, facilitating targeted repair.
The Propane/Starting Fluid Test (Use Extreme Caution)
This method leverages the engine’s reaction to unmetered fuel but carries inherent risks. Use only as a secondary confirmation or if a smoke machine is unavailable.
- With the engine running at idle, carefully spray small, controlled bursts of unlit propane gas (from a torch, not directly lit) or starting fluid around suspected vacuum leak areas.
- Listen intently for a sudden, temporary increase in engine RPMs. This indicates the engine is drawing the flammable substance through the leak, causing a momentary enrichment of the air-fuel mixture.
- Exercise extreme caution. Keep a fire extinguisher within immediate reach. This method is less precise than smoke testing and poses a significant fire hazard if not performed meticulously and safely.
Troubleshooting: What If You Still Can’t Find the Leak?
Even with advanced diagnostic tools, some vacuum leaks can be elusive. If you’ve exhausted the primary methods and symptoms persist, consider these next steps to avoid unnecessary part replacement.
- Re-evaluate Common Failure Points: Double-check notorious leak sources such as the PCV valve and its hose, brake booster and its vacuum hose, intake manifold gaskets (especially plastic manifolds prevalent since the 2010s), and all small, rigid plastic vacuum lines which become brittle over time.
- Utilize Advanced OBD-II Diagnostics: Connect a professional-grade OBD-II scanner capable of live data streaming. Monitor short-term (STFT) and long-term fuel trims (LTFT). Consistently high positive fuel trims (e.g., +15% or higher) across multiple drive cycles indicate the Engine Control Unit (ECU) is adding significant fuel to compensate for unmetered air, strongly pointing to a vacuum leak.
- Consider Specialized Diagnostic Shops: If the issue remains unresolved, it’s time to seek professional assistance. Modern independent automotive service centers, equipped with higher-tier diagnostic systems and specialized technicians, can perform pressure decay tests or use ultrasonic leak detectors that can hear vacuum leaks, even silent ones.
- Professional Consultation and Repair Costs: A diagnostic fee for a complex vacuum leak investigation typically ranges from $150 to $250 by 2027. The repair cost can vary widely, from $50 for a simple hose replacement to $800+ for an intake manifold gasket replacement, depending on vehicle complexity and labor rates.
Conclusion
Effectively diagnosing a vacuum leak is crucial for maintaining engine efficiency, performance, and emissions compliance. Unaddressed leaks can lead to issues ranging from rough idling to significant fuel economy penalties and even catalytic converter damage. According to verified research and expert sources from leading automotive diagnostic firms, a systematic approach leveraging modern diagnostic tools like smoke machines is paramount for accurate identification. Apply these proven methods to ensure optimal engine performance and longevity for your vehicle.
❓ Frequently Asked Questions
How does an engine vacuum leak affect vehicle performance and fuel economy?
A vacuum leak introduces unmetered air into the engine, leading to an overly lean air-fuel mixture. This can cause rough idling, misfires, reduced power, poor fuel economy, and potential long-term engine damage due to overheating.
What are the most common places to check for vacuum leaks on an engine?
Start with common failure points: all rubber vacuum hoses for cracks or disconnections, intake manifold gaskets, PCV (Positive Crankcase Ventilation) valve and its hoses, brake booster hose, and any connections to the throttle body or EGR valve.
Is it safe to use flammable sprays like carburetor cleaner or starting fluid to detect a vacuum leak?
While effective, using flammable sprays carries a significant fire risk and should be done with extreme caution on a cold engine with a fire extinguisher nearby. Propane or an unlit cigar for a DIY smoke test are often safer alternatives for diagnostics.
How can I perform a basic DIY smoke test to find a vacuum leak?
You can create a DIY smoke machine using a small air compressor, a container (like a paint can) filled with mineral oil, and an ignitor (like a soldering iron) to produce smoke. Connect this setup to a vacuum line on the engine and watch for smoke escaping from leak points.
What kind of sounds or engine behavior indicates a vacuum leak during testing?
During a spray test, an increase in engine RPMs or a smoothing out of a rough idle indicates you’ve hit a leak. When listening, a distinct hissing, whistling, or sucking sound usually points directly to the location of the vacuum leak.
When should I consider taking my vehicle to a professional mechanic for a vacuum leak diagnosis?
If you’ve performed multiple diagnostic steps and still cannot locate the leak, or if the leak appears to be in a difficult-to-reach area like a cracked intake manifold, it’s best to consult a professional mechanic. They have specialized tools and expertise for complex diagnostics.