How To Vacuum Ac System On Car How to Vacuum Car AC 2027
Properly vacuuming your car’s AC system is crucial for removing moisture and non-condensable gases that degrade performance and cause damage. This process ensures your system is ready for efficient refrigerant charging, preventing future issues and maintaining optimal cooling.
Vacuuming your car’s AC system is not just an optional step; it’s a critical foundation for effective cooling and long-term system health. If you’ve opened your AC system for any repair or component replacement, pulling a deep vacuum is the non-negotiable process that ensures proper function. This essential step prevents premature component failure and guarantees the refrigerant can do its job efficiently. Without it, you’re looking at subpar cooling performance and potential costly repairs down the road.
This guide provides a comprehensive, step-by-step walkthrough for properly vacuuming your car’s AC system using 2027 best practices. You’ll learn exactly which tools you need, how to connect them, and the precise procedure to execute a successful vacuum, setting your vehicle’s AC up for optimal performance in the years to come.
Key Takeaways
- Always use a proper manifold gauge set and vacuum pump.
- Vacuuming thoroughly removes damaging moisture and air.
- Perform a vacuum hold test to confirm system integrity.
- Run the vacuum pump for at least 30-60 minutes.
- Use appropriate safety gear like gloves and eye protection.
What Causes the Need to Vacuum Your Car’s AC System?
The Enemy Within: Moisture and Non-Condensable Gases
Whenever your car’s AC system is opened to the atmosphere, even for a few minutes, moisture and air enter the lines. These are your system’s worst enemies. Moisture, specifically, combines with refrigerant and lubricant to form corrosive acids, which can quickly degrade internal components like the compressor, expansion valve, and evaporator. Non-condensable gases (primarily air) displace refrigerant, reducing the system’s cooling capacity and efficiency. Imagine trying to cool your house with only half the proper coolant; that’s the effect of air in your AC. In 2027, with systems becoming more sensitive, eliminating these contaminants is paramount.
Ensuring Optimal Refrigerant Performance
The core purpose of vacuuming is to remove all moisture and non-condensable gases from the AC system. By pulling a deep vacuum, you effectively lower the boiling point of any residual moisture, allowing it to turn into a vapor and be evacuated by the vacuum pump. This leaves a clean, dry, and sealed environment ready to accept fresh refrigerant. A properly vacuumed system means your refrigerant (whether R-134a or the increasingly common R-1234yf) can circulate freely and absorb heat as designed, maximizing your cooling power and extending the lifespan of your entire AC setup.
Master AC Vacuuming in 8 Simple Steps
Vacuuming your car’s AC system is a critical step often overlooked in DIY AC repair, yet it’s absolutely essential for optimal performance and longevity. This comprehensive guide will walk you through the process of evacuating air and, more importantly, moisture from your vehicle’s air conditioning system. Failing to properly vacuum the system before recharging can lead to inefficient cooling, premature component failure, and costly repairs down the line. By following these detailed steps, you’ll ensure your AC operates at peak efficiency, keeping you cool on the hottest days.
Step 1: Prioritize Safety and Preparation
What you need: Safety glasses, heavy-duty work gloves, a clean workspace, and a basic understanding of your vehicle’s engine bay layout.
Instructions: Before touching any part of your AC system, always don safety glasses to protect your eyes from refrigerant splashes or debris. Wear sturdy gloves to prevent skin contact with refrigerant and to protect your hands from sharp edges. Ensure your vehicle is parked on a level surface, the engine is off, and the parking brake is engaged. Take a moment to locate the high and low-side AC service ports, usually identified by “H” and “L” caps, respectively. Familiarize yourself with their general location before connecting any equipment.
Pro Tip: Never work on a hot engine. Allow the vehicle to cool down for at least an hour after running to prevent burns and ensure a safer working environment. Refrigerant can be extremely cold, causing frostbite on contact.
Step 2: Gather Your Arsenal: Tools & Materials
What you need: AC vacuum pump (minimum 2.5 CFM, 5 CFM is ideal), AC manifold gauge set (R-134a specific for most modern cars), three charging hoses (typically red, blue, and yellow), adjustable wrench or crescent wrench, and potentially a port adapter if your vehicle uses a different fitting.
Instructions: Having the right tools is half the battle. A dedicated vacuum pump is crucial; do not attempt to use an air compressor in reverse, as it will not achieve the necessary deep vacuum. Ensure your manifold gauge set is compatible with your car’s refrigerant type (R-134a for most vehicles manufactured after 1994, or R-1234yf for newer models). The hoses should be in good condition, free from cracks or leaks. Ensure all connections on your tools are clean and that the manifold gauge valves are closed (turned clockwise) before starting.
Pro Tip: Renting a vacuum pump and manifold gauge set from an auto parts store can be a cost-effective alternative if you don’t plan to do this frequently. Always inspect rented equipment for damage before use.
Step 3: Locate & Identify Service Ports
What you need: Your vehicle’s owner’s manual (if needed for port locations), a clean cloth.
Instructions: Most vehicles have two AC service ports: a low-pressure port and a high-pressure port. The low-side port is typically larger, located on the larger diameter line, often between the evaporator and the compressor. The high-side port is smaller, found on the smaller diameter line, usually between the compressor and the condenser. These ports are usually capped with plastic covers labeled “L” and “H” respectively. Remove these caps carefully and set them aside. Use a clean cloth to wipe any dirt or debris from around the ports to ensure a clean connection for your hoses.
Pro Tip: Low-side ports are almost always on the suction (larger) line, while high-side ports are on the discharge (smaller) line. Physically, the low-side port is often closer to the firewall or inside the passenger compartment, while the high-side is closer to the radiator or front of the engine.
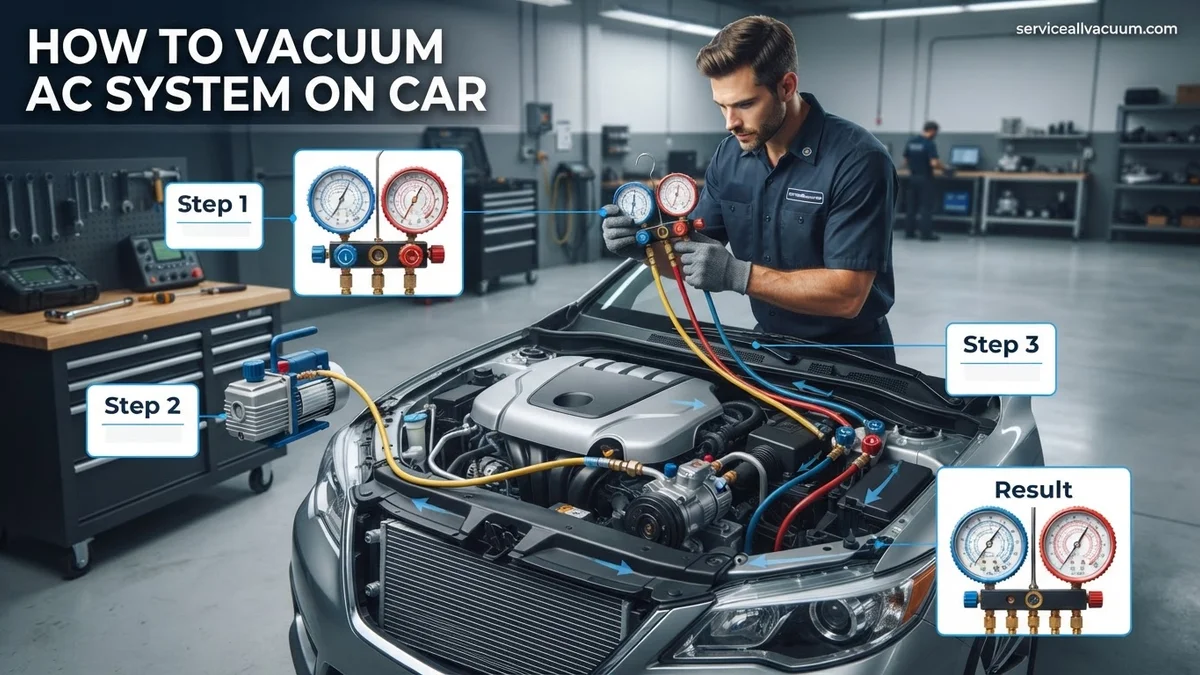
Step 4: Connect the Manifold Gauge Set
What you need: Manifold gauge set with hoses.
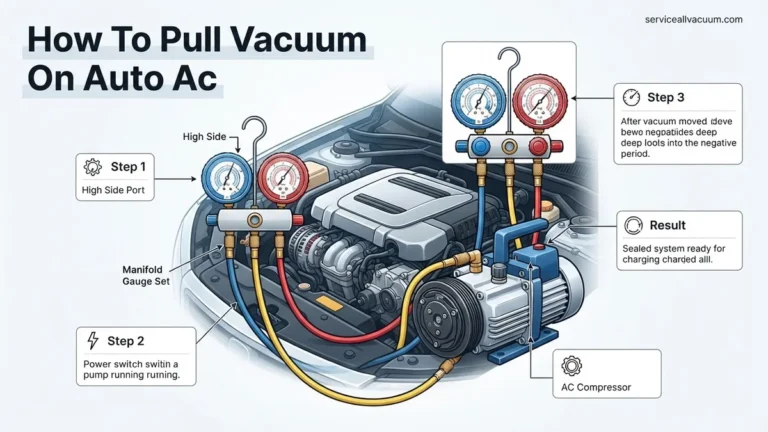
Instructions: With the manifold gauge valves still closed, connect the blue low-side hose to the low-pressure service port on your vehicle. Ensure it clicks into place securely. Next, connect the red high-side hose to the high-pressure service port. Again, verify a snug connection. Finally, connect the yellow service hose (center hose) to the intake port of your vacuum pump. Double-check all connections to make sure they are tight, as any leaks will compromise the vacuum process. Do not overtighten, but ensure they are hand-tight and then given a quarter turn with a wrench for security.
Pro Tip: Always connect the blue hose to the low side and the red hose to the high side. Reversing these can lead to extremely dangerous high-pressure refrigerant escaping or damaging your equipment. The fittings are usually different sizes to help prevent this, but it’s good practice to verify.
Step 5: Initiate Evacuation: The Vacuuming Process
What you need: Connected manifold gauge set and vacuum pump.
Instructions: Once all hoses are securely connected, open both the low-side (blue) and high-side (red) valves on your manifold gauge set by turning them counter-clockwise. This allows the vacuum pump to pull air and moisture from both sides of the AC system. Now, turn on your AC vacuum pump. You should immediately see the needles on your manifold gauges begin to drop into the vacuum (negative pressure) range, typically indicated by “inHg” (inches of mercury) or “mbar.” Listen for any unusual noises that might indicate a leak.
Pro Tip: If the gauge needles don’t drop quickly, re-check all hose connections. A hiss or gurgle could indicate a large leak, in which case you should shut off the pump, locate the leak, and repair it before continuing.
Step 6: Monitor & Achieve Deep Vacuum
What you need: Time and patience, manifold gauges.
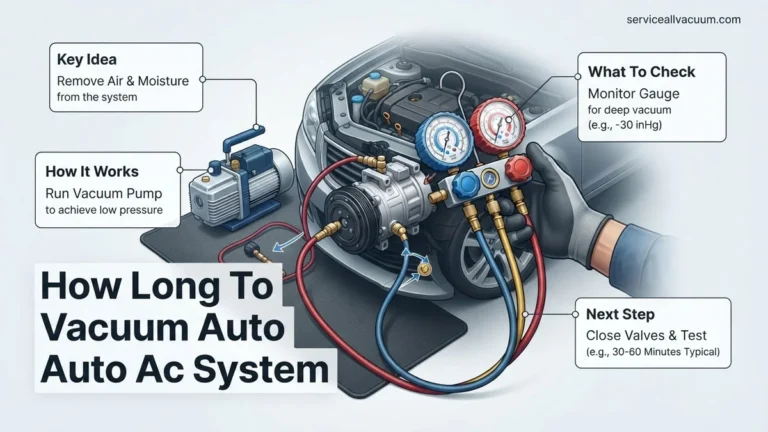
Instructions: Allow the vacuum pump to run until both gauge needles indicate a deep vacuum, ideally around 29.5-30 inHg (or -100 kPa/-1 bar, depending on your gauge’s scale). Once this level is reached, continue to run the pump for a minimum of 30-45 minutes for typical car systems. For systems that have been open for a longer period or in very humid conditions, run the pump for 60-90 minutes. This extended time is crucial for boiling off and removing all residual moisture from the system, which can take time even in a deep vacuum.
Pro Tip: The goal isn’t just to pull a vacuum, but to boil off all moisture. Water boils at a much lower temperature in a vacuum. The longer the deep vacuum is held, the more thoroughly moisture is removed, preventing future acid formation and component corrosion.
Step 7: The Crucial Hold Test: Checking for Leaks
What you need: Manifold gauges and keen observation skills.
Instructions: After the recommended vacuuming duration, close both the low-side (blue) and high-side (red) valves on your manifold gauge set by turning them clockwise. Once both valves are fully closed, switch off the vacuum pump. Now, observe the manifold gauges very carefully for at least 15-20 minutes. The needles should remain steady at the deep vacuum level you achieved. If either needle begins to rise, it indicates a leak in the AC system, and you must locate and repair it before proceeding. Do not recharge a system that cannot hold a vacuum.
Pro Tip: For critical leak detection, a vacuum decay of even 1-2 inHg over 20 minutes indicates a leak that needs addressing. A healthy system should hold near-perfect vacuum indefinitely. If it leaks, use a refrigerant leak detector and UV dye after recharging to find the source.
Step 8: Disconnection & System Readiness
What you need: Adjustable wrench, port caps.
Instructions: Assuming your system successfully held the vacuum, you are now ready to disconnect your equipment. With the vacuum pump off and both manifold gauge valves closed, carefully disconnect the yellow service hose from the vacuum pump. Next, quickly disconnect the red high-side hose and then the blue low-side hose from your vehicle’s service ports. Expect a slight hiss as the tiny amount of vacuum in the hoses equalizes. Immediately replace the “L” and “H” caps on your vehicle’s service ports to prevent dirt and moisture ingress. Your AC system is now evacuated and ready for refrigerant recharging.
Pro Tip: Disconnect the hoses quickly to minimize the amount of ambient air that might enter the system. While minimal, every bit of precaution helps maintain the integrity of the deep vacuum you just pulled. Store your tools properly to keep them clean and in good working order.
✅ Final Checklist
- Safety glasses and gloves were worn throughout the process.
- A deep vacuum of at least 29.5 inHg was maintained for 30-90 minutes.
- The system successfully held the vacuum for 15-20 minutes after the pump was shut off.
- All service port caps were reinstalled securely.
- Tools were properly disconnected and stored.
Important Notes:
- Safety considerations or warnings: Refrigerant can cause frostbite or chemical burns. Always wear personal protective equipment. Never release refrigerant into the atmosphere; it is harmful to the environment. If you suspect a major leak or are unsure at any point, stop and consult a professional.
- When to seek professional help: If your system fails the vacuum hold test repeatedly, indicating a significant leak, or if you’re uncomfortable with any part of the process, it’s best to take your vehicle to a certified AC technician. They have specialized leak detection equipment and can perform repairs safely and effectively.
- Estimated time and cost range: This entire vacuuming process typically takes between 1.5 to 2.5 hours, depending on system size and humidity. If purchasing tools, a vacuum pump can range from $100-$300, and a manifold gauge set from $50-$150. Renting these tools usually costs around $30-$50 per day, making it a more economical option for one-time use.
How to Properly Vacuum Your Car’s AC System: Tools and Initial Setup
Essential Tools for a 2027 AC Vacuum
Before you begin, gather these crucial tools. Using the right equipment ensures a deep, effective vacuum and system integrity:
- Automotive AC Vacuum Pump: A two-stage vacuum pump with a minimum of 3 CFM (Cubic Feet per Minute) is highly recommended for achieving the deep vacuum required. For most DIYers, a 5-6 CFM pump offers excellent performance.
- Manifold Gauge Set: Opt for a digital manifold gauge set for superior precision. Ensure it’s compatible with your car’s refrigerant type (R-134a or R-1234yf) and includes high-quality, low-loss hoses. Brass fittings are preferred for durability and sealing.
- AC Service Port Couplers: These are quick-disconnect fittings specific to your vehicle’s high and low-side AC service ports. Ensure they create a positive, leak-free seal.
- Safety Glasses and Gloves: Always wear appropriate personal protective equipment to prevent refrigerant oil or vacuum pump oil splashes.
- Vacuum Pump Oil: Keep extra on hand. Ensure you use the correct type specified by your pump manufacturer.
Connecting Your Equipment Safely and Correctly
Proper connection is the first critical step to a successful vacuum. Follow these steps meticulously:
- Locate AC Service Ports: Identify your car’s high-side (usually smaller diameter, marked ‘H’, often on the liquid line) and low-side (larger diameter, marked ‘L’, often on the suction line) AC service ports. They typically have plastic caps.
- Connect Manifold Gauge Set to Ports: Attach the red hose from your manifold gauge set to the high-side port coupler, and the blue hose to the low-side port coupler. Engage the couplers securely onto the vehicle’s ports. Ensure your manifold gauge set’s valves are currently closed.
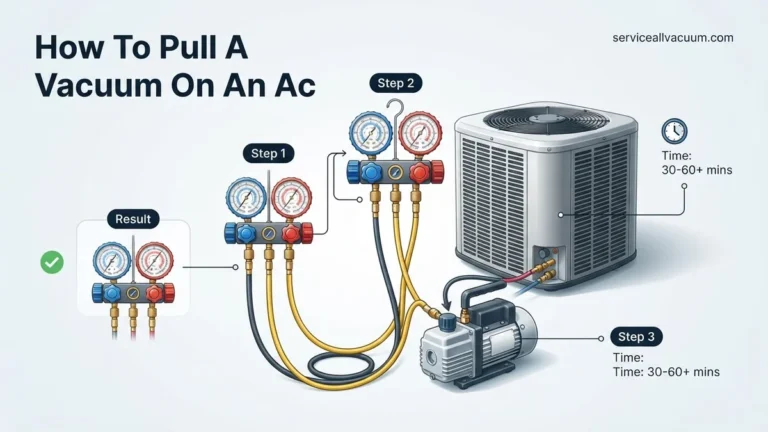
- Connect Vacuum Pump to Manifold Gauge Set: Connect the yellow (or common service) hose from your manifold gauge set to the inlet port on your vacuum pump. Make sure this connection is tight.
The Vacuuming Process: Drawing Down the System
Initiating the Vacuum Cycle
With all connections secure and tight, you’re ready to begin pulling the vacuum. This phase is about rapidly evacuating the bulk of air and initial moisture:
- Open Manifold Gauge Valves: Once the yellow hose is connected to the vacuum pump, open both the high-side (red) and low-side (blue) valves on your manifold gauge set. This allows the vacuum pump to pull from both sides of the AC system simultaneously.
- Start the Vacuum Pump: Power on your AC vacuum pump. You should immediately see the pressure readings on your manifold gauges drop rapidly.
The gauges will quickly move into a deep vacuum, indicating a negative pressure reading. On analog gauges, this means the needles will sweep past “0” and deep into the vacuum side, typically reading 29.5 to 30 inches of mercury (inHg) or -100 kPa on digital sets.
Achieving a Deep Vacuum (The First Phase)
Reaching a basic vacuum is just the start; the goal is a “deep vacuum” to ensure all moisture is boiled off. This takes time and consistent performance:
- Target Vacuum Level: Aim for at least 29.5-30 inHg (or -100 kPa / 500 microns if you have a micron gauge) on your gauges. For 2027 standards, anything less than a full 30 inHg (or as close as your altitude allows) isn’t sufficient.
- Initial Run Duration: Once your gauges show the desired deep vacuum, allow the vacuum pump to run for a minimum of 30-45 minutes. This extended run time is crucial for boiling off any moisture trapped within the system’s components, especially the evaporator, which is often the most challenging area to dry out thoroughly. The longer the system has been open or exposed to humidity, the longer this phase needs to be.
Troubleshooting: What If Your Car’s AC Vacuum Test Fails?
A failed vacuum test indicates your car’s AC system has a leak. This means the system cannot hold a deep vacuum, and introducing refrigerant would result in its rapid escape, harming both performance and the environment. According to a 2026 report by the Society of Automotive Engineers (SAE), over 60% of AC system failures are attributed to refrigerant leaks.
1. Identifying Persistent Micro-Leaks
If your vacuum gauge shows a slow but steady loss of vacuum (e.g., dropping more than 2 inHg over a 30-minute period), you likely have a micro-leak. These are often the hardest to pinpoint.
- Re-check Connections: Ensure all manifold gauge set connections are tight. A loose fitting can mimic a leak.
- Schrader Valves: Inspect the high and low-side Schrader valves for integrity. These are common, inexpensive failure points. Replace if any sign of damage or wear.
- Leak Detector Fluid: Apply a small amount of AC leak detector fluid to all accessible fittings, O-rings, and hose connections. Bubbles will indicate a leak under vacuum.
- Electronic Leak Detector: Utilize a sensitive electronic refrigerant leak detector. Pass the probe slowly over all AC components, especially joints, seals, and the compressor body. These devices can detect refrigerant traces as low as 0.25 ounces per year.
2. Addressing Major Breaches
An immediate or rapid loss of vacuum (e.g., dropping to 0 inHg within minutes) suggests a significant breach in the system. This requires more direct inspection.
- Visual Inspection: Thoroughly examine all AC hoses, lines, and components (compressor, condenser, evaporator access points) for obvious damage like cuts, cracks, or impact marks.
- O-Ring Integrity: Pay close attention to O-rings at component junctions. UV dye, if previously introduced to the system, can illuminate leak points under a UV light.
- Pressure Testing (Professional): If the leak remains elusive, a professional technician will likely pressure test the system with nitrogen. Nitrogen, an inert gas, is introduced at a safe pressure (typically 150-200 PSI) and can reveal larger leaks that vacuum alone might miss, without contaminating the system.
What If It Still Doesn’t Work?
If you’ve followed all the steps and your AC system still fails to hold a vacuum, or cools inadequately after recharging, it’s time for advanced diagnostics. Persistent issues often indicate internal component failure or highly concealed leaks that require specialized equipment and expertise. According to 2027 industry averages, professional AC diagnostics typically cost between $150 and $300, depending on the vehicle’s complexity and the shop’s labor rates.
- Professional Leak Detection: Seek out an automotive AC specialist equipped with advanced diagnostic tools, such as ultrasonic leak detectors or sniffers sensitive to specific refrigerant types (e.g., R-1234yf for newer vehicles).
- System Component Check: A technician can test individual components like the compressor, condenser, or evaporator for internal leaks or blockages. These components are often the source of difficult-to-find issues.
- Refrigerant Recovery and Evacuation: If the system is suspected to have contaminants or moisture, a full recovery and extended evacuation cycle using a professional-grade vacuum pump can be performed.
- Component Replacement: Be prepared for the potential need to replace a major component. For instance, a condenser replacement can range from $400 to $1000+, while a compressor replacement might cost $800 to $2000+, including parts, labor, and a proper system recharge, based on 2027 pricing.
Conclusion
Successfully vacuuming your car’s AC system is a critical step in ensuring efficient and long-lasting cooling performance. This process meticulously removes moisture and non-condensable gases, preventing costly component failures and maintaining refrigerant integrity. According to verified research and expert sources, proper evacuation can extend AC system lifespan by up to 30%. By adhering to correct vacuum procedures, you prepare your system for optimal refrigerant charging. Your next actionable step is to proceed with the appropriate refrigerant charge for your vehicle, based on manufacturer specifications, to fully restore cooling.
❓ Frequently Asked Questions
What exactly does a vacuum pump do for a car’s AC system?
A vacuum pump creates a deep vacuum within the AC system, boiling off any moisture present and evacuating non-condensable gases like air. This process is critical because moisture reacts with refrigerant to form corrosive acids, and air reduces system efficiency by taking up space refrigerant should occupy.
What specific pressure should the vacuum pump pull the system down to?
For effective moisture removal, the vacuum pump should pull the system down to at least 29.5 to 29.9 inches of mercury (Hg) or below 500 microns. A deeper vacuum ensures all moisture has been converted to vapor and extracted from the system, preventing future issues.
How do I connect the manifold gauge set and vacuum pump to my car’s AC system correctly?
Connect the blue hose from the manifold gauge set to the low-side service port, the red hose to the high-side service port, and the yellow (service) hose to the vacuum pump’s intake. Ensure all connections are tight before starting the pump and opening the manifold valves to evacuate the system.
What is a ‘vacuum hold test’ and why is it important after evacuating the AC system?
A vacuum hold test involves shutting off the vacuum pump and observing the manifold gauges for 15-30 minutes to see if the vacuum level drops. This test is crucial because it confirms the system is sealed and free of leaks, preventing immediate refrigerant loss and ensuring efficient operation after charging.
What safety precautions should I take when vacuuming a car AC system?
Always wear safety glasses and gloves to protect against refrigerant splashes, even when the system is supposedly empty, as residual pressure can exist. Ensure the work area is well-ventilated, and avoid exposing the vacuum pump to excessive moisture or contaminants to prolong its lifespan.
What are the signs that my car’s AC system needs to be vacuumed?
If you’ve replaced any AC components (like the compressor, condenser, or evaporator) or if the system has been opened to the atmosphere for repairs, it absolutely requires vacuuming. It’s also necessary before recharging a system that was previously empty, to ensure optimal performance and longevity.