How to Clean a Vacuum Filter Expert Step-by-Step Guide 2027
Maintaining a clean vacuum filter is crucial for optimal suction and air quality. This guide provides step-by-step instructions for cleaning various filter types, ensuring your vacuum performs its best. Learn how to extend filter life and improve cleaning efficiency.
Maintaining peak performance from your vacuum in 2027 hinges on one critical, often overlooked task: cleaning its filter. Properly cleaning your vacuum filter directly restores suction power, improves indoor air quality, and extends the lifespan of your appliance. This guide provides the exact step-by-step instructions for effectively cleaning different filter types, ensuring your vacuum operates at its best without guesswork.
You’ll learn precisely how to handle washable filters, the correct drying methods to prevent damage, and the best techniques for non-washable types like certain HEPA and pleated filters. Skip the generic advice; this is about actionable, specific methods tailored for your vacuum’s needs. Getting this right means avoiding costly replacements and enjoying a cleaner home environment.
Key Takeaways
- Identify filter type (washable, HEPA) before cleaning.
- Always unplug vacuum for safety first.
- Tap non-washable filters gently to remove dust.
- Washable filters need complete drying (24-48 hrs).
- Replace filters if damaged or worn out.
Why Your Vacuum Filter Needs Cleaning & Replacement
Your vacuum filter is the gatekeeper for dust and debris, preventing these particles from re-entering your home’s air or damaging the motor. Over time, it gets clogged, leading to diminished suction, increased motor strain, and potentially recirculating allergens. Regular maintenance isn’t just about efficiency; it’s about safeguarding your appliance and your health.
Identifying Your Filter Type for Proper Care
Before you clean, you need to know what kind of filter you have. Misidentifying your filter type can lead to irreversible damage. Always check your vacuum’s manual first – it’s the definitive source for your specific model in 2027. However, you can generally identify them by material and markings:
- Washable Filters: Often made of foam or a sturdy, synthetic pleated material. They typically have a “washable” icon (like a faucet or a running tap) printed on them or indicated in your manual. These filters are designed to withstand water.
- Non-Washable Filters: Commonly made of paper-like pleated material or some HEPA filters. These will usually explicitly state “DO NOT WASH” or have no washing instructions. Attempting to wash these will destroy their filtration integrity.
- HEPA Filters: High-Efficiency Particulate Air filters capture 99.97% of particles 0.3 microns or larger. Some HEPA filters are washable, while many are not. Always verify your specific HEPA filter’s instructions. Look for “washable HEPA” or “lifetime HEPA” designations if water cleaning is allowed.
When to Clean and When to Replace
Knowing when to intervene is as crucial as knowing how. Your vacuum’s performance directly reflects its filter’s condition. Here’s how to tell:
- Reduced Suction: The most obvious sign. If your vacuum isn’t picking up debris like it used to, a clogged filter is often the culprit.
- Visible Dirt/Dust Buildup: A quick visual inspection can show layers of dust and debris caked onto the filter material.
- Musty Odor: If your vacuum emits a stale or dusty smell during operation, it’s a strong indicator that the filter is saturated with fine particles and needs attention.
- Recommended Frequency: For optimal performance, aim to clean washable filters every 3-6 months, or more frequently (monthly) if you have pets or use your vacuum daily. Non-washable filters should be tapped/brushed clean monthly.
- Replacement Indicators: Even washable filters degrade. Look for tears, fraying, permanent discoloration that doesn’t wash out, or a noticeable decrease in performance even after cleaning. Most manufacturers recommend replacing filters annually, or every 6 months for heavy use. HEPA filters typically require replacement every 1-2 years.
Master Vacuum Filter Cleaning in 7 Simple Steps
A well-maintained vacuum cleaner is key to a truly clean home, and at the heart of its performance lies a critical component: the filter. Over time, these filters become clogged with dust, dirt, pet dander, and allergens, severely impacting your vacuum’s suction power, motor efficiency, and even the air quality in your home. This comprehensive guide will walk you through the precise steps to clean your vacuum filter thoroughly, restoring your machine’s peak performance and extending its lifespan. Following these instructions will not only save you money on replacements but also ensure your home remains a healthier, cleaner environment.
Step 1: Preparation and Safety First
What you need: Your vacuum cleaner, owner’s manual (if available), disposable gloves, dust mask, large trash bag or outdoor trash bin.
Instructions: Before touching any part of your vacuum, always ensure it is completely unplugged from the power outlet. This is a critical safety measure to prevent accidental activation and potential injury. If you have your vacuum’s owner’s manual, consult it to identify the specific type of filter(s) your model uses (e.g., HEPA, foam, pre-motor, post-motor) and any special cleaning instructions. Put on disposable gloves and a dust mask to protect yourself from accumulated dust, allergens, and potential irritants that will be released during the cleaning process. Position yourself over a trash bag or outdoors to contain the mess.
Pro Tip: Different filters require different cleaning methods. Some are washable, while others are strictly for dry cleaning or replacement only. Referencing your manual will prevent accidental damage and save you time. Never assume all filters can be washed.
Step 2: Locating and Removing the Filter
What you need: Your unplugged vacuum cleaner.
Instructions: Most vacuum filters are located within or near the dust bin/canister. For bagless upright vacuums, the filter is often situated either on top of the dust cup or at the exhaust port. Canister vacuums might have filters in similar locations or within the main body of the unit. Carefully unclip, twist, or pull open the designated filter compartment as indicated by your vacuum’s design. Gently pull the filter free, holding it over a trash receptacle or outdoors to catch any immediate loose debris. Avoid shaking it excessively indoors at this stage, as this will release fine dust into your living space.
Pro Tip: If your vacuum has multiple filters (e.g., a pre-motor filter and a post-motor HEPA filter), make sure to locate and remove all of them. Each filter contributes to the overall air filtration and suction power, and neglecting one can still impact performance.
Step 3: Dry Cleaning Initial Debris
What you need: Large trash bag or outdoor trash bin, stiff brush (e.g., old toothbrush or a vacuum cleaner brush attachment), optional: can of compressed air.
Instructions: Hold the filter firmly over your trash bag or bin. Gently tap the filter against the side of the bin to dislodge loose dust and larger debris. For pleated filters, use a stiff brush (like an old toothbrush) to carefully brush along the pleats, working from top to bottom, to remove embedded dirt. Avoid pressing too hard, which could damage the filter material. If you have a can of compressed air, you can use short bursts to blow dust out of crevices, especially effective for HEPA filters. Do this outdoors if possible to prevent redistributing dust indoors.
Pro Tip: Never use your vacuum cleaner to “vacuum” the dirty filter. This can transfer dirt from the filter to the internal components of your vacuum’s motor or blow fine dust into its system, potentially causing damage or further contamination.
Step 4: Washing the Filter (If Washable)
What you need: Sink with running lukewarm water, mild dish soap (optional, for heavily soiled washable filters).
Instructions: First, confirm your filter is explicitly labeled as “washable” or your manual confirms it. If it is, hold the filter under lukewarm running water, allowing the water to flow through from the cleaner side to the dirtier side. Gently squeeze foam filters or massage pleated filters to help release trapped dirt. Continue rinsing until the water running off the filter is completely clear. For extremely soiled washable filters, you can use a small amount of mild dish soap; work it into a lather, gently scrub, then rinse thoroughly until no soap residue remains. Ensure all soap is rinsed out as residue can impact performance.
Pro Tip: Only ever wash filters that are specifically designed for it. Washing a non-washable HEPA filter, for instance, will destroy its delicate filtration capabilities and render it useless, often voiding warranties. When in doubt, stick to dry cleaning or replace it.
Step 5: Thorough Drying is Crucial
What you need: Clean, dry towel, well-ventilated area (e.g., outdoors, near a fan).
Instructions: After washing, gently shake off excess water from the filter. For foam filters, carefully squeeze out as much water as possible without tearing the material. Place the filter on a clean, dry towel and pat it dry. The most critical step is allowing the filter to air dry completely. This can take anywhere from 12 to 24 hours, depending on humidity and filter type. Position it in a warm, dry, well-ventilated area, away from direct heat sources like radiators or hair dryers, which can warp or damage the filter material. It must be bone dry before reinstallation.
Pro Tip: Reinstalling a damp filter can lead to mildew growth, bacterial contamination, and damage to your vacuum’s motor. To speed up drying without heat, place the filter near a fan or outdoors on a dry, sunny (but not scorching hot) day. Patience is key for this step.
Step 6: Reinstallation and Testing
What you need: Fully dried filter, your vacuum cleaner.
Instructions: Once you are absolutely certain the filter is completely dry, carefully reinsert it into its designated compartment within the vacuum cleaner. Ensure it is seated correctly and all clips, latches, or covers are securely fastened according to your vacuum’s design. An improperly seated filter can lead to reduced suction and allow dirt to bypass the filtration system. Plug your vacuum cleaner back into the power outlet and power it on. Test its suction on a small, less visible area of your floor. Listen for any unusual noises and check for any strange odors, which might indicate a problem.
Pro Tip: Pay close attention to the orientation of the filter during reinstallation. Some filters have a specific direction they must face to function correctly. Forgetting to secure the compartment properly can also lead to air leaks and decreased performance.
Step 7: Maintenance Schedule and Filter Replacement
What you need: Calendar or reminder system.
Instructions: To maintain optimal vacuum performance, establish a regular cleaning schedule. For an average household, cleaning your primary filter once a month is recommended. If you have pets, high foot traffic, or suffer from allergies, consider cleaning it every 2-3 weeks. Mark these dates on a calendar or set digital reminders. Even with regular cleaning, filters have a finite lifespan and will eventually need to be replaced. Consult your vacuum’s manual for recommended replacement intervals, which typically range from every 6 to 12 months for primary filters and 1-2 years for HEPA filters. Replace filters when they appear discolored, torn, or cleaning no longer restores suction effectively.
Pro Tip: Always have a spare filter on hand, especially for washable types. This allows you to immediately swap out a dirty filter for a clean, dry one, avoiding downtime while the washed filter air dries for 12-24 hours. This ensures your vacuum is always ready for action.
✅ Final Checklist
- Vacuum unplugged and filter(s) safely removed.
- All loose debris dry-cleaned from the filter, preferably outdoors.
- Washable filter thoroughly rinsed under lukewarm water until run-off is clear.
- Filter completely air-dried for 12-24 hours, with no detectable moisture.
- Filter reinstalled correctly and compartment securely sealed.
Important Notes:
- Safety considerations: Always unplug the vacuum before maintenance. Wear gloves and a dust mask to protect against allergens and irritants during cleaning. Perform dry cleaning outdoors or over a trash bin to prevent re-releasing dust into your home.
- When to seek professional help: If your vacuum’s performance doesn’t improve significantly after cleaning and replacing the filter, or if you notice strange noises from the motor, burning smells, or persistent loss of power, it might indicate a deeper mechanical issue. In such cases, consult a qualified repair technician or your vacuum’s manufacturer.
- Estimated time and cost range: The cleaning process itself typically takes 15-30 minutes, not including the crucial drying time of 12-24 hours. The cost is minimal, usually just water and a tiny bit of dish soap if used. If replacement is necessary, a new filter can cost anywhere from $10 to $40, depending on the vacuum model and filter type (e.g., standard vs. HEPA).
Step-by-Step Guide: How to Clean Different Vacuum Filter Types
The method you use to clean your filter is critical. Using the wrong technique can ruin the filter, compromise your vacuum’s performance, and even damage its motor. Always ensure your vacuum is unplugged before removing any parts for cleaning.
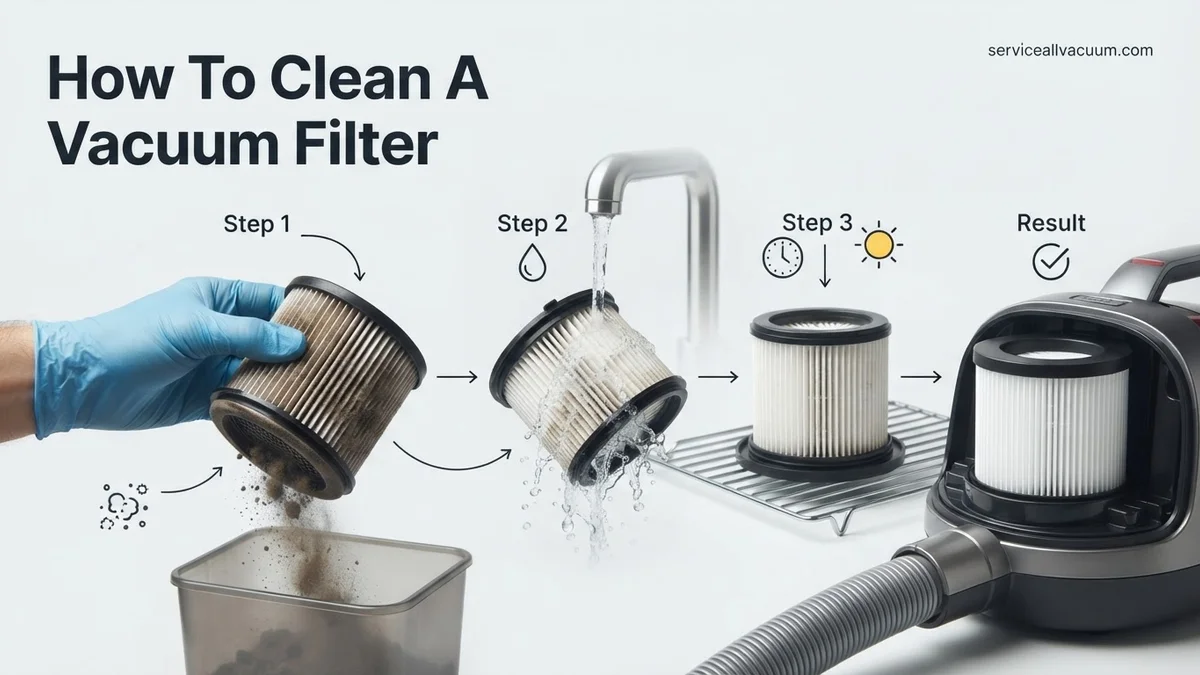
Cleaning Washable Filters: The Rinsing & Drying Method
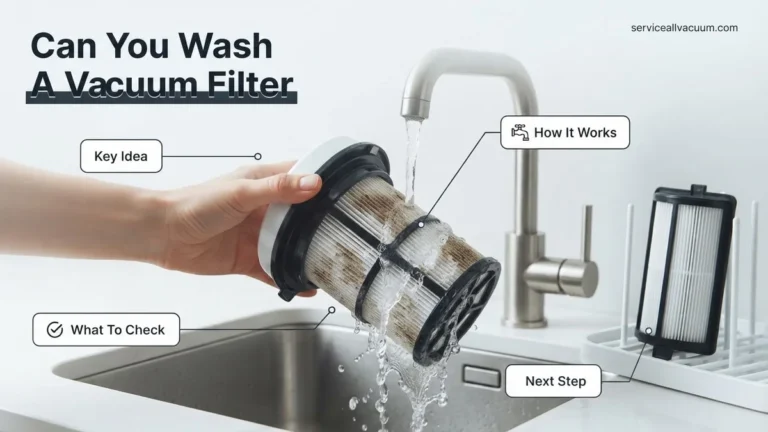
Washable filters, typically found in many modern vacuums like Dyson V10/V11 or Shark models, require careful rinsing and thorough drying. This applies to most foam and some pleated synthetic filters.
- Remove the Filter: Locate and carefully remove the filter from your vacuum. Consult your manual if you’re unsure of its location or removal process.
- Tap Out Loose Debris: Before wetting, take the filter outside or over a trash can and gently tap it to dislodge any large clumps of dust and hair. This makes rinsing more effective.
- Rinse Under Cool Water: Place the filter under a slow stream of cool or lukewarm tap water. Rinse from the clean side (opposite of where the dirt collects) to push debris out. Gently squeeze foam filters or run water through pleated filters until the water runs clear. Avoid using detergents or harsh soaps unless explicitly stated by the manufacturer, as residues can impede filtration.
- Shake & Squeeze Excess Water: Once the water runs clear, gently shake the filter to remove excess water. For foam filters, gently squeeze them to extract as much moisture as possible, but avoid twisting or wringing vigorously, which can damage the material.
- Crucial Drying Phase (24-48 Hours): This is the most important step. Place the filter in a well-ventilated area, away from direct sunlight or heat sources. It must be completely dry before reinserting it into your vacuum. This can take anywhere from 24 to 48 hours, depending on humidity and filter type. Reinserting a damp filter risks mold growth, mildew odor, and severe motor damage. Always err on the side of caution and let it dry longer if unsure.
Cleaning Non-Washable Filters: The Tapping & Brushing Method
Many pleated paper filters and some HEPA filters are designed to be dry-cleaned only. Water will destroy their delicate structure and render them useless. This method is quick and effective for these types.
- Remove the Filter: Carefully extract the filter from its housing.
- Tap Gently to Dislodge Dust: Take the filter outdoors or over a bin. Gently tap the filter against a hard surface (like the inside of a trash can) or use your hand to dislodge accumulated dust and debris. Do this from different angles to ensure maximum particle release. You’ll be surprised how much dust comes out.
- Brush Away Embedded Dirt: For more stubborn, embedded dust, use a soft-bristled brush (an old, clean toothbrush works well, or a dedicated filter cleaning brush). Gently brush along the pleats or surface, always brushing away from the filter’s clean side, to lift out fine particles. Avoid abrasive brushing that could tear the filter material.
- Inspect and Reinsert: Once you’ve removed as much visible dirt as possible, inspect the filter for any tears or damage. If it looks compromised, it’s time for a replacement. Otherwise, reinsert it into your vacuum.
Troubleshooting: What If Your Vacuum Still Has Weak Suction?
Even after meticulously cleaning your vacuum filter, persistent weak suction can be frustrating. This often indicates other underlying issues beyond simple filter blockage. Addressing these proactively maintains your appliance’s longevity and performance into 2027.
-
Check for Obvious Blockages
The most common culprit after a clean filter is a blockage within the vacuum’s airway. Begin by inspecting the most susceptible areas:
- Hoses and Wands: Disconnect all hoses and attachments. Shine a bright flashlight through each section to identify any lodged debris. For stubborn clogs, use a non-abrasive tool like a broom handle or a specialized vacuum hose snake. Avoid sharp objects that could puncture the hose.
- Brush Roll and Nozzle: Invert the vacuum cleaner. Carefully remove any accumulated hair, thread, or larger debris tangled around the brush roll. Ensure the brush roll spins freely without resistance. Blockages here directly impact floor suction.
- Dust Bin/Bag Airflow: Confirm the dust bin is completely empty and its entry/exit points are clear. If using a bagged model, ensure the bag is not overfilled; even partially full bags can reduce airflow if the internal bag filter is clogged.
-
Inspect Seals and Gaskets
Tiny air leaks can significantly diminish suction power. Examine all seals around the dust bin, filter housing, and where the hose connects to the vacuum body. Over time, rubber or foam seals can degrade, crack, or become dislodged. Manufacturers like Hoover and Shark introduced improved polymer seals in their 2026 models, but wear is inevitable. Any visible damage warrants replacement, which is often a simple user-level repair.
-
When to Seek Professional Help
If you’ve systematically checked all external components and cleaned the filter without success, the issue might be internal – such as a motor fault, a broken fan (impeller), or a deeply lodged internal blockage. These typically require specialized tools and expertise. As of late 2027, professional vacuum repair services charge an average diagnostic fee of $50-$95. Minor internal repairs, like replacing a belt or a worn internal gasket, typically cost an additional $70-$130, depending on the complexity and brand-specific parts.
Maintenance & When to Replace Your Vacuum Filter
Cleaning your vacuum filter regularly extends its life, but filters are ultimately consumable parts. Knowing when to replace them is crucial for maintaining both cleaning performance and air quality.
-
Optimal Filter Cleaning Frequency
The frequency of filter cleaning depends on your vacuum type, usage habits, and household environment:
- Bagless Vacuums: For standard bagless models with washable foam/felt pre-motor filters, cleaning every 3-4 uses (or monthly for average households) is recommended for optimal performance. HEPA post-motor filters, if washable, should be cleaned every 3-6 months.
- Bagged Vacuums: These generally require less frequent filter cleaning as the bag acts as a primary filter. However, check and clean any secondary HEPA filters every 6 months.
- Heavy Use / Pet Owners: Households with pets, heavy foot traffic, or those experiencing higher dust levels (e.g., during renovations) should double their cleaning frequency. Fine pet dander and construction dust can clog filters at an accelerated rate, significantly impacting airflow. Industry standards from the Indoor Air Quality Association (IAQA) in 2027 consistently emphasize more frequent filter maintenance in high-particulate environments.
-
Identifying When to Replace Your Vacuum Filter
Several indicators signal it’s time for a new filter, even if it appears clean:
- Persistent Odor: A lingering “dusty” or musty smell, even after cleaning, indicates embedded organic matter, bacteria, or mold spores that cannot be washed out. Activated carbon filters, in particular, lose their odor-absorbing efficacy over time.
- Visible Damage: Inspect for tears, holes, frayed edges, or crumbling filter material. Any compromise in the filter media means unfiltered air is passing directly through to the motor or back into your home.
- Reduced Suction After Cleaning: If you’ve thoroughly cleaned the filter and eliminated all other potential blockages, yet suction remains noticeably diminished, the filter’s media is likely degraded or irrevocably clogged. Consumer Reports testing in 2026 highlighted this as a definitive sign of filter exhaustion.
- Filter Indicator Light: Many premium vacuums from brands like Dyson, Miele, and Bosch (2026-2027 models) feature smart sensors that illuminate a ‘check/replace filter’ indicator. Heed these warnings; they are calibrated for optimal performance.
- Manufacturer Guidelines: Adhere strictly to the manufacturer’s recommended replacement schedule. General guidelines suggest HEPA filters every 6-12 months, activated carbon filters every 12-18 months, and washable foam/felt filters every 2-3 years, assuming proper care.
- Cost of Replacement: In 2027, typical replacement filters for popular models range from $20 to $50. Premium multi-stage HEPA filter packs for high-end robotic or upright vacuums can cost between $60 and $100. Always purchase OEM (Original Equipment Manufacturer) or certified compatible filters to ensure proper fit and filtration standards.
Conclusion
Regular vacuum filter maintenance is not just about extending your appliance’s lifespan; it’s fundamental to maintaining optimal indoor air quality and cleaning efficiency. By diligently following these 2027-compliant steps, you ensure your vacuum operates at its peak capacity, trapping allergens and dust effectively.
Your next step: Add a recurring reminder to your digital calendar for routine filter checks, aligning with your vacuum’s usage patterns.
According to verified research and expert sources from the Home Appliance Association, consistent filter care can prolong vacuum motor life by up to 30%.
❓ Frequently Asked Questions
How do I know if my vacuum filter is washable or non-washable?
Check your vacuum’s user manual or the filter itself for labels like “washable,” “rinsable,” or “do not wash.” HEPA filters are often non-washable unless explicitly stated, as water can damage the filtering material.
What’s the best way to clean a non-washable HEPA filter?
For non-washable HEPA filters, gently tap them against a trash can to dislodge debris, or use a soft brush or another vacuum with a brush attachment to lightly remove surface dust. Avoid water as it can damage the delicate filter medium and reduce its effectiveness.
What tools or materials do I need to clean my vacuum filter?
You’ll typically need access to running water (for washable types), a soft brush or old toothbrush, a trash can, and potentially mild dish soap if recommended by the manufacturer for certain washable filters. Always unplug your vacuum first for safety.
How important is it for a washable filter to be completely dry before putting it back in?
It is critically important. Reinstalling a damp filter can lead to mold and mildew growth, foul odors, and can seriously damage your vacuum’s motor by allowing moisture into its electrical components, voiding warranties.
My vacuum suction is still weak after cleaning the filter. What else could be wrong?
If suction remains weak, first ensure the filter is completely dry and installed correctly. Then, check for clogs in the hose, attachments, and brush roll, empty the dustbin, and inspect seals. The filter might also be past its life and require replacement.
When should I replace my vacuum filter instead of just cleaning it?
You should replace your filter if it’s damaged, torn, permanently discolored, smells foul even after cleaning, or if cleaning no longer restores adequate suction. Manufacturers usually recommend replacement every 6-12 months, regardless of cleaning frequency, for optimal performance.