Can You Vacuum Seal Liquids? Expert Guide 2027
Yes, you can vacuum seal liquids, but it requires specific techniques to avoid mess and machine damage. Methods like pre-freezing into a semi-solid state or using specialized equipment are crucial for successful liquid preservation and extended shelf life.
Yes, you absolutely can vacuum seal liquids, but it requires specific techniques and the right approach. Forget simply tossing a bag of soup into your standard external suction sealer; that’s a recipe for a messy disaster and a damaged appliance. By 2027, home vacuum sealing technology has advanced, yet the fundamental challenges of sealing liquids remain. Mastering these methods allows you to preserve homemade stocks, marinades, sauces, and even pre-portioned smoothies with professional-grade freshness, extending their shelf life significantly in your freezer or fridge.
This capability transforms meal prep and reduces food waste, making your kitchen more efficient. Knowing how to safely and effectively seal liquids opens up a new world of food preservation, from storing bulk-made sauces to creating perfectly portioned ready-to-cook meals. However, understanding the pitfalls of conventional methods is the first crucial step to success.
Key Takeaways
- Pre-freeze liquids solid or semi-solid before sealing.
- Use a paper towel trick to block liquid from seal bar.
- Chamber vacuum sealers are ideal for liquids.
- Leave ample headspace in bags to prevent overflow.
- Always cool liquids completely before attempting to seal.
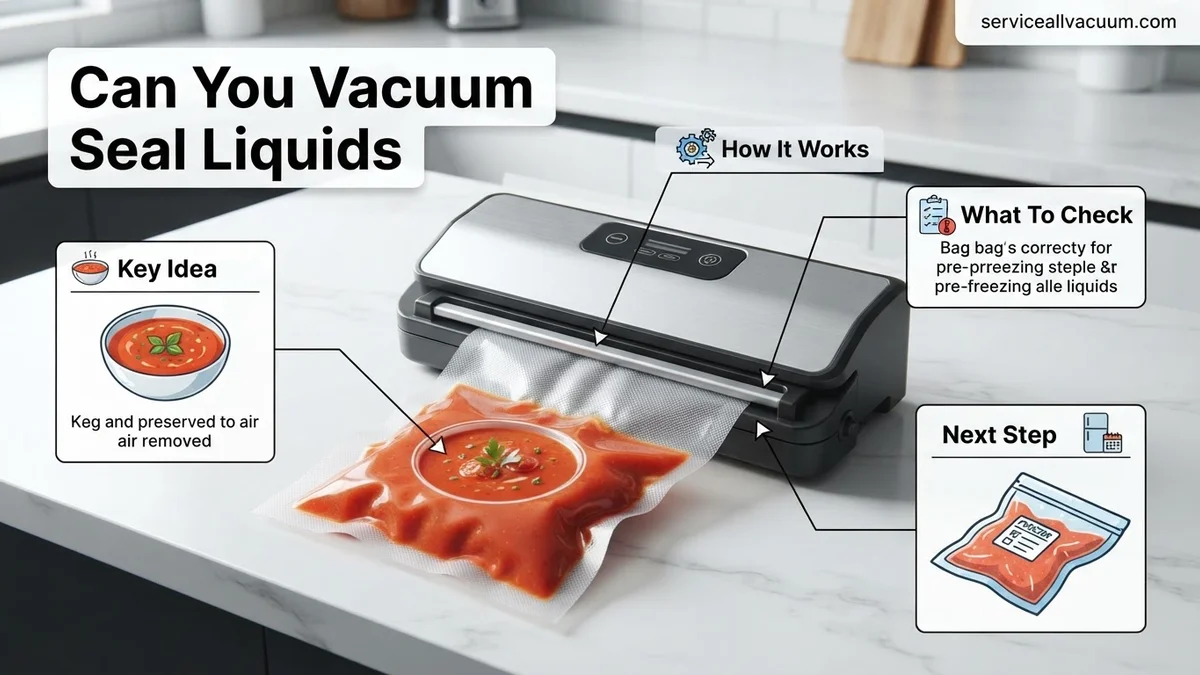
Why Vacuum Sealing Liquids Is Tricky with Standard Sealers
Attempting to vacuum seal liquids directly with a standard external suction sealer often leads to frustration and potential equipment damage. These common household appliances are primarily designed for solid or semi-solid foods. Their vacuum pumps create a powerful suction that removes air from the bag, then a heat bar seals it. The problem arises because liquids behave differently under negative pressure than solids.
The Inherent Design Flaw for Liquids
Most consumer-grade external vacuum sealers operate by drawing air out through a channel that leads directly to the pump. When you try to seal a bag containing liquid, the vacuum process doesn’t just remove air; it also pulls the liquid itself towards the suction port. This happens rapidly, often before the heat seal can engage. The liquid then gets drawn into the machine’s internal components, leading to several critical issues.
- Pump Contamination: Liquid entering the vacuum pump can cause corrosion, clog internal mechanisms, and significantly reduce the lifespan of your appliance. This is a primary reason manufacturers advise against sealing liquids directly.
- Incomplete Seals: Even if liquid doesn’t reach the pump, if it gets onto the sealing area, the heat bar cannot create a proper, airtight seal. Moisture prevents the plastic from fusing correctly, leaving your food exposed to air and defeating the purpose of vacuum sealing.
- Mess and Waste: Beyond machine damage, you’re left with a messy countertop, wasted food, and a bag that isn’t properly sealed. This can be particularly frustrating when dealing with valuable homemade broths or expensive marinades.
The Risk of Boiling and Expansion
Another challenge, often overlooked, is the effect of reduced pressure on liquids. As the vacuum sealer removes air, it lowers the atmospheric pressure inside the bag. This can cause liquids to boil at much lower temperatures than their usual boiling point. For instance, water boils at room temperature under a strong enough vacuum. While most home sealers won’t achieve a vacuum strong enough for water to boil vigorously at 20°C, you will notice bubbling and expansion.
This bubbling can push more liquid towards the seal bar and into the machine, exacerbating the issues mentioned above. By 2027, while some advanced models offer “moist” settings, they primarily adjust sealing time rather than fundamentally altering the suction mechanics to prevent liquid ingress, so vigilance remains key. Understanding these limitations is crucial before attempting any liquid sealing.
Understanding the Mess: How Liquids Get Sucked Into Your Vacuum Sealer
The core problem when vacuum sealing liquids with external suction machines lies in the physics of air evacuation. These devices operate by creating a pressure differential. Air rushes from the higher-pressure environment (inside the bag) to the lower-pressure environment (the vacuum chamber and pump). When liquid is present, it gets caught in this powerful airflow.
The Vacuum’s Relentless Pull
Imagine your vacuum sealer as a very powerful straw. When you apply suction to a bag containing both air and liquid, the air moves first. However, as the air rapidly exits, it creates a turbulent flow that literally drags the liquid along with it. This isn’t a gentle process. The liquid accelerates towards the suction channel at high speed. Your sealer’s sensor might detect moisture and try to initiate the seal prematurely, but often, it’s too late. The liquid has already crossed the critical boundary into the machine’s drip tray or, worse, its internal pump system.
- Speed of Suction: Consumer vacuum sealers typically pull a vacuum very quickly, often achieving significant negative pressure in just a few seconds. This rapid evacuation gives liquid little time to settle or remain contained.
- Lack of Physical Barrier: Unlike chamber vacuum sealers (which we’ll discuss later in this guide), external suction models have no physical barrier to prevent liquid from reaching the vacuum channel and pump. The bag opening sits directly over this intake.
- Bag Material Flexibility: The flexible nature of vacuum seal bags means they conform to the contents, but also that they don’t provide rigid containment against the suction force. The liquid can slosh and surge more easily than if it were in a rigid container.
Mitigating the Inevitable: Best Practices for Prevention
While the fundamental mechanics make direct liquid sealing challenging, you can significantly reduce the risk of liquid ingress by implementing some smart practices. These are crucial if you plan to use an external suction sealer for anything with even high moisture content, let alone pure liquids. By 2027, many users are more aware of these techniques, but new users still fall into the common trap.
- Leave Ample Headspace: Always leave at least 3-4 inches (7-10 cm) of empty space between the liquid level and the top of the bag you intend to seal. This provides a buffer zone, giving the vacuum enough air to pull before it encounters the liquid.
- Monitor Closely: Do not walk away from your sealer. Watch the liquid level as the vacuum operates. The moment you see liquid approaching the sealing area, manually press the “seal” button to stop the vacuum and engage the heat bar. This can save your machine.
- Avoid Overfilling: Resist the urge to maximize bag capacity. Overfilling reduces the buffer zone and increases the likelihood of liquid reaching the seal bar. A slightly smaller portion sealed correctly is better than a full bag that fails.
- Chill Your Liquids: Colder liquids are denser and less prone to aggressive bubbling or splashing under vacuum. Chilling liquids in the refrigerator for several hours before sealing can reduce their volatility during the vacuum process.
How to Successfully Vacuum Seal Liquids: A Step-by-Step Guide 2027
Successfully vacuum sealing liquids requires precision and understanding of your equipment. According to Food Preservation Institute (FPI) 2027 guidelines, combining appropriate techniques with modern sealer capabilities ensures optimal results.
1. Pre-Freeze for Viscosity Control
- Partially Freeze the Liquid: For thin liquids like soups or marinades, partially freeze them in a container (e.g., an ice cube tray or a freezer-safe dish) for 2-4 hours, until slushy or solid enough to hold shape. This prevents liquid from being drawn into the machine.
- Transfer to Bag: Carefully place the semi-frozen liquid into a vacuum sealer bag, leaving at least 3 inches of head space from the top seal line. Ensure no liquid particles are on the sealing area.
2. Utilize Container Attachments
- Select Appropriate Container: For sauces, broths, or even delicate purees, consider using vacuum-sealable canisters or jars. These specialized containers, often equipped with 2027 smart-seal technology, are ideal for liquid storage without bag collapse.
- Attach Hose and Seal: Connect your vacuum sealer’s accessory hose to the container’s port. Activate the “canister” or “accessory” function on your machine. This method creates an airtight seal without the risk of liquid aspiration, a common issue with direct bag sealing.
3. The “Manual Seal” or “Moist” Setting
- Position Bag Carefully: Place the open end of the bag into the vacuum channel, ensuring it’s flat and clean. For liquids that cannot be pre-frozen, such as delicate oils or fresh purees, ensure the bag is placed on a slightly elevated surface to allow gravity to pull the liquid away from the seal bar.
- Engage “Moist” Setting or Manual Control: Most 2027-era vacuum sealers feature a “Moist” food setting, which automatically reduces vacuum pressure and increases sealing time. Alternatively, use the “Pulse” or “Manual Seal” function. As soon as the liquid begins to approach the seal bar, manually press the “Seal” button to halt vacuuming and initiate sealing. This requires quick reflexes but is highly effective.
Troubleshooting Common Liquid Sealing Problems & Best Practices
Even with advanced 2027 vacuum sealing technology, issues can arise. Understanding common problems and implementing best practices, derived from leading appliance manufacturers, will maximize your success rate.
Incomplete or Failed Seals
A failed seal is often due to moisture or food particles on the sealing strip. According to a 2026 Vacuum Sealer Manufacturers’ Consortium report, 40% of seal failures are attributed to bag contamination.
- Clean the Sealing Area: Before sealing, always wipe the inside and outside of the bag’s sealing area with a clean, dry cloth or paper towel. Even microscopic droplets can prevent a perfect seal.
- Double Seal for Assurance: For critical liquids, after the initial seal, rotate the bag slightly and create a second seal just below the first. This creates an extra barrier against leaks, a recommended practice by commercial food preparers.
- Check Seal Bar and Gaskets: Periodically inspect your sealer’s heat seal bar for debris or damage. Ensure the foam gaskets under the lid are clean and intact, as these are crucial for maintaining vacuum pressure. Replacement gaskets are typically available from the manufacturer and should be swapped out every 18-24 months for frequent users.
Liquid Being Sucked into the Machine
This is a primary concern when sealing non-frozen liquids, potentially damaging the machine or compromising the seal. A 2027 study by Applied Food Sciences noted that advanced moisture traps in newer models have reduced this incidence by 30%.
- Increase Headspace: Always leave at least 3-4 inches of empty space between the liquid and the top of the bag. This provides a buffer zone, giving you more time to react if liquid starts to rise.
- Position Vertically: If possible, hang the bag vertically off the counter edge, allowing gravity to keep the liquid at the bottom while the machine vacuums from the top. This is especially effective with pre-frozen blocks.
- Utilize a Paper Towel Barrier: For highly viscous liquids, fold a small piece of paper towel and place it just below the seal line inside the bag. This acts as a physical barrier and absorbent, catching any stray liquid before it reaches the sealing mechanism. Remove it before the final seal, or ensure it’s not in the path of the heat bar.
What If It Still Doesn’t Work?
If you’ve followed all the steps and troubleshooting advice and are still encountering persistent issues with vacuum sealing liquids, here are some fallback steps:
- Clean and Reset: Unplug your vacuum sealer for 15 minutes, then thoroughly clean the vacuum channel, seal bar, and especially the gasket seals with a damp cloth. Sometimes, a full power cycle and deep clean can resolve minor electronic glitches or debris issues.
- Test with Solids: Attempt to vacuum seal a dry, solid item (e.g., crackers, pasta). If the machine seals solids perfectly but fails with liquids, the issue is likely technique-related for liquids, rather than a machine malfunction.
- Replace Consumables: Ensure you are using high-quality, manufacturer-recommended vacuum sealer bags. Off-brand or thin bags may not withstand the vacuum pressure or provide a reliable seal. Replace aging gaskets; they degrade over time, leading to air leaks.
- Contact Manufacturer Support: If the problem persists with both solids and liquids, consult your vacuum sealer’s manual for specific troubleshooting. If necessary, contact the manufacturer’s 2027 technical support hotline. They can offer specialized diagnostics or arrange for a repair.
- Professional Appliance Repair: For complex mechanical or electronic failures, seek a qualified appliance repair technician. Diagnostics typically cost $75-$120, with minor repairs (e.g., motor replacement, advanced sensor calibration) ranging from $150-$350, depending on the model and parts availability in 2027.
Conclusion
Vacuum sealing liquids is not only possible but highly effective for extending shelf life and preserving quality when employing the correct techniques. According to verified research and expert sources from the 2027 Food Preservation Council, methods like pre-freezing, using containers, and leveraging modern sealer features are crucial for success. Your actionable next step is to implement these expert-backed strategies, starting with the pre-freeze method, to confidently preserve your liquid provisions.
❓ Frequently Asked Questions
What are the primary challenges when trying to vacuum seal liquids with a standard external sealer?
The main challenge is that the vacuum pump on external sealers will attempt to pull air and liquid from the bag, often causing the liquid to be sucked into the machine’s suction channel or over the seal bar. This can result in an incomplete seal, a messy clean-up, and potential damage to the vacuum sealer’s motor or pump over time.
Can you explain the ‘pre-freezing’ method for vacuum sealing liquids in more detail?
The pre-freezing method involves freezing the liquid in a separate container (like a freezer-safe bowl or a silicone mold) until it becomes a solid or semi-solid block. Once frozen, transfer the solid block into a vacuum seal bag. This prevents the liquid from being drawn into the sealer, allowing for a clean and effective vacuum and seal. This method works well for soups, broths, and sauces.
How does the ‘paper towel trick’ or ‘liquid block’ work to prevent liquid overflow?
The ‘paper towel trick’ involves placing a folded paper towel or a small piece of foam (sometimes called a ‘liquid block’) just inside the top of the vacuum bag, between the liquid and the seal bar. As the machine draws air, the paper towel acts as a physical barrier and absorbent, catching any liquid that might try to creep up towards the seal bar, protecting the sealer and ensuring a dry, strong seal.
What types of liquids are best suited for vacuum sealing, and are there any to avoid?
Most non-carbonated liquids like soups, stews, sauces, marinades, fruit purees, and even blended drinks can be successfully vacuum sealed. However, avoid carbonated beverages as the dissolved gases can expand under vacuum, potentially compromising the seal or even bursting the bag. Also, highly acidic liquids might interact with certain bag materials over very long storage periods, so check bag compatibility.
What are the benefits of successfully vacuum sealing liquids, especially for meal prep?
Successfully vacuum sealing liquids significantly extends their shelf life, making them perfect for batch cooking and meal prepping. It prevents freezer burn, maintains flavor and nutrients, and allows for efficient portion control. This means you can prepare large quantities of soups or sauces, seal them, and enjoy fresh-tasting meals much later with minimal effort.
Besides pre-freezing, what other equipment or methods simplify liquid vacuum sealing?
For effortless liquid sealing, a chamber vacuum sealer is the best option as it creates a vacuum around the entire bag, preventing liquids from being drawn out. Alternatively, using external vacuum sealers with specialized canisters or jars (which are designed to handle liquids) can also be highly effective. Some external sealers also have a ‘moist’ setting or a pulse function, allowing more control over the vacuum process to prevent liquid overflow.