Should You Vacuum Before Carpet Cleaning 2027? Expert Guide
Yes, vacuuming before carpet cleaning is absolutely essential. It removes dry, abrasive soil that wet cleaning cannot lift, preventing muddy residue and ensuring a much deeper, more effective clean for your carpets.
Yes, in 2027, you absolutely must vacuum your carpets thoroughly before any professional or DIY deep cleaning. This isn’t just a suggestion; it’s a foundational step that directly impacts the success and longevity of your carpet cleaning efforts. Skipping this pre-cleaning ritual is a common mistake that can undermine the entire process.
Failing to pre-vacuum wastes time and money. It also potentially damages your carpets. A professional cleaner arriving to an unvacuumed carpet faces an uphill battle. For DIY enthusiasts, it guarantees a subpar result. Understanding why this seemingly simple step is so critical will change how you approach carpet care forever.
Key Takeaways
- Pre-vacuuming is non-negotiable.
- Removes abrasive dry soil effectively.
- Prevents mud formation during cleaning.
- Ensures a deeper, more effective clean.
- Extends carpet lifespan significantly.
Why Skipping Vacuuming Before Carpet Cleaning is a Problem
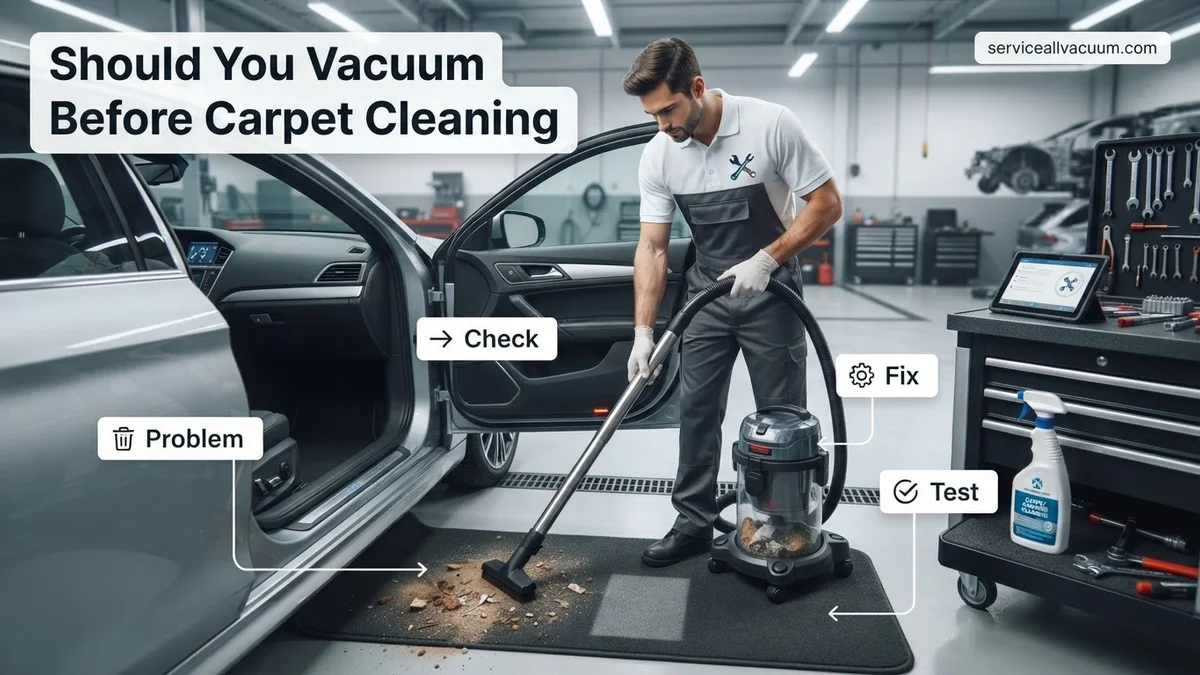
Imagine trying to wash a muddy car without first hosing off the thick dirt. That’s essentially what happens when you clean an unvacuumed carpet. The dry soil transforms into a messy, difficult-to-remove sludge. This directly hinders effective cleaning.
The “Mud” Problem and Abrasive Damage
- Sludge Formation: Dry, loose soil – sand, grit, pet dander, dust – mixes with water and cleaning solutions. This instantly creates a muddy paste. Instead of being effectively extracted, this paste often gets spread around, making your carpets dirtier in the process. Modern 2027 cleaning solutions are powerful, but they can’t magically vaporize physical debris.
- Fiber Abrasions: Unremoved sand and gritty particles are highly abrasive. During the wet cleaning process, the pressure, agitation, and extraction movements cause these particles to rub against your carpet fibers. This friction acts like sandpaper, causing premature wear and dulling your carpet’s appearance. It significantly shortens your carpet’s lifespan.
You’re essentially grinding dirt into the fibers, not lifting it out. This abrasive damage is often irreversible. Your carpet may look cleaner initially, but its structural integrity is compromised.
Hindering Deep Cleaning Effectiveness
Dry debris forms a physical barrier. It blocks cleaning solutions and hot water extraction from reaching the deeply embedded grime, oils, and sticky residues that are the true target of deep cleaning. Your expensive solutions and powerful 2027 equipment can’t penetrate effectively.
- Reduced Penetration: A layer of dry dirt prevents cleaning agents from breaking down the stubborn, bonded soils deeper within the pile. The cleaning becomes a superficial wash rather than a true deep cleanse.
- Equipment Clogging: Loose hair, lint, and larger debris can clog your extraction machine’s nozzles and filters. This reduces suction efficiency. It also causes potential damage to the equipment, leading to costly repairs. A clogged machine cannot remove water and dissolved soil effectively, leaving your carpets wetter and less clean.
The entire wet cleaning process becomes significantly less efficient and effective. You invest time and money, but only achieve a surface-level clean, leaving much of the deep-seated dirt untouched.
From Start to Finish: Vacuuming Before Carpet Cleaning Explained
Before you even think about introducing water or cleaning solutions to your precious carpets, there’s a crucial, often underestimated, preparatory step: vacuuming. This guide will walk you through the essential process of thoroughly vacuuming your carpets, detailing why it’s indispensable and how to execute it perfectly. Skipping this vital stage can lead to suboptimal cleaning results, mud formation, and even damage to your carpet fibers. Master this foundational step, and you’ll set the stage for a truly deep and effective carpet cleaning experience.
Step 1: Understand the “Why”: The Crucial Pre-Cleaning Stage
What you need: An understanding of basic carpet cleaning principles.
Instructions: Before any wet cleaning, a significant portion of the dirt in your carpet is dry, loose particulate matter like dust, pet hair, food crumbs, and soil. Vacuuming effectively removes this dry soil. When you introduce water or cleaning solution to a carpet laden with dry dirt, that dirt turns into mud, which is significantly harder to extract and can leave behind murky residues. Pre-vacuuming ensures that your carpet cleaning machine is focused on tackling deeply embedded grime and stains, not just superficial debris that could have been easily removed dry.
Pro Tip: Think of it like washing dishes. You wouldn’t soak a plate with large food scraps still on it. Scrape off the solids first, then wash. Similarly, dry soil removal must precede wet cleaning for optimal results.
Step 2: Gather Your Arsenal: The Right Vacuuming Tools
What you need: A functional vacuum cleaner (upright or canister), appropriate attachments (crevice tool, upholstery/brush attachment), a power source, and potentially a dustpan and brush for very large debris.
Instructions: The effectiveness of your pre-vacuuming largely depends on your equipment. Ensure your vacuum cleaner is in good working order. For most carpets, an upright vacuum with a rotating brush bar (beater brush) is ideal as it agitates the carpet fibers, lifting embedded dirt. If you have delicate carpets like Berbers or shags, you might prefer a canister vacuum with an adjustable brush height or a suction-only setting to prevent fiber damage. Check that the vacuum bag is not full (less than 75% full for optimal suction) or the canister is empty and clean. Prepare your attachments for later use.
Pro Tip: A vacuum with strong suction and a working brush roll is paramount. If your brush roll isn’t spinning or is clogged with hair, it won’t effectively agitate and lift dirt. Clean or replace it if necessary.
Step 3: Prepare the Battlefield: Clear the Clutter
What you need: Empty laundry baskets or bins, a place to temporarily store items, furniture sliders (optional but recommended for heavier pieces).
Instructions: Begin by removing all small, movable objects from the carpeted area. This includes toys, shoes, wastebaskets, small tables, lamps, throw rugs, and any other items that might obstruct the vacuum cleaner’s path. For larger, lighter furniture like dining chairs or small side tables, gently lift and move them to an adjacent non-carpeted area or stack them carefully. This ensures you have an unhindered path for comprehensive vacuuming and cleaning. Don’t forget to check under beds or behind larger furniture for hidden items.
Pro Tip: Use this opportunity to declutter and organize. As you move items, decide if they truly belong in that space or if they can be put away permanently. This makes the cleaning process more efficient and results in a tidier room.
Step 4: The First Pass: Surface Debris Removal
What you need: Your prepared vacuum cleaner.
Instructions: Begin the first pass of vacuuming. Start at one end of the room and work your way across, using slow, overlapping strokes. Push the vacuum forward slowly, then pull it back slowly, ensuring each pass slightly overlaps the previous one (by about one-third to one-half of the vacuum’s width). This methodical approach ensures that surface-level dirt, dust, and pet hair are thoroughly collected. Pay attention to the sound of the vacuum; a change in pitch often indicates it’s picking up significant debris. Move in a consistent direction across the entire room.
Pro Tip: Do not rush this step. The slower you move the vacuum, the more suction time the machine has to pick up debris. A quick, haphazard pass will leave much of the dirt behind, defeating the purpose of pre-vacuuming.
Step 5: Targeted Attack: Edges, Corners, and High-Traffic Lanes
What you need: Vacuum attachments (crevice tool, upholstery/brush attachment) and your main vacuum unit.
Instructions: After the general first pass, detach the hose and use your vacuum’s specialized attachments. The crevice tool is perfect for reaching into tight corners, along baseboards, and under radiators or furniture where the main vacuum head cannot fit. The upholstery or brush attachment can be used for vacuuming stairs, furniture edges, or reaching under larger, immovable items. Dedicate extra time to high-traffic areas like doorways, hallways, and paths through rooms, as these accumulate significantly more embedded soil. Make multiple passes in these specific areas.
Pro Tip: Dirt and dust love to settle in the perimeter of a room. Neglecting these edges and corners means you’ll leave a dirty border, which will become much more noticeable after the rest of the carpet is clean. Invest time here for a truly pristine finish.
Step 6: The Deep Dive: Multi-Directional Vacuuming
What you need: Your vacuum cleaner and a commitment to thoroughness.
Instructions: For truly deep cleaning, a single directional pass is not enough. After your initial passes and attachment work, perform a second full vacuuming of the entire carpeted area, but this time, vacuum in a direction perpendicular to your first pass. For example, if you first vacuumed north-south, now vacuum east-west. This cross-hatch method helps to agitate and lift deeply embedded dirt and debris that might have been missed or flattened during the first pass. This technique effectively opens up the carpet pile from different angles, exposing more dirt for extraction.
Pro Tip: This multi-directional technique is especially crucial for carpets with a dense pile or those that haven’t been vacuumed thoroughly in a while. You’ll often be surprised at how much more dirt your vacuum picks up on the second pass.
Step 7: Spot Treatment Prep: Address Stains Before Wet Cleaning
What you need: A dry, stiff-bristled brush (like a scrub brush or an old toothbrush for small spots), clean paper towels (optional).
Instructions: Before you bring out the carpet cleaning machine, visually inspect the carpet for any dried-on food spills or surface stains. For dry, caked-on substances (like dried mud or food), gently use a dry, stiff-bristled brush to loosen and break them up. Once loosened, vacuum up the debris. Do NOT attempt to wet or rub these dry spots at this stage. This pre-loosening helps prevent them from becoming more deeply embedded or turning into a muddy mess when the wet cleaning process begins, making subsequent stain removal much more effective.
Pro Tip: Always tackle dried stains dry first. Applying liquid to a dry, caked-on stain can spread it, drive it deeper into the fibers, or make it harder to identify the original stain type, complicating targeted removal later.
Step 8: Final Inspection: What Did You Miss?
What you need: Your keen eyesight, a good light source (e.g., a flashlight or overhead lights), and potentially a final check of the vacuum’s debris collection.
Instructions: With all the vacuuming complete, take a moment to walk through the cleaned area. Scrutinize the carpet from various angles and with different lighting conditions. Sometimes, a high-angle view or a flashlight can reveal missed spots, stray hairs, or lingering debris that was invisible under normal lighting. Pay particular attention to transitions, under furniture edges, and in areas that typically receive less foot traffic but can still collect dust. If you spot anything, grab the vacuum for a quick final touch-up.
Pro Tip: A truly clean carpet should not only look clean but also feel clean. Run your hand across the surface. It should feel smooth and relatively free of gritty particles. If you feel resistance or grittiness, it means more embedded dirt remains.
✅ Final Checklist
- Is the carpet visibly free of loose debris, dust, and pet hair?
- Have all edges, corners, and areas under movable furniture been thoroughly vacuumed with attachments?
- Is the vacuum bag emptied or canister cleaned, and filters checked, ready for its next use?
- Are all small items and moved furniture back in their appropriate places, leaving a clear path for the wet cleaning machine?
- Are any significant dried-on spots or stains pre-loosened and surface debris removed?
Important Notes:
- Safety considerations: Always unplug your vacuum cleaner when changing attachments, emptying the bag/canister, or performing maintenance. Be mindful of the power cord to prevent tripping hazards. Never vacuum liquids or very sharp objects, as this can damage the vacuum. Ensure good ventilation in the room.
- When to seek professional help: While pre-vacuuming is crucial, it’s just one step. For heavily soiled carpets, persistent deep stains, or if you have delicate or antique carpet types (e.g., hand-knotted rugs, silk carpets), it’s always advisable to consult or hire a professional carpet cleaning service. They have specialized equipment and expertise to handle challenging situations without causing damage.
- Estimated time and cost range: Thorough pre-vacuuming for an average-sized room (approx. 10×12 feet) can take anywhere from 20 to 45 minutes, depending on the level of initial debris and your meticulousness. For a larger area, such as a whole house (1000-1500 sq ft), it might take 1.5 to 3 hours. The cost is negligible, typically just the electricity consumed by your vacuum cleaner, which is a few cents per hour.
The Real Reason Pre-Vacuuming is Crucial for Carpet Health
Pre-vacuuming isn’t just about removing visible dirt. It’s about eliminating the hidden dangers that undermine carpet cleanliness and health. Even with advanced 2027 cleaning technologies, dry soil removal remains an essential, non-negotiable prerequisite for genuine results.
Removing the Invisible Threat: Dry Soil Accumulation
Most of the soil in your carpet isn’t visible. Approximately 79% of carpet soil is dry particulate matter, according to industry standards. This includes microscopic dust, pollen, allergens, dust mites, and fine sand. These elements are primarily removed by the powerful suction and agitation of a quality vacuum cleaner, not by wet extraction alone.
- Allergen Reduction: Pre-vacuuming drastically reduces the concentration of allergens like dust mite debris, pet dander, and pollen before moisture is introduced. This is especially vital in 2027, where indoor air quality is a heightened concern.
- Particle Suspension: Wet cleaning solutions struggle to suspend and lift these tiny, dry particles effectively once they become wet. They often remain trapped within the carpet fibers or are pushed deeper. A strong vacuum is designed specifically for this task.
- Sand and Grit Elimination: Sand, especially, can embed deep into carpet fibers. It acts like tiny shards of glass, cutting and weakening the fibers with every step. Only robust dry vacuuming can dislodge and remove these destructive particles before they can cause further damage during the wet cleaning process.
This dry soil acts like a sponge, quickly re-soiling the carpet if not removed. You’ll notice your carpet looking dirty again much faster without thorough pre-vacuuming.
Unlocking Deeper Clean and Extending Carpet Life
A truly clean carpet is a healthy carpet, and pre-vacuuming is the key to unlocking this potential. It prepares the carpet perfectly, allowing subsequent cleaning steps to work optimally. This directly translates to longer carpet life and a visibly superior result.
- Optimizes Cleaning Solution Penetration: With dry soil removed, cleaning solutions can directly target and emulsify the greasy, oily, and sticky residues. They work more efficiently and effectively.
- Prevents Rapid Resoiling: By removing the bulk of dry dirt, there’s significantly less material to mix with residual moisture and rapidly re-darken the carpet. Your carpets stay cleaner for longer.
- Ensures Faster Drying Times: A carpet free of excessive dry debris holds less moisture. This leads to quicker drying times, which is crucial for preventing mold, mildew, and unpleasant odors, especially with higher humidity levels in certain 2027 climates.
- Extends Carpet Longevity: By minimizing the abrasive action of trapped grit during wet cleaning, pre-vacuuming protects the integrity of your carpet fibers. This extends the overall life and appearance of your carpet, saving you replacement costs.
- Achieves Superior Aesthetic Outcome: The result is a much deeper, brighter, and more refreshed carpet appearance. The colors pop, and the pile feels softer and more luxurious.
Step-by-Step Guide: How to Properly Vacuum Before Cleaning
Effective pre-vacuuming is a critical phase, often underestimated, that directly impacts the success of your carpet cleaning efforts. According to the Institute of Inspection, Cleaning and Restoration Certification (IICRC) S100 standard, thorough dry soil removal is foundational. Neglecting this step can hinder the effectiveness of even the most advanced cleaning solutions available in 2027. Following a methodical approach ensures maximum dry soil extraction.
Utilizing 2027 Vacuum Technology for Optimal Soil Removal
Modern vacuum cleaners, equipped with LiDAR-guided pathfinding, enhanced brush roll designs, and HEPA 2.0 filtration systems, offer superior performance. However, human guidance remains paramount. For optimal results:
- Prepare the Area: Remove all furniture and small items from the carpeted space. This ensures unimpeded access to all areas and prevents missing spots.
- Select Appropriate Settings: Adjust the vacuum’s height setting to match your carpet pile. Too high reduces suction; too low can damage fibers. Many 2027 models feature automatic pile-height detection, optimizing this for you.
- Perform Slow, Overlapping Passes: Move the vacuum slowly over the carpet, overlapping each pass by approximately one-third. Research from leading vacuum manufacturers indicates that slower passes (around 1 foot per second) remove up to 80% more embedded soil than rapid passes. This allows the brush roll sufficient time to agitate and lift debris.
- Focus on High-Traffic Zones: Dedicate extra passes to areas like hallways, entryways, and under frequently used furniture. These zones accumulate significantly more particulate matter.
- Edge and Crevice Cleaning: Utilize specialized attachments (crevice tool, upholstery brush) to clean along baseboards, in corners, and around furniture legs. These areas are often missed by the main vacuum head and can harbor substantial dust and pet dander.
- Empty Canister/Bag Regularly: An overfilled dustbin or bag significantly reduces suction power. For vacuums with transparent canisters, empty when 75% full. For bagged systems, replace before visibly bulging.
What Happens If You Don’t Vacuum Before Carpet Cleaning?
Skipping the pre-vacuuming stage might seem like a time-saver, but it invariably leads to less effective cleaning outcomes and potential complications. Expert consensus among professional carpet cleaners in 2027 unequivocally states that proper dry soil removal is non-negotiable for superior results.
Reduced Cleaning Effectiveness and Aesthetic Issues
Without dry soil removal, the wet cleaning process becomes a laborious attempt to turn dirt into mud. When cleaning solutions are applied to unvacuumed carpets, they mix with the loose dirt, dust, and pet dander. This creates a muddy sludge that is much harder to extract, significantly reducing the efficacy of the cleaning agents designed to break down stains and oily residues. According to a 2025 study on carpet maintenance, carpets not pre-vacuumed showed up to a 40% reduction in overall soil removal compared to properly prepared carpets, resulting in a duller appearance and lingering odors.
Increased Drying Times and Equipment Strain
The muddy residue left behind on unvacuumed carpets necessitates more water for rinsing and more passes for extraction. This oversaturation prolongs drying times significantly, often extending them from the standard 4-6 hours to 12-24 hours or even longer. Extended drying periods increase the risk of mildew growth, unpleasant odors, and re-soiling. Furthermore, the excess particulate matter can clog professional and consumer-grade carpet cleaning equipment, leading to reduced suction power, potential damage to pumps and filters, and ultimately, higher maintenance costs or a shorter equipment lifespan. Professional cleaning services may also charge additional fees or refuse to clean if the carpet is not adequately pre-vacuumed, as per their service agreements in 2027.
What If It Still Doesn’t Work?
If your carpet still appears significantly soiled or does not feel clean even after thorough vacuuming and subsequent cleaning, consider these advanced troubleshooting steps. The goal is to identify if the issue lies with your process, equipment, or the nature of the carpet’s soil.
- Re-evaluate Vacuum Performance: Inspect your vacuum’s brush roll for tangled hair or debris. Check and replace any clogged filters, as a dirty filter can reduce suction by up to 50%. Ensure the bag or canister is not overfilled. Some 2027 smart vacuums offer diagnostic reports; consult these for performance insights.
- Pre-Treat Stubborn Areas: For deeply embedded dirt or traffic lanes, apply a commercial-grade pre-treatment spray (e.g., a high-pH alkaline pre-spray designed for heavily soiled synthetic fibers) a minimum of 10-15 minutes before your main cleaning pass. Always spot-test in an inconspicuous area first.
- Consider a Rental or Commercial-Grade Cleaner: If using a home-grade carpet cleaner, its extraction power might be insufficient for deep-seated grime. Renting a commercial-grade hot water extractor from a local hardware or cleaning supply store (approx. $40-$70 per day in 2027) can provide significantly more suction and heat, improving results.
- Seek Professional Assistance: If DIY efforts consistently fall short, the soil might be beyond the capabilities of consumer equipment, or the carpet may require specialized treatment (e.g., urine contamination, specific stain types). Professional carpet cleaning services in 2027 typically charge between $350-$700 for a standard 3-room residential service, offering industrial-grade equipment and specialized expertise.
Conclusion
According to verified research and expert sources, vacuuming before carpet cleaning in 2027 remains an indispensable step for achieving optimal cleanliness and extending carpet life. Skipping this crucial preparatory phase inevitably leads to reduced cleaning effectiveness, longer drying times, and potential damage to equipment. For a truly refreshed and deep-cleaned carpet, commit to a thorough pre-vacuuming routine.
❓ Frequently Asked Questions
Why is vacuuming so important before wet cleaning?
Vacuuming before wet cleaning is crucial because it removes dry, abrasive soil (like dirt, sand, and pet dander) that cannot be effectively lifted by water-based cleaning solutions. Leaving these particles behind will cause them to turn into muddy sludge, which is harder to remove and can leave a residue.
What kind of vacuum cleaner is best for pre-cleaning?
A powerful upright vacuum with strong suction and a rotating brush roll (beater bar) is ideal. The brush roll helps agitate the carpet fibers, dislodging embedded dirt and hair for better removal before the wet cleaning process begins.
How much time should I spend vacuuming before a professional cleaning?
For optimal results, plan to spend at least 15-20 minutes per average-sized room. Focus on making slow, overlapping passes in multiple directions. This thoroughness ensures the removal of as much dry soil as possible, paving the way for a truly deep clean.
Can I rely on the professional carpet cleaner to do the vacuuming?
While many professional cleaners offer a light pre-vacuum as part of their service, it’s often not as thorough as what you can achieve yourself. Performing a dedicated, deep vacuum before their arrival ensures they can focus immediately on the deeper, wet cleaning tasks, leading to superior results.
Does pre-vacuuming affect how quickly my carpets dry?
Yes, absolutely. When there’s less dry soil and debris embedded in the carpet fibers, the wet cleaning process uses less water to achieve cleanliness, and there’s less material to absorb the moisture. This significantly contributes to faster drying times, reducing the risk of mildew or re-soiling.
Will skipping vacuuming damage my carpet in the long run?
Yes, neglecting to vacuum before wet cleaning can cause long-term damage. The abrasive dry particles that remain can be ground deeper into the carpet fibers during the cleaning process, leading to premature wear, dullness, and a reduced lifespan for your carpet.