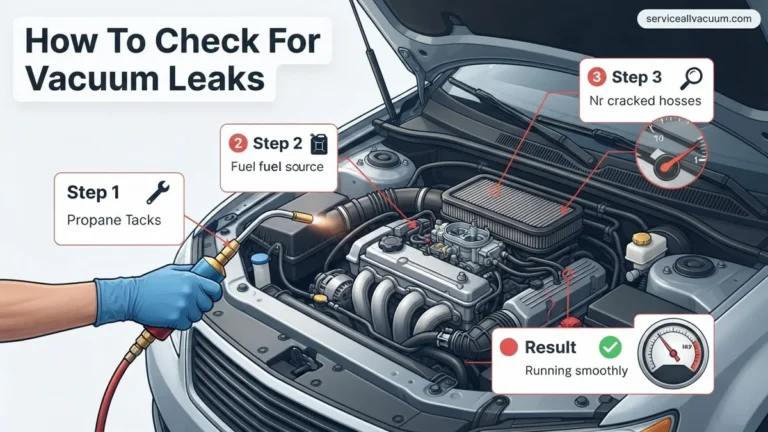
How to Find Vacuum Leak Step-by-Step Guide 2027
A vacuum leak occurs when unmetered air enters the engine’s intake tract, leading to a rough idle, engine stalling, and reduced fuel efficiency. You can accurately track down these leaks using accessible diagnostic methods like visual checks, spray tests, and smoke testing.
An engine vacuum leak occurs when unmetered air enters your intake tract past the throttle body, disrupting the precise air-fuel ratio your computer calculates. To find a vacuum leak quickly, you need to systematically inspect brittle rubber hoses, test suspect areas using a targeted spray technique, or deploy an automotive smoke machine to reveal escaping vapor under pressure.
Ignoring this issue in 2027 leads to rough idling, poor fuel economy, and persistent check engine lights flashing error codes like P0171 or P0174. Pinpointing the source yourself saves hundreds in diagnostic fees and prevents long-term catalytic converter damage caused by running too lean.
Key Takeaways
- Common symptoms include rough idle, high engine RPM, hissing noises, and the check engine light.
- Start with a thorough visual inspection of all rubber vacuum lines and plastic connectors.
- Use carburetor cleaner or water spray to safely detect RPM changes during engine idle.
- A smoke machine provides the most accurate method for revealing hidden, small intake leaks.
- Always replace brittle, cracked, or disconnected hoses to immediately restore proper engine vacuum pressure.
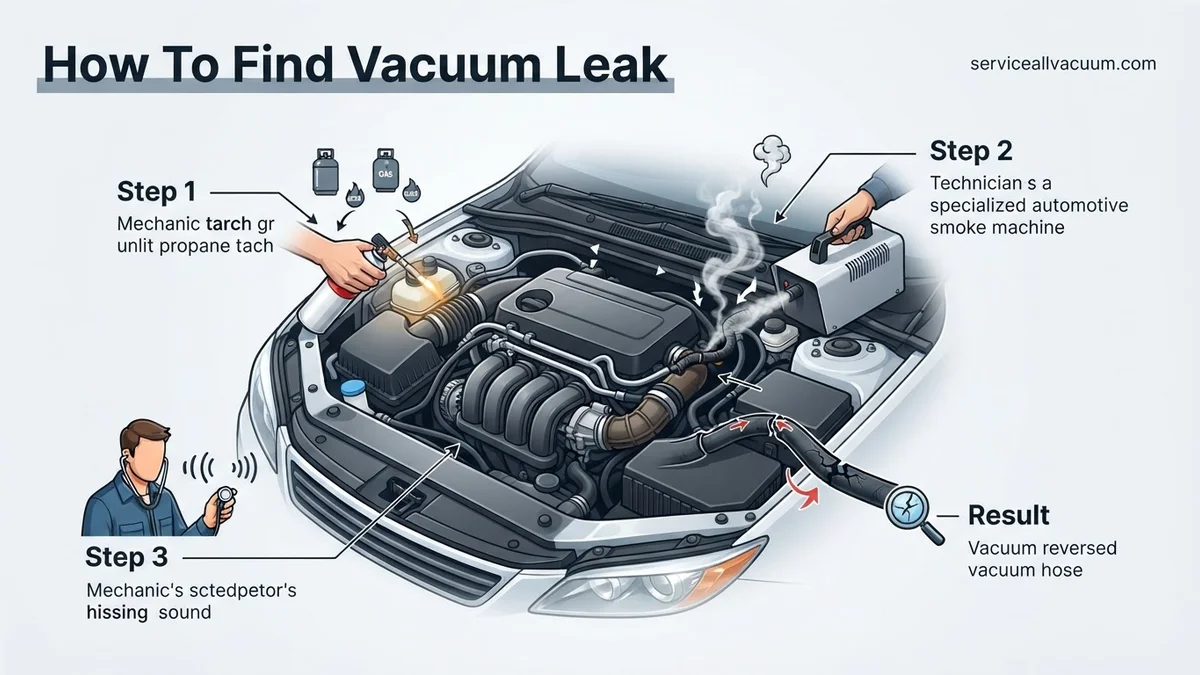
What Causes Engine Vacuum Leaks and Common Symptoms
Common Failure Points in Modern Intakes
Modern engine bays subject rubber and plastic components to extreme heat cycles. Over time, these materials degrade, crack, or disconnect entirely. You should focus your initial search on these high-wear areas:
- Rubber vacuum lines: Dry rot, splits, or loose connections on small-diameter hoses.
- Intake manifold gaskets: Hardened or compressed rubber seals leaking where the manifold meets the cylinder head.
- PCV system: Cracked positive crankcase ventilation hoses or a stuck valve.
- EGR components: Worn gaskets or degraded control lines on exhaust gas recirculation setups.
- Throttle body and brake booster lines: Large hoses prone to internal delamination or loose clamps.
Recognizing Engine Vacuum Leak Symptoms
Your vehicle will display distinct behavioral changes when it sucks in unmetered air. Recognizing these signs narrows down your troubleshooting before you even pop the hood in 2027:
- High or erratic idle: Engine RPMs surge up and down while stopped in traffic.
- Stalling: The engine dies when you come to a sudden stop or shift into drive.
- Hitching acceleration: Hesitation or flat spots when you press the gas pedal.
- Lean codes: Diagnostic trouble codes indicating too much oxygen in the exhaust stream.
Master Finding a Vacuum Leak in 7 Simple Steps
Dealing with a rough idle, reduced fuel economy, or that dreaded check engine light can be frustrating, but these issues are frequently caused by an unmetered air intrusion in your engine’s intake system. This comprehensive guide will walk you through the exact methodology professional mechanics use to isolate, identify, and address vacuum leaks safely and efficiently, saving you both time and diagnostic fees.
Step 1: Perform a Visual Inspection of Hoses and Lines
What you need: A flashlight, a clean rag, and a basic inspection mirror.
Instructions: Start by popping the hood on a completely cold engine to prevent burns. Systematically trace every rubber hose, vacuum line, and plastic tubing connected to the intake manifold, air filter housing, and emissions control components. Look closely for dry rot, deep cracks, splits, fraying, or completely disconnected lines. Pay special attention to the bends and connection points where rubber hoses slip over plastic or metal nipples, as these areas experience the highest stress and thermal degradation.
Pro Tip: Gently squeeze rubber lines; if they feel rock-hard, gummy, or collapse under light pressure, they need immediate replacement regardless of external appearance.
Step 2: Listen Closely for Hissing Noises
What you need: A quiet workspace, a section of rubber garden hose or a mechanic’s stethoscope.
Instructions: Turn off all accessories like the radio and air conditioning, start the engine, and let it idle. Carefully lean over the engine bay and listen for a distinct hissing or whistling sound. Because vacuum leaks draw air inward under engine suction, they often create a high-pitched noise. If the ambient engine noise is too loud to pinpoint the sound manually, place one end of your rubber hose near your ear and use the other end as a directional probe to scan along intake gaskets and vacuum lines.
Pro Tip: Be extremely cautious around moving engine belts, pulleys, and hot exhaust manifolds while listening and probing with a hose.
Step 3: Conduct the Idle Drop Test
What you need: A can of standard automotive brake cleaner or carburetor cleaner with a straw nozzle.
Instructions: With the engine idling smoothly (or as smoothly as it can manage), carefully spray small, targeted bursts of brake cleaner onto suspect areas, including vacuum junctions, hose fittings, and intake manifold gaskets. Watch and listen to the engine RPMs. If the spray hits a leak, the engine will suck the chemical inside, temporarily enriching the air-fuel mixture and causing the idle speed to noticeably smooth out, rise, or drop depending on the mixture density.
Pro Tip: Avoid spraying an excessive amount of cleaner, as it can coat the engine exterior and make subsequent tests messy, or spill onto hot exhaust components, posing a fire risk.
Step 4: Use the Propane Enrichment Method
What you need: An unlit propane torch with a flexible extension hose attached to the nozzle.
Instructions: This is a safer and cleaner alternative to liquid aerosol sprays, especially around hot engine parts. Turn on the propane valve slightly so gas flows slowly out of the extension tube without a flame. Slowly wave the tip of the tube around gasket seams, vacuum trees, and PCV valves. Just like the brake cleaner test, if the escaping propane is drawn into a vacuum leak, the engine RPM will immediately increase as it burns the rich gas.
Pro Tip: Never ignite the torch near the engine bay during this test; you only want the unburned propane gas to act as a temporary fuel tracer.
Step 5: Inspect the Intake Manifold Gaskets
What you need: A torque wrench or a long plastic screwdriver handle.
Instructions: Intake manifold gaskets often shrink, harden, or tear over years of heat cycles, creating massive vacuum leaks where the metal manifold meets the aluminum cylinder head. With the engine running, take the plastic handle of a screwdriver and gently tap or press against various points of the intake manifold to see if engine speed changes. You can also use a torque wrench to verify that all manifold mounting bolts meet the manufacturer’s specified torque rating, as loose fasteners are a primary culprit.
Pro Tip: Never use a metal hammer or heavy tool to tap on the intake, as modern composite and aluminum manifolds can easily crack or shatter.
Step 6: Test Brake Booster Diaphragm Integrity
What you need: Your vehicle’s braking system and a vacuum line plug.
Instructions: The brake booster relies heavily on engine vacuum to assist your foot pressure. To test if the internal booster diaphragm is leaking, disconnect the large vacuum hose running from the intake manifold to the brake booster, and plug the intake port securely with a rubber cap or your finger while the engine runs. If the engine idle suddenly normalizes, your brake booster is internally leaking and must be replaced. Alternatively, pump the brakes with the engine off, hold pressure on the pedal, start the car, and feel if the pedal drops slightly.
Pro Tip: A failing brake booster will often cause a hard brake pedal feel accompanied by a hissing noise directly underneath the dashboard near the brake pedal assembly.
Step 7: Perform a Professional Smoke Test (If Needed)
What you need: An automotive low-pressure smoke machine and specialized intake adapter cones.
Instructions: If external tests fail to reveal the issue, a smoke machine is the ultimate diagnostic tool. Disconnect the main air intake ducting, insert the smoke machine cone nozzle into the intake boot, and pump dense, oil-based smoke into the sealed intake system. Turn on the machine and watch closely. Within seconds, pressurized smoke will escape directly out of any crack, split hose, bad gasket, or loose fitting, making even the smallest hairline leak immediately visible in daylight or under a flashlight beam.
Pro Tip: If you do not own a smoke machine, many local auto parts stores rent them out, or a professional mechanic can perform this specific test in under fifteen minutes.
✅ Final Checklist
- All vacuum hoses visually inspected for cracks, soft spots, and secure connections.
- Idle drop or propane enrichment test performed around all suspect gasket areas.
- Intake manifold mounting bolts verified to proper torque specifications.
- Brake booster and PCV valve checked for internal air leaks.
- Engine idle stability confirmed after replacing any faulty lines or components.
Important Notes:
- Always work in a well-ventilated area away from open flames when using aerosol sprays or flammable gasses.
- Seek professional mechanic assistance if you suspect internal engine damage or encounter complex forced-induction turbo lines.
- Estimated time: 30 to 60 minutes. Estimated cost: $0 to $30 for replacement hoses, or up to $150 if professional smoke testing is required.
How to Inspect and Prepare Your Vehicle for Testing
Visual and Manual Inspection Techniques
Before breaking out specialized diagnostic gear, perform a thorough physical check of your engine bay. Many vacuum leaks are blatantly obvious once you know what to look for and where to feel.
- Listen closely: Start a cold engine and listen for a distinct hissing or whistling sound coming from the upper intake area.
- Wiggle test: Gently grab and flex rubber vacuum hoses while the engine runs. If the idle changes or stumbles, you just found your leak.
- Flashlight sweep: Look for disconnected nipples on intake trees, cracked plastic elbows, and oil residue pooling around gasket seams.
Safety and Preparation Guidelines
Working around a running engine requires caution to prevent injury or accidental damage. Proper setup ensures your diagnostic results are accurate and safe:
- Secure loose items: Keep long hair, clothing, and loose tools away from spinning belts and cooling fans.
- Work in a well-ventilated area: Exhaust fumes and automotive chemicals require proper airflow, especially if you use flammable testing sprays.
- Keep a fire extinguisher ready: Essential safety precaution when spraying aerosols near warm exhaust manifolds or electrical connections.
Step-by-Step Guide to Finding a Vacuum Leak Using Proven Methods
Mastering how to find a vacuum leak requires a methodical approach. Professional technicians recommend starting with the most accurate diagnostic strategy available for modern engines in 2027: the smoke test.
Method 1: The Automotive Smoke Test
- Prepare the engine: Ensure the engine is completely cool and turned off. Disconnect the air intake boot near the throttle body.
- Introduce smoke: Insert the nozzle of an automotive smoke machine into the intake opening. Seal the remaining gaps using a rubber bladder adapter.
- Inject smoke and pressure: Activate the machine to pump low-pressure smoke mixed with mineral oil into the sealed intake manifold and vacuum lines.
- Inspect for escapes: Watch closely in well-lit conditions or use a specialized UV light if your smoke contains UV dye. Wisps of smoke will instantly escape from cracked lines, worn gaskets, or loose fittings.
Method 2: The Controlled Propane or Unlit Torch Test
If you lack a smoke machine, mechanics often use a propane torch kit with the valve slightly cracked—without lighting it. Hover the nozzle near suspected vacuum hoses and gasket seams. According to Automotive Service Association (ASA) repair guidelines, if the engine RPM suddenly rises or smooths out, you have pinpointed the exact location where the propane is being sucked into the leak.
What If It Still Doesn’t Work and Advanced Troubleshooting
When standard diagnostic techniques fail to reveal a vacuum leak, the problem usually stems from internal engine components or electronic control modules. Follow these advanced fallback steps to resolve stubborn issues:
- Check internal engine components: A warped intake manifold or a failing head gasket can mimic external vacuum leaks without showing smoke externally.
- Test the brake booster: Disconnect and plug the vacuum line leading to the brake booster. If your rough idle disappears, the internal diaphragm of the booster has ruptured and requires replacement.
- Inspect PCV system valves: Modern Positive Crankcase Ventilation valves can stick open under engine vacuum, creating a massive hidden leak that standard visual checks miss.
- Seek professional assistance: If DIY methods fail, take your vehicle to a certified repair facility equipped with advanced bi-directional OBD2 scanners. These tools monitor fuel trim data and dynamic engine parameters in real time.
- Estimate professional costs: Professional diagnostic testing typically ranges from $100 to $200. Total repair costs for replacing a complex intake manifold gasket or a deeply hidden line generally run between $150 and $450, depending on vehicle make and model.
Conclusion
Uncovering a vacuum leak prevents long-term engine damage, poor fuel economy, and frustrating driving dynamics. By following a structured diagnostic procedure—ranging from visual inspections to professional smoke testing—you can accurately locate and repair faulty lines or gaskets. According to verified research and expert automotive service sources, prompt attention to vacuum system integrity saves drivers hundreds of dollars in wasted fuel and prevented engine wear. Take your next step today by inspecting your vehicle’s primary rubber lines or investing in a basic smoke test kit to restore peak engine performance.
❓ Frequently Asked Questions
How does a smoke machine work to find a vacuum leak?
A smoke machine pumps dense, low-pressure smoke into the intake system while the engine is off. The smoke escapes through any cracks, loose fittings, or torn gaskets, making the exact leak location instantly visible.
Is it safe to use brake cleaner or carb cleaner to test for vacuum leaks?
Yes, but use caution because these chemicals are flammable and can damage vehicle paint. Alternatively, a spray bottle filled with plain water is a completely safe and non-flammable substitute that still causes a temporary RPM drop when hitting a leak.
Can a vacuum leak trigger a Check Engine Light?
Yes, vacuum leaks alter the air-fuel ratio, causing the oxygen sensors to report a lean condition. This typically triggers diagnostic trouble codes such as P0171 or P0174.
What is the easiest way to test for a vacuum leak without tools?
Listen closely to the engine bay while it is idling for any hissing or whistling sounds, and manually inspect every rubber hose by squeezing them to check for cracks or dry rot.
How do I test intake manifold gaskets for leaks?
Spray a small amount of water or cleaner carefully along the mating surface where the intake manifold meets the cylinder head while the engine idles. A sudden change in engine speed indicates a failed gasket.
What should I do after I find a damaged vacuum line?
Measure the inner diameter and length of the damaged hose, purchase replacement vacuum tubing at an auto parts store, and swap out the old line to restore correct pressure.