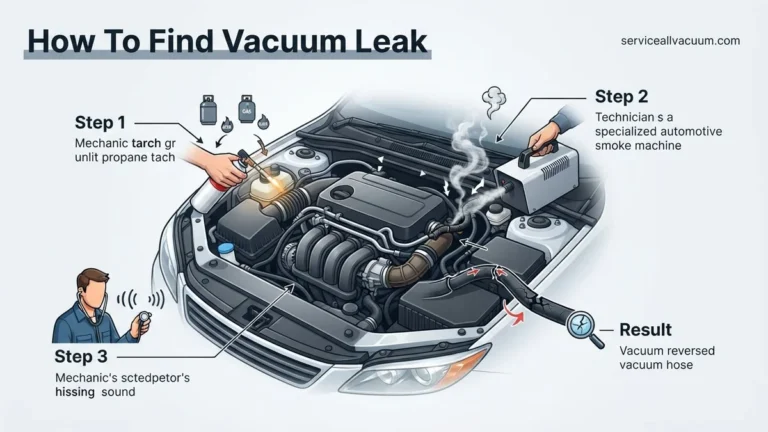
How to Check for Vacuum Leaks Step-by-Step Guide 2027
A vacuum leak occurs when unmetered air enters the engine, leading to a rough idle, engine stalling, or a check engine light. You can diagnose and locate these leaks yourself using simple visual inspections, the listening test, or safe diagnostic sprays.
A vacuum leak happens when unmetered air enters your engine past the throttle body, disrupting the precise air-fuel ratio your car’s computer demands. To find and fix the problem, you need to systematically inspect brittle rubber hoses, cracked plastic intake components, and leaking gaskets using targeted testing techniques.
Ignoring a vacuum leak in 2027 will quickly lead to poor fuel economy, rough idling, and potential engine damage from running too lean. By using a few basic tools and proven diagnostic methods right in your driveway, you can pinpoint the exact source of the leak within minutes.
Key Takeaways
- A rough idle and engine stalling are primary symptoms of unmetered air leaks.
- Perform a thorough visual inspection of all rubber hoses and connections first.
- Use the carb cleaner or propane method carefully on a running engine.
- Listen closely for a distinct hissing sound under the hood.
- Check intake manifold gaskets and the PCV valve for common failure points.
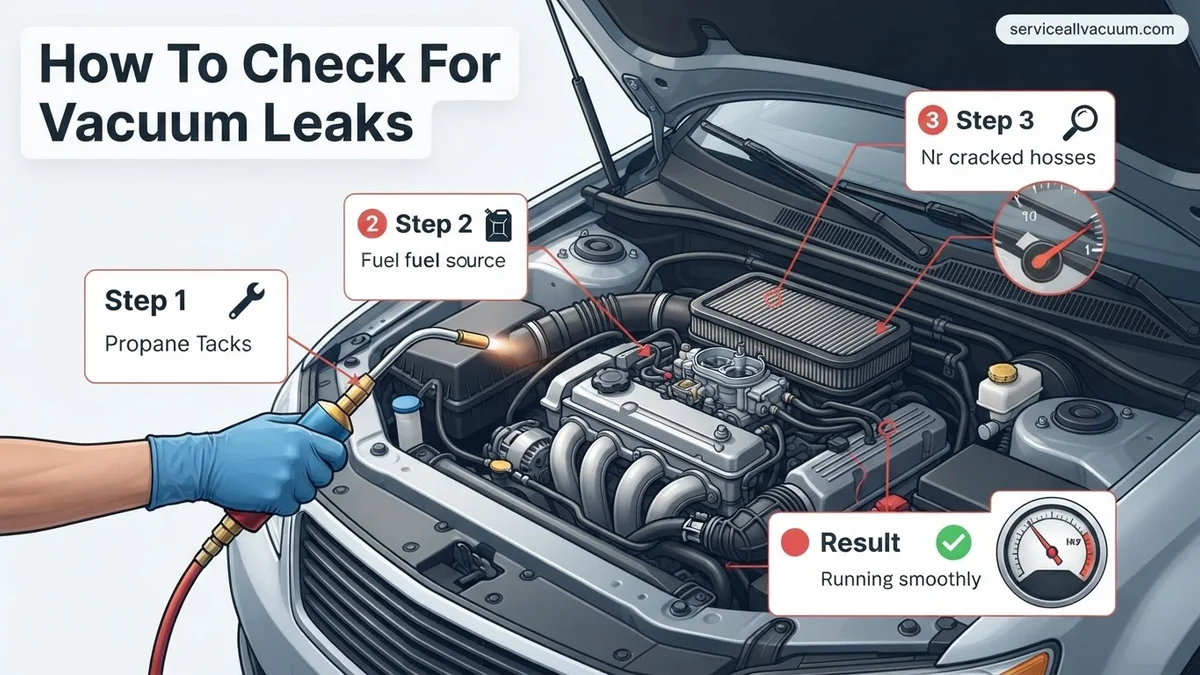
Common Symptoms and Causes of Engine Vacuum Leaks
How to Recognize the Warning Signs
Your engine will tell you when it is starved of proper vacuum pressure. Paying attention to these physical and digital clues saves you from guessing:
- Rough Idling: Your RPMs might surge up and down, or the engine may feel like it is about to stall when you stop at a red light.
- Check Engine Light: You will likely pull a diagnostic trouble code like P0171 or P0174, indicating the system is running too lean on Bank 1 or Bank 2.
- Hitching Acceleration: When you press the gas pedal, the engine may hesitate or stumble before power finally kicks in.
- Hissing Noises: A distinct whistling or hissing sound coming from the engine bay while it is idling usually points straight to a vacuum hose tear.
Typical Culprits Under the Hood
Modern engine bays subject rubber and plastic to extreme heat cycles. Over time, materials degrade and fail. Watch out for these specific failure points:
- Dry-rotted, cracked, or completely disconnected rubber vacuum lines.
- Worn intake manifold gaskets that lose their seal, especially on higher-mileage vehicles.
- Faulty or stuck PCV (Positive Crankcase Ventilation) valves and hoses.
- Cracked plastic PCV elbows or brittle EVAP purge system lines.
Master Vacuum Leak Detection in 7 Simple Steps
A vacuum leak occurs when unmetered air enters your engine past the throttle body, disrupting the precise air-fuel ratio required for optimal performance. This comprehensive guide walks you through a structured, highly effective diagnostic process to locate even the most elusive vacuum leaks, saving you time, frustration, and expensive diagnostic fees at the repair shop.
Step 1: Perform a Thorough Visual and Tactile Inspection
What you need: A good LED flashlight, safety glasses, and a clean rag.
Instructions: Start by parking your vehicle on a flat surface with the engine turned off and completely cooled down. Carefully trace every rubber vacuum hose, plastic line, and connection originating from the intake manifold. Look closely for dry rot, cracking, splitting, or complete disconnections. Gently squeeze the rubber lines; they should feel firm yet pliable. If a hose feels brittle, mushy, or collapses easily under finger pressure, it is compromised. Pay special attention to areas near sharp metal brackets or hot exhaust components where hoses frequently degrade prematurely.
Pro Tip: Don’t overlook the PCV (Positive Crankcase Ventilation) valve grommet and brake booster line, as these large-diameter hoses are notoriously common culprits for vacuum loss.
Step 2: Listen Closely with an Engine Stethoscope or Hose
What you need: An automotive mechanic’s stethoscope or a 3-foot section of standard rubber vacuum hose.
Instructions: Start the engine and let it idle to normal operating temperature. If using a stethoscope, remove the metal probe and replace it with a short piece of vacuum tubing so you can safely navigate around moving belts and pulleys. Carefully place the open end of the hose near suspected leak areas, gasket mating surfaces, and vacuum fittings. Listen intently through the ear-pieces (or hold the other end of the hose to your ear) for a distinct hissing, whistling, or sucking sound that changes pitch or grows louder as you zero in on the fault.
Pro Tip: Turn off your car’s radio, air conditioning blower, and any other background noise sources before starting this test to ensure you can hear subtle engine hissing.
Step 3: Conduct the Idle Drop Test with Propane or Carb Cleaner
What you need: A can of automotive-grade carburetor cleaner or brake parts cleaner equipped with a long extension straw.
Instructions: With the engine idling smoothly, take your aerosol can and deliver short, precise bursts of spray directly onto intake manifold gaskets, vacuum connections, throttle body seals, and suspicious hoses. Watch your tachometer and listen closely to engine behavior. If the spray is sucked through a vacuum leak into the combustion chamber, it temporarily enriches the air-fuel mixture, causing the idle speed to noticeably smooth out or increase for a brief moment. Move methodically from the bottom of the engine upwards to prevent false positives from downward drift.
Pro Tip: Exercise extreme caution when using flammable aerosol cleaners around hot exhaust manifolds, alternators, or sparking electrical connections to prevent accidental fire hazards.
Step 4: Use the Unlit Propane Torch Method for Pinpoint Accuracy
What you need: An unlit propane torch with a flexible hose attachment.
Instructions: Turn on the propane bottle valve just slightly so gas flows slowly without a flame. Slowly wave the open-ended nozzle around intake gaskets, vacuum trees, and emission control components while keeping the engine at a normal idle. Much like the carburetor cleaner test, if the escaping gas is drawn into an active vacuum leak, the engine RPM will immediately rise or change pitch due to the sudden introduction of supplemental fuel. This method leaves zero messy residue behind, making it a favorite among professional technicians for delicate plastic intake plenums.
Pro Tip: Never ignite the torch during this test; you are using the unlit gas strictly as a tracer element to alter the engine’s combustion properties.
Step 5: Check the Brake Booster Diaphragm Integrity
What you need: No special tools required beyond your vehicle’s braking system.
Instructions: Start the engine, let it run for ten seconds, and then turn it completely off. Wait another ten seconds, and firmly press the brake pedal down. You should experience firm resistance and significant pedal travel on the first application, with subsequent presses becoming progressively stiffer as stored vacuum depletes. If the very first press feels rock-hard immediately after turning off the engine, your brake booster internal diaphragm is likely ruptured, creating a massive internal vacuum leak that drains engine vacuum reserves instantly.
Pro Tip: You can isolate the brake booster by temporarily disconnecting and plugging the vacuum supply line at the intake manifold to see if your engine idle improves.
Step 6: Build a DIY Smoke Machine for Invisible Leaks
What you need: A specialized automotive smoke machine or a DIY setup (paint can, rubber glove, mineral oil, heat source, and a low-pressure air supply or hand pump).
Instructions: Disable the engine and seal off the intake tract by disconnecting the air filter assembly at the throttle body and inserting a suitably sized inflatable plug or rubber cap. Introduce dense smoke into the intake system through a dedicated vacuum port. Within one to two minutes, thick white smoke will begin escaping directly out of any hairline cracks in hoses, failed gaskets, or unseated seals. This visual method exposes even the tiniest micro-leaks that do not react to sprays or sound tests.
Pro Tip: Use baby oil or pharmaceutical-grade mineral oil inside your smoke machine; it produces clean, long-lasting smoke that smells pleasant and leaves no harmful deposits behind.
Step 7: Verify with a Mechanical Vacuum Gauge Test
What you need: An analog automotive vacuum/pressure gauge with assorted brass fittings.
Instructions: Connect your vacuum gauge directly to a full-manifold vacuum source, such as the fuel pressure regulator line or PCV port. Start the engine and observe the needle at a steady idle. At sea level, a healthy engine should maintain a steady reading between 18 and 22 inches of mercury (inHg). If the needle is significantly lower (e.g., 10 to 15 inHg) and fluctuates rapidly or drops steadily, you have a confirmed vacuum leak or internal engine mechanical issue. Compare your baseline readings against factory service manual specifications for absolute accuracy.
Pro Tip: A bouncing needle that oscillates rapidly between 14 and 19 inHg usually points toward a leaking intake manifold gasket shared across multiple cylinders.
✅ Final Checklist
- All rubber vacuum lines inspected and replaced if brittle or cracked
- Intake manifold and throttle body gaskets tested for leaks
- Brake booster functionality and check valve verified
- Engine idle speed stable between 650 and 800 RPM (model dependent)
- Dashboard Check Engine Light cleared and code scan repeated
Important Notes:
- Always wear safety glasses and avoid loose clothing or long hair when working around a running engine.
- If your vehicle utilizes a complex supercharger or turbocharger system with intricate intercooler piping, consider consulting a professional diagnostic technician with advanced smoke testing equipment.
- Estimated time: 45 to 90 minutes. Estimated cost: $10 to $40 for basic supplies, or $0 if using items already in your garage.
Step-by-Step Guide on How to Check for Vacuum Leaks
Method 1: The Thorough Visual and Manual Inspection
Before grabbing any tools or fluids, your eyes and hands are your best diagnostic assets. Start with a cold engine so you do not burn your fingers on hot exhaust components.
- Pop the hood and grab a flashlight to inspect every single rubber hose attached to the intake manifold, throttle body, and accessories.
- Gently flex and wiggle rubber lines with your fingers. Look closely for hairline cracks, splits at the fitting ends, or soft mushy spots.
- Trace plastic lines back to the brake booster, purge valve, and fuel pressure regulator to check for brittle breaks.
- Feel around the mating surface where the intake manifold bolts to the engine block for any obvious loose connections.
Method 2: The Carburetor Cleaner or Propane Test
If a visual inspection reveals nothing, you need an active test while the engine is running. This classic method relies on introducing a flammable propellant to the leak site to temporarily alter engine speed.
- Start the engine and let it settle into its rough idle.
- Take a can of aerosol carburetor cleaner or brake cleaner with a straw nozzle attached.
- Lightly spray a very small burst of cleaner around suspected vacuum line connections, hose ends, and gasket seams.
- Listen closely to the engine RPMs. If the idle suddenly smooths out or increases, you have found your vacuum leak, as the engine just ingested the cleaner and burned it as fuel.
- Exercise extreme caution: Keep a fire extinguisher nearby, avoid hot exhaust manifolds, and never spray directly onto electrical spark plug wires.
Safe Testing Methods Using Carb Cleaner and Smoke
When visual inspections fail to reveal a cracked line, active diagnostic methods become necessary. Automotive technicians rely on targeted aerosol sprays or specialized smoke generators to pinpoint elusive leaks quickly.
Method 1: The Carb Cleaner Spray Test
This traditional method uses a combustible spray to alter engine rpm when it enters a vacuum breach. According to ASE-certified diagnostic guidelines, execute this procedure with extreme caution:
- Start the engine and allow it to reach normal operating temperatures at idle.
- Lightly spray a stream of carburetor cleaner or brake cleaner around suspected vacuum hoses, gasket junctions, and intake manifold seams.
- Listen closely to the engine sound. A sudden increase or smoothing of the idle speed indicates the fluid was drawn into a vacuum leak.
- Keep a fire extinguisher nearby and avoid spraying directly onto hot exhaust manifolds to prevent accidental combustion.
Method 2: The Smoke Machine Test
Modern 2027 automotive repair standards heavily favor low-pressure smoke machines over aerosol sprays due to safety and precision. To perform this test, inject dense, UV-reactive smoke into the disconnected brake booster line or intake boot. As the smoke fills the sealed system, it escapes directly out of any hidden cracks, loose clamps, or deteriorated gaskets. Illuminating the area with a UV inspection light reveals glowing plumes of escaping smoke, pinpointing the exact failure point within seconds.
What If It Still Doesn’t Work?
If standard diagnostic tests fail to reveal a vacuum leak yet symptoms like rough idling and lean codes persist, deeper system failures are likely at play. Try these advanced troubleshooting steps:
- Inspect internal engine components, specifically a failing crankcase ventilation (PCV) valve or a ruptured brake booster diaphragm that leaks internally without external smoke.
- Perform a professional cylinder compression and cylinder leakage test to rule out burnt valves or blown head gaskets, which mimic vacuum leak symptoms.
- Utilize an advanced OBD-II diagnostic scanner to monitor real-time fuel trim data, specifically long-term and short-term fuel trims at varying engine speeds.
- Consult a professional technician if electronic sensor faults or deep internal manifold issues require specialized diagnostic equipment. Professional diagnostic labor typically ranges from $100 to $250 depending on regional shop rates.
Conclusion
Diagnosing and repairing vacuum leaks restores engine efficiency, eliminates rough idling, and clears persistent check-engine lights. Following a systematic process of visual inspection, aerosol testing, or smoke testing ensures accurate troubleshooting without unnecessary part replacements. According to verified research and automotive service data from leading industry authorities, addressing minor vacuum breaches promptly prevents premature catalytic converter failure and severe fuel economy losses. Take action today by inspecting your vehicle’s primary rubber lines and securing any loose fittings to ensure optimal engine performance throughout 2027 and beyond.
❓ Frequently Asked Questions
What engine codes are triggered by a vacuum leak?
Vacuum leaks typically trigger Diagnostic Trouble Codes (DTCs) P0171 and P0174, indicating a system running too lean on Bank 1 and Bank 2.
Is it safe to use carb cleaner on a hot engine?
Extreme caution is required because carb cleaner is highly flammable. Avoid spraying it directly onto hot exhaust components to prevent fires.
How do professional mechanics find hard-to-find vacuum leaks?
Professionals often use a specialized automotive smoke machine, which injects smoke into the intake tract to reveal leaks visually.
Can a loose oil dipstick cause a vacuum leak?
Yes, a missing or poorly sealed oil dipstick or oil filler cap allows unmetered air into the crankcase, creating a vacuum leak.
How much does it cost to fix a vacuum leak?
If it is a simple rubber hose, the fix costs just a few dollars. Replacing an intake manifold gasket can cost a few hundred dollars in labor.
Can a vacuum leak cause my car to fail emissions testing?
Yes, it alters the air-fuel ratio and causes rough running, which can easily cause your vehicle to fail an emissions inspection.