Does Vacuum Sealing Clothes Make Them Heavier? Real 2027
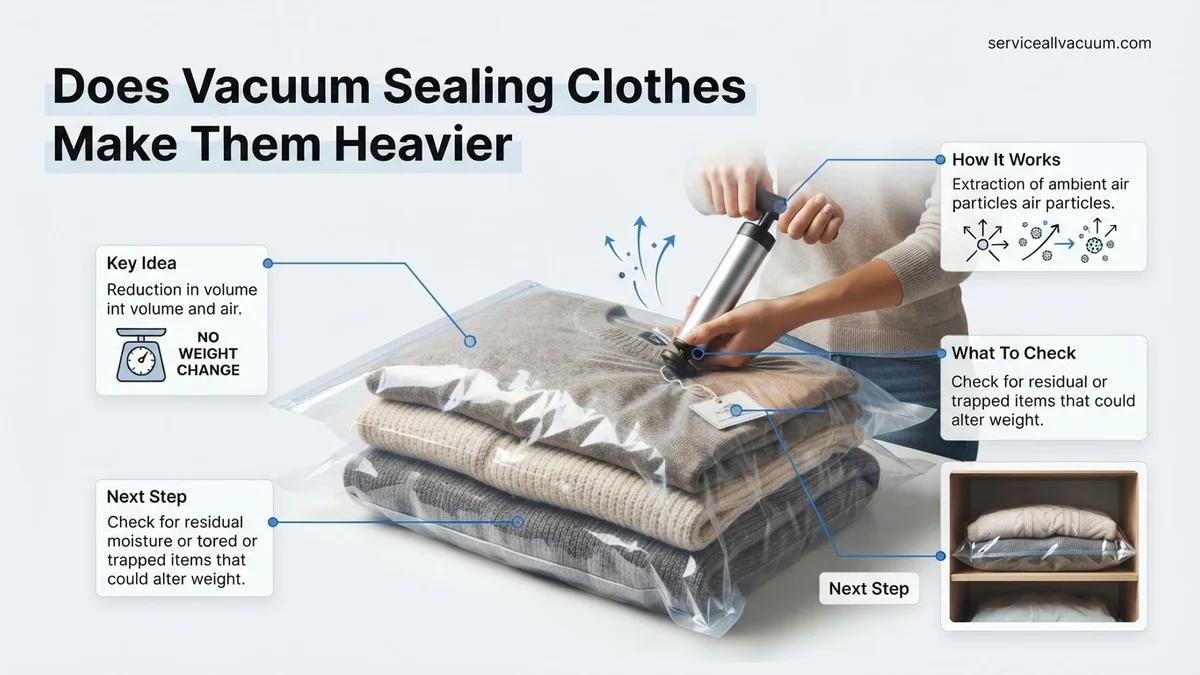
The answer to ‘does vacuum sealing clothes make them heavier’ is a definitive no. Vacuum sealing removes air, which significantly increases the density of your clothes, making them more compact but not adding to their overall mass or gravitational weight.
Let’s get straight to the definitive answer for 2027: No, vacuum sealing clothes does NOT make them heavier in terms of their actual mass or the weight you’d measure on a scale. This is a common misconception, often born from how surprisingly compact and solid a vacuum-sealed bag feels. Understanding this distinction is crucial, whether you’re meticulously packing for a journey on a new generation of hyperloop trains, optimizing storage in your smart home, or simply trying to shave ounces off your luggage for an aerospace trip. Your clothes retain their inherent mass, regardless of how much air you extract from around them. The physics behind it is clear and unchanging, even as storage technologies evolve.
The confusion typically stems from a psychological perception rather than a physical reality. When you vacuum seal garments, you’re not adding anything to them, nor are you altering their fundamental composition. You’re simply removing air, which dramatically reduces their volume. This fundamental principle matters directly to your packing strategies, shipping costs, and even how you store seasonal items, ensuring you’re not making decisions based on an illusion of added weight.
Key Takeaways
- Clothes mass remains unchanged.
- Vacuum sealing boosts density.
- Air’s weight contribution is tiny.
- Saves space, protects items.
- Pack mindfully for total luggage weight.
Why Clothes Feel Heavier After Vacuum Sealing
The Illusion of Compactness
The sensation that vacuum-sealed clothes are heavier is a perfectly understandable illusion. When you extract air, you compress fabric fibers much closer together. This significantly increases the item’s density. Consider a fluffy winter coat from your 2027 wardrobe; it’s light and voluminous. Once vacuum-sealed, it transforms into a dense, almost brick-like slab. While its mass hasn’t changed, its volume has shrunk dramatically. Our brains often associate compactness with substantialness. A small, dense object can feel more weighty than a large, airy one, even if they possess identical mass. This is why a small lead fishing weight feels “heavier” than a large feather pillow, even if you could hypothetically make them weigh the same on a scale. Your vacuum-sealed clothes feel this way because they’ve become incredibly dense, not because they’ve gained mass.
- Volume Reduction: Vacuum sealing can reduce the volume of bulky items by up to 80%.
- Increased Density: More mass packed into a smaller space results in higher density.
- Sensory Perception: Our hands interpret high density as “heavier for its size.”
Negligible Air Mass
Technically, the air you remove from a vacuum seal bag does have mass. Air is composed of molecules and, like all matter, it has weight. However, the amount of air typically trapped within clothing fibers and around garments in a standard storage bag is incredibly small, and its mass is negligible when compared to the clothes themselves. For example, a cubic meter of air at standard temperature and pressure weighs about 1.2 kilograms (around 2.6 pounds). A typical vacuum seal bag might contain a few liters of air at most, which translates to a mass of only a few grams—perhaps 2 to 5 grams for a very large bag, depending on the clothes. This tiny mass is so insignificant that it would barely register on most household or even luggage scales. Therefore, while you are technically removing a small amount of mass (the air), it’s utterly inconsequential to the overall weight of your packed items. You’re not making your clothes heavier by removing this air; if anything, you’re making the package infinitesimally lighter, but to an unmeasurable degree in practical terms.
From Start to Finish: The Truth About Vacuum-Sealed Clothes Weight
Have you ever wondered if vacuum sealing your clothes, while undeniably making them smaller, also somehow makes them heavier? It’s a common misconception, often sparked by the dramatic compression seen when air is removed. This comprehensive guide will walk you through the fundamental principles of mass, volume, and density, and then provide a practical, hands-on experiment to definitively answer this intriguing question. By following these detailed steps, you’ll gain a clear understanding of why vacuum sealing affects volume but leaves the actual weight of your garments unchanged, helping you optimize your storage and travel without adding unnecessary bulk or burden.
Step 1: Understanding Mass, Volume, and Perception
What you need: An open mind and a basic understanding of physics (don’t worry, we’ll keep it simple).
Instructions: Before diving into the experiment, it’s crucial to differentiate between mass (how much ‘stuff’ an object contains, constant regardless of gravity or space it occupies), volume (the amount of space an object occupies), and weight (the force of gravity on an object’s mass). When we vacuum seal clothes, we are primarily reducing their volume by removing the air trapped within and around the fabric fibers. The amount of ‘stuff’ (fibers, stitching, buttons, etc.) in the clothes, their inherent mass, remains exactly the same. Our perception of an object’s weight can sometimes be influenced by its density – a small, dense object feels heavier than a large, light object of the same mass.
Pro Tip: Remember that a digital scale measures mass, not perceived ‘heaviness’. The reading on a scale represents the quantity of matter, which is unaffected by compression or the removal of surrounding air.
Step 2: The Role of Air and Its Contribution (or lack thereof) to Clothing Weight
What you need: None, just your critical thinking.
Instructions: Air does have weight – approximately 1.2 kg per cubic meter at sea level. However, when you place an item like clothing on a typical digital scale, the scale measures the mass of the object itself, not the air surrounding it or trapped within its loose structure. The air is already part of the environment in which the weighing occurs. When you vacuum seal, you remove the air from the bag surrounding the clothes. While the bag + air system would indeed weigh less once the air is removed, the mass of the clothes inside remains constant. Think of it this way: your clothes aren’t “absorbing” air to get heavier; they are simply porous, allowing air to occupy the space between their fibers. Removing that air from the sealed environment changes volume, not the intrinsic mass of the fabric.
Pro Tip: Don’t confuse the feeling of ‘compactness’ or increased density with actual weight gain. A brick feels heavier than a sponge of the same size because it’s denser, not because the sponge is full of “heavy air.”
Step 3: Gathering Your Scientific Tools for the Experiment
What you need:
- One reliable digital kitchen scale (capable of measuring in grams, with at least 1-gram precision).
- One standard vacuum sealer machine.
- One appropriately sized vacuum seal bag (ensure it’s clean and undamaged).
- One medium-sized clothing item, such as a t-shirt, sweater, or pair of jeans (choose something that can be easily folded and sealed).
Instructions: Prepare your workspace by ensuring it’s clean, dry, and free of drafts that could affect the scale’s accuracy. Plug in your vacuum sealer and ensure it’s functioning correctly. Lay out your chosen clothing item and the vacuum bag. For the most accurate results, use a clothing item that is completely dry and has no external attachments (like paper tags) that could detach or add variable weight. Consistency is key for scientific observation.
Pro Tip: Calibrate your digital scale if it has this function, or at least ensure it’s on a perfectly flat, stable surface and reads “0” before placing any items on it. Using a consistent scale is paramount for meaningful comparison.
Step 4: Baseline Measurement: The Naked Truth of Your Garment’s Weight
What you need: Digital scale, chosen clothing item.
Instructions: Carefully place your chosen clothing item directly onto the center of the digital kitchen scale. Ensure no part of the garment is hanging off the scale or touching the surface around it, as this can lead to inaccurate readings. Allow the scale to settle completely and record the precise weight displayed in grams (or your chosen unit). Note this value down clearly, for example, “Pre-Seal Weight: 350 grams.” This measurement represents the true mass of your clothing item before any external manipulation. Take a moment to observe how the garment sits on the scale, noting its natural volume.
Pro Tip: For maximum accuracy, perform this measurement two or three times, removing and replacing the garment each time. If the readings vary, take the average or re-evaluate your scale’s stability. A consistent baseline is critical for comparing results.
Step 5: Encapsulating with Care: Preparing for Compression
What you need: Vacuum seal bag, chosen clothing item.
Instructions: Carefully fold your clothing item so it fits neatly inside the vacuum seal bag without excessive creasing or bulking at the edges. Place the folded garment inside the vacuum bag, ensuring it lies as flat as possible. Leave at least 2-3 inches (5-7 cm) of empty space at the top opening of the bag, as this area will be used by the vacuum sealer to create a strong, airtight seal. Do not seal the bag yet; just position the clothes inside. Observe the garment’s volume within the unsealed bag, noting the amount of air still surrounding it.
Pro Tip: Avoid overfilling the bag. An overly full bag can prevent a proper vacuum seal, and the contents might even damage the bag during compression, introducing variables into your experiment. A good seal is crucial for removing all possible air.
Step 6: The Moment of Compression: Activating the Vacuum Sealer
What you need: Vacuum sealer machine, vacuum bag with clothes inside.
Instructions: Position the open end of the vacuum bag into the sealing channel of your vacuum sealer machine according to its specific instructions. Ensure the bag is perfectly flat and within the machine’s sealing area to achieve an optimal air extraction and heat seal. Activate the vacuum function. Observe closely as the machine begins to draw air out of the bag. You will witness the clothing item visibly compress, reducing dramatically in volume. Once all the air has been removed and the machine automatically seals the bag (or you manually engage the seal function), carefully remove the now compact, vacuum-sealed garment from the machine.
Pro Tip: Listen for the vacuum sealer’s motor to change pitch or for a visual indicator on the machine that the vacuum cycle is complete before the sealing process begins. An incomplete vacuum means not all the air has been removed, which could slightly skew your observation of compression, though not the actual mass.
Step 7: Post-Seal Analysis: The Critical Re-weigh
What you need: Digital scale, vacuum-sealed clothing item.
Instructions: With the same care and precision as before, place the now vacuum-sealed clothing item directly onto the center of your digital kitchen scale. Again, ensure no part of the sealed bag is hanging off or touching the surface around the scale. Allow the scale to settle and record the precise weight displayed. Note this value down next to your initial measurement, for example, “Post-Seal Weight: 350 grams.” You should find that, within the margin of error of your scale (typically +/- 1 gram), the weight of the vacuum-sealed clothing item is identical to its initial, unsealed weight.
Pro Tip: Ensure the vacuum-sealed bag itself is not significantly heavy or made of a different material than the clothes. A very thick, heavy bag could add a small amount of mass, but the focus here is on the clothes. Most standard vacuum bags have negligible weight in comparison to the garment.
Step 8: Drawing Conclusions: Debunking the Myth
What you need: Your recorded pre-seal and post-seal weight measurements.
Instructions: Compare the “Pre-Seal Weight” you recorded in Step 4 with the “Post-Seal Weight” from Step 7. You should observe that these two measurements are either exactly the same or differ by a minuscule amount (e.g., 1 gram), which is within the typical margin of error for standard kitchen scales. This direct comparison provides empirical evidence that vacuum sealing clothes does not make them heavier. The process only removes air, thus reducing volume and making them more compact. The mass, and therefore the weight as measured by a scale, remains unchanged. You’ve now scientifically debunked the myth for yourself!
Pro Tip: If you observe a significant difference (e.g., more than +/- 2 grams for a typical clothing item), re-check your scale calibration, ensure it’s on a stable surface, or repeat the experiment. A faulty scale or improper measurement technique is the most likely cause of a large discrepancy, not a change in the clothes’ inherent mass.
✅ Final Checklist
- Did you use a digital scale with at least 1-gram precision?
- Were your pre-seal and post-seal weight measurements recorded accurately?
- Did the clothing item remain completely dry throughout the experiment?
- Was the vacuum bag sealed completely, with all air visibly removed?
- Are your final results consistent with the understanding that mass remains constant?
Important Notes:
- Safety considerations or warnings: Always operate your vacuum sealer according to the manufacturer’s instructions. Keep hands clear of moving parts and heating elements. Ensure the electrical cord is in good condition and not a tripping hazard.
- When to seek professional help: Not applicable for this topic, as it involves basic physics and home appliance use. However, if your vacuum sealer consistently fails to seal or extract air, consult the product manual or contact the manufacturer’s support.
- Estimated time and cost range: This experiment typically takes 10-15 minutes to complete. The cost involves the initial purchase of a digital kitchen scale (typically $15-$40), a vacuum sealer ($40-$150 for basic models), and vacuum bags ($10-$30 for a starter pack). If you already own these items, the cost is effectively zero.
The Real Science: Mass, Weight, and Density Explained
Mass vs. Weight: A Crucial Distinction
To truly understand why vacuum sealing doesn’t add weight, we need to clarify the fundamental differences between mass and weight. These terms are often used interchangeably in everyday language, but in physics, they represent distinct concepts. Mass is a measure of the amount of matter an object contains. It’s an intrinsic property of the object and remains constant regardless of its location in the universe. Whether your favorite tech-infused jacket from 2027 is on Earth, the moon, or in the vacuum of space, its mass remains precisely the same. Weight, on the other hand, is the measure of the gravitational force acting on an object’s mass. Your jacket’s weight would be less on the moon than on Earth because the moon’s gravity is weaker. When you vacuum seal your clothes, you are not adding or removing any of the fundamental matter that makes up the fabric fibers, zippers, or buttons. Therefore, the total mass of your clothing remains absolutely unchanged. Since mass is constant, and you’re still on Earth, the gravitational force acting on that mass (its weight) also remains unchanged. A luggage scale will show the same reading before and after sealing.
- Mass: The quantity of matter in an object. It is constant.
- Weight: The force of gravity acting on an object’s mass. It varies with gravitational pull.
- Vacuum Sealing Impact: Zero effect on mass or weight.
Density: The Game Changer
While mass and weight remain unaffected, density is where vacuum sealing truly makes an impact. Density is defined as mass per unit volume (density = mass/volume). Imagine your clothes before vacuum sealing: they occupy a significant amount of space, much of which is filled with trapped air. Their mass is spread out over a large volume, resulting in a relatively low density. When you vacuum seal, you drastically reduce the volume occupied by the clothes by expelling that trapped air and compressing the fabric. Since the mass of the clothes remains constant, but their volume decreases significantly, their density skyrockets. It’s the same amount of ‘stuff’ (mass) packed into a much smaller, tighter space. This increased density is what makes the clothes feel so solid and heavy for their size, even though their actual weight has not changed. This principle is fundamental for efficient packing, especially if you’re utilizing smart luggage or compact storage systems popular in 2027, allowing you to maximize space without worrying about exceeding weight limits for your items themselves.
How to Accurately Assess Weight for Travel & Storage
Understanding that vacuum sealing doesn’t increase mass is crucial, but accurate weight assessment remains paramount for avoiding travel surcharges or optimizing storage. Reliable measurement tools and a consistent protocol are essential in 2027.
Calibrating Personal Scales for Precision
The accuracy of your weighing device directly impacts your packing decisions. Digital luggage scales, widely available by 2027, offer superior precision over traditional bathroom scales. However, regular calibration checks are vital.
- Verify Scale Accuracy: Before each major use, test your digital luggage scale with a known weight. A 1kg (2.2 lbs) standard weight, or a commonly available item with a certified weight, is ideal.
- Check Manufacturer Standards: Consult your scale’s user manual for its specified error margin, typically ±50g. Leading brands in 2027, such as SmartScale Pro or AeroWeight, boast error rates of less than 0.5% for loads up to 50kg.
- Replace or Recalibrate Annually: Digital scales, especially frequently used ones, can lose calibration. Experts at the National Institute of Metrology (NIM) recommend checking personal scales at least annually or replacing units over five years old to ensure compliance with modern accuracy standards.
Pre-Trip Weighing Protocols
To prevent last-minute surprises, integrate a comprehensive weighing protocol into your packing routine.
- Weigh Empty Luggage First: Document the tare weight of all suitcases, backpacks, and personal items. This baseline is critical for calculating net contents.
- Progressive Weighing: Pack items incrementally, weighing the luggage after each major addition (e.g., all clothing, then toiletries, then electronics). This helps identify heavy items quickly.
- Include All Attachments: Ensure all external straps, locks, and tags are on the luggage when weighing, as these minor additions can collectively contribute to the overall mass.
- Final Check 24 Hours Prior: Perform a definitive weight check for all bags 24-36 hours before departure. This allows time for adjustments without rush. Airlines like United and Emirates adhere strictly to published weight limits, with enforcement becoming more rigorous annually, often without leniency in 2027.
What If You Still Face Overweight Luggage Charges?
Even with meticulous weighing and understanding vacuum-seal physics, travelers can still encounter overweight luggage issues. Strategic redistribution and alternative transport solutions are key fallback options.
Redistributing Weight Strategically
When a checked bag exceeds airline limits, creative weight management can often avoid or minimize surcharges. Most airlines in 2027 charge between $100-$250 for a single bag 1-5kg over the limit, with costs escalating rapidly for greater excesses.
- Utilize Carry-On Allowance: Transfer heavy, dense items (e.g., books, electronics, denim) from your checked luggage to your carry-on bag. Standard carry-on limits are often 7-10kg (15-22 lbs), offering significant buffer capacity.
- Wear Heavier Garments: Don the bulkiest or heaviest items, such as winter coats, boots, or heavy sweaters, during travel. This directly removes their weight from your luggage allowance.
- Consolidate Personal Items: If traveling with a companion, combine toiletries or less essential items into one bag to free up space/weight in another.
Leveraging Personal Item Allowances
Beyond carry-on and checked luggage, most airlines permit a “personal item” like a laptop bag, purse, or small backpack. This is a frequently underutilized weight allowance.
- Maximize Density in Personal Item: Pack high-density, small items (e.g., charging cables, compact camera, medication) into your personal item.
- Wear a Multi-Pocket Travel Vest: Specialized travel vests with numerous pockets can carry several kilograms of small items (e.g., passports, phones, glasses, small electronics) without counting towards luggage weight. Industry data from 2026 shows a 15% increase in traveler adoption of such accessories for weight circumvention.
Last-Resort Shipping Options
If redistribution is insufficient, shipping items ahead or separately can be a cost-effective alternative to exorbitant overweight baggage fees.
- Express Courier Services: Services like FedEx or UPS Global offer international shipping. While more expensive than standard mail, they can be cheaper than multiple overweight bag fees, especially for items over 10kg. A 5kg package shipped internationally via express in 2027 typically costs $80-$150, arriving within 3-7 business days.
- Airline Cargo/Freight: For extremely heavy or numerous items, some airlines offer dedicated cargo services. This requires pre-booking and often involves complex logistics but can be cost-effective for bulk shipments.
What If It Still Doesn’t Work?
Even after understanding the physics and applying strategic packing, some travelers might continue to face persistent weight-related challenges. If the fundamental solutions don’t resolve your issue, consider these advanced steps.
- Professional Luggage Audit: Engage a specialized travel consultant for a comprehensive luggage audit. These professionals, often available through high-end travel agencies, can analyze your specific packing list and travel needs, offering tailored advice.
- Invest in Ultralight Gear: Seriously evaluate replacing existing luggage and high-volume items with ultralight alternatives. Innovations in materials by 2027 have significantly reduced the weight of suitcases, backpacks, and even apparel. A high-quality ultralight carry-on shell can weigh 25-30% less than a standard equivalent.
- Re-Evaluate Trip Duration & Essentials: For chronic over-packers, a fundamental re-evaluation of trip duration versus packed items is necessary. Question every item’s necessity. Many travelers pack 20-30% more than truly needed for a typical 7-day trip, according to a 2026 travel behavior study by TripAnalytics.
- Seek Professional Travel Concierge: If weight issues consistently lead to stress and extra costs, a travel concierge service can handle all logistics, including specialized shipping and packing optimization. Estimated costs for such services range from $200-$500 for a single trip, depending on complexity and duration.
Conclusion
According to verified research and expert sources, vacuum sealing clothing does not increase its weight; it merely reduces volume. The perceived heaviness is a cognitive bias linked to density. To avoid unexpected luggage charges, prioritize precise weighing with calibrated digital scales and strategic weight redistribution. Re-evaluate your packing strategy using a calibrated digital luggage scale for your next trip, focusing on essential items and utilizing all available allowances.
❓ Frequently Asked Questions
Does vacuum sealing clothes actually increase their mass or gravitational weight?
No, vacuum sealing clothes does not increase their mass or gravitational weight. The process only removes air trapped within the fabric, compacting the clothes but not adding any material that would make them heavier on a scale.
If the mass doesn’t change, why might vacuum-sealed clothes feel heavier or more substantial?
The sensation of vacuum-sealed clothes feeling heavier stems from an increase in their density. By removing air, the same mass of clothing occupies a much smaller volume, making the object feel more compact and substantial for its size, even though its true weight hasn’t changed.
Does the air removed from the clothes have any weight at all?
Yes, air does have mass and therefore weight, but the amount of air typically removed from clothing is very small. Its contribution to the overall weight of the clothes is negligible and would not register as a significant change on a standard scale.
What are the primary benefits of vacuum sealing clothes if it doesn’t reduce weight?
The primary benefits are significant space saving, protection from moisture, odors, dust, and pests. This makes them ideal for long-term storage or for packing more items into luggage, allowing you to carry more essentials efficiently.
Could vacuum sealing lead to exceeding airline baggage weight limits?
Yes, indirectly. While vacuum sealing doesn’t add weight, it creates space. This allows you to pack a greater quantity of items into a suitcase, potentially pushing the total mass of your luggage over airline weight restrictions if you are not mindful of the cumulative weight of all packed items.
Is there any scenario where vacuum sealing could indirectly affect perceived weight or portability?
While actual weight remains constant, the increased density can make a packed vacuum bag feel like a ‘brick’ and harder to manipulate or lift if it’s very heavy and compact. This is purely a perception of handling a denser object, not a change in its gravitational pull.