How Do You Vacuum Seal Soup Step-by-Step Guide 2026
Liquid soups will get sucked directly into a standard vacuum sealer pump, ruining the appliance and failing to seal. The key is to freeze the soup solid first or use precise liquid-handling techniques to achieve an airtight seal without the mess.
Vacuum sealing soup safely without making a massive liquid mess requires a simple workaround: you must freeze the soup into a solid block before applying any vacuum pressure. If you attempt to vacuum seal liquid soup directly in a standard chamber or external suction sealer, the machine will immediately suck the broth into the pump, ruining your appliance and destroying the seal.
By shifting your technique to a pre-freezing process or utilizing proper hanging physics, you can successfully preserve your favorite broths and chilis for long-term storage in 2026. This step-by-step guide walks you through the exact methods needed to lock in flavor and prevent kitchen disasters.
Key Takeaways
- Freeze soup solid in molds or containers before vacuum sealing.
- Leave at least three inches of headspace in bags.
- Never run a standard suction sealer with boiling or warm liquids.
- Use the pulse function if your sealer supports manual liquid control.
- Store sealed soup blocks in the freezer for up to six months.
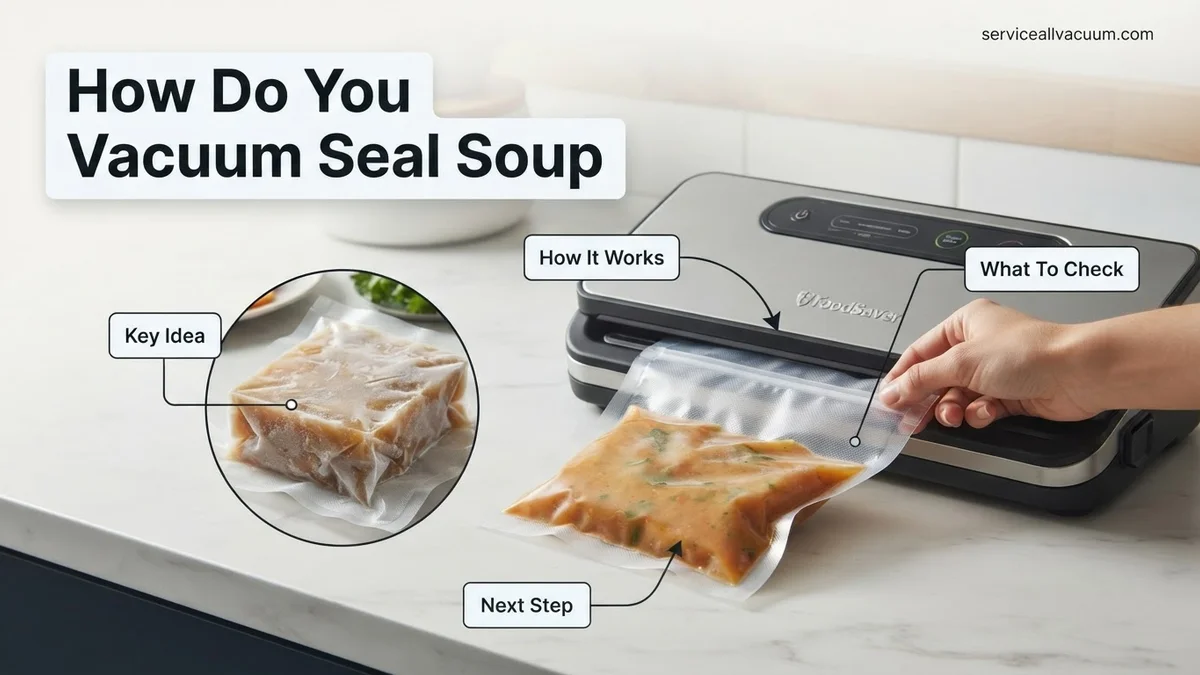
Why Standard Vacuum Sealing Fails with Liquid Soup
Standard external vacuum sealers rely on negative pressure to suck air out of a textured plastic bag before heating the seal bar. When that air is accompanied by free-flowing liquid, physics takes over immediately. The suction pump draws the hot or cold broth right up the bag, which ruins the vacuum seal and introduces moisture into your machine’s motor.
The Liquid Suction Hazard
- Pump Failure: Liquid entering the vacuum intake valve will short-circuit electronic components or cause mold growth inside the internal tubing.
- Weak Seals: Any spilled soup on the inner rim of the bag opening prevents the heating element from melting the plastic properly, leaving your food exposed to air.
- Boil-Point Drop: In standard sealers, the vacuum pressure can cause room-temperature liquids to bubble and boil aggressively, forcing soup out of the bag mid-cycle.
Chamber Sealers vs. External Sealers
If you own a heavy-duty chamber vacuum sealer, sealing liquid is actually quite easy because the air pressure inside the chamber drops equally both inside and outside the bag. However, 95 percent of home cooks use external clamp-style sealers. If your machine does not have a specialized “moist” or “liquid” setting, you cannot safely vacuum seal wet soup without altering its physical state first.
Master Vacuum Sealing Soup in 7 Simple Steps
Vacuum sealing soup is one of the best ways to preserve homemade broths, chilis, and hearty bisques for long-term freezer storage without dealing with freezer burn. However, liquids present a unique challenge in the vacuum sealing process because standard machines will immediately suck the liquid right out of the bag and into the vacuum chamber. This comprehensive guide will walk you through the proven techniques, specific freezing methods, and essential equipment needed to lock in flavor and prevent kitchen messes.
Step 1: Cool Your Soup Completely
What you need: Large shallow containers, refrigerator timer, food-safe thermometer.
Instructions: Never attempt to seal or freeze hot soup. Pour your freshly cooked soup into shallow containers and place them in the refrigerator until the temperature drops below 40 degrees Fahrenheit. Hot liquids placed directly into the freezer will raise the internal temperature of surrounding foods and create excessive condensation inside the vacuum bag, which ruins the vacuum seal and breeds bacteria. This chilling process typically takes between two to four hours depending on the volume of soup.
Pro Tip: Speed up the cooling process by setting your pot of soup into an ice water bath in the sink, stirring occasionally until it reaches room temperature before transferring it to the fridge.
Step 2: Pre-Freeze the Soup (The Solidification Trick)
What you need: Silicone soup freezing trays, muffin tins, or standard freezer-safe containers lined with plastic wrap.
Instructions: Because liquid cannot be easily vacuum sealed in a standard strip-style sealer, you must freeze the soup into solid blocks first. Pour your cooled soup into silicone molds, freezer-safe blocks, or even clean empty milk cartons cut to size. Place these containers into the deep freezer for 12 to 24 hours until the soup is completely frozen solid. Once frozen, pop the soup blocks out of their molds. These uniform blocks will fit neatly into your vacuum sealer bags without spilling.
Pro Tip: Measure the exact amount of soup you pour into each mold so you know the portion sizes you are storing for future weeknight dinners.
Step 3: Choose the Right Vacuum Seal Bags
What you need: Heavy-duty textured vacuum sealer rolls or pre-cut bags (at least 3 to 4 mil thick).
Instructions: Select a high-quality, puncture-resistant vacuum sealer bag that is specifically designed for food storage and freezer use. If you are using a vacuum sealer roll, cut a piece that is at least 3 inches longer than your frozen soup block to allow enough room for a secure, airtight seal. Seal one end of the cut roll first using your machine’s “Seal Only” function to create a custom-sized pouch. Ensure the edges are clean and free of any liquid residue.
Pro Tip: Always buy BPA-free, commercial-grade bags designed for sous-vide and boiling, as you can drop the frozen sealed bag directly into simmering water to reheat later.
Step 4: Bag the Frozen Soup Block
What you need: Frozen soup blocks, paper towels, vacuum sealer bags.
Instructions: Slip your frozen soup block carefully into the prepared vacuum bag. Take extreme care to ensure that the top 3 inches of the inside of the bag remain completely dry and clean. If any soup crumbs or moisture touch the area where the heating element will create the seal, the seal will fail and air will leak back into the package. Fold the top opening of the bag down slightly like a cuff while inserting the block to keep the inner walls clean.
Pro Tip: Wipe the inside rim of the bag with a damp paper towel and then a dry paper towel just to be certain no oily residue from the soup is present.
Step 5: Position the Bag in the Sealer
What you need: Vacuum sealer machine, clean and dry counter space.
Instructions: Open your vacuum sealer and place the open end of the bag inside the vacuum channel (the drip tray area). Make sure the bag is lying completely flat across the sealing strip with no wrinkles, folds, or creases. If the bag has wrinkles, air channels will form, preventing a proper airtight seal. Close the lid of the machine firmly and lock the latches on both sides until you hear a click.
Pro Tip: If your machine has a “Moist” setting, select it now. This setting applies a longer seal time and less vacuum pressure to ensure a secure bond even if trace amounts of moisture are present.
Step 6: Vacuum, Seal, and Inspect
What you need: Vacuum sealer machine.
Instructions: Press the “Vacuum and Seal” button on your machine. Listen as the air is extracted from the bag. Once the air is removed, the machine will automatically switch to the sealing phase, heating the plastic to fuse the opening shut. Wait for the indicator light to turn off before unlocking the lid and removing the bag. Inspect the final seal closely: it should look clear, wide, and uniform without any bubbles, gaps, or wrinkles.
Pro Tip: Perform the tug test. Gently try to pull the sealed edges apart. If the plastic gives way or air enters, cut the seal off and repeat the process with a fresh bag.
Step 7: Label, Date, and Freeze
What you need: Permanent marker or waterproof labels, freezer tape.
Instructions: Never guess what is inside a frozen vacuum-sealed brick. Use a permanent marker to write the name of the soup and the exact date of sealing directly onto the bag or on an adhesive freezer label. Lay the sealed bags flat in your freezer for the first few hours so they freeze into neat, stackable rectangles, maximizing your freezer storage space. Once fully frozen solid, you can stack them vertically like books or organize them in storage bins.
Pro Tip: Most vacuum-sealed vegetable, chicken, or beef soups will safely maintain peak quality and flavor in the freezer for 6 to 12 months.
✅ Final Checklist
- Soup was completely chilled before freezing into solid blocks
- Top 3 inches of the vacuum bag remained completely clean and dry
- Bag was positioned flat in the vacuum channel without any wrinkles
- Machine successfully created a solid, uniform, heat-sealed closure
- Packages were clearly labeled with the soup name and storage date
Important Notes:
- Never attempt to vacuum seal raw, warm, or liquid soup without pre-freezing, as liquid pulled into the vacuum motor can permanently damage the appliance.
- If you suspect a seal has failed while in the freezer, discard the soup or consume it immediately upon thawing to avoid foodborne illness risks.
- Estimated time: 30 minutes of active work spread across a 24-hour pre-freezing period; Equipment cost range: $40 to $150 for a standard household vacuum sealer and specialized bags.
How to Freeze Soup Solid Before Vacuum Sealing
The absolute easiest and most reliable way to vacuum seal soup with a standard home machine is the freeze-first method. By freezing your soup into a rigid shape ahead of time, you eliminate all liquid movement and turn a messy hazard into a dry, solid block that behaves just like a solid cut of meat.
Using Silicone Molds or Freezer Containers
- Block Shaping: Pour your cooled soup into parchment-lined baking pans, silicone loaf pans, or rigid plastic containers that match the width of your vacuum sealer bags.
- Complete Freezing: Place the containers in the freezer for 12 to 24 hours until the soup is completely frozen through to the center.
- Easy Extraction: Run warm water briefly over the outside of the mold to slide the solid soup block out cleanly.
Bagging and Sealing Your Frozen Soup Block
Slide your frozen soup block directly into a heavy-duty vacuum sealer bag. Make sure you leave at least 4 inches of empty space between the top of the frozen soup block and the open end of the bag. This extra headroom ensures a clean, reliable seal. Wipe the inner opening of the bag with a dry paper towel to remove any stray frost or crumbs, then insert it into your sealer and run a normal dry-seal cycle.
Step-by-Step Guide to Sealing and Storing Soup Blocks
Once your soup is completely frozen into solid blocks, you are ready for the final vacuum sealing process. Modern chamber and external vacuum sealers manufactured for 2026 usage require precise handling to maintain the airtight integrity necessary for long-term food preservation. Follow this exact workflow to complete the task.
Executing the Final Seal
- Take your frozen soup blocks out of the freezer and immediately remove the temporary containers or silicone molds.
- Slide each frozen block into a heavy-duty, BPA-free vacuum sealer bag, ensuring you maintain at least three inches of headspace between the soup and the top of the bag.
- Fold the very top edge of the bag down by about one inch before inserting it; this prevents any lingering surface moisture from contaminating the sealing strip.
- Place the open end of the bag flat across the sealing bar of your machine, smoothing out any wrinkles that could compromise the airtight barrier.
- Select the “Moist” or “Extended Seal” setting on your 2026 vacuum sealer model to apply extra heat time, ensuring a complete melt across the thick plastic layers.
After the machine finishes its cycle, inspect the final seal closely. It should appear as a clear, uniform, translucent band across the plastic without any air pockets, wrinkles, or liquid seepage.
What If Your Soup Still Leaks into the Sealer
Even with careful preparation, moisture can occasionally breach the seal during the vacuum process. If you encounter persistent liquid suction issues, apply these troubleshooting steps:
- Double-seal the bottom of your bags before filling them, or create a secondary parallel seal right above the first one for added security.
- Switch to specialized textured channel bags specifically rated for heavy liquids and high-puncture resistance, which cost roughly $15 to $25 for a pack of 50.
- Wipe the interior rim of the bag thoroughly with a dry paper towel immediately before placing it into the vacuum channel to eliminate microscopic moisture films.
- If your external suction machine continues to pull liquid despite your best efforts, consider upgrading to a commercial-grade chamber vacuum sealer, which typically ranges from $300 to $600 for entry-level home models.
Conclusion
Mastering how to vacuum seal soup requires shifting your focus from liquid handling to solid-state block freezing. By pre-freezing your portions and utilizing proper moisture barriers, you eliminate freezer burn and extend shelf life significantly. According to verified research and food safety experts from the USDA and leading appliance manufacturers, properly vacuum-sealed and frozen soups remain safely consumable for up to 12 months without losing nutritional quality. Your actionable next step is to prepare your first test batch of silicone-molded soup blocks this weekend and test your sealer’s moist-setting capabilities.
❓ Frequently Asked Questions
Can you vacuum seal soup in mason jars instead of bags?
Yes, using a jar attachment with a standard vacuum sealer allows you to seal cooled liquid soup in glass mason jars safely. This bypasses the issue of liquid getting sucked into the machine pump.
What happens if liquid gets sucked into my vacuum sealer?
Liquid inside the pump can ruin the motor and cause electrical malfunctions. Immediately turn off the machine, clean out the liquid reservoir, and let the unit dry completely before attempting to use it again.
How do you thaw and reheat vacuum sealed soup blocks?
Cut open the vacuum bag and drop the frozen soup block directly into a pot of warm water or soup pot over low heat. Alternatively, thaw the bag in the refrigerator overnight before reheating.
Is it safe to boil vacuum sealed soup bags?
Only use bags specifically labeled as boil-safe or sous-vide compatible. Standard cheap vacuum bags may leach chemicals into your food when exposed to high heat.
Why is my soup seal failing after freezing?
If ice crystals form on the open edge of the bag during freezing, the moisture will prevent the heat strip from creating an airtight seal. Wipe the inside of the opening completely dry before sealing.
Can you vacuum seal creamy or dairy-based soups?
Yes, dairy-based soups freeze and seal just like broth-based soups. Ensure the soup is thoroughly chilled in the refrigerator before transferring it to the freezer molds.